


Updating My Fireplace, Valances, and Blinds: A Quick & Easy Makeover

This post is sponsored by Somfy but all opinions are my own.
For several years I have wanted to update my fireplace wall but I wasn’t sure what exactly I wanted to do. I knew that I wanted it to be simple and affordable but still elegant. I decided to finally give it a go by making new valances, painting the fireplace, and updating my blinds with the Somfy Clever™ Tilt Blind Motorization Kit.
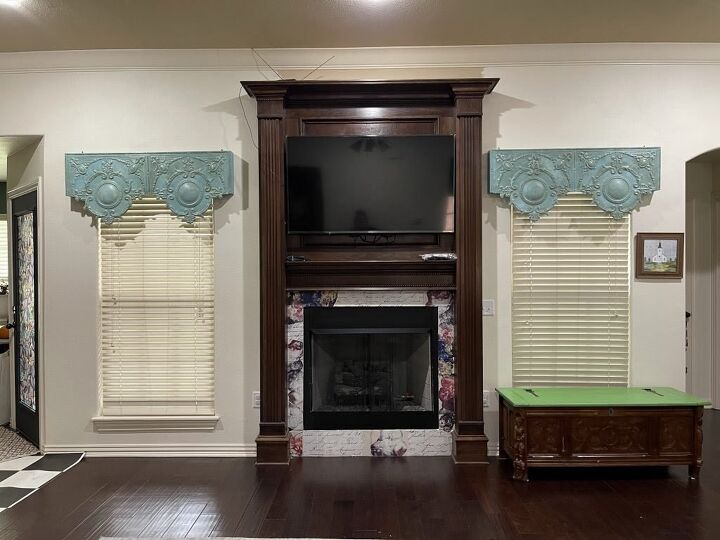
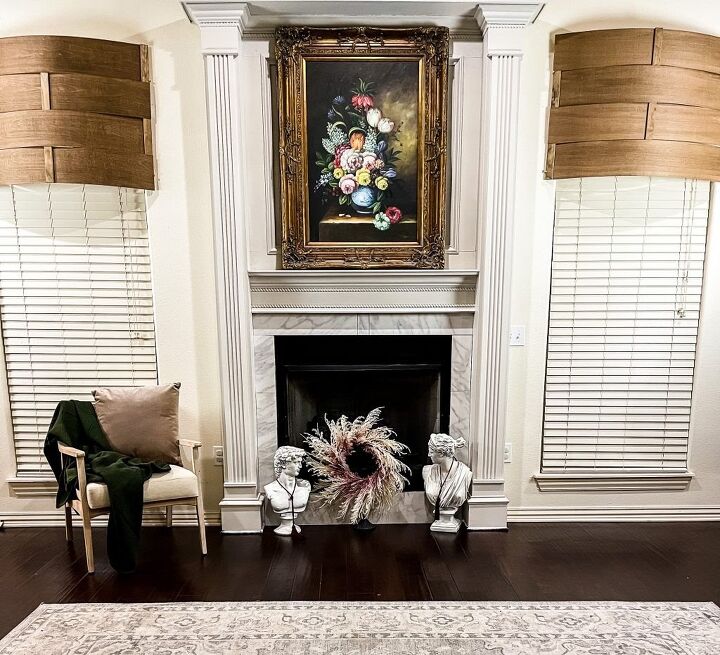
Before
Step 1: Making New Valances
Basket weaving is not something I have ever done before but I saw some inspiration on the DeVol Kitchen show on The Magnolia Network. They had used a basket weave type pattern for the backing in a cabinet and I thought it was beautiful and I wanted to try it in a project.
When I was planning the update for my fireplace focal wall (which is the first thing you see when you walk into my home) I remembered that DeVol episode wondered how I could make it work on this wall? It hit me. Valances. I have had these turquoise antique tin valances since I built my house in 2012. I get more compliments on those valances than anything in my house, but it is time for a change.
- You could use an unfinished toekick that is already cut to 5 inches.
- I used the unfinished oak veneer 24 inches by 8 feet for the end of cabinets that are in the cabinet section of Home Depot. I cut it into 7-inch sections.
- I found some smaller flat trim at Restore (pictured below)
- I cut my 7-inch sections to fit across my window plus several inches for the bowing about 4 feet total
- Stain the boards. I used Varathane aged wood accelerator
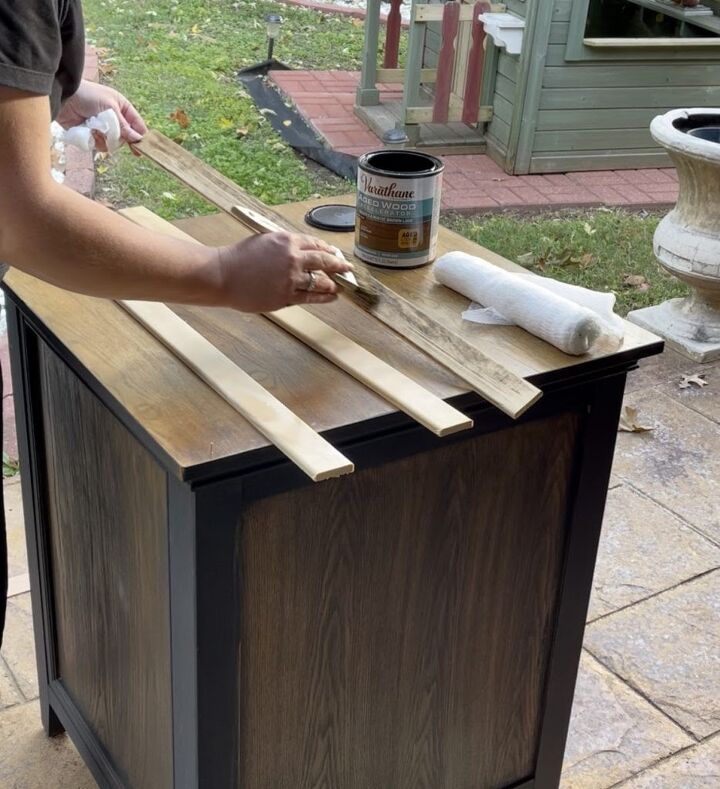
- Once the 8 sections of my pieces were cut to size and stained I started to weave my smaller pieces, three across (one on each side and one in the center).
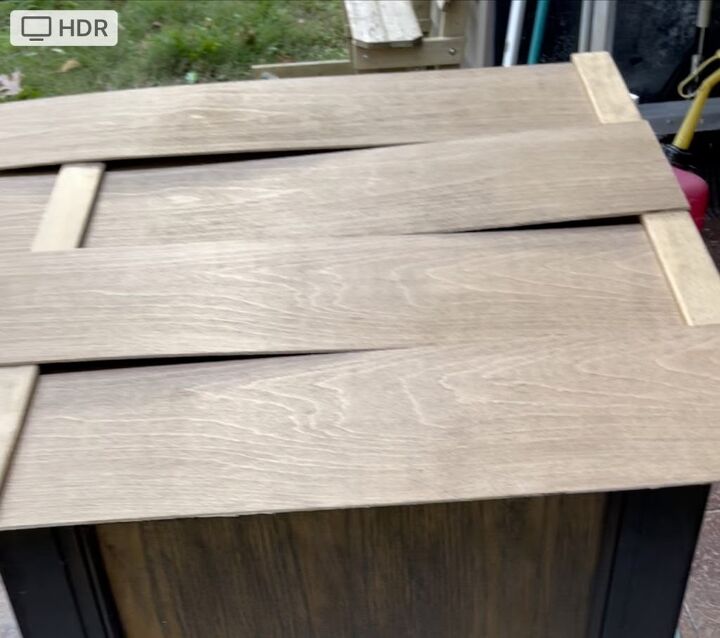
- I used my brad nailer to secure them together along with wood glue, and bent down the nail on the other side with a hammer.

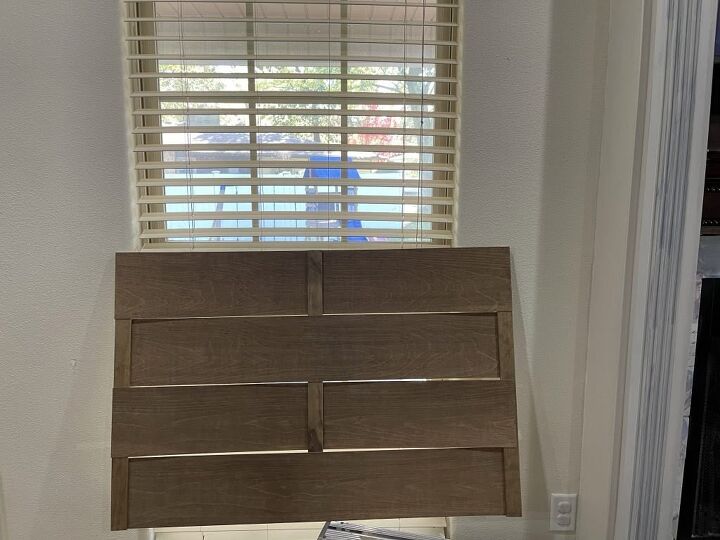
- I lined up screws on my wall in two’s on the parallel. Two 2 1/2 inch screws on each side of the window and into the studs.
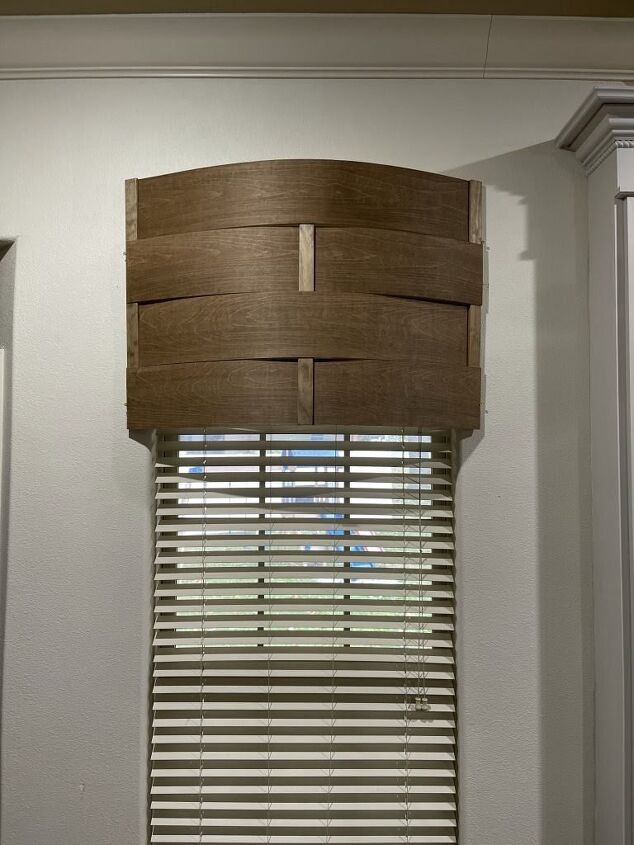
- I placed one side of the basket weave valance under the screws and then bowed the valance and under the other two screws on the other side of the window. The tension holds them up and they remain secure
Step 2: Motorized Blinds
I always thought that having motorized blinds would be so convenient. I also thought they would be expensive and difficult but it turns out that I was wrong about that! I was able to use my own blinds which saved costs and made the update so easy!
When I heard about the Somfy Clever™ Tilt Blind Motorization Kit I was all in. I wondered if it would be difficult to install as I had never looked inside the mechanics of my blinds. I received the kit and read the instructions. Once I started to assemble the motorized blind kit it became clear that it was going to be very simple.
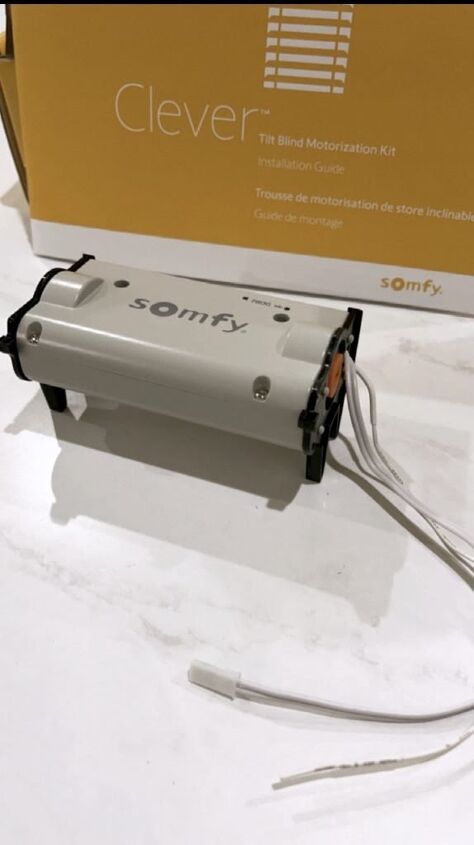
It comes with the motor and multiple fittings (for different types of blinds), the battery pack and charger, remote and detailed instructions.
I started my makeover by installing the Somfy Clever™ Tilt Blind Motorization Kit.

How the kit comes
Steps
I started by reading the instructions carefully. I was intimidated at first but once I started the process it became clear that it would not be difficult.
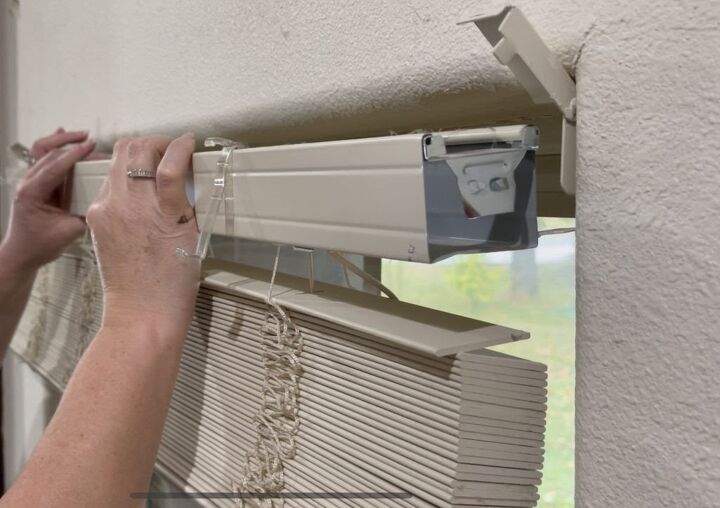
- Start by putting your blinds in the open position and pulling them all the way up so that they are tightly together. This makes it easier to remove and work with.
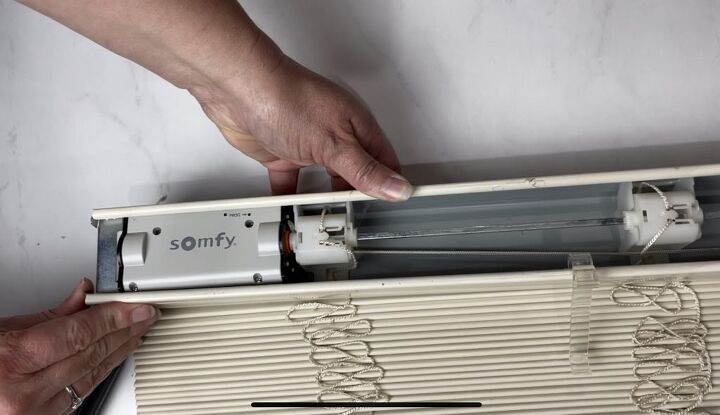
- Unclip the blind encasement and slide the blinds out
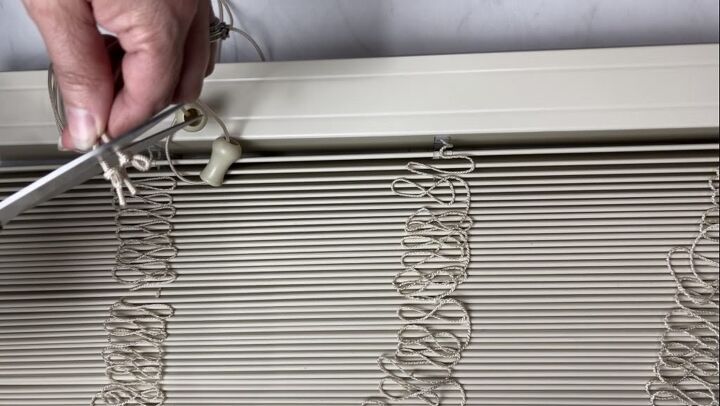
- Cut the blind tilt cords at the very bottom and remove the wooden beads
- Pull the tilt cords up through the blind
- Remove the end cap
- Remove the blind tilt mechanism
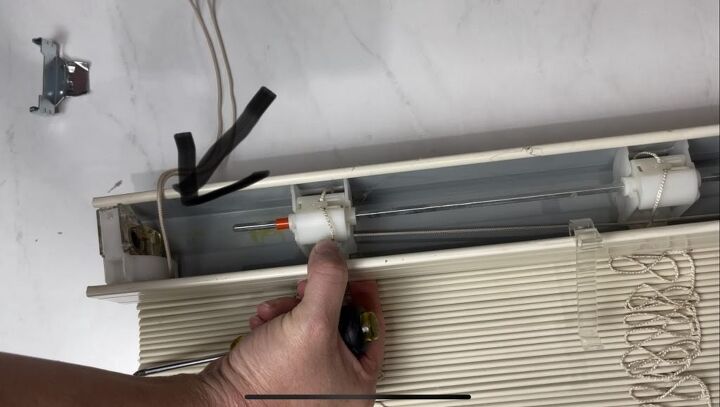
- Fit your blind tilt rod to the correct adaptor in your kit box (mine was the orange one)
- Fit your headrail adapters to the inside of your blinds
- Attach the adaptors to your Somfy Clever™ Tilt Blind Motorization Kit
- Slide your motor into the end or the center (follow instruction manual for installation)
- Slide the tilt rod into the end of the motor with the adaptor
- Ensure that your motor wires are exposed through the end of the blind
- Slide your blinds back into their encasement and close the clip
- Ensure that your motor wires are pulled through the end and exposed outside of the blinds.
- Lower the blinds and they should still be in the open position
- Attach the battery pack that comes in your kit to the wall in an inconspicuous place and hidden behind curtains or in my case valances, inside of the window behind the blinds if you have room, or you can use the clips and clip them to the front of the blind encasement.
- Plug the battery pack into the motor (it will immediately move the motor once it is connected so you know that there is a good connection)

- Now you can program your remote to control up to five windows that use the Somfy Clever™ Tilt Blind Motorization Kit
Watch the detailed video instructions here.
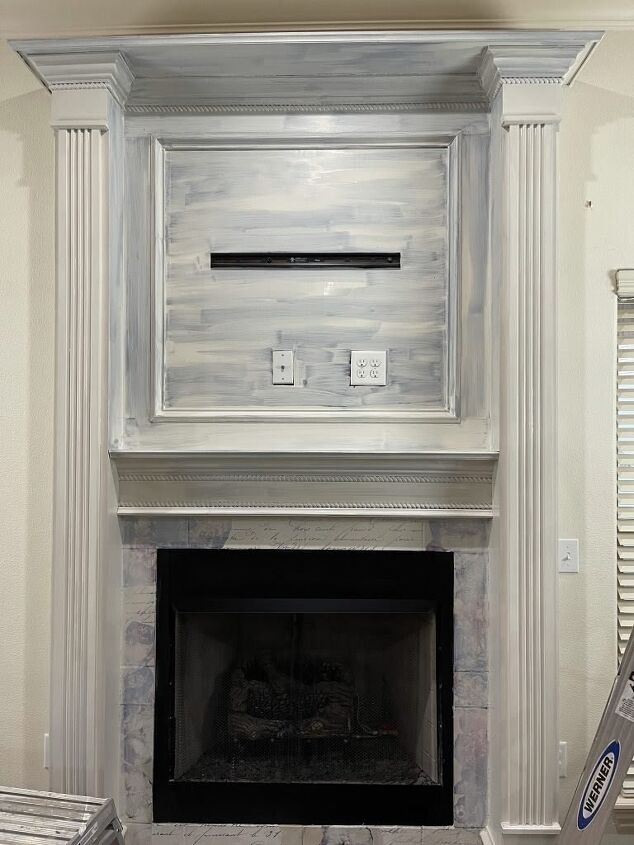
Step 3: Painting the Fireplace
I have wanted to change the dark wood of the fireplace because I felt like it brought the room down a little. The floors are dark and I thought the room needed to be lightened up. The best way to do that was paint and marble tile!
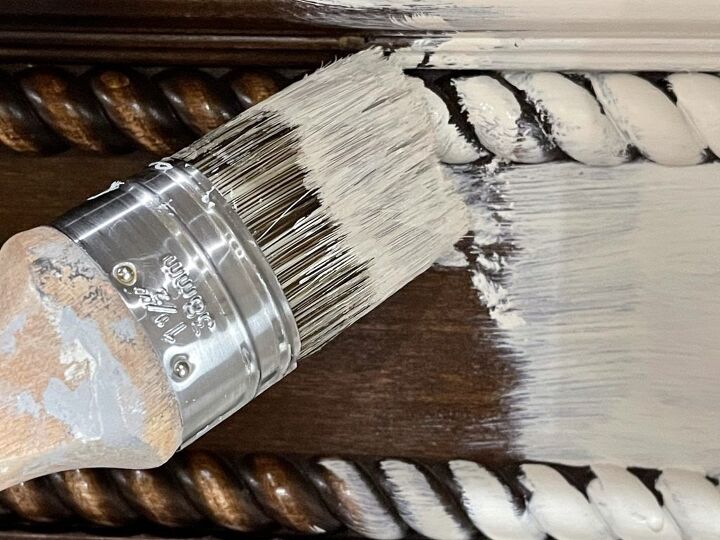
- I cleaned the wood with Krud Kutter Deglosser and a scotch pad first
- Next I added some Calcium Carbonate to my favorite Joanna Gaines color of soft linen
- Mix 2 tablespoons of Calcium Carbonate with 2 tablespoons of water and mix first
- Add to one quart of latex paint (I love Clark and Kensington from Ace Hardware)
- I painted the first coat
First Coat
- A second coat after an hour
- A third coat was more of a touch up coat for any spots where I may have not gotten great coverage, like corners and the very tip top
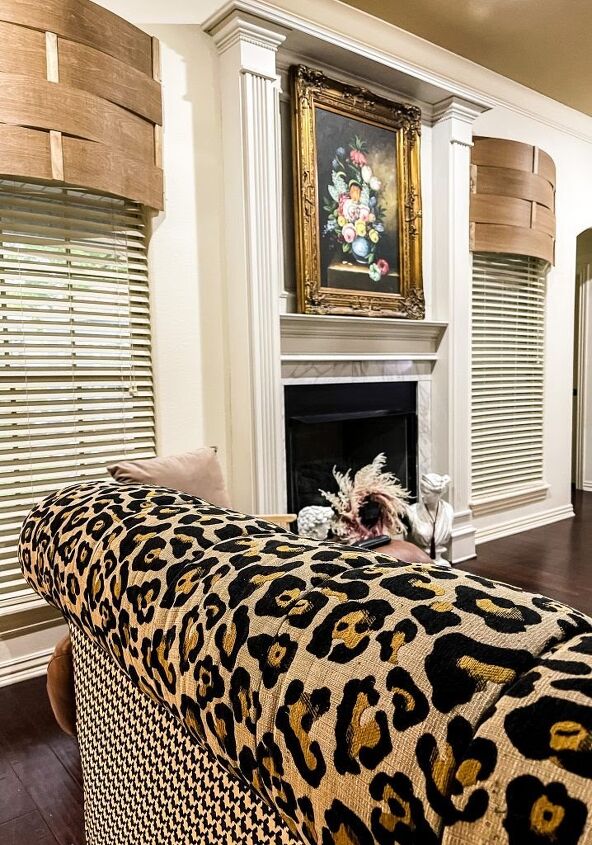
I am extremely pleased with the outcome of the soft linen and my creamy walls. This makeover is taking my breath away each time I walk into the room!
After
Resources for this project:
See all materials


Comments
Join the conversation
-
WOW!!!! 😍
-
Hi Amy,
Firstly, your vision was spot on, what a beautiful and functional design. I love the woven valences, and the remote control blinds is genius.
I noticed and I may be off here, but just eyeballing the picture, the valance on the rt side (facing the fireplace) appears a bit higher on the wall than the lt side. It could be an illusion in the pic.
As I was admiring your work I thought since your valances come down at least appx 28 inches (according to your stated measurements) raising them to the top of the wall under the crown molding, would increase the light coming in from the window when blinds are open and give the illusion of taller windows. Also it would extend the height of your room with the higher placement. All while covering the top of the window and blinds.
This would add to the auguster of your beautiful and functional refresh of both your fireplace and your book-case windows.
These are just one persons’ observations and thoughts of course, your room looks grand yet cozy and you should be proud of your beautiful work regardless of anyone else’s opinions and personal tastes.


Frequently asked questions
Have a question about this project?
Love this project BUT I want to know what happened to those incredible galvanized tin valances which are, admittedly a jarring color, but the pattern is gorgeous.
What did you do with the old valences? I want them!
Hi, Your room looks wonderful, I wasn't sure about the woven valences but I think they work very well in the newly designed space. I would love to know what stain (or paint) is on your floors. I took up my living room carpet to reveal old (kind of beat-up) wood floors and have been taking my time deciding what to do with them, I love the color and sheen of yours. Thank you.