


$15 DIY Door Update

Do you have old, outdated, simply blah doors and would love new ones but just can’t fathom the amount they cost? Don’t worry, I get it. I did too! When I moved in, my house had plain brown doors from the 70's that I absolutely hated. This quick and easy DIY will transform them into what looks like brand new doors! And, the best part is that it only costs $15!
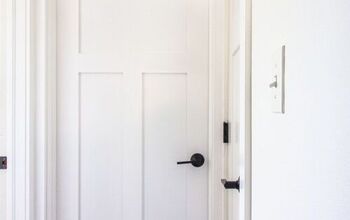
When I first moved in my doors looked like this...
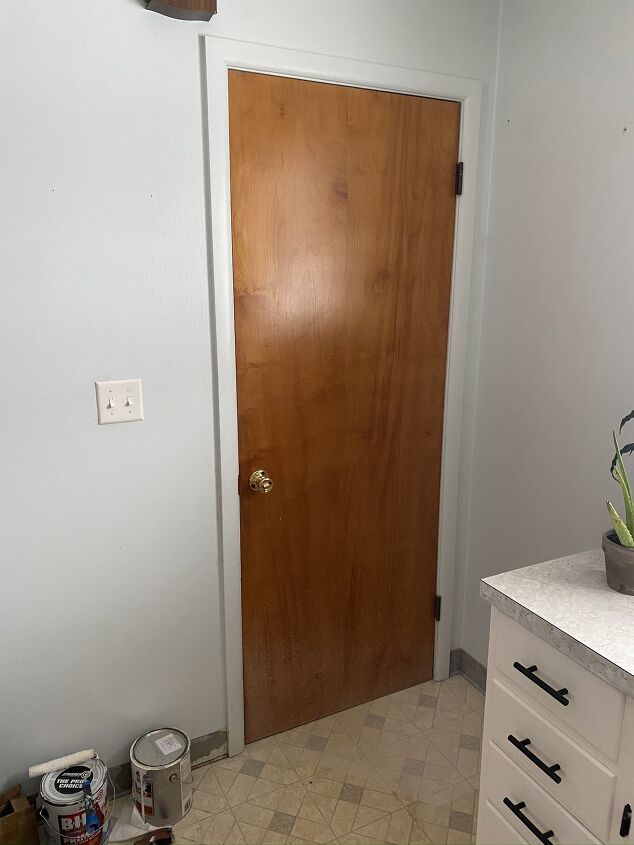
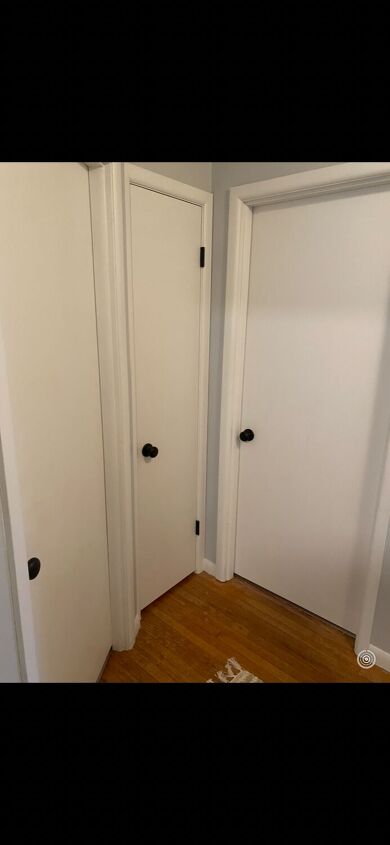
I immediately painted them all white and updated the hardware. For two years I had dealt with the plain white doors because new ones just weren’t in the budget! Pictured are my bedroom and closet doors right before I updated them!
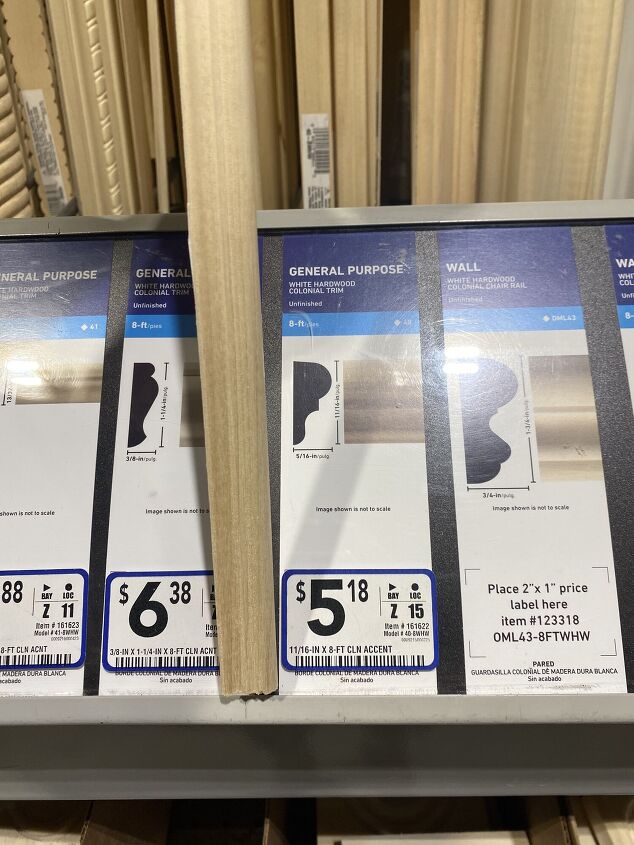
After two years of updating other parts of the house that needed attention first, it was now the door's turn! I went to Lowe’s and picked up some trim! I have linked the exact trim I used. The other supplies I already had and hopefully you will too! If not I have them all listed below! Here is a picture of the trim I used...
Supplies :
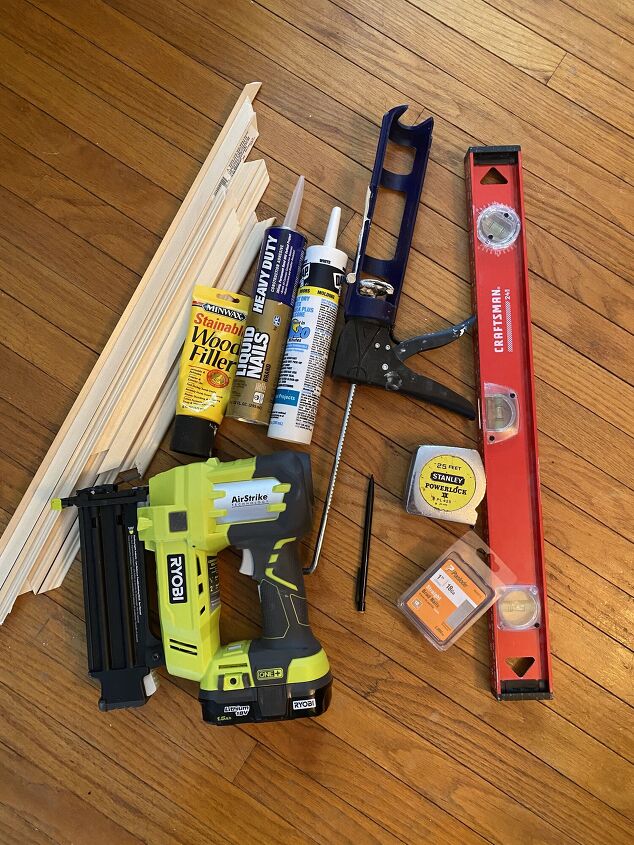
- 3 Pieces of 11/16in 8ft Chair Rail Moulding (aka Trim)
- Miter saw or Miter box (either will work to make 45 degree angled cuts)
- Pencil
- Leveler
- Measuring tape
- Liquid nails
- Caulk gun
- Nail gun
- 1 1/2in brad nails
- Wood filler
- Caulk
- Paint color of your choice! I went with white!
Now that you’ve got your supplies you’ll want to measure the height and width of your doors! Every one of my doors are a different width, but they all are the same height! I will use one of my doors as an example. Just know that your measurement may be different based off of your door size! I will help you through this part!
For example, one of my doors was 29.75in wide. To start we will measure for the six horizontal trim pieces. I wanted a space from the side of the door to my trim of 4.5in on each side, I just liked the look of this spacing. After adding 4.5in + 4.5in, for each side of the door, I subtracted 9in from the width of my door. So, I cut 6 pieces 20.75in long for the 6 horizontal pieces of trim. Keep in mind, if you have wider or more narrow doors you will have a different number. Each of these pieces needed to be cut at a 45 degree angle with your miter saw.
Now you will need to cut your vertical pieces of trim. You will have three different heights for this part, because you will be creating 3 sections on your door. I will refer to these as “boxes.” My doors are 79.5in tall. I cut 2 pieces 31.5in long for the upper “box,“ 2 pieces 13in long for the middle “box,“ and 2 pieces 22in long for the bottom ”box.” Each of these pieces will also need to be cut at a 45 degree angle with your miter saw. Keep in mind, if you have taller or shorter doors, you may want to adjust the height's of the vertical pieces.
You should now have:
- 6 - 20.75in horizontal pieces
- 2 - 31.5in vertical pieces for your upper “box”
- 2 - 13in vertical pieces For your middle “box”
- 2 - 22” vertical pieces for your bottom “box”
After you’re done cutting the trim, it is time to assemble the pieces! I started with my middle “box.”
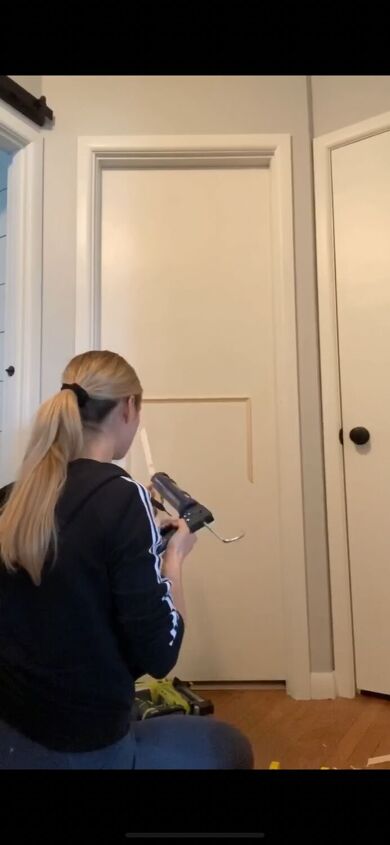
Grab your 13” vertical piece, apply a small amount of liquid nails (a little goes a long way). Place it vertically 4.5in in from the side of your door and lined up centered with your door knob. Use your level to make sure it’s straight up and down. Once you’ve got it where you want it, nail it in place to secure! Yay you just did your first piece, it will be a breeze from here on out.
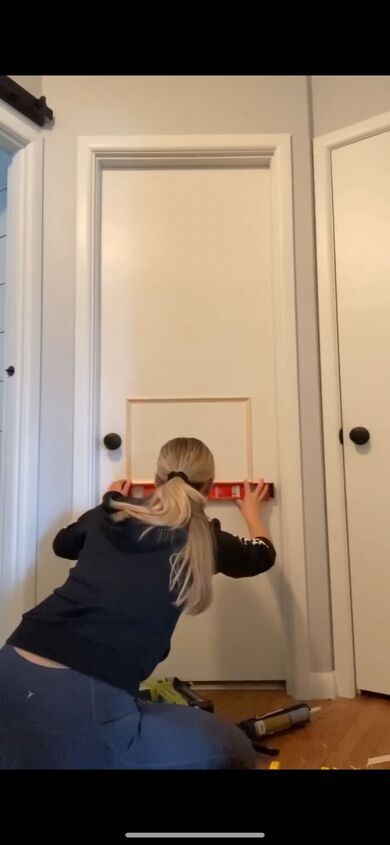
Next, grab 2 of your horizontal pieces, line them up on the top and bottom of your middle “box.” Apply a small amount of liquid nails, use your level to ensure it is straight. Nail both in place. Grab your last vertical piece or side of the middle “box,” apply liquid nails, level, and nail! And you’re done with your first box!
Now you just have your top and bottom ”boxes” left. I left a 2in spacing between the middle and top, and middle and bottom “boxes.” This happened to be the width of my leveler which made it very easy to space out.
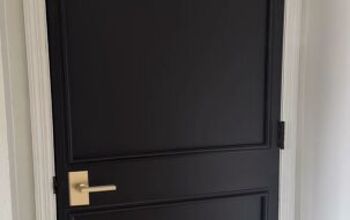
Repeat the same process for your top and bottom boxes that you did for your middle box. Align a vertical piece 4.5in inwards from the side of the door so that it is level and straight, apply liquid nails, and nail into place. Grab your horizontal pieces, apply liquid nails, level, nail into place. Then your last vertical piece to finish the ”box.” When you’re all done you will have completed 3 “boxes" and your door should look like this!
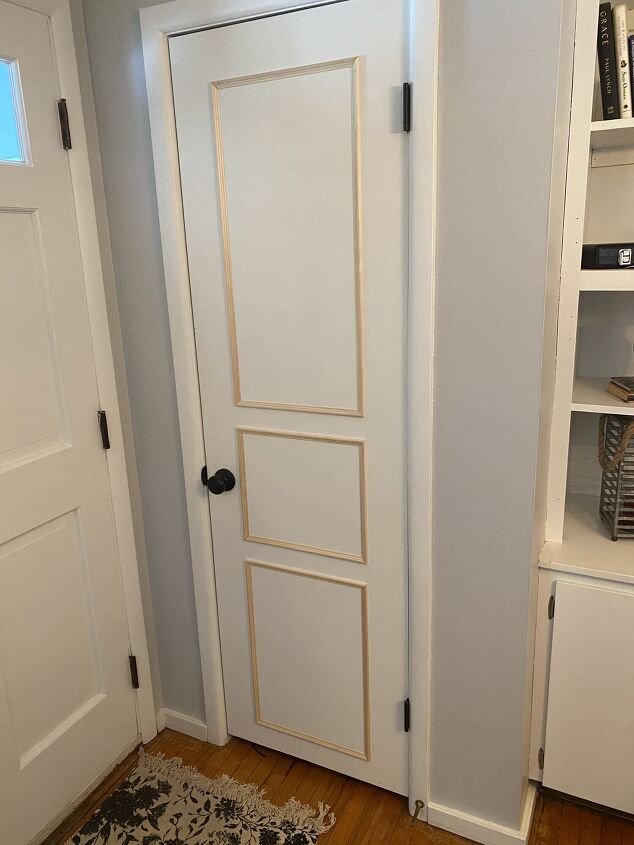
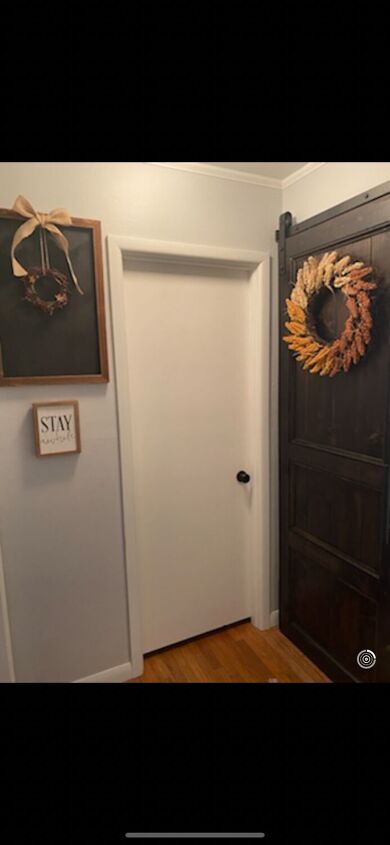
To complete your door you will want to caulk the seams where your wood comes in contact with the door so that you get rid of any gaps! Then fill any nail holes with wood filler! After this dries you are ready to paint with your color of choice! I went with white! Here are my finished doors!
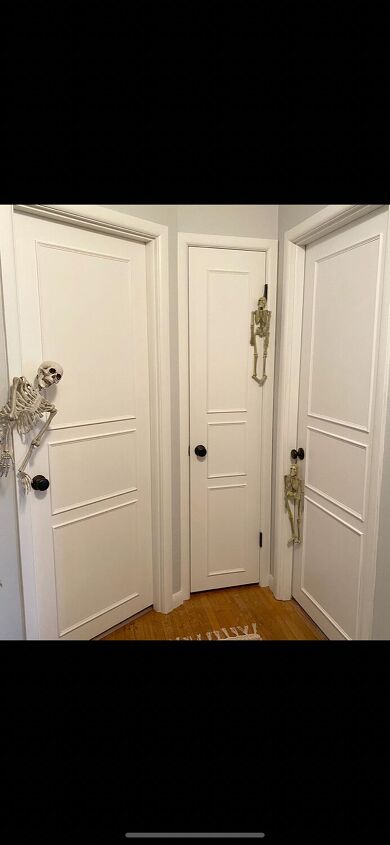
These pictures were taken before Halloween last year, my roomies were loving the new updated look 💀😉 It has officially been a year since I have updated these doors and they are holding up great!

Hopefully this helps you if you are planning on adding some trim to your doors! I post videos on my Instagram that may better help you as well! If you have done this already I would love to hear in the comments how it went for you! Thanks for reading 😌
Comments
Join the conversation
-
Beautiful Results! Does anyone know how to update louvered doors?
-
Good job and a good tutorial!


Frequently asked questions
Have a question about this project?
Did you do both sides of the door or just the side facing the hallway?
I am confused with the barn door. Did you install the barn door to conceal the middle door? Also did you use a hollow door as the barn door and just apply the trim to it? Why is it on one side in the first few pics and on the oppisite side in the latter pics? B
What a transformation, they look great