


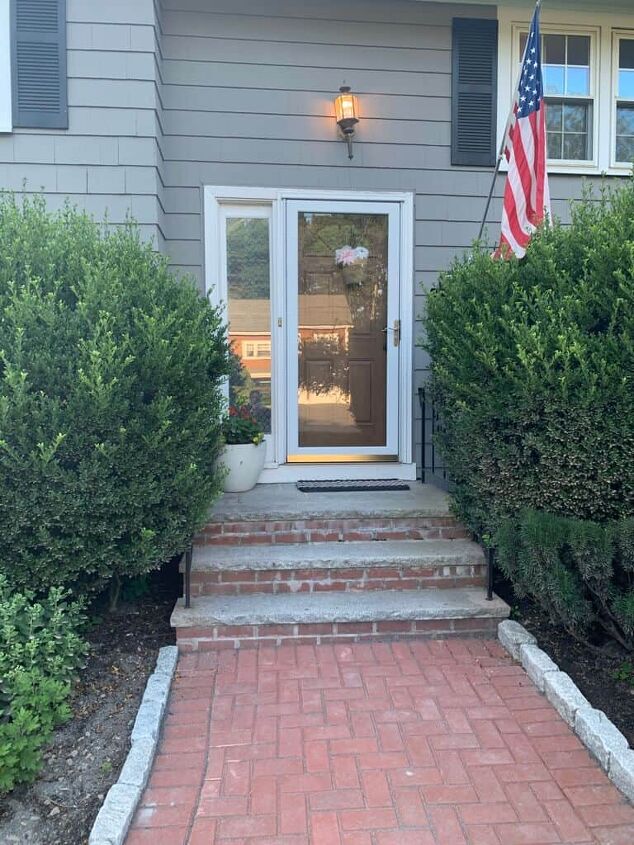
3 Simple Ways to Update an Ugly Old Storm Door

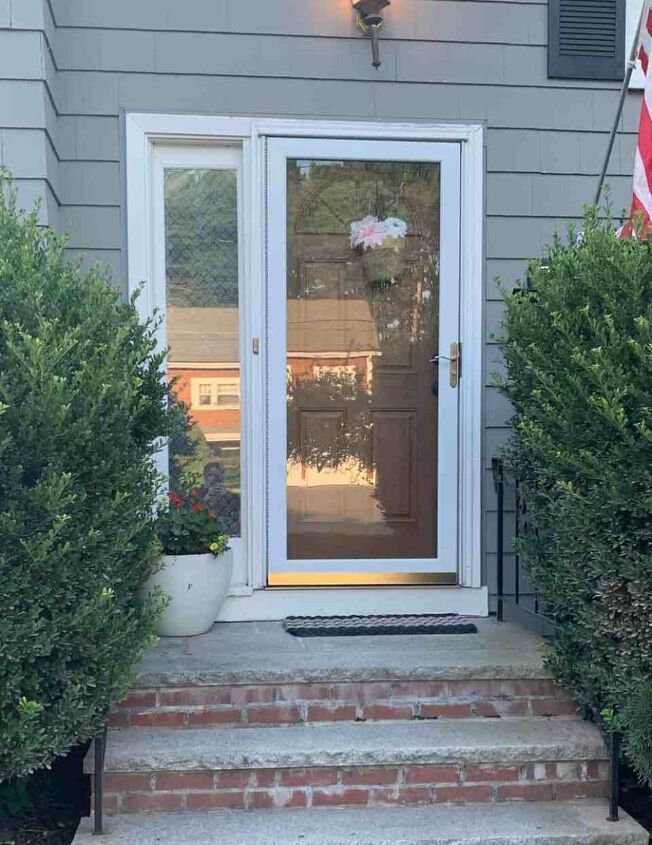
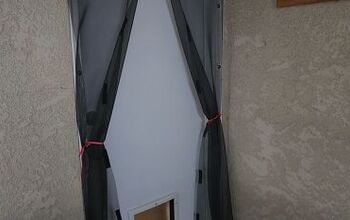
Ok, I’m going to be honest here. I hated our storm door. Like HATED it. But my husband didn’t want to get rid of it. And storm doors serve a purpose, right? But my door was old, ugly, and didn’t close right. Since taking it off wasn’t an option (per my husband), I considered buying a new one…which can cost hundreds or even thousands of dollars. So instead of spending a ton of money, I did what I do best which is getting creative and working with what I’ve already got. And you know what?! It turned out pretty dang good with just a few little inexpensive updates.
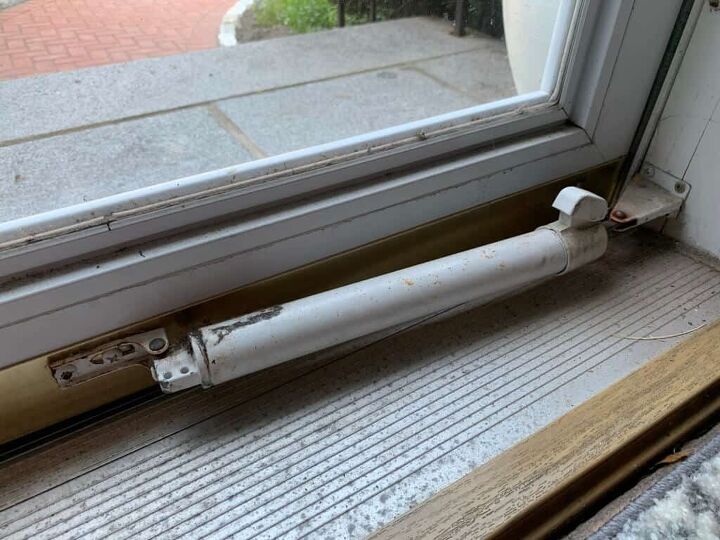
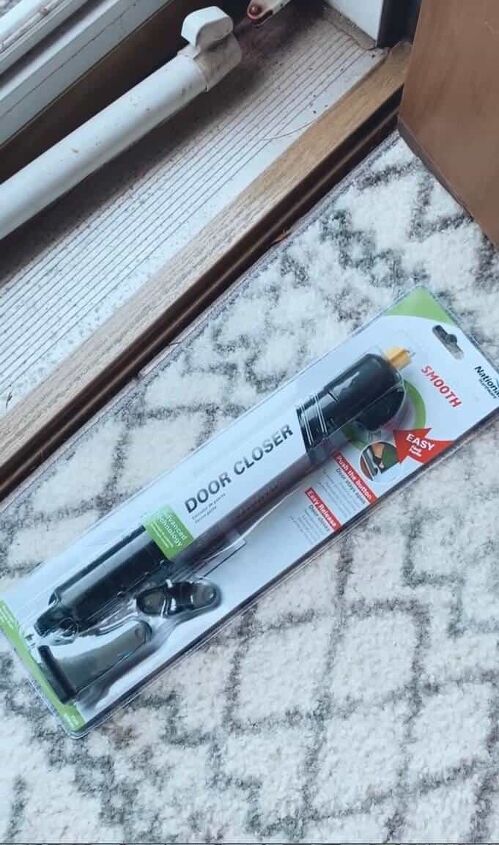
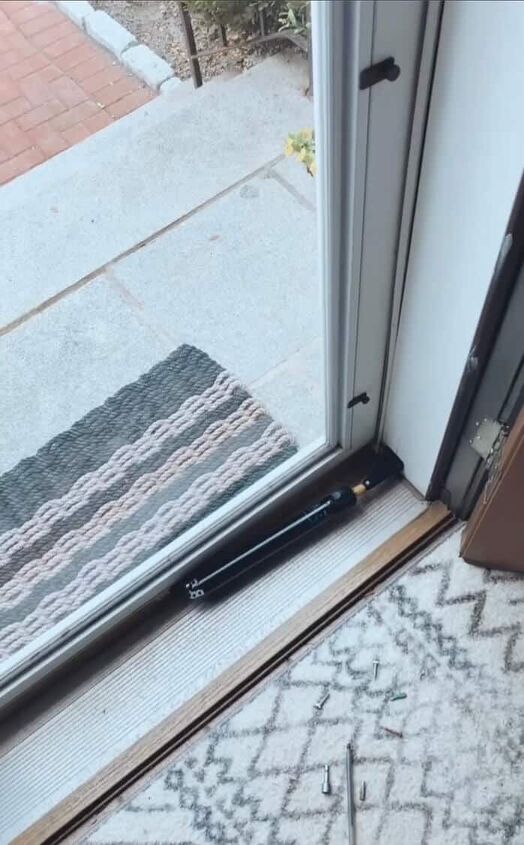
Since my door wouldn’t close right, I started with the hardware. If your door doesn’t function properly, no amount of cosmetic updates will make it work the way you need. And replacing the door closer to make the door close smoothing is actually a super easy fix! National Hardware makes a super functional door closer that can be installed with just a few steps and basic tools like a screw driver, drill, and level.
Start by removing the original door closer. Mine was a bit tricky because the screws were stripped out, but other than that it was just a few screws to remove! This door closer was bent and a bit rusted after years of use which is why the door was a little wonky.
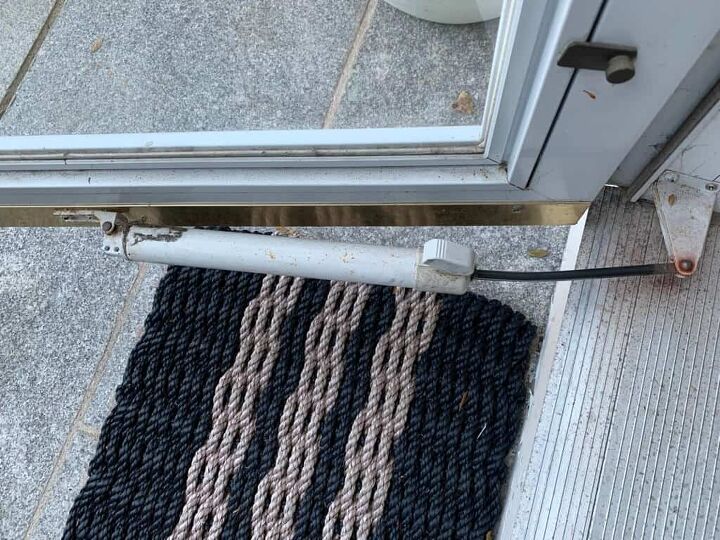
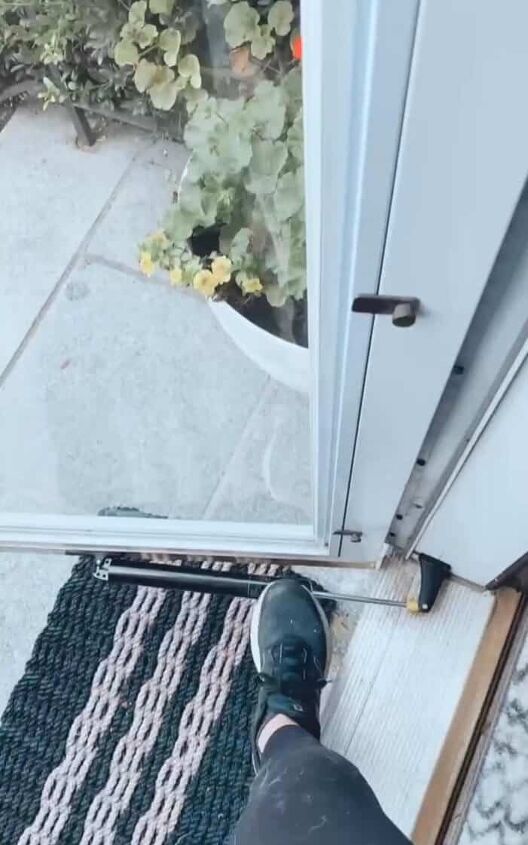
After the old door closer is removed, it is as easy as following the template provided by National Hardware in the packaging. The instructions walk you through how to determine placement of your new closer, make sure it is level (most important part), and reattach to the door jamb and door. That is it! Now my door opens and closes like a dream. Oh, and you can also adjust the speed at which the door closes as well as hold it open with just a tap of the foot. Pretty flipping cool.
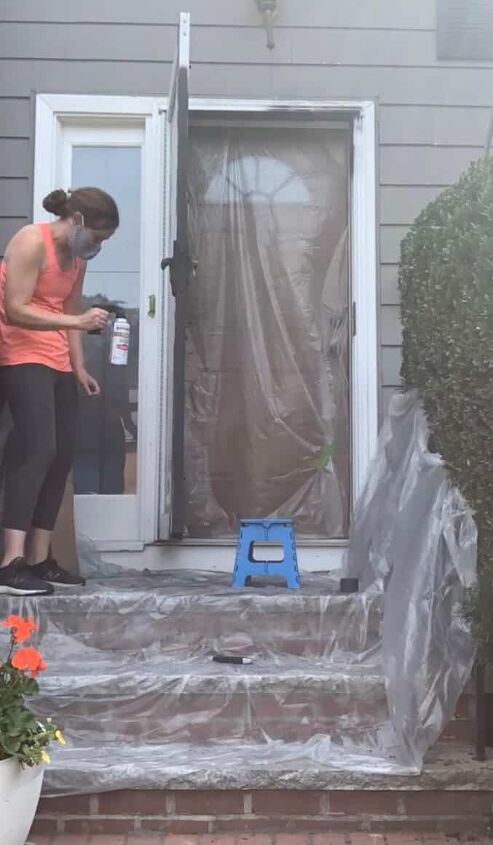
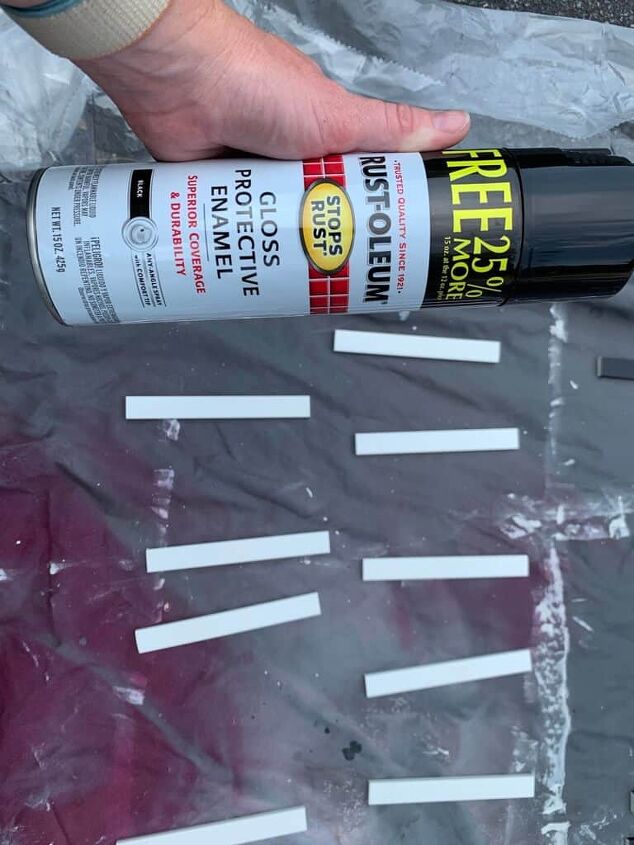
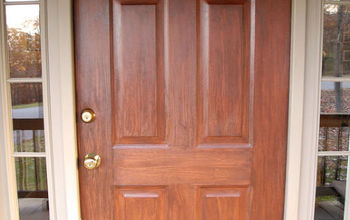
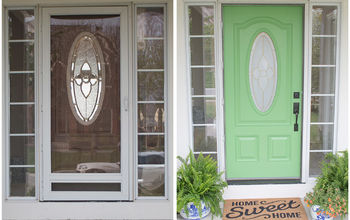
Paint is one of my favorite DIY projects and can make such a huge difference in making an old door look new again. This storm door was white, brass, and rusty. After a bit of prep (cleaning followed by lots of painters tape and plastic to protect the glass and surrounding walls and porch) automotive primer was sprayed on followed by two coats of black Rustoleum spray paint. I then applied Sherwin Williams Tricorn Black exterior paint to the wood trim to pull it all together.
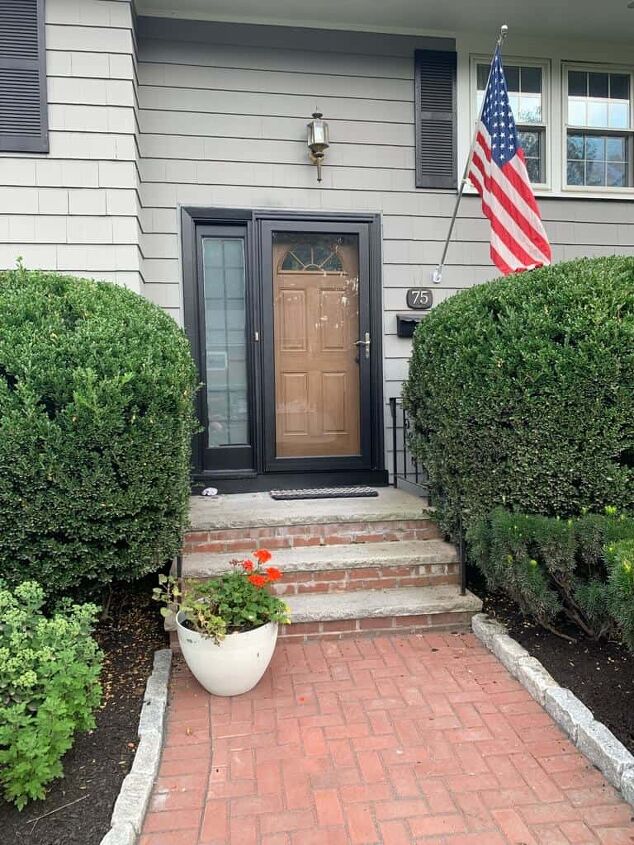
The storm door already looks and functions a ton better after adding new hardware and paint, but adding fun details and finishing touches can really make it pop! In this case, I had a window to the side and decided to add some PVC trim to create a window grid. This grid was spray painted black before it was attached to the window with exterior double stick tape.
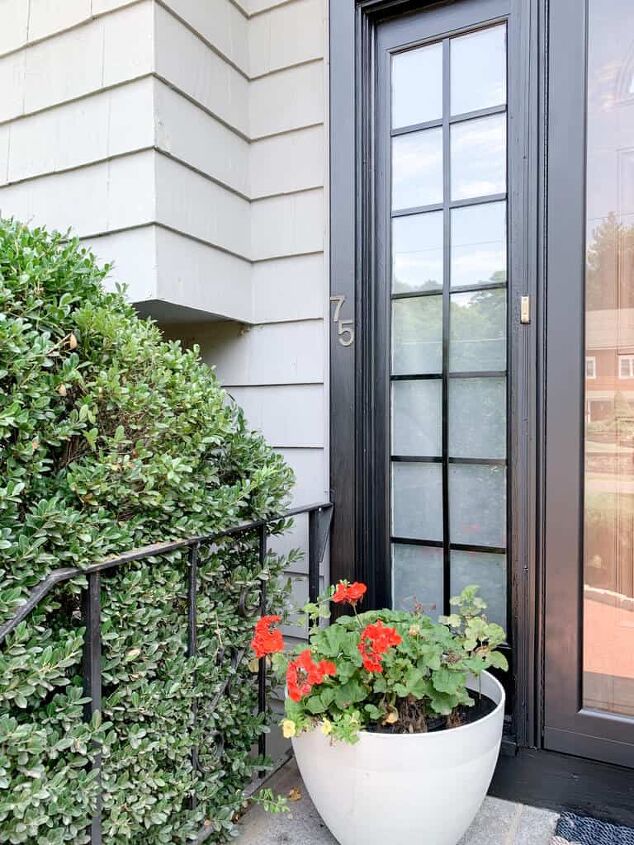
Lastly, add a pretty seasonal wreath, plants on the porch, or a nice vinyl decal to bring it all together! My front door gets crazy hot from the sun so the vinyl decal is perfect here! All my wreaths eventually melt.
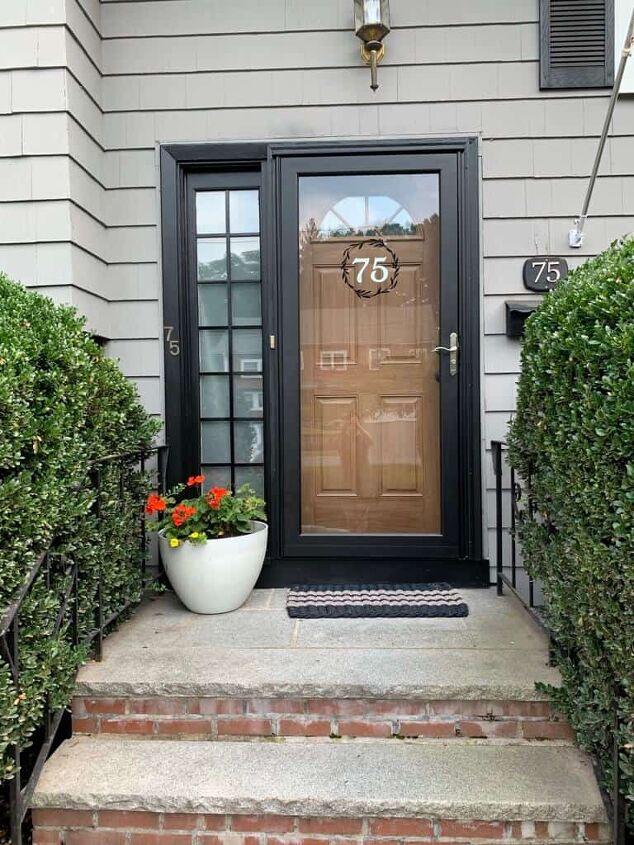
And now you have a beautiful like new storm entry door for way less money and time than buying a brand new storm door! I must say, I think it looks better and more custom too! Looking for more inexpensive ways to update a door?? Check out how to update an old slab door with trim! I also have a great post about how to turn an old door into a barn door!

Comments
Join the conversation
-
Gorgeous! You must get the south sun like we do. Our white front door is so blah but there’s is no way I can go darker as it gets so hot in that area! Our house trim is a grey/brown colour so I would have chosen that colour if I could, lol! Thank you for sharing.
-
Just beautiful. Looks like a very stylish new door. Does your hubby like it?


Frequently asked questions
Have a question about this project?