


Create a Stylish Screen Door Installation in Five Straightforward Step

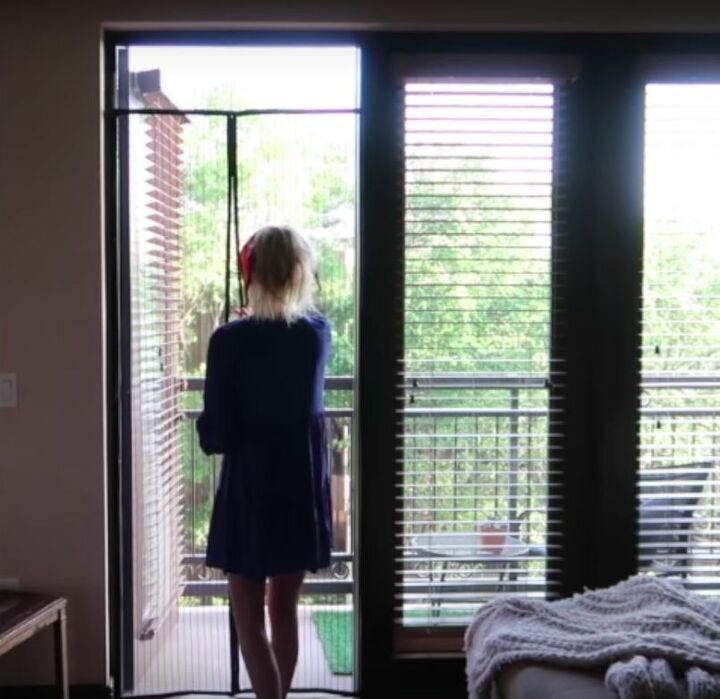
balcony didn’t have a screen. It might only seem like a minor inconvenience, but I like to know I can walk easily in and out on a whim, preferably without having to fiddle with the sliding doors.
It’s not so much of a problem in winter, but during the summer, it’s definitely nice to have the luxury of going back and forth without having to think about it, especially when you have your hands full with a couple of glasses of wine, or some orange juice for the kids.
Talking of kids, the thought of those heavy doors sliding backwards and forwards around little feet is another big issue, so it made sense to try and come up with a solution. It took some thought, but I quickly settled on a workaround.
The complicating factor was that I don’t own the property, so installing a permanent solution was out of the question. Instead, I needed an option that would cause zero damage to the doorframe and leave me able to get my security deposit back once the lease is up.
Here’s how I did it.
Tools and Materials
- Tape measure
- Wood stain
- Plastic gloves
- A painting sponge or paintbrush
- Wooden struts
- A pen
- A wood saw
- A drill
- Titan Mall magnetic screen door, with a self-closing magnetic seal from Amazon
- Double-sided sticky tape
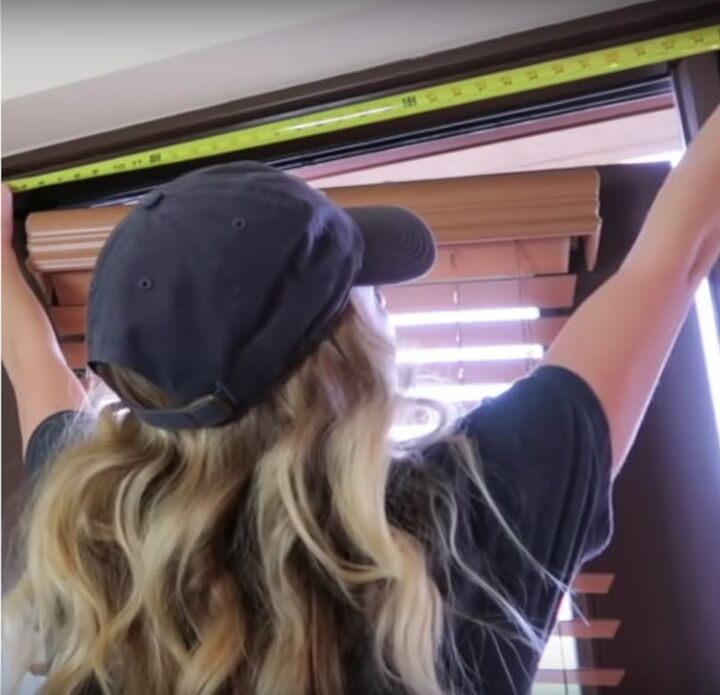
Step 1: Measure the Doorframe
The first thing I had to do when working out what quantity of materials I needed was to measure the doorframe, which was a nice, easy task to start with. Depending on the height of your door, you might find that you either require something to stand on or a tall friend to help you. Be sure to measure both the length and width to ensure you have all of the information you need for your calculations.
Step 2: Apply the Stain
Once you have your measurements, you can go out and get your hands on some appropriately sized wooden struts. I’ll explain what to do and where to attach these later, but for now, you need them to stay on the ground and in a space where you have plenty of room for painting them.
That’s because it’s time to stain the wood, to make it a better match for your doorframe and your other fixtures and fittings. Get out those plastic gloves you have at the ready and put them on, then use either a sponge or paintbrush to apply the stain.
Once you’ve achieved your desired finish, leave these to dry – ideally somewhere that’s free of both animals and kids!

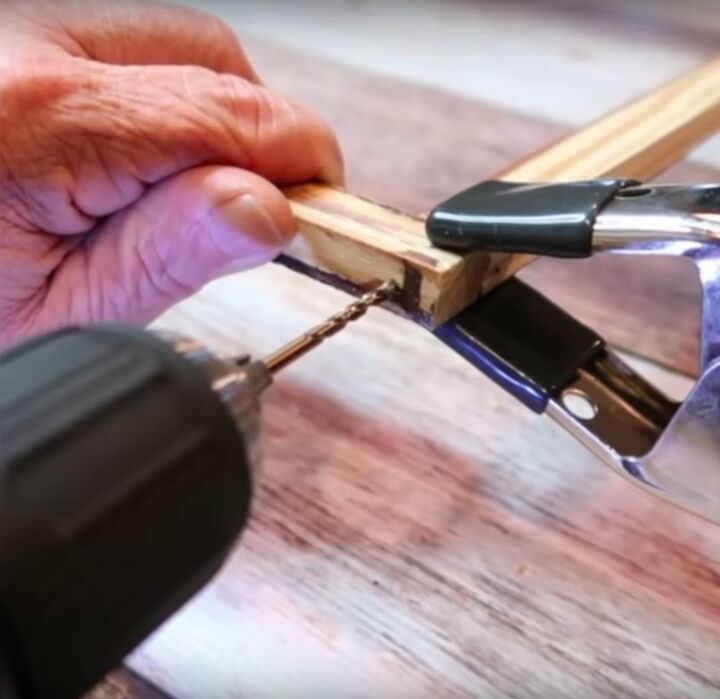
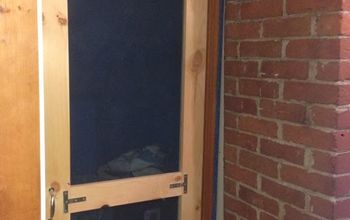
Step 3: Screw Together
Once your paint has dried, use the pen to mark some nail holes onto the wood, and if it’s not quite the right size, use a saw to ensure the dimensions are correct. When it’s the proper fit, fire up your drill and use it to make your pen marks into proper holes.
When all of your preparation is done, assemble the wooden frame and position it in place around your sliding door.
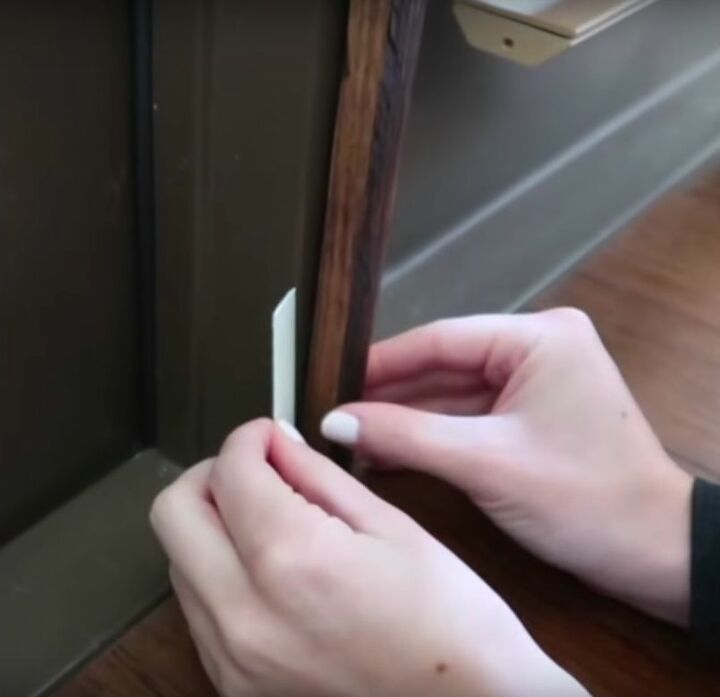
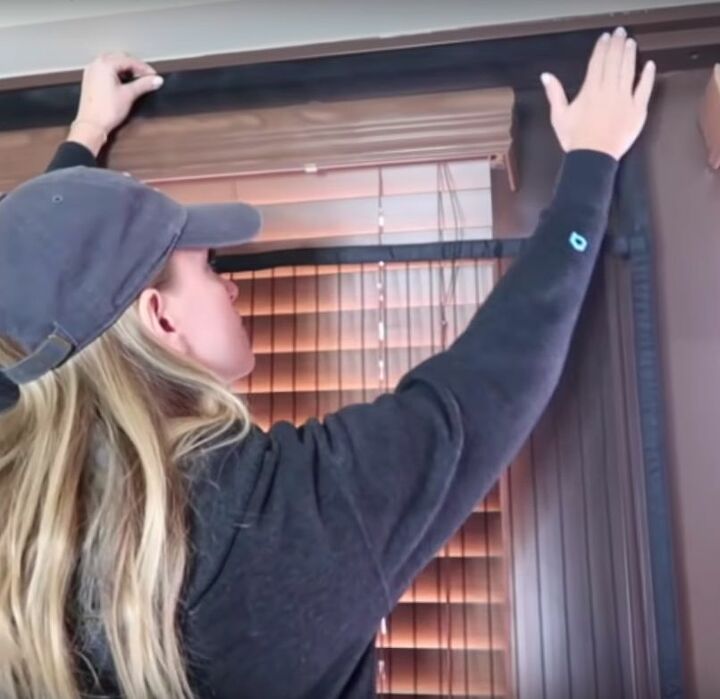
Step 4: Affix to the Doorframe
Once your wooden frame is where you want it to be and you’ve checked your measurements are correct, it’s time to affix it to your door frame, and there’s a super-simple way to do this (one that won’t leave any marks behind for those who are keen to get their security deposit back at the end of their lease).
That solution is double-sided sticky tape. Insert this between the doorframe and your wooden structure to make sure the latter is securely held in place and doesn’t fall down every time you or your dog brush against it. When you’re sure it’s firmly attached, it’s time to unbox your newly bought screen and prepare to attach it.
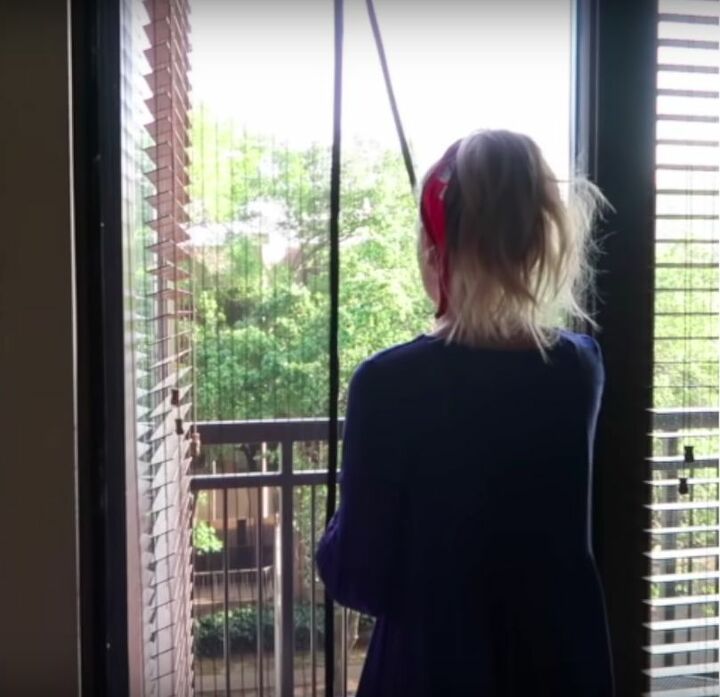
Step 5: Attach the Screen to Your Frame
One of the reasons that you measured your doorframe in advance was to make sure your screen would fit. The one I ordered from Amazon is suitable for door sizes up to 39” x 82”, but there are other options out there for those who require something bigger.
Coming complete with both push pins and full-frame mounting tape, this particular screen was incredibly easy to attach, although I was careful to remove the backing bit by bit, pressing each section in place and smoothing it down before removing any more. This helped me to fit it neatly, so the finished result looked professional and polished.
The instructions that came in the box were really useful, making the whole process straightforward and seamless, and I referred back to them numerous times along the way. So do be careful not to throw these away until you have the frame properly installed and can make certain you haven’t missed anything.
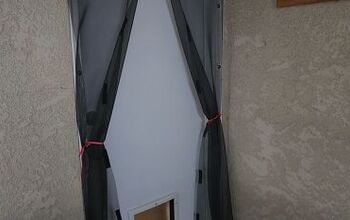
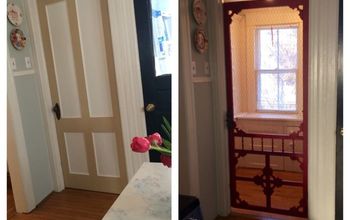
Admire Your Work!
Et voila! You’ve now worked out how to install a screen door! I have to say I was super impressed with the end result, which looked and functioned exactly as I’d hoped it would. Perfect for keeping bugs out and encouraging better airflow, the screen opens easily when you don’t have a free hand and then closes neatly behind thanks to its magnetic closure, which is exactly what I wanted.
With this in mind, I’d definitely recommend giving the DIY project a go for anyone who’s in need of a temporary screen door that’s fully functional but can be put up and taken down with minimal effort. An ideal option for those living in rented accommodation, I’ve also found that it makes warmer days much more pleasant.
Ready to give it a go? Then comment below with some pictures of the finished product. I can’t wait to see if these tips for a quick and easy screen door installation work as well for other DIYers as they have for me!
Comments
Join the conversation
-
That is genius. Using double stick tape to hold the fame and screen. Perfect for renters. Great tutorial and share.
-
Nice, job. The video tut turned out perfect and you must be loving that screen.


Frequently asked questions
Have a question about this project?
If you use the double sided tape to secure the frame, why didn't you just use the tape the screen to the door frame?