


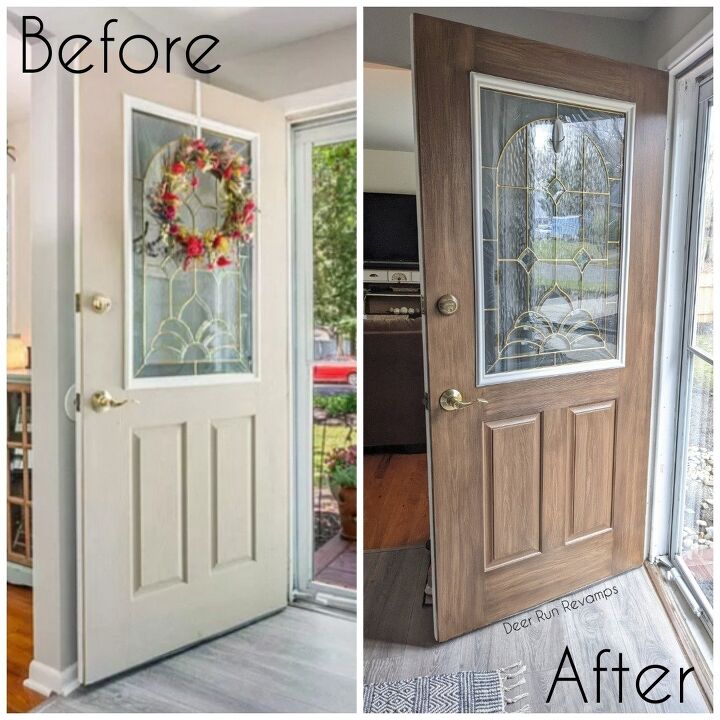
Front Door Makeover Using Liquid Wood - From Boring To Stained Wood

I've always wanted a stained wood door, but my goodness are they expensive! And, our door was already in really good condition, so we definitely didn't NEED a new one!
To get the look that I really wanted without having to spend much, I turned to Retique It, a liquid wood product that you paint on and then stain.
*You can find all of the products used in this tutorial in our Etsy shop which we've linked towards the end of the tutorial.
*Time listed is for work time only, does not include dry times
*Price listed is for the amount of product used, not the initial cost. You will have plenty of product leftover for more projects
Hometalk Recommends!
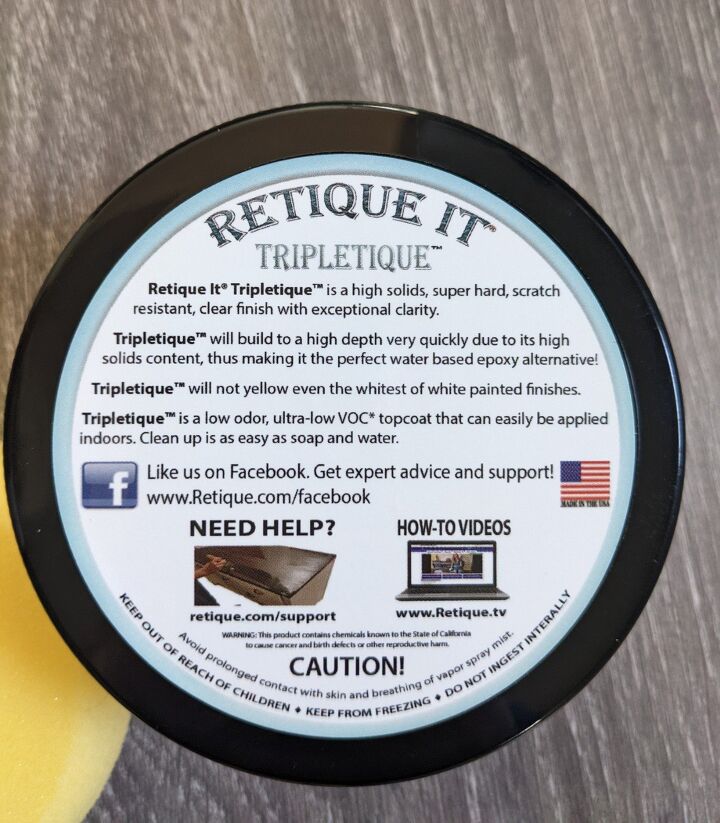
A little information about Retique It Liquid Wood -
Retique It looks and feels like real wood because it is real wood! Retique It is made with 65% recycled wood fibers, so you really are painting with wood!
Retique it is waterbased
It has very little to no odor
It can be used on just about any hard surface - metal doors, glass top tables, cabinets, previously painted surfaces, MDF, plastic, laminate countertops...I could go on and on 😆
It comes in multiple colors and along with their waterbased gel stains, you can achieve any wood color such as oak, mahogany, walnut, teak, cherry, driftwood ect..
There are multiple ways to apply Retique It, but this is the most common -
You first apply your base color. This will be the color that peaks through as the "grain". Typically, you apply two coats of your base color.
Then, you apply your contrasting color and immediately run the graining tool through it
Then, stain and seal 😊
Here is a quick video showing you the steps
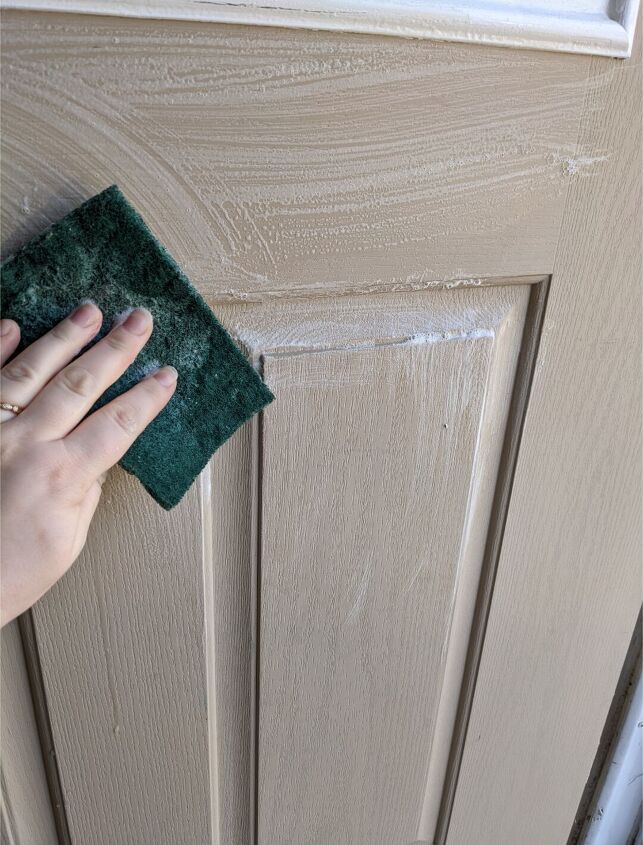
First, you need to scrub the door. Use dish soap and water, and scrub extra well. Then rinse it off with water and allow to dry. Do a quick scuff sand using 220 grit sandpaper. Then wipe with water again
If there is any grease, cleaner residue, dirt or grime left behind, it could jeopardize the adhesion process causing the finish to scratch easier and/or peel. So this step is extremely important. Take the extra time to clean the surface thoroughly and save yourself from the disappointment and frustration later on
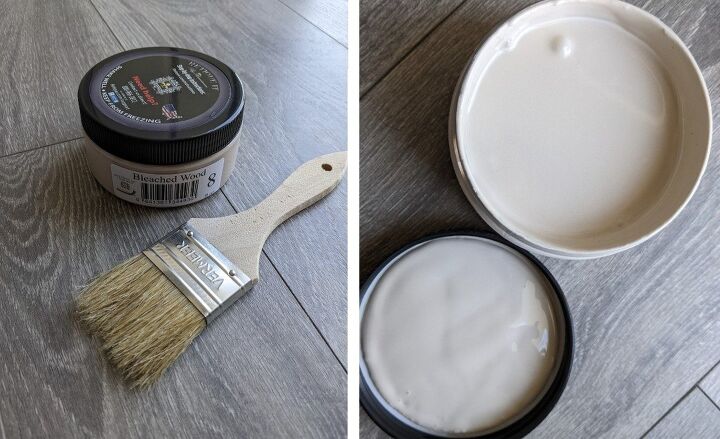
The product you use will depend on where the door is...
Regular interior Retique It Liquid Wood is very durable, but it is not recommended for exterior use. So if your door is exposed to the elements, you'll want to use exterior Retique It Liquid Wood. My door has a storm door protecting it, so I didn't need the exterior.
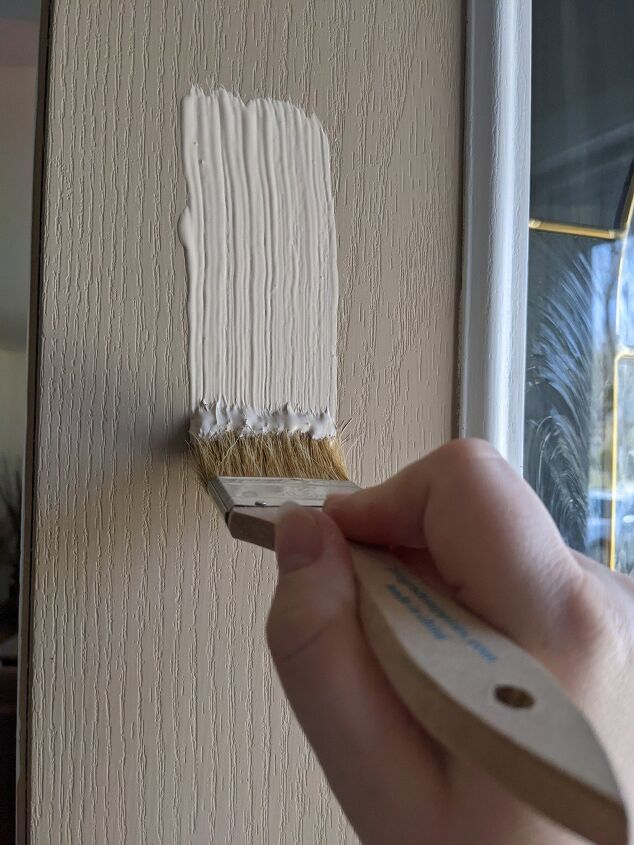
Using a chip brush, apply a coat of Retique it in the color of your choice. I used bleached as my base.
Allow to dry, then apply a 2nd coat
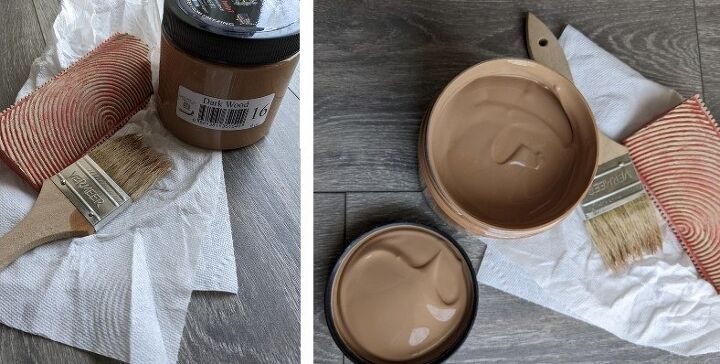
Now it's time to apply the contrasting color and create the wood grain.
Apply one coat of Retique It in the color of your choice, I used Dark

And then immediately, while the liquid wood is still wet, run the graining tool through, wiping the tool off after each pass
If you're doing an extra large area and can not do it in smaller sections, you may need to mist a bit of water over the liquid wood to keep it from drying before you're able to run the graining tool through.
After applying the liquid wood, I simply just lightly mist the area with water and go over it quickly with the paint brush, and then run the graining tool through
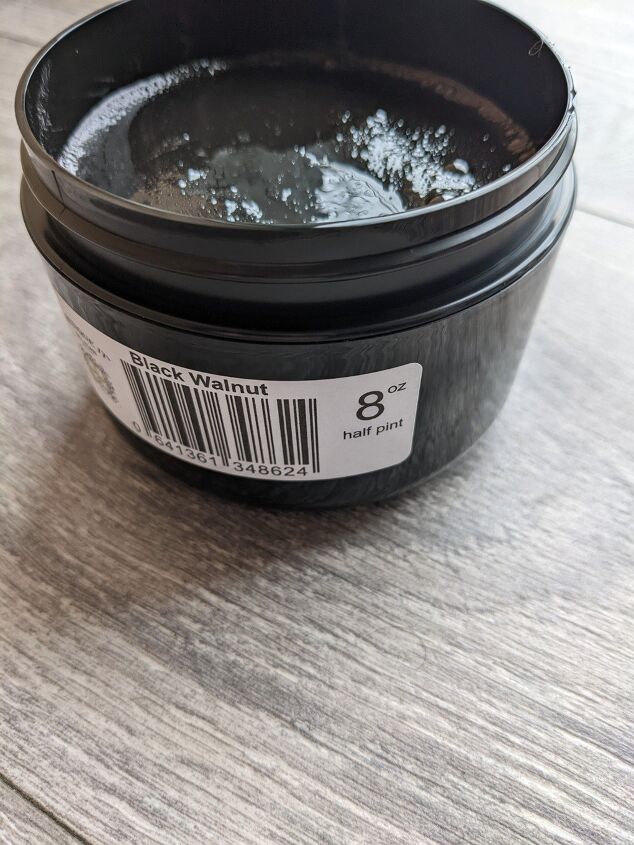
Once that dries, you can apply the stain in your choice of color.
I used black walnut
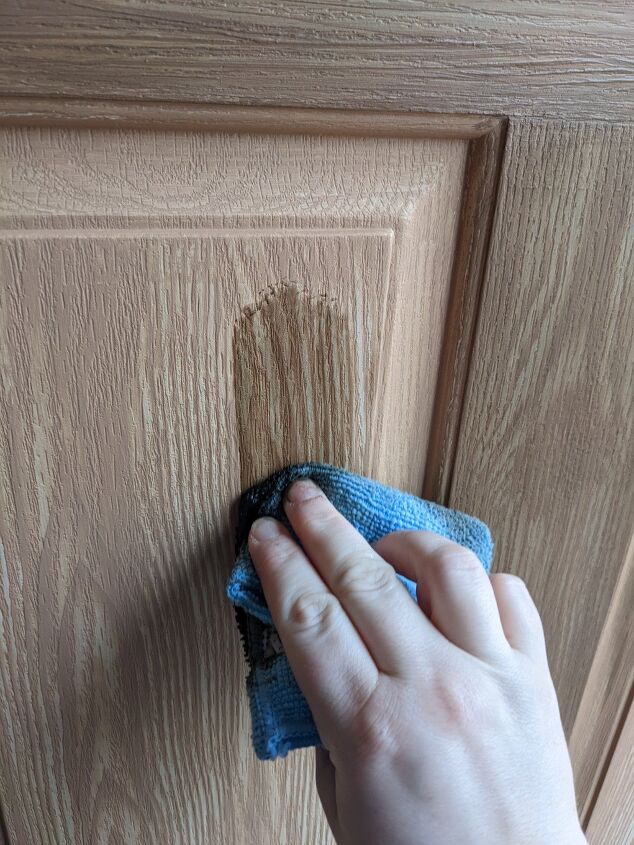
Dip a rag into the stain and wipe onto the surface in an even layer.
Try not to go over the same area numerous times.
If you want it darker, wait for that coat to completely dry, and then apply another coat.
I applied 3 coats of the black walnut stain to my door
Now, seal your hard work.
Doors typically receive quite a bit of traffic, so you want to use a good topcoat.
Tripletique is my go to for high traffic pieces. I used a satin finish for the my door
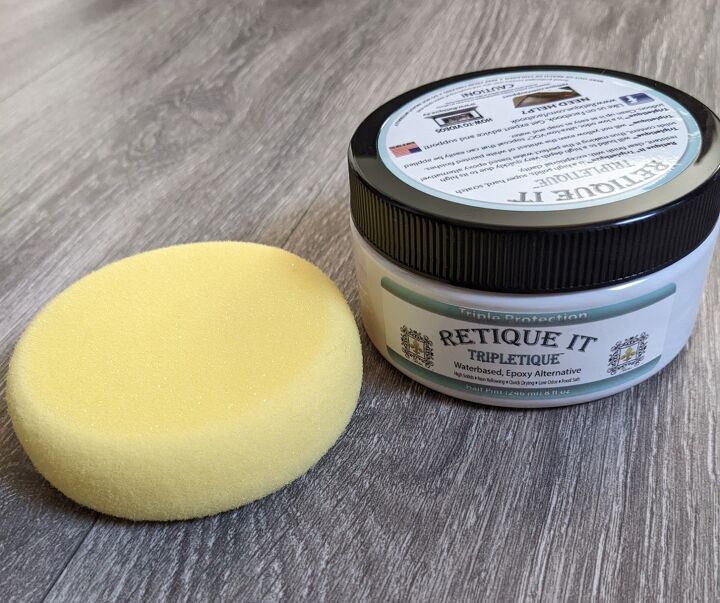
These sponge applicators are great for applying topcoats! They are available in our Etsy shop but we do include them with all Retique It and Tripletique purchases.
I pour a bit of sealer onto a paper plate, then dip just a bit of the sponge into the topcoat, and apply it just as I did the stain, dipping the sponge into the sealer as needed
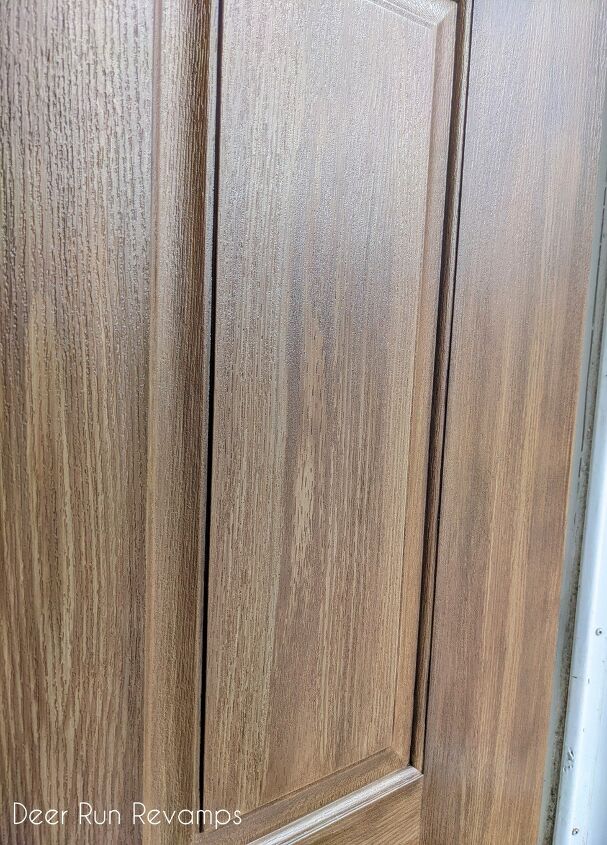
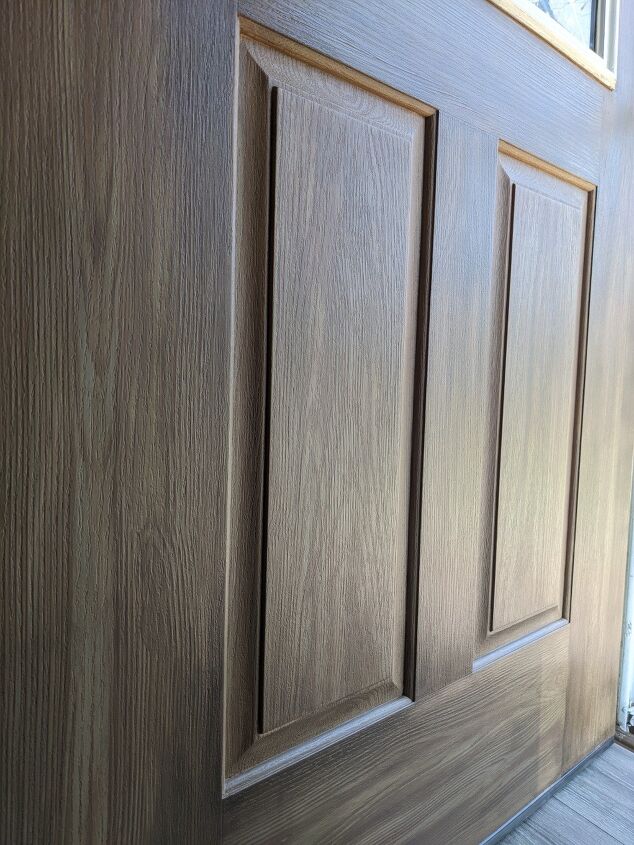
The sheen is just perfect!
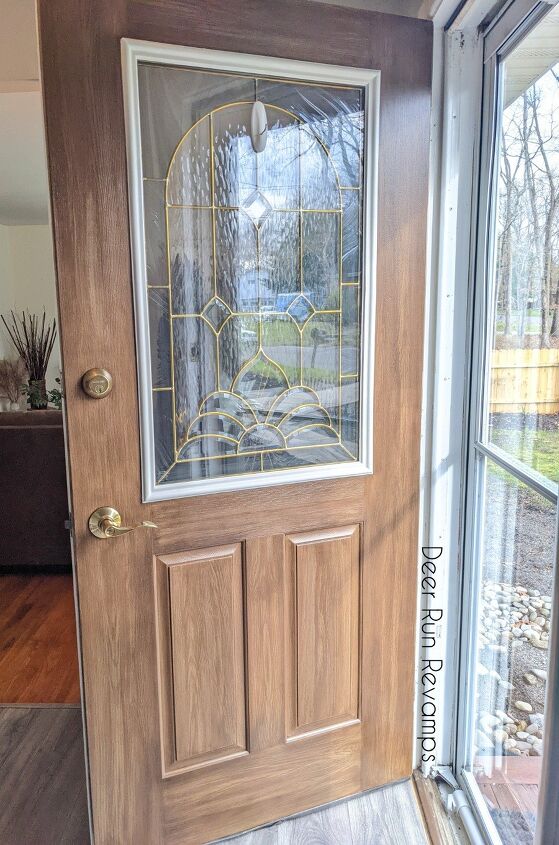
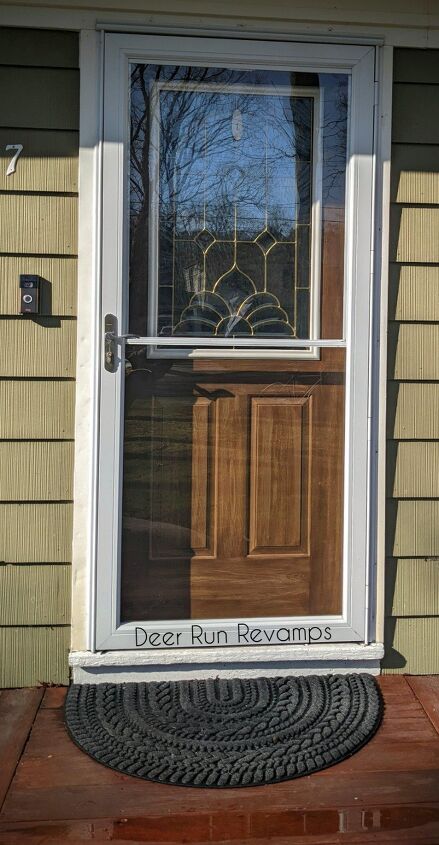
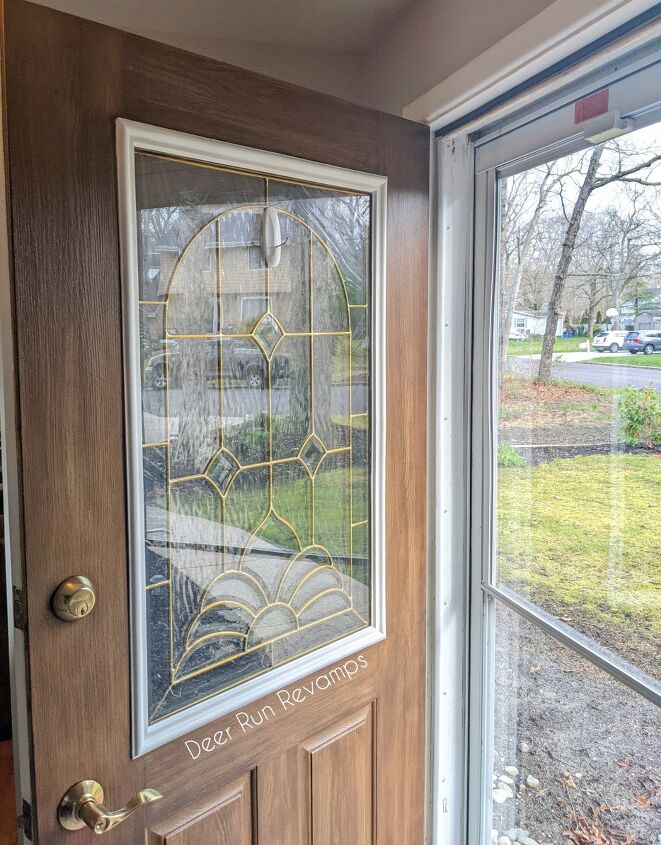
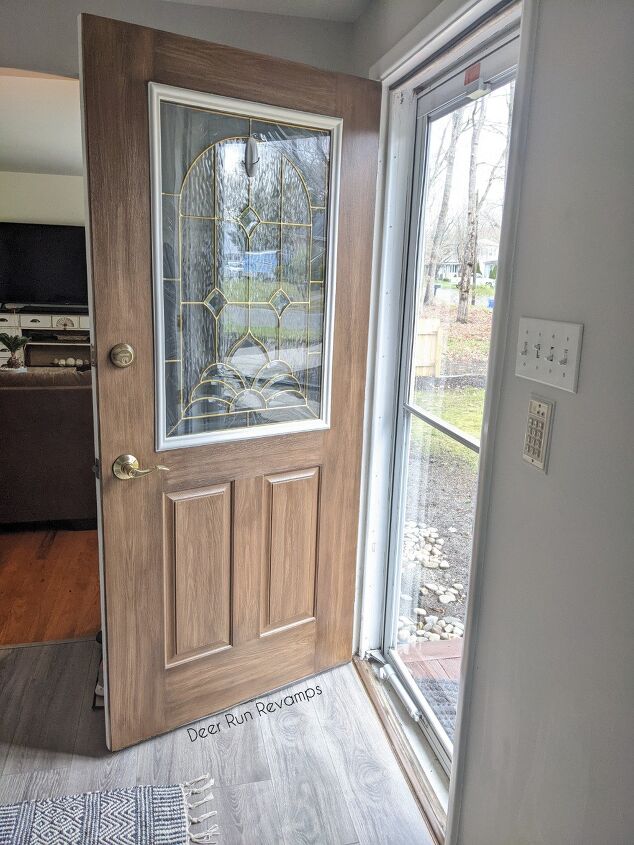
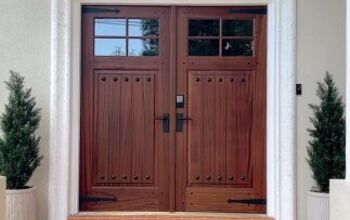
The last step is to enjoy your new wood door 😍
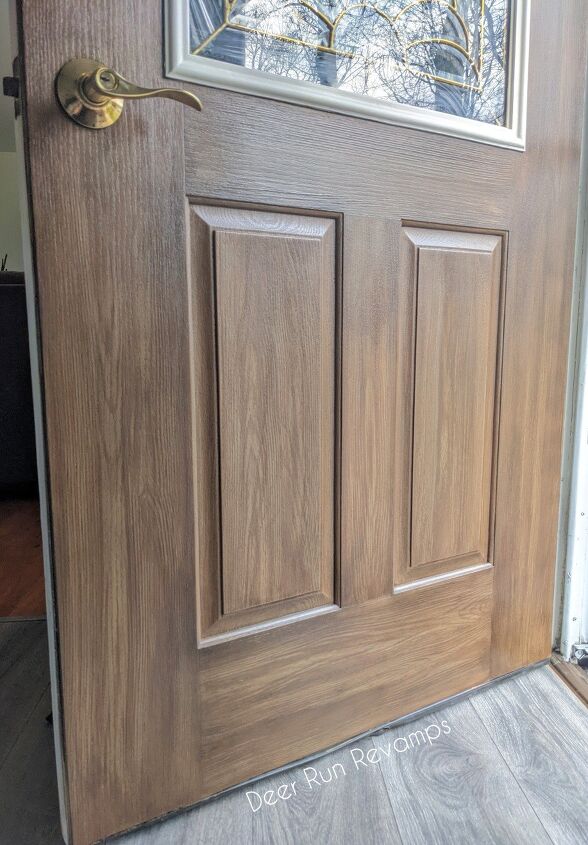
I am so happy with how this project came out 😍

You can really see the different colors
You can find all of the products used in this tutorial in our Etsy shop. And as a small token of our appreciation for taking the time to read our tutorial, use code THANKYOU10 for 10% off your purchase 😊 You'll find much more then just Retique It products in our shop!
Thank you for reading! We hope you've enjoyed this tutorial and are inspired to redo your front door 💜
If you'd like to see more of our projects, visit our Facebook page
https://facebook.com/deerrunrevamps
And as always, feel free to reach out with any questions 😁
Resources for this project:
See all materials


Comments
Join the conversation
-
Beautiful job, I've been wanting to do our door. Last time it was painted was 25 years ago!
-
Stunning! Great work!


Frequently asked questions
Have a question about this project?
Would this technique be appropriate for a metal garage door?
Can you use this on metal doors?
Love it! I love when people paint their doors to look like solid wood, it just gives a little more elegance to the "eyes" of the home. Was wondering if you ever finished painting & staining the white frame around the glass insert? I have a solid oak front door on my house (thanks to the previous owner's updates🤗) and the moulding /trim around the glass insert is wood, so it is stained the same color as the door.