


Refinishing an Old Door for My New Guest Bedroom and Library!
3 Materials
$20
3 Hours
Medium
How I refinished a 100 year old door for my guest bedroom. I have a confession to make – I’m actually a pretty terrible procrastinator… I’ve had two doors in my workshop literally since before I even moved in here waiting for me to cut them to fit and refinish them for my house. My master bedroom has never had a door on it (its on its own floor so its never been weird) and the other room that still needed a door was my old office which is now becoming my new guest bedroom and library which, ya know, REALLY DOES NEED A DOOR.

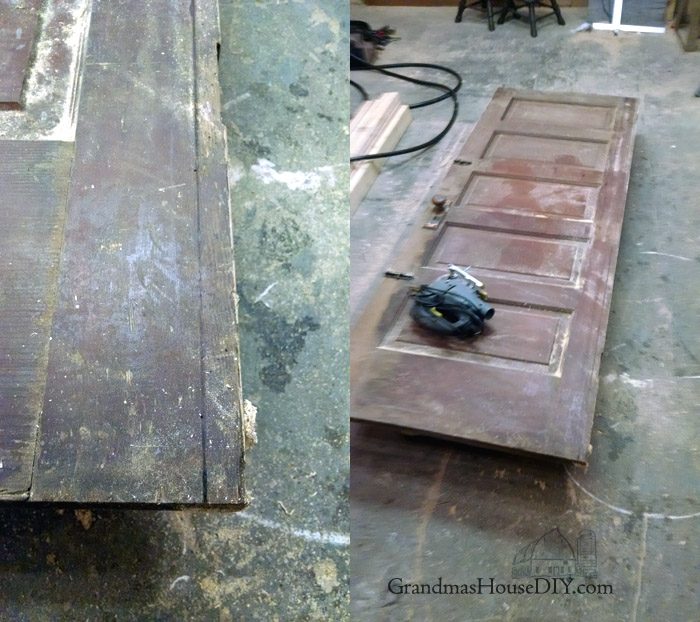
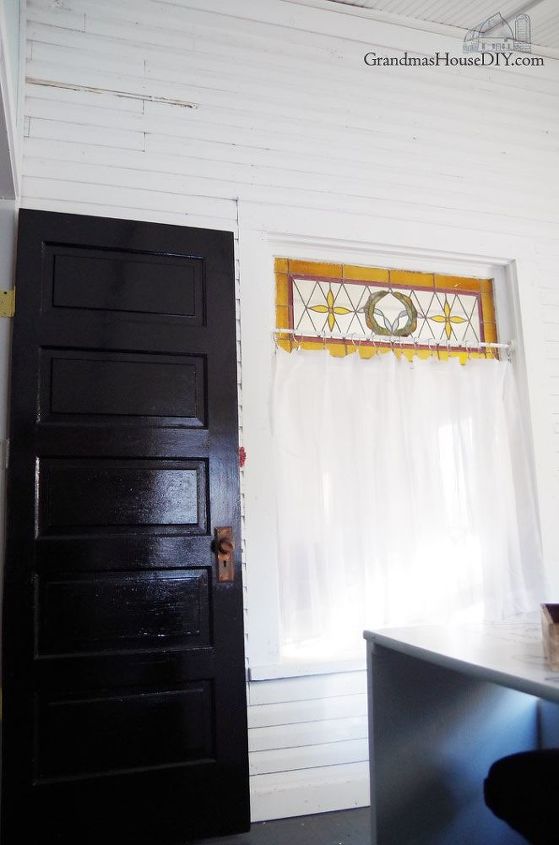
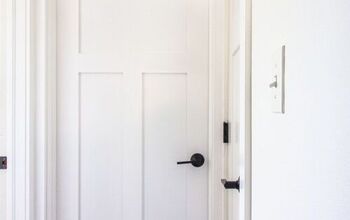
There were two doors left of my stash of old doors for this home one of them was an interior door with a gorgeous glass knob that just HAD to be my master bedroom door. (You can see that one peaking out from behind the one in this post in the next pic.) The other door was this one I’m working on today. It is an old exterior door that needed lots of love. But the handle worked and when I flipped it over my heart leaped, one side had never been painted!
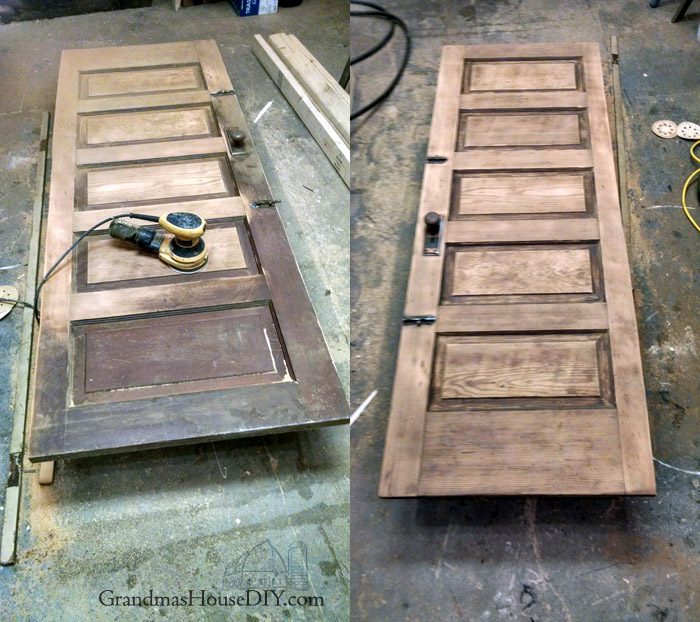
I always had the plan to not even try to refinish these old doors back to solid wood because they had so many layers of oil based ancient paint on them that I just didn’t want to mess with it. And I always wanted the doors in my house painted black anyway so that was my plan: paint all my doors black. But when I saw that wood I just couldn’t do it, I had to try and get it to bare wood and stain it back to its former glory.
So, first thing is first, I laid it down on a bunch of paint cans. I had to cut a little over an inch off the width and I chose to just use my jigsaw, cutting off the hinge side of the old door. Is this ideal? Heck no! Don’t use a jigsaw for this if you have other options! The reason I used a jigsaw is because I’m a chicka alone in her house at night and I’m just not comfortable pulling out a skill saw or using my table saw if I know I’ll probably be laying there until morning if I cut something important off of me (like a hand). Moving on…
(If I ever do a renovation again I would know exactly which door would go where and frame in according to their size. Because I didn’t realize when I was framing that I would even have enough old doors to use I just framed the room doors in to standard interior door sizes expecting to have to buy doors. So, now I’m having to cut my solid wood gorgeous ancient doors down to the correct widths. This one, being an exterior door, was the ONLY door of the bunch that was anywhere near the right height, the rest of them were at least four inches short… and I’m calling that weirdness character.)
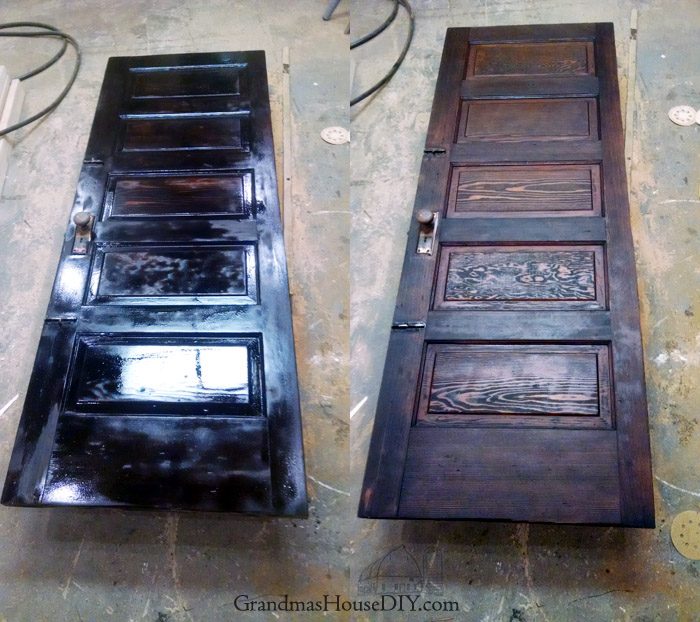
Then I sanded for an hour and a half and cussed myself out the whole time for not using paint stripper instead. These old oil based finishes are TOUGH – I used a lot of sand paper. I started with 40 grit and finally finished with a 200 using my Dewalt orbitol palm sander. After staining it with dark walnut stain by minwax I put two coats of a satin poly acrylic on it, let it dry for 24 hours, flipped it over and then painted the painted side with two coats of a gloss black rustoleum. After that I added the hinges and it was time to hang it!
You only need to know one trick when it comes to hanging doors and that is: THE HINGE SIDE HAS TO BE PERFECTLY LEVEL. After that you don’t have very much to worry about. As long as wherever those hinges are getting screwed into is level in every way then you know your door will hang without drifting open or closed on its own. This is true of the door as well, the door needs to be “standing upright” so keep your level close. I do this by putting in the top most screw in the top most hinge and then adjusting the door with a level on it before adding a screw to the center hinge. Another tip is to not drive your screws in too far initially, if you over tighten them they can pull your door out of plumb.
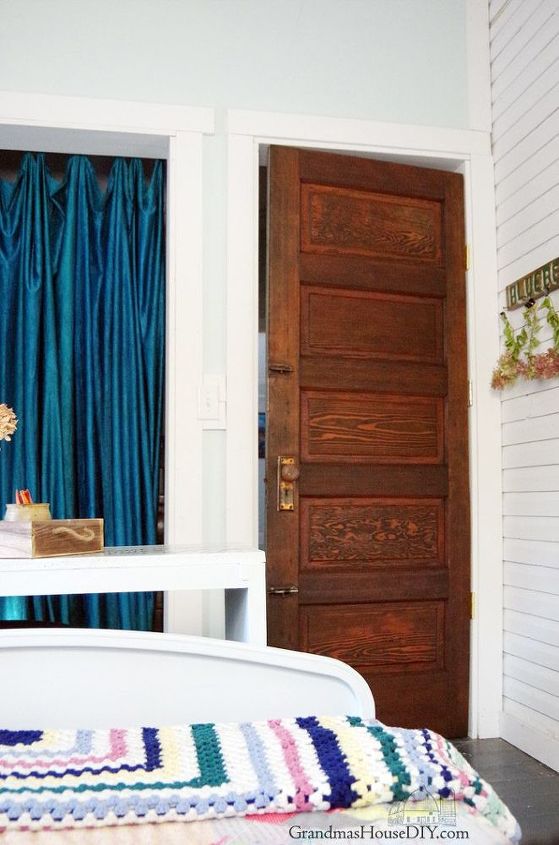
Does it need to be perfect? Heck no. But its good to at least do your best! I am a long ways from perfect around here, lol. With my newly refinished old door hung I actually feel like I can have guests now! Coming next week the FINAL completion and reveal of my new guest bedroom and library!
Resources for this project:


Any price and availability information displayed on [relevant Amazon Site(s), as applicable] at the time of purchase will apply to the purchase of this product.
Hometalk may collect a small share of sales from the links on this page.More info

Want more details about this and other DIY projects? Check out my blog post!
Comments
Join the conversation
4 of 27 comments
-
You turned ugly into beautiful and anytime that happens, you can be proud!!!
-
I am SO happy you chose to leave the old wood natural! It breaks my heart to see real solid wood painted. This is a beautiful door!


Frequently asked questions
Have a question about this project?