


DIY Roman Shades on a Budget!

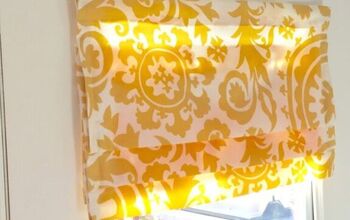
Looking to update your windows...Make these expensive looking custom Roman shades for next to nothing. I made these using a table cloth, but any heavier weight fabric will work! I had a basic idea as to how Roman shades operated but I made this up as I went along. I hope this tutorial is easy to follow and you are successful with making your own Roman shades. Please don’t hesitate to ask for clarification, I am more than happy to answer any questions 😊
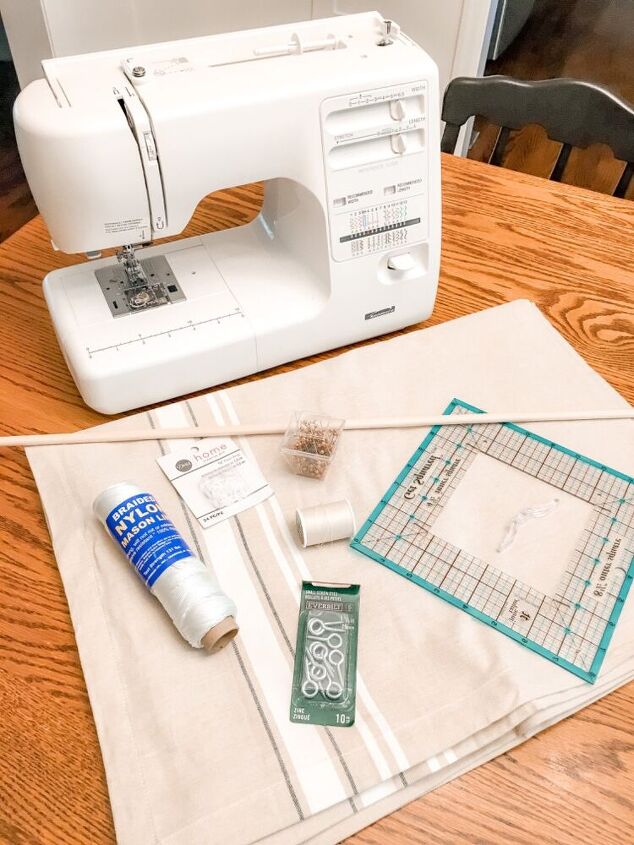
- Sewing Machine
- fabric (table cloth)
- thread
- plastic rings
- nylon cord
- pins
- eye hooks
- Wooden dowel
- scrap piece of wood for hanging
- measuring tape
- staple gun and staples
- blind cord wrap
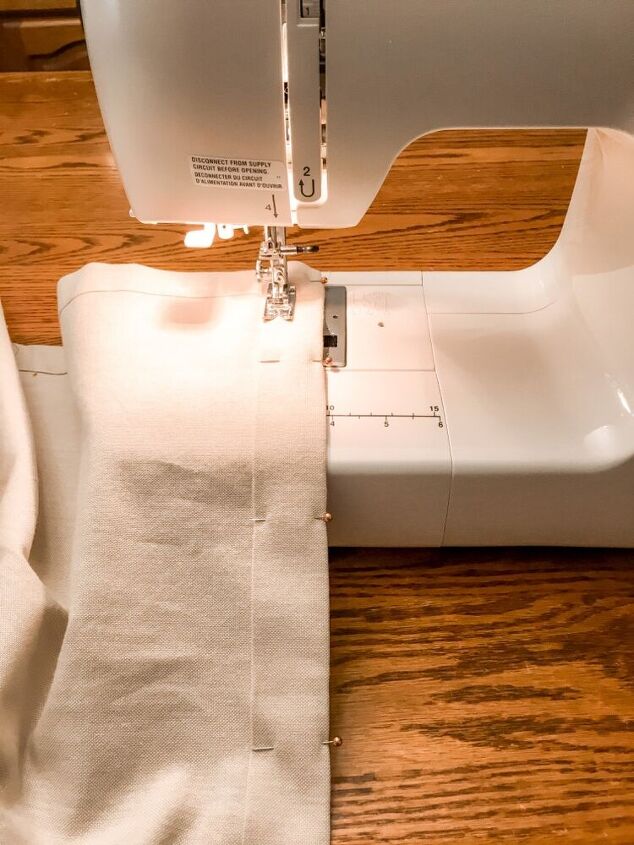
The first thing you will need to do is measure the width of your window. Once you have that number you will add two inches to either side to allow extra fabric for the hem. My window was 60” so I cut my fabric a 64” wide. You will then fold your fabric in 1” and then fold it over once more on either side. This will create a lovely finished edge. Sew up each side and then repeat the process to the top and bottom edges of your soon to be shades. *I didn’t worry too much about measuring the length of the shades as I am going to have them pulled up most of the time, but I did ensure to leave an adequate amount of extra fabric for sewing the horizontal pleats*

Once all of the raw edges have been neatly hemmed, measure and make sure everything is nice and square and sewn evenly. Staring from the bottom of your shades you will measure up 8”. Fold the fabric right sides together and sew a pleat. You will continue measuring up every 8” and sewing horizontal pleats until you reach the top of your shades.
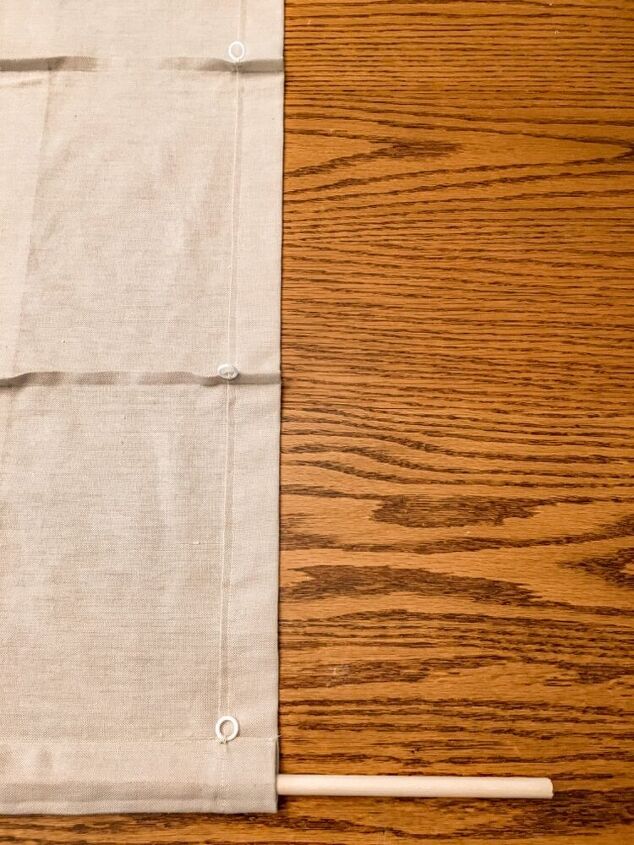
You will now sew on the plastic rings that will hold the cord used to operate the blinds. I sewed on 4 rings per row (pleat). You want to hand sew the rings on to the pleats and make sure they are lined up evenly with the row above. If you want a more structured shade you can slide a wooden dowel into the bottom hem of your shade.
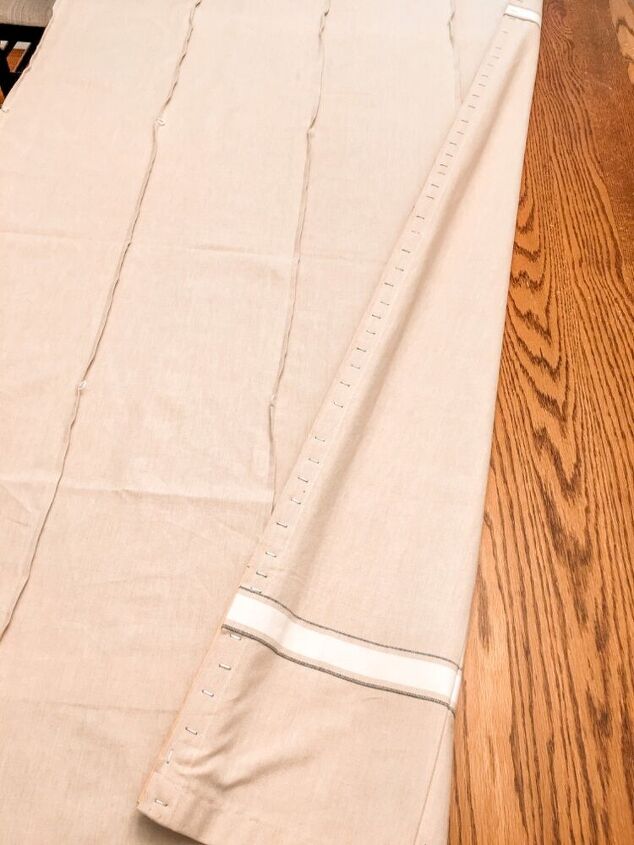
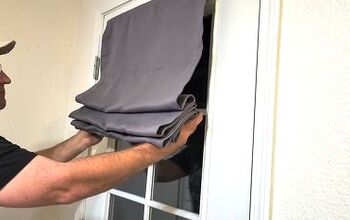
After you have sewn on the plastic rings it’s time time staple the top of the shade to a thin piece of wood. I used a scrap that I had lying around and it ended up working perfectly. You want the piece of wood to be the same length as the width of your shades. So since my shades were 60” wide I cut the piece of wood to 60”. I lined up the edge of my fabric to the edge of the wood and stapled It down every inch or so.
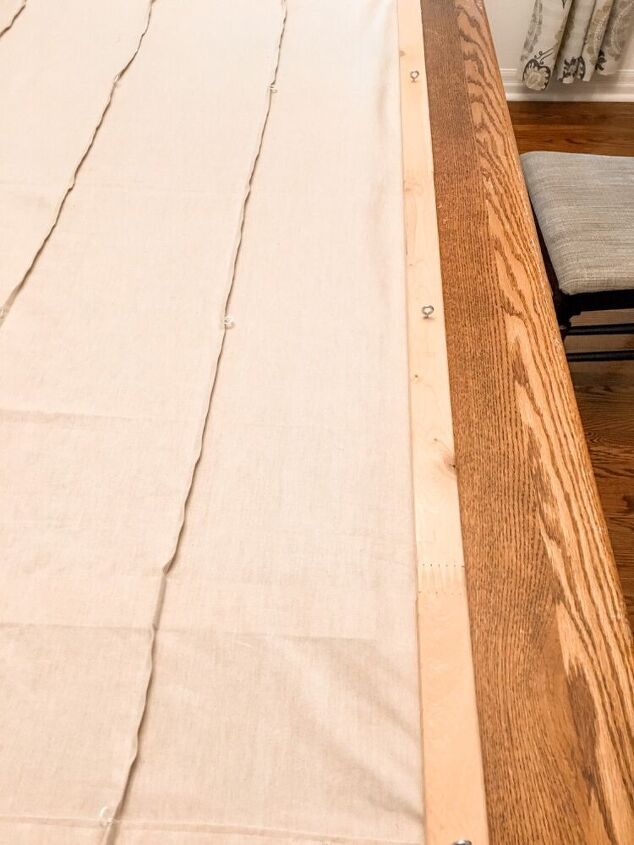
On the opposite side of the wood that you stapled screw in 4 eye hooks at the same spacing you used for the plastic rings. Basically you want the plastic rings and the eye hooks to perfectly line up vertically. This will ensure that your shades operate smoothly.
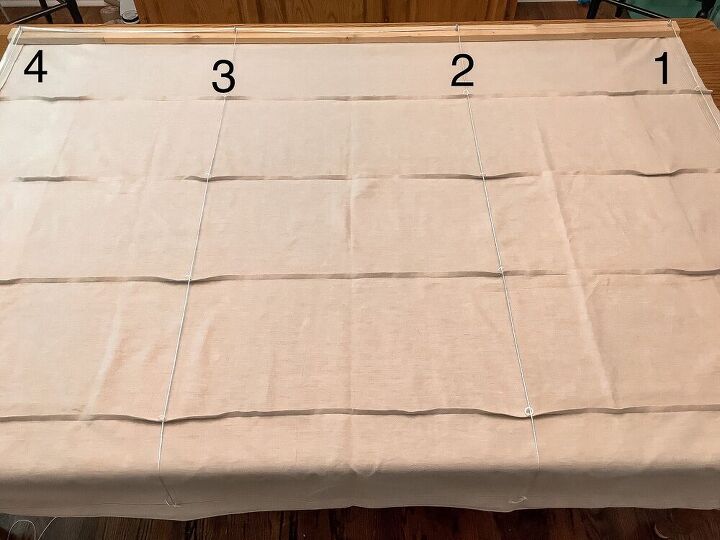
Starting from the very bottom right corner of the shade tie on a piece of the nylon cord to the first plastic ring using a few tight knots. You will then thread the cord all the up the plastic rings and then through all 4 eye hooks. Leave a good amount of extra cord at the end. You will repeat the same step to the next row over, however this time you will only be threading the cord through 3 of the eye hooks. Continue this for all four rows. The last eye hook should have all four cords through it.
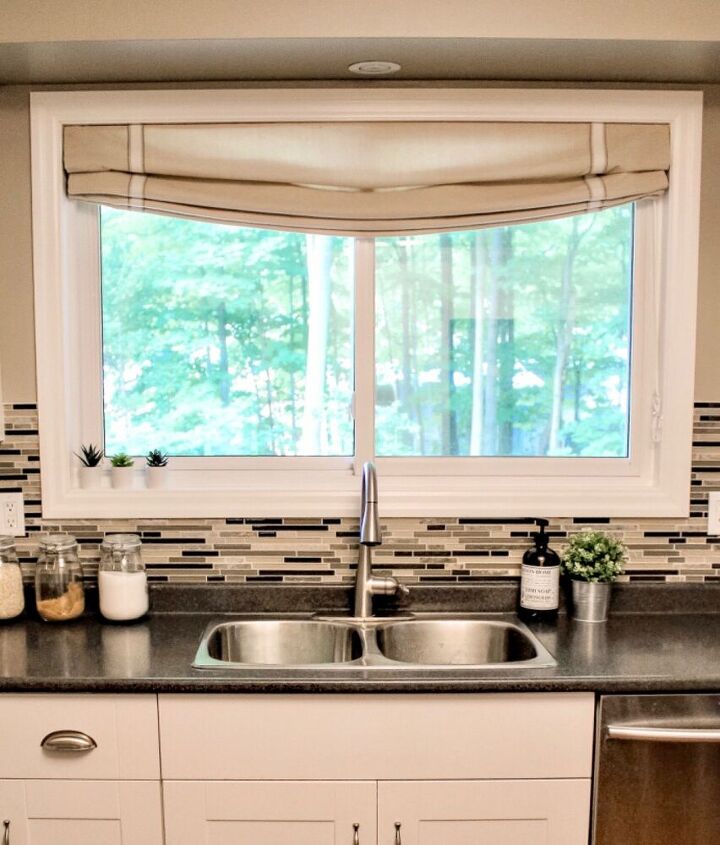
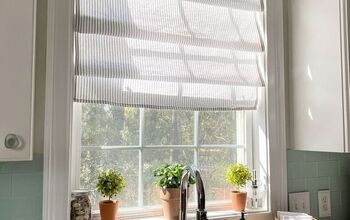
You are now ready to hang your shades! To do this simply screw the board to the top of the window (staple side up) so the screws will going in the same direction as the eye hooks you previously installed. Once hung collect all 4 pieces of cord and make sure they are all pulling the shade up evenly. Tie the four strands in a knot and trim off the excess cord. I used a blind cord wrap to keep my shades open.
Resources for this project:
See all materials


Comments
Join the conversation
-
Yes I would like to make these for my living room. I just cant figure out how the middle drops down with just 4 rows plastic holes. I love the look
-
They look gorgeous!!


Frequently asked questions
Have a question about this project?
Your Roman shade Is gorgeous. My question is how does it round out in the middle? I love the look but just can’t figure it out, lol. Thank you.
You all use existing shades or blinds. How about a tutorial on roman shades for some large rectangular windows that don't have existing blinds or shades? I live in Florida insulation would be ab fab!
Thanks,