


Homemade Geode Sun-Catchers

One of the unexpected, great things about having kids is that they 100% have forced me to be less of a perfectionist. I’ve never said “good enough” as often as I have since trying to complete projects with two little bundles of attention-seeking joy underfoot. I’ve learned to not fix their art projects or crafts or sections of my own projects that they help with. Sometimes a goof or quirkily finished section of molding paint is a good thing – it stays as a reminder of a good time when “we helped mommy there” and shows that this is their home too.
I’ve always been crafty, and I love that I’m seeing that interest in my girls more and more. This also means that I have little people to make crafts for rather than just having a bunch of ideas but no one to give things to (or any place to put them).
But making crafts with kids means the final product might not be quite what I had in mind.
Enter my homemade geode sun-catchers. I made these and will certainly use this method to make nicer ones for myself in the future, but this batch went to my kids after my 3-yo “helped” me assemble the pieces, so they’re not quite what I’d had in mind. However, rather than gritting my teeth whenever I see these hanging in their rooms, I’ll let these sun-catchers be one of those things that I smile at and know Alice is proud of because she was a part of its creation.
So here we go.
Supplies:
(See this blog post on my DIY website for purchase links!)
- Epoxy
- Silicone caulk
- Silicone baking sheet
- Glitter
- Mica powder (whatever colors you choose)
- Fishing line
- Short piece of wood
Side note: What looks like a big price tag for this project is really only so much because this is if it’s the first time you have to buy these supplies. The epoxy and mica powders in particular will last for MANY projects to come, so keep in mind that you won’t have to buy those again for a long, long time.
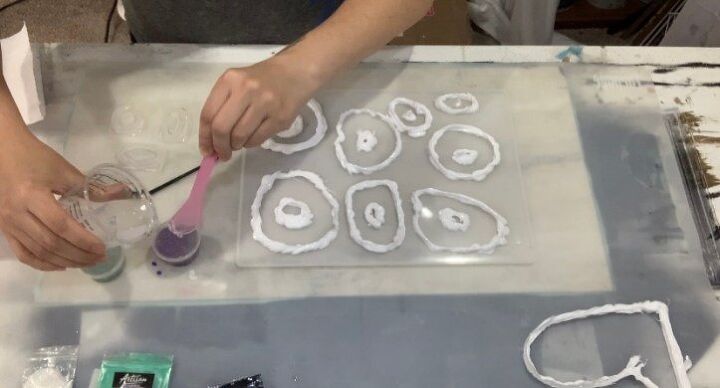
Step 1: Make molds. You can easily skip this step and buy silicone molds made specifically for resin, but part of this experiment was to see if I could save some $$ (those things aren’t cheap!) and make my own. I did buy one set of 3 and used those first, but I quickly realized I didn’t want to take forever making the geodes in batches of 3. They weren’t terribly expensive, but I was fairly confident I could make my own. I watched a few videos on YouTube to confirm I was on the right track, and then I gathered my supplies and had at it.
I used a spare silicone sheet I’d partially ruined earlier (more on that another time), but I’ve seen this done on silicone baking sheets and will use those next time to make different shapes (Christmas tree ornaments!). Simply lay your sheet flat and make sure it’s clean.
Then take silicone caulk, cut the tip so the hole is about as wide as your pinky finger, and place the caulk container in a caulk gun. This stuff is a bit smelly, so be sure to do this in a ventilated area.
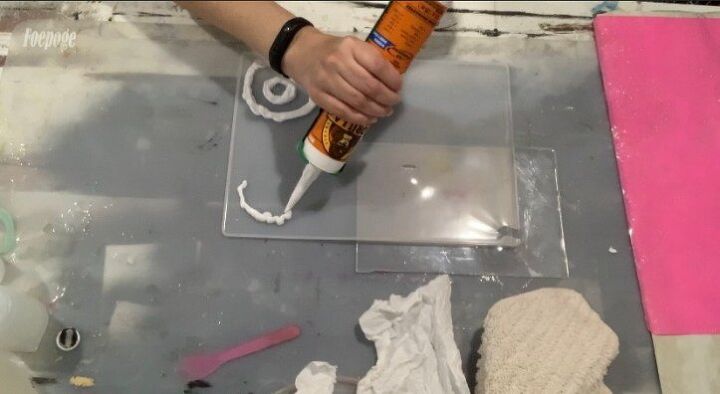
Then all you do is gently squeeze out the caulk as you outline whatever mold shape you want to make. Make sure the caulk is pretty thick and stands up a decent amount from the sheet base. I tapped mine down a bit and smoothed the insides by putting a wet wipe over my finger, and this also helps to make sure you don’t have any gaps between the caulk and the base. If you want a really smooth edge to the sides of your epoxy creations, you can mix some water with dish soap and really rub it smooth. But since I was going for a rougher, “geode edge” look, I didn’t worry about getting my sides smooth.
Once I had my mold shapes made, I let them dry overnight.
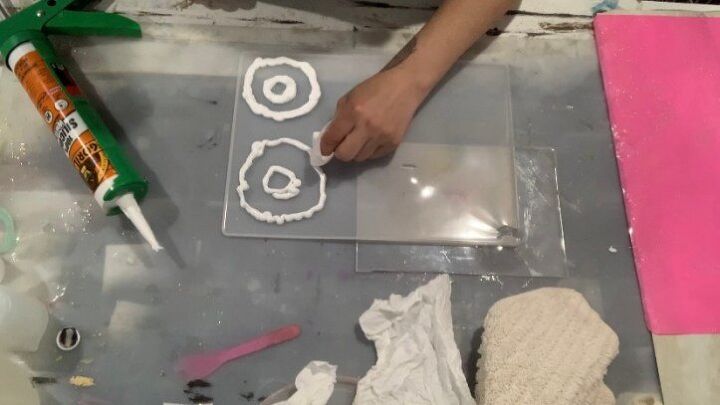
Step 2: Water test. Once the silicone was dry, it was REALLY well stuck to the sheet. So, now it was time to test if the molds I’d made would work. To make sure I wouldn’t have any leaks of epoxy, I filled one of my little measuring cups with water and poured it into the molds. If it leaks out anywhere, you know where you need to patch up with another squirt of caulk.
Lesson learned: BE SURE to fill the molds all the way with water. I only poured one mold about halfway, and of course that was the one that had a small gap higher up . So, once filled with epoxy all the way, that gap caused a leak. 🤦♀️
If you need to patch your mold, make sure that the added silicone dries again, then try another water test if you want to be safe. If you’re lucky and you have no leaks in the first place, simply use a cloth or paper towel and soak up the water to get your molds dry again.
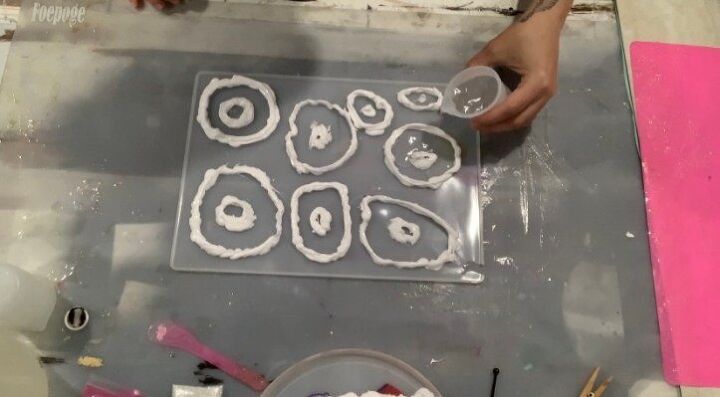
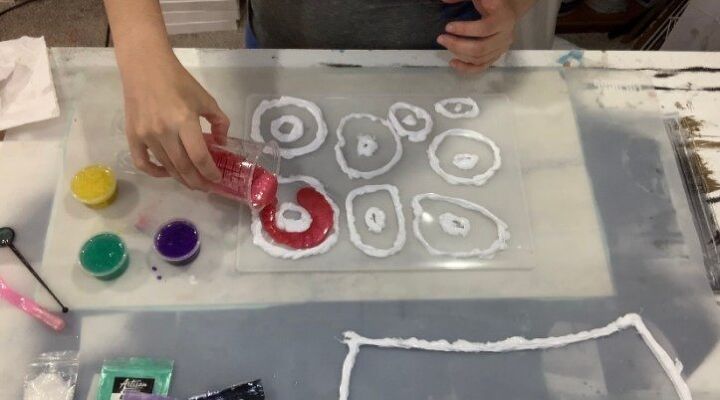
Step 3: Epoxy time! It’s fun to pick which colors and additives to use. I have this awesome pack of mica powders that have lasted me forever, and the colors are so bright and perfect for this project for my kids. Unfortunately that particular brand of mica powders is unavailable on Amazon right now, but I linked in my “Supplies” section to a similar kind. I used yellow, purple, emerald, and scarlet mica powders. Plus I used some glitters for additional sparkle.
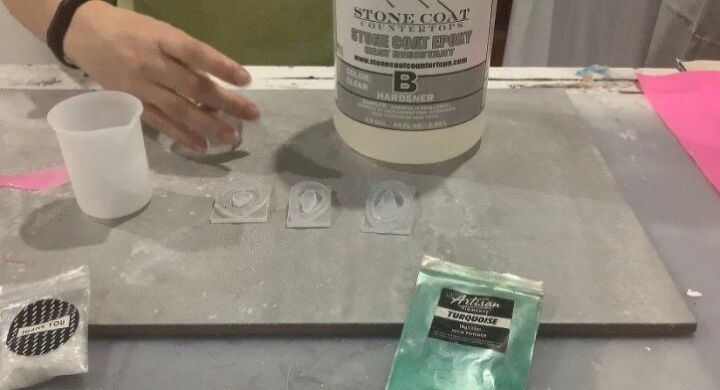
For the epoxy itself, I always use Stonecoat Countertops epoxy because it’s what I use on my countertops, it doesn’t smell or have fumes, and I know it’s tough enough to stand up to anything my kids throw at it – literally. If you use another kind of epoxy (there are many craft epoxies out these) be sure to follow those particular instructions for mixing, curing times, and safety precautions.
So how much epoxy does this take? It feels wasteful to mix a bunch and then have too much, so a great way to get an idea of how much epoxy to mix is to keep track of how much water you use in your water test. Once you know how much water it takes to fill all your molds, that’s how much epoxy it will obviously take too.
I needed a little over 4 ounces for all my molds, including my 3 purchased little molds. Stonecoat Countertops epoxy is a 1:1 mixing ratio, so I needed 2 ounces of part A and 2 ounces of part B. Because I have done over 100 square feet with this epoxy, here are a few things I do to make this process go smoothly without creating a huge mess.
- I use silicone measuring cups and stir sticks as much as possible to avoid too much trash/waste. It washed easily with 91% alcohol OR you can wait until the epoxy dries and then you just peel it off, which is strangely satisfying. 😆
- Be sure to measure out the epoxy in containers you KNOW have accurate measurements. If you don’t mix it at very, very close to a 1:1 ratio, it won’t cure correctly.
- I use wet wipes to clean as I go. This way I don’t accidentally touch sticky drips that then transfer from my hands to EVERYWHERE. (Another lesson learned.)
- Turn part A upside-down to make sure it mixes well.
- Always start with part B because it’s less dense. That way, part A will settle down THROUGH part B and start mixing itself as you pour it in with part B. Otherwise part A is harder to get off the bottom and stirred as thoroughly.
- Take the lids off while holding a wet wipe so you don’t get any on your hands or gloves, and also wipe the lid’s threads before putting the lid back on so it doesn’t stick next time you try to open it.
- Put the mica powders and additives like glitter in your separate color containers first. It’s easier to open and scoop in the mica powders if you don’t have sticky epoxy possibly on your hands/gloves already. Plus, mica powders can kick up in a poof! and get everywhere, so better to have that happen in the bottom of a container rather than near the top if the epoxy is already in your container.
- Be SURE your working surface is level. Epoxy is self-leveling and will run if your table/desk/counter is not extremely level.
Ok. So once you’ve got your parts A and B mixed (for about 2 minutes until it’s a clear, evenly thick consistency), pour the epoxy into your separate color containers. Then stir the epoxy and mica powders until it’s thoroughly mixed. If one of your colors isn’t strong enough, you can always add a bit more mica powder. But I’ve found that a little goes a long way. Just be sure to really stir it up so there aren’t chunks or streaks.
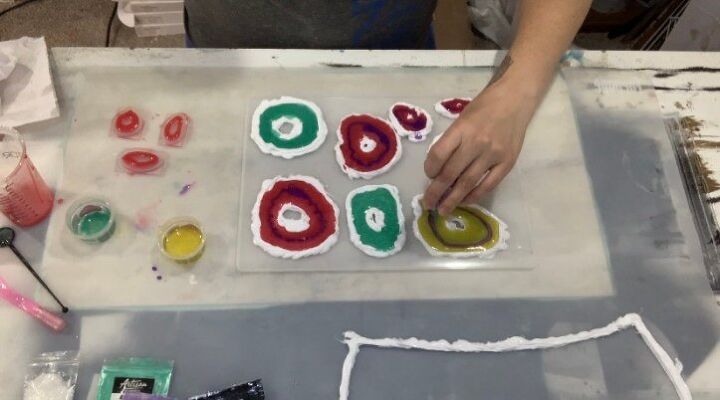
Once mixed, pour each color into your molds however you like. I mostly filled each mold, leaving a little bit in each container. Then I used different colors to pour little rings around a few future “geode” to add something cool.
The last part of this epoxy step was to add extra glitter to really help these look like geodes. I followed my ring patterns and added just enough to clearly add some sparkle.
Step 4: Let it cure! It’s hard to know when to stop with epoxy art, but I forced myself to stop playing at this point and left my creations alone to cure! lol
For best result, I find that keeping the room around 70 degrees will let epoxy cure in 24 hours. Depending on your climate, this might vary. But a solid 24 hours is usually good for me. If you can touch your epoxy and it leaves a mark or feels squishy, it helps to turn on a heater and give it more time. Especially if your molds are thicker, it might take longer.
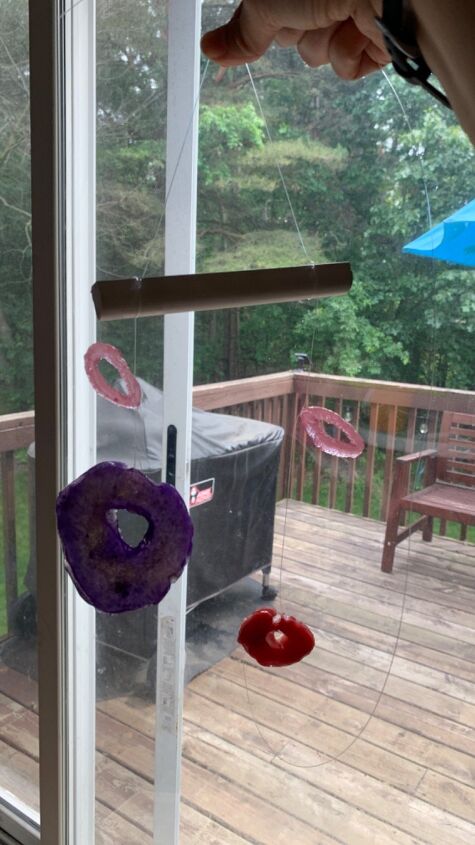
Step 5: Remove from molds and see what you’ve got! I was very relieved to find that my epoxy geodes popped right out of my molds without any issue. And they looked pretty cool!
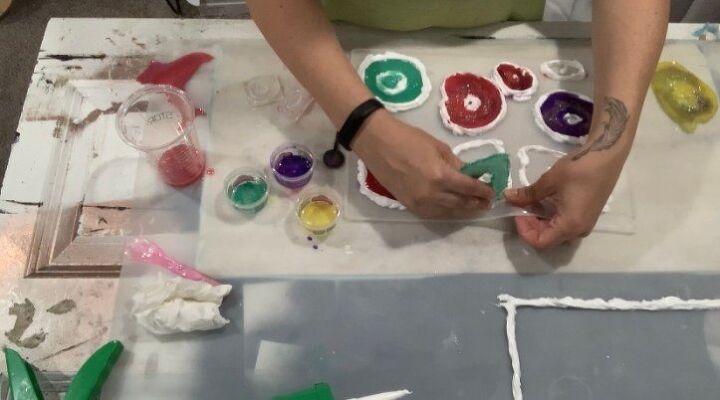
Step 6: Sand. A few of my edges were a little sharp, so I simply used some sand paper on my multitool and buffed down those spots. Then I wiped off the dust with a wet wipe and they looked great. If you find that your shape isn’t quite right, you can sand down to get rounder curves or whatever.

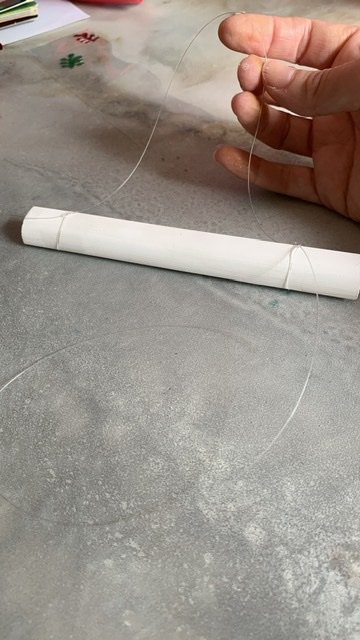
Step 7: Find a hanging base. I had elaborate plans to find wooden rings at a craft store, but my 3-yo was impatient. Hence I used pieces of scrap molding since they at least had neat curves and were already white. 🤷♀️ I’m SURE you can find something better, but this also proves that just about anything would work. The geode creations aren’t heavy at all, so just about anything would support their weight.
Step 8: Attach with fishing line. I played with different lengths, but you really can hang your geodes however you want and it will look pretty neat. For my first string, I left a long end hanging below the wood piece, then tied securely around the wood, then made a loop above the wood to hang, tied it again on the other end of the wood, then left a long end hanging from that other side. “Snip!” went the scissors, and now I could tie on the geodes to those two ends.
For the rest, I tied the fishing line to the wood, left a long end, cut, and then played around with the positions of the geodes until I liked how long they hung in relation to each other. Once they were on, it was easy to slide the line along the wood if I wanted to adjust a bit.
Fun fact: I worked with my 3-yo during this assembly process, and we made a pile of geodes for her and a pile for her sister. While I tied on the strings, she picked one from her pile and would hand it to me to add. To my surprise, once I was done with hers…her sister’s pile was considerably smaller than it had been. 🤦♀️ Oh well, at least my 2-yo hasn’t seemed to notice.
Once all were attached and positioned “good enough,” I snipped off the extra bits of fishing line on the ends and made doubly sure that my knots were tight.
Last Step: Hang the assembled sun-catcher! My girls were very excited to pick spots in their rooms to hang these up. Little sister copied big sister (and fortunately made it easy on me) by hanging them from the curtain rod braces in front of their windows.
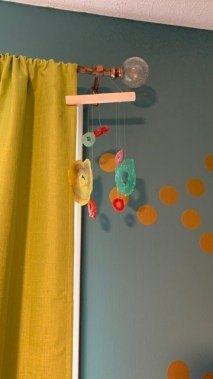
They look nice! They are bright and let sun through, and the glitter adds some cool sparkle.

Easy enough. If they’re happy, I’m happy! 😆


Frequently asked questions
Have a question about this project?