


How to Make a DIY Roller Shade

Alissa HaganHow to Make a DIY Roller Shade
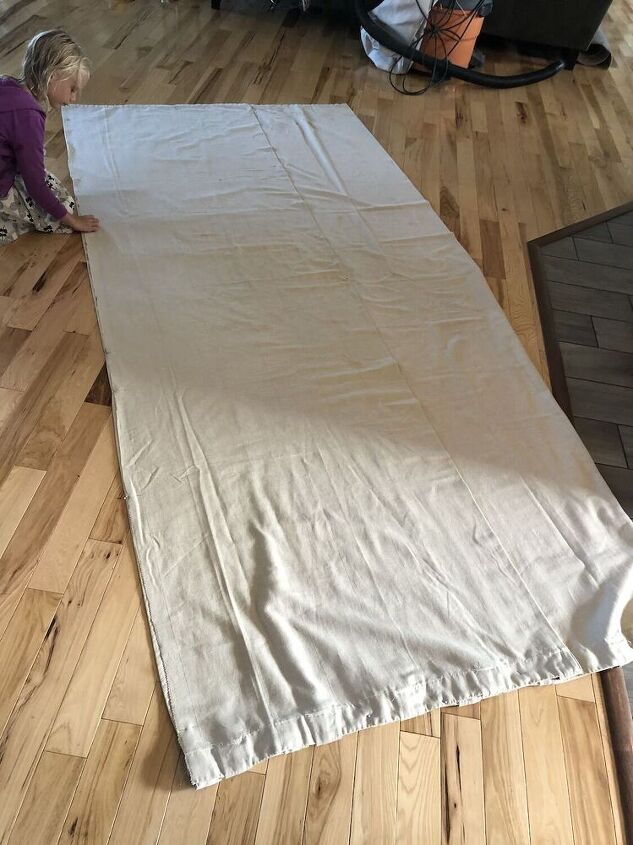
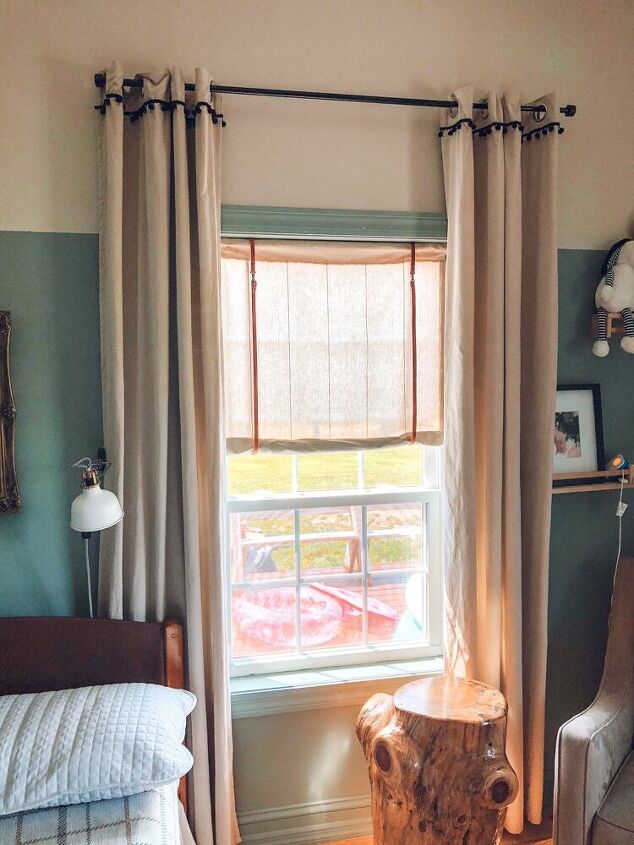
The old blackout roller shades in my daughters nursery have been falling apart. They rarely roll up anymore and when they do it takes 2-3x to get them to go. Then sometimes they just unroll all on their own. It was beyond time to replace them. I read through a few diy Roman shade tutorials, ordered my supplies and winged it, per usual. Here’s what I did!
Materials: Fabric of your choice (I used old linen curtain panels from Ikea) Using curtain panels saved me time on sewing hems and money. (How much you need will depend on your window size.)
2- Lobster Claw Clasps with D Rings. I got mine here. (Should have ordered larger ones but I made them work.)
Embroidery thread or other thicker thread.
2- 60” Leather strips. I got mine here.
Sewing machine or could do this as a non-sewing project and use hem tape.
2- 1/2” wood screws
2- 1 1/2” wood screws (I chose brass to match the lobster clasps)
1- 1/2” x 1” board for the top rail, cut. 1/2” less than the width of the window (the part that screws into the window frame).
1- 1/2” wooden dowel, cut 1/2” less than the width of the window. This is for the bottom hem to give the curtain some weight and roll the fabric on.
Fabric Scissors
Large Sewing needle with a big eye
Step 1: Cut your fabric. My measurements were 35.25” x 66”. My window measured 34.25” x 58”. Be sure and calculate for hem allowance. I added 8” to the length dimension (4“ hem on top and bottom) and 1“ to the width (1/2” hem). I wanted my curtain to cover the whole width so there would be less light filtering through the sides.
Step 2:
Hem the sides of your panel and the bottom and top. Fortunately, I only had one side hem because I used the hem from the curtain panel.
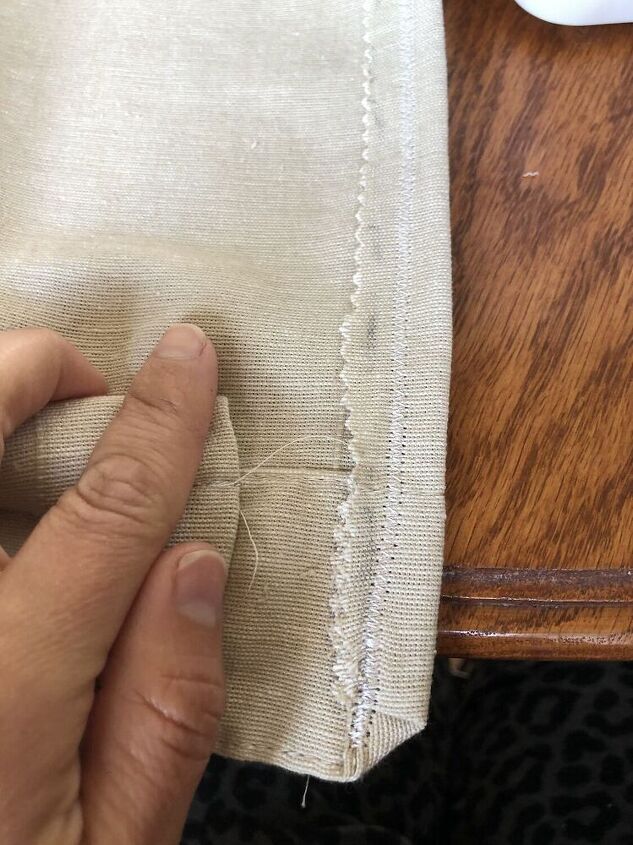
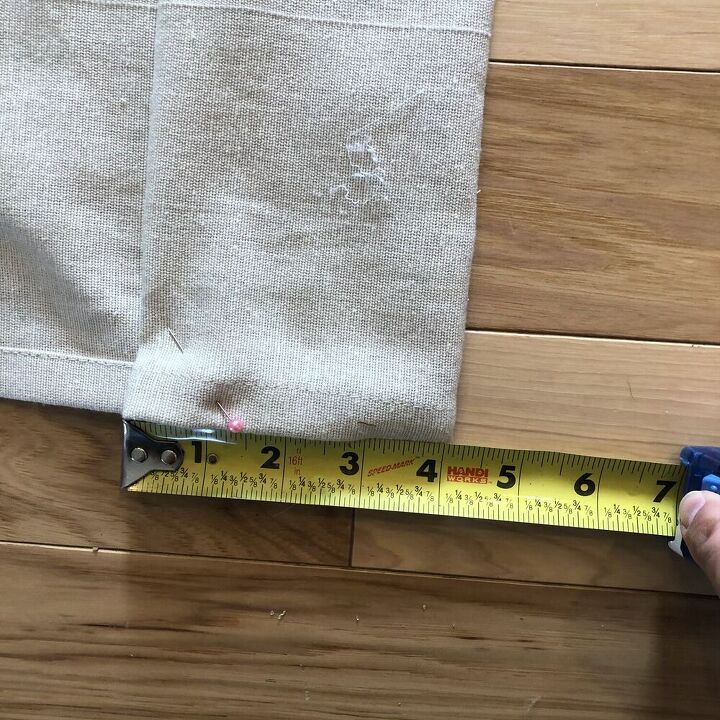
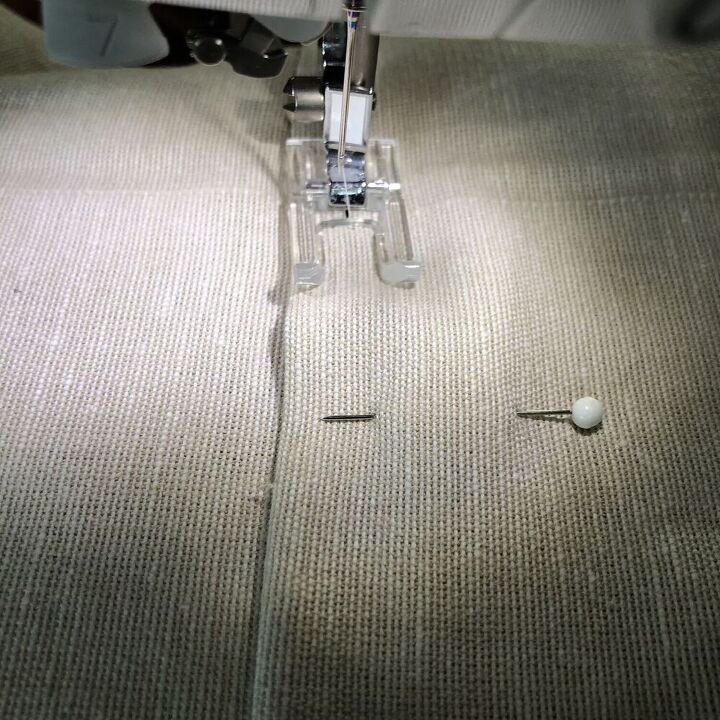
Be sure and sew on the inside edge of the seem to create a pocket for your wood rail and wood dowel.
Step 3:
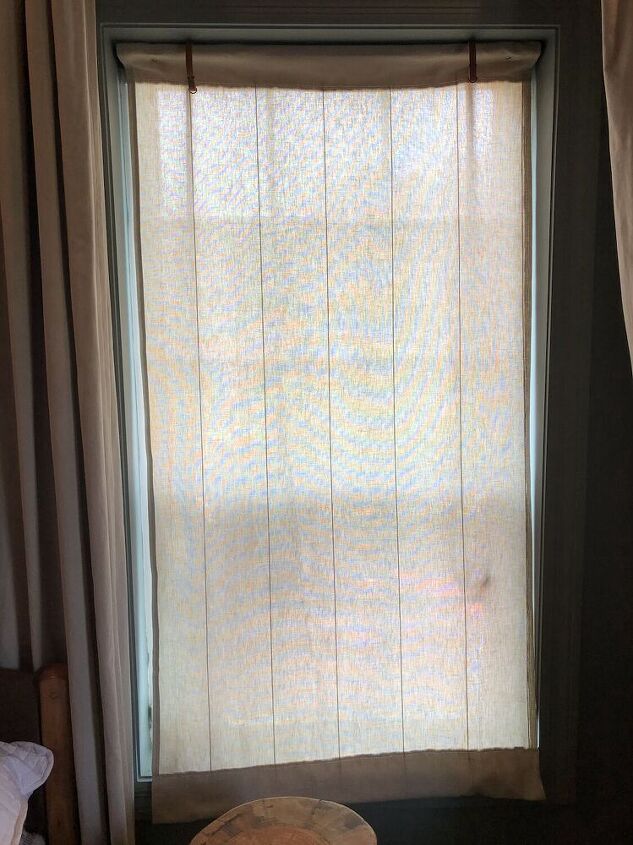
Leather strap work. Fold the end of your leather strap over about 1”. To make things easier to sew, use a small drill to drill holes to put your needle through.
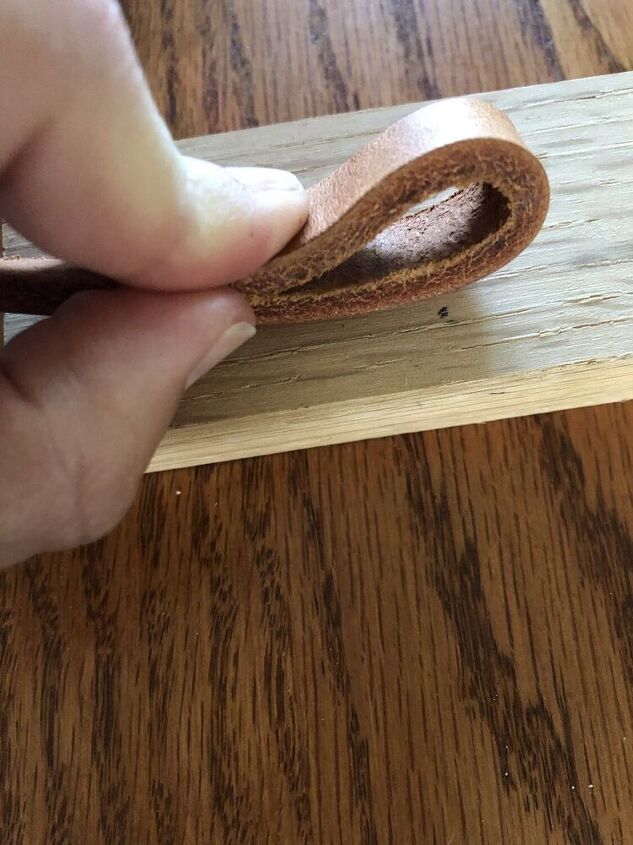
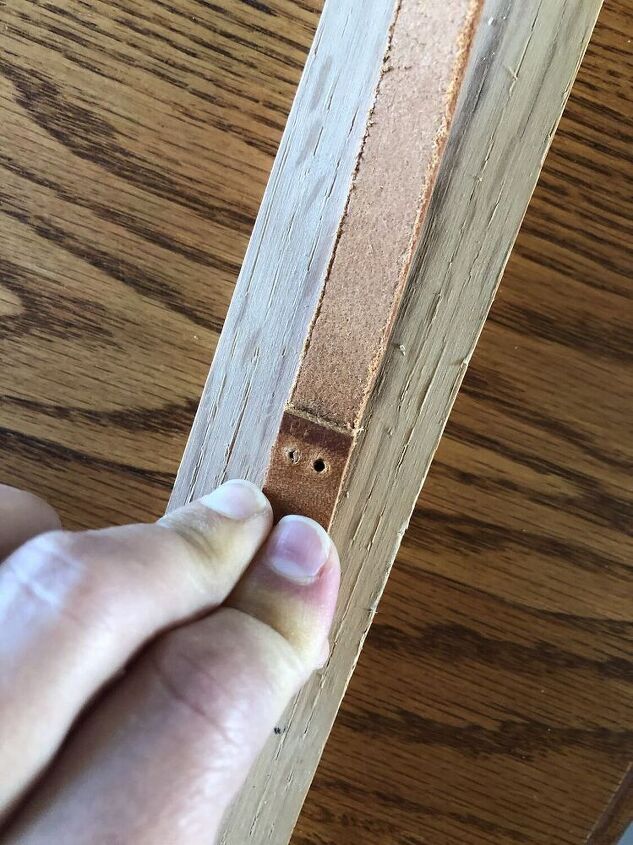
On one end you will have your D-ring and on the other end you will have your lobster clasp. On the end with the lobster clasp drill two holes side by side (shown above) and one hole towards the end of the loop (Shown below). In a perfect world I would have paid better attention to the size of clasp I ordered and the leather strap no would have been threaded through the clasp but in my case the clasp was to small.
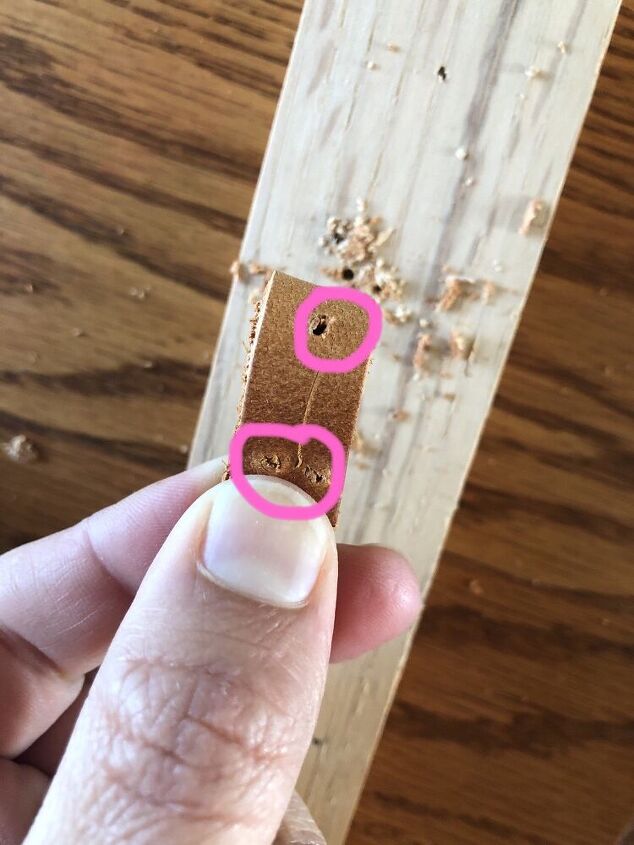
Drill holes for sewing
With your larger needle and embroidery thread sew down the ends of the leather strap. Then secure with super glue on the back.
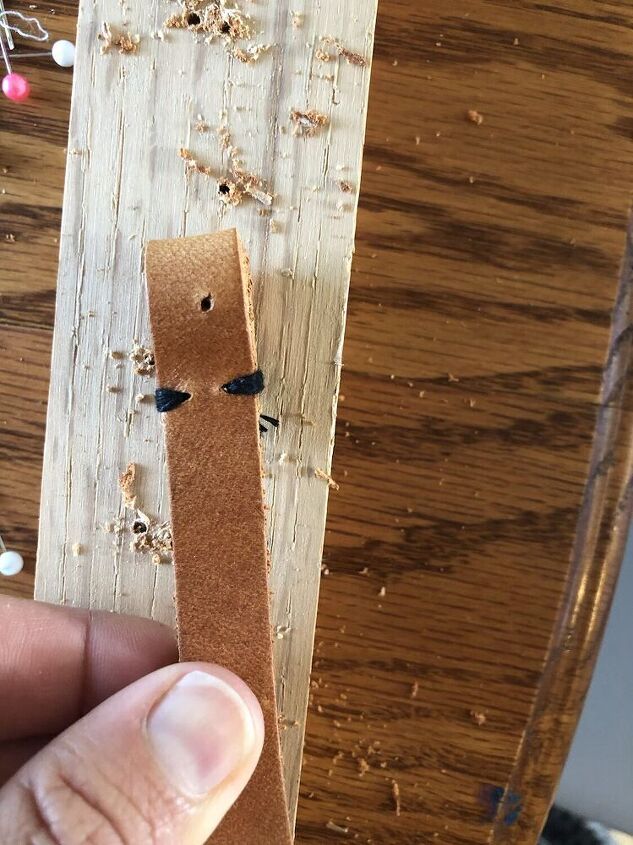
Front view of the end sewn together
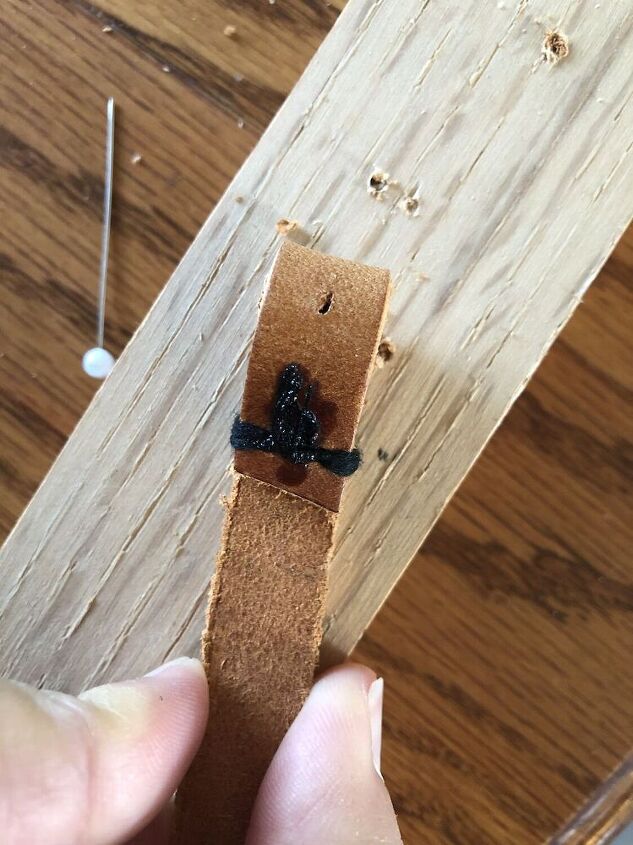
Super glued
Time to sew on the clasp where you have drilled the third hole. When done also use super glue to make it more secure.
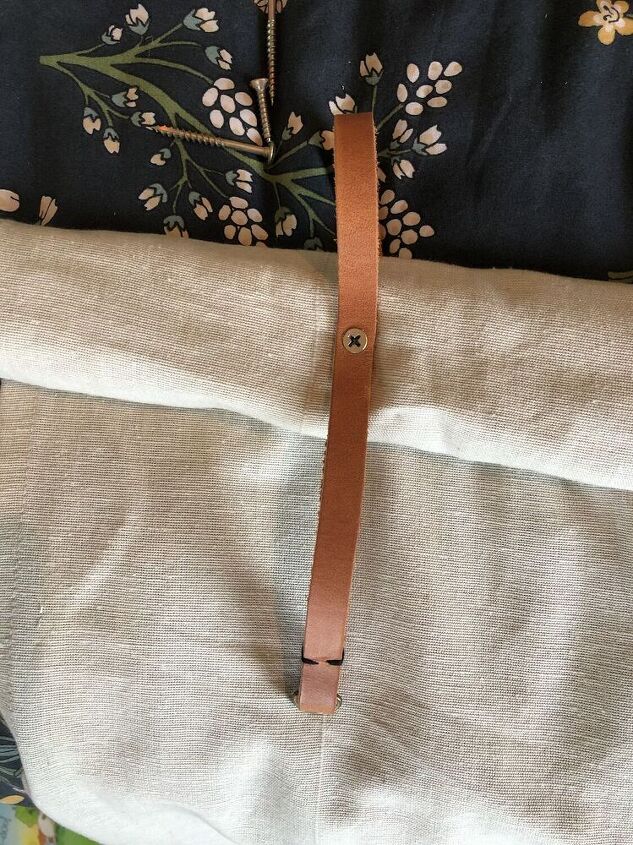
For the end with just the D-ring you will only need to drill the two holes at the end of the leather strap. Loop the leather strap through the D-ring, then sew the end together and secure on the back with super glue.
Step 4:
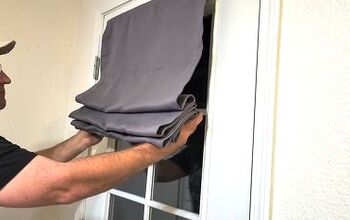
Put your 1 1/2” board through the top pocket. Take your leather straps and place them under the back side of the shade and looped around to the front over the top board (First picture below). I placed mine at 5.5” in from the edge (second picture). Screw the leather straps down taking caution with your fabric so it doesn’t get wrapped around your screw. I had to back my acre out and forward a few times before I got it to not twist.

Step 5:
Time to hand the shade in the window. I chose to place mine flush with the window frame to minimize the light filtering around the edges. You will use your longer screws and screw straight into the wood of the window frame.
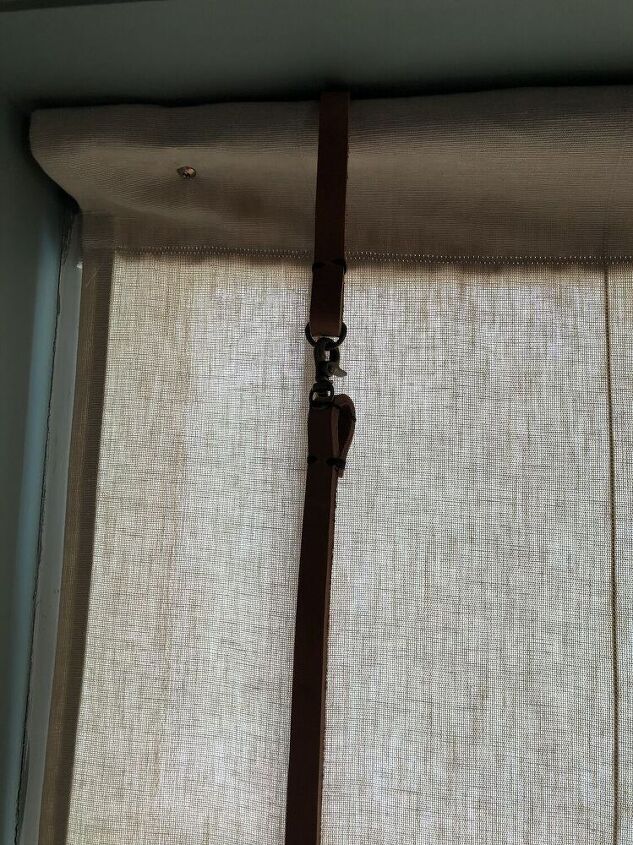
Place the dowel in the bottom pocket and roll your shade up.
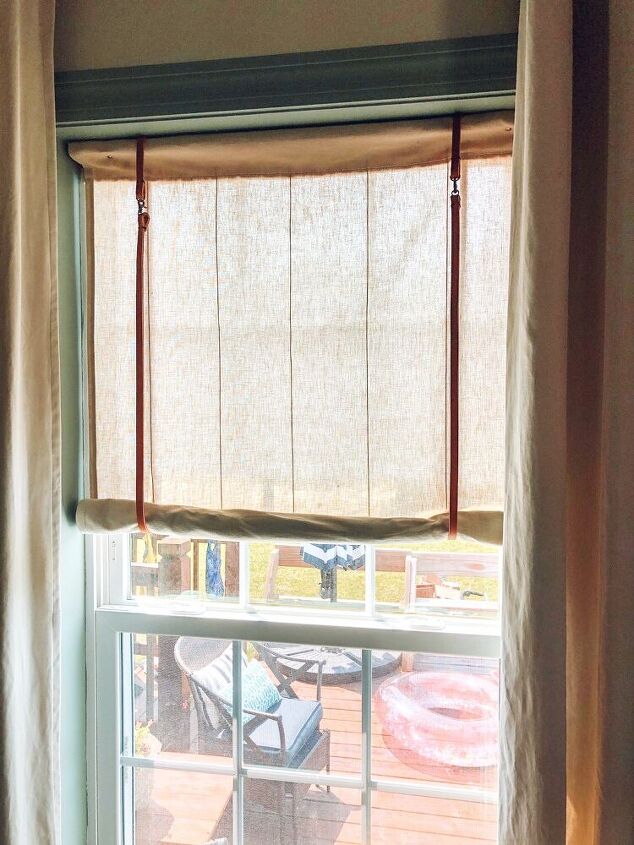
I love the way this project turned out! It was a budget friendly way to update the window shades and make them look 1000x better than the vinyl roller shades.
Come follow me in IG @haganhomestead for new project inspiration and home design tips.
Happy DIYing!
Alissa
0Post not marked as liked
Resources for this project:
See all materials


Comments
Join the conversation
-
Awesome! Please come back here and share when you do or visit my Instagram page and send me a message! Can’t wait to see!
-
Great project! It looks very high end!


Frequently asked questions
Have a question about this project?