


How to Remove and Install Shutters
6 Materials
$700
2 Days
Medium
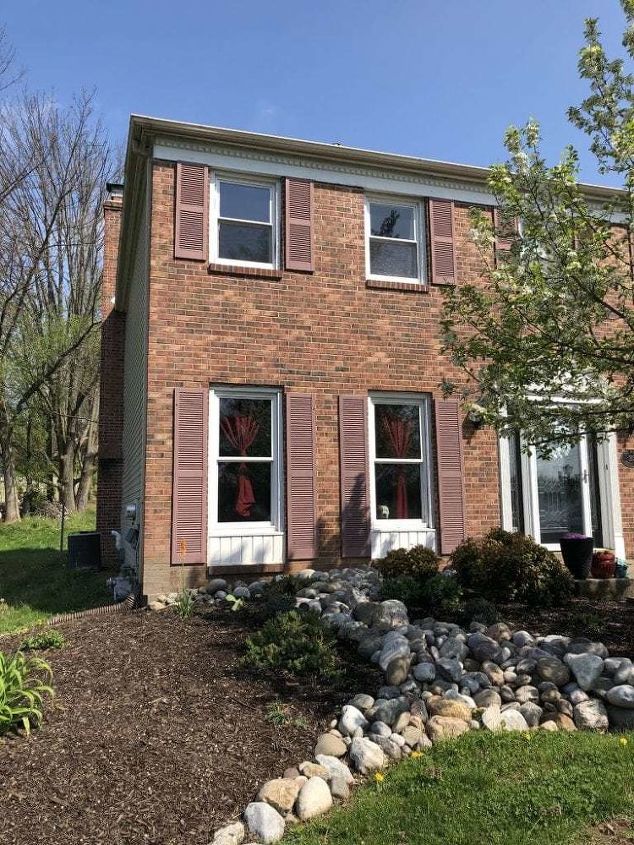
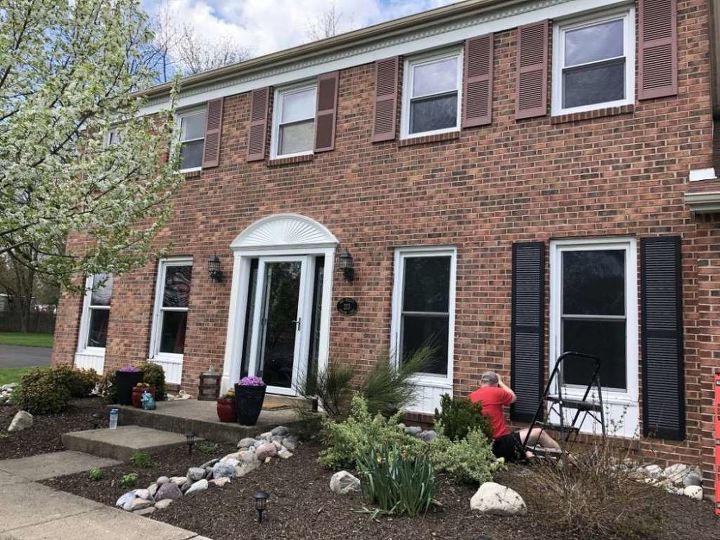
Boy, oh boy. We took our sweet time getting this job crossed off the list. Installing new shutters was a monster job. We’ve been in our house 3.5 years. We have come a LONG way in that time, which I am very grateful for.

We removed all the bushes, updated the front door, and seal coated the driveway.
I’m really proud of the progress we’ve made! Which obviously leads us to this project… new shutters. This has been one of those projects that feels really important, but for whatever reason it takes like 4 years to actually do.
You can’t really tell, mainly because in the picture above the tree is blocking it, and of course because the homeowners before us put red shutters on a red house, but there is a missing shutter and another shutter that was installed upside down.
Told ya so. (I spy a pitbull).
In theory, this was a simple project, remove the existing shutters, then put up the new ones. MUAH HA HA HA HA said the ghost of homeowners past. Let me tell you, these people were special.
We tried removing the shutters with a hammer.
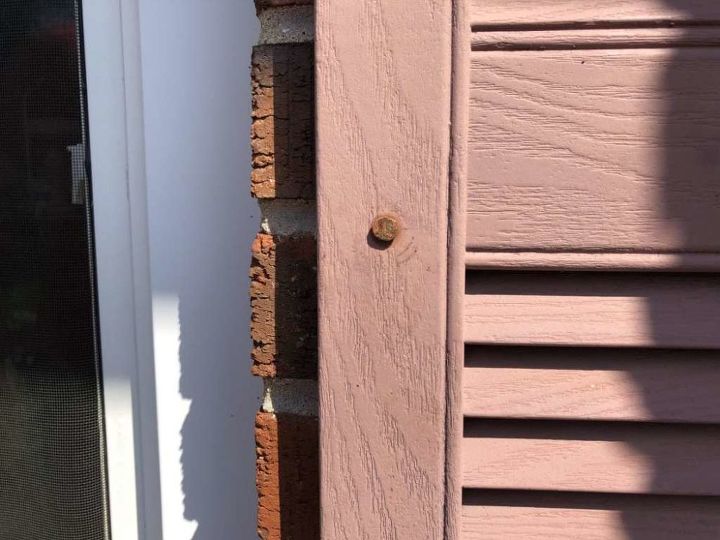
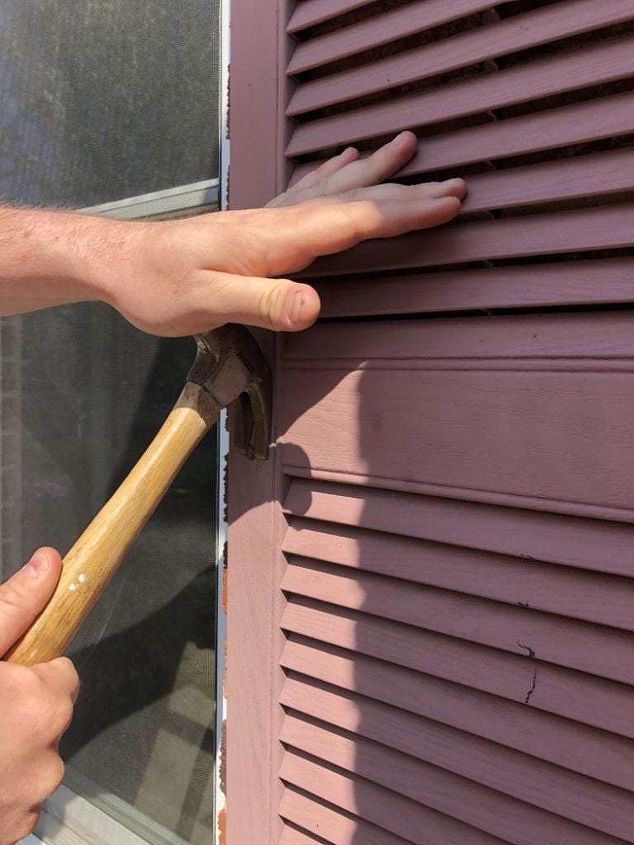
That strategy was no good. We didn’t realize that the shutters were rusted into the brick when we started this project. Time to bring in the big guns.
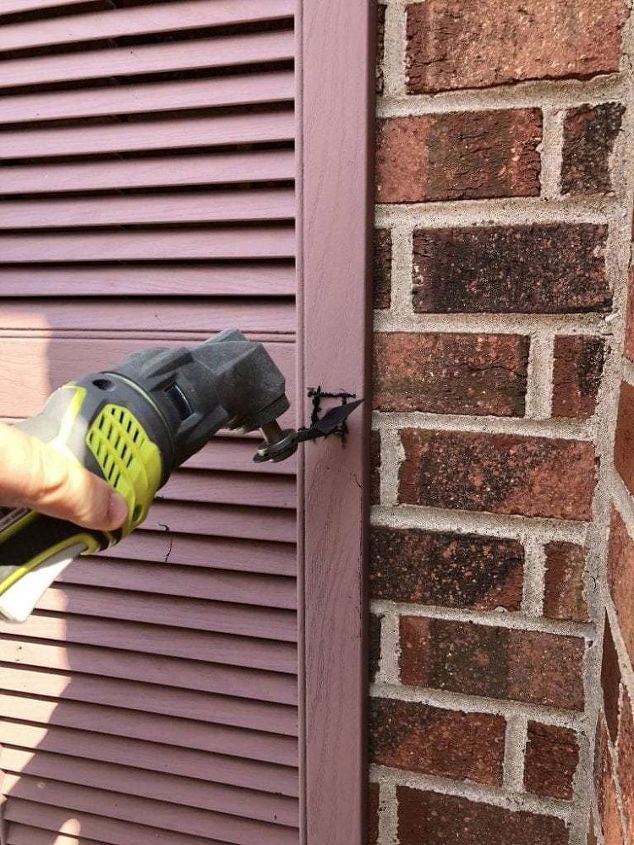
We use a Ryobi Oscillating Tool to cut the shutters off of the house.
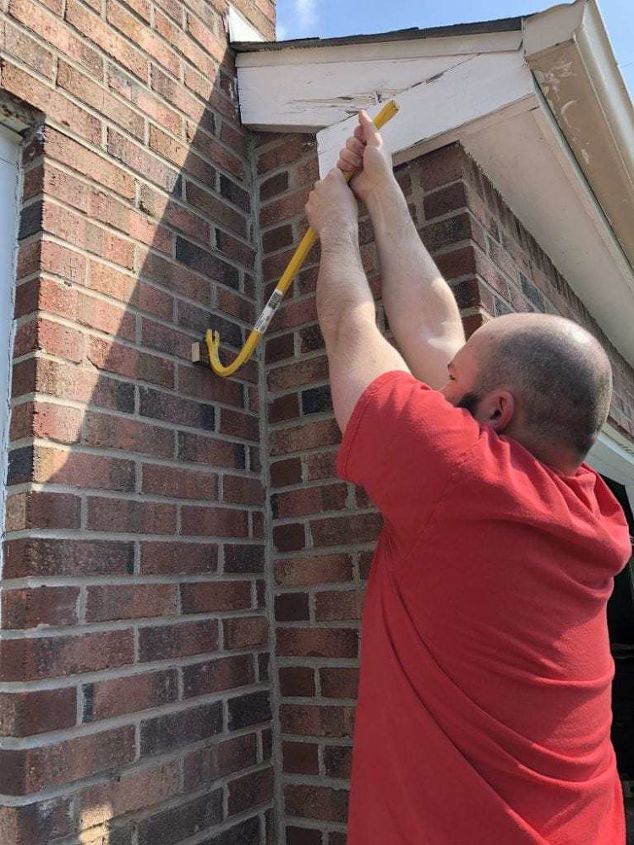
Then we used a crowbar to pull the remaining screws, nails, and whatever else they jammed into the mortar. We tried to do this as gingerly as possible, but we ripped out chunks of brick and house in a few places. Thankfully, they ended up being covered by the new shutters.
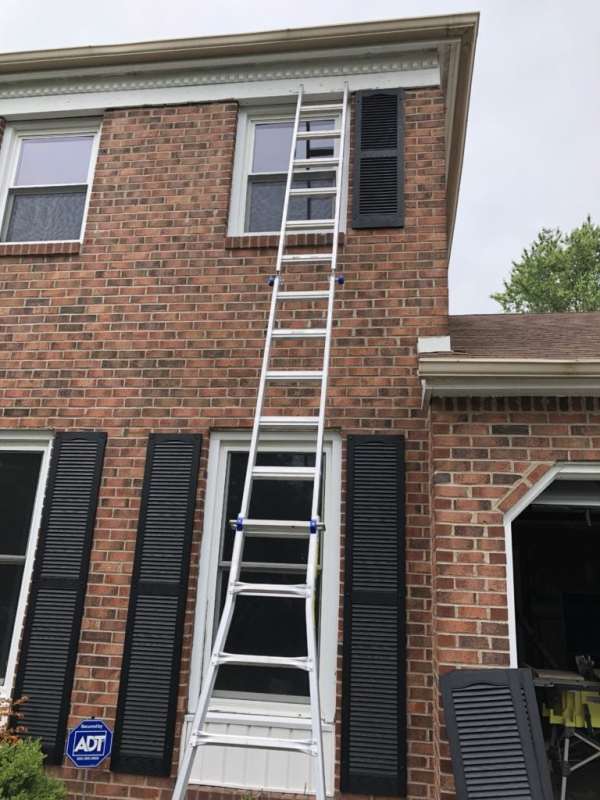
We repeated this process on almost every shutter. The ones on the second floor were particularly difficult to remove because the ladder added an extra element of danger. Since it took a lot longer to remove the shutters than we were planning, we decided to remove the entire first floor and install the new ones in one day. We benched tackling the second floor for another day.
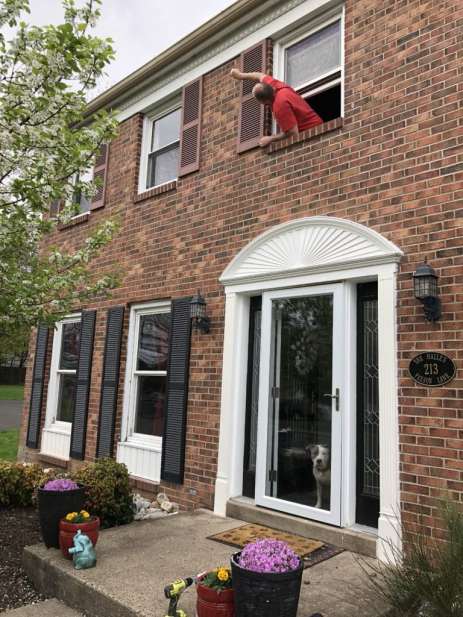
Removing the shutters on the second floor was a little more difficult than the ground floor. So you know, you gotta do what you can and improvise a little.
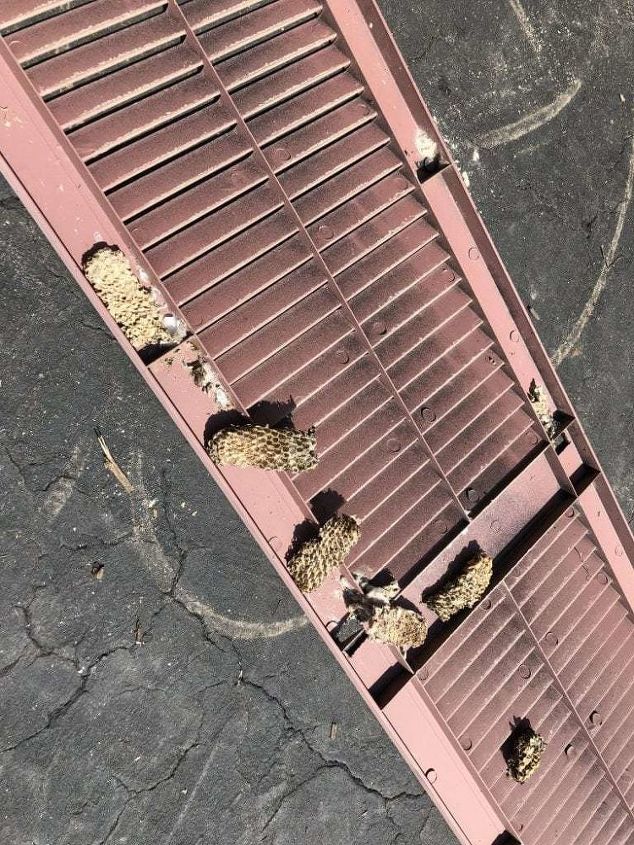
Then we unearthed this madness. These hives were everywhere. They were mostly abandoned, thank God. But we’re betting that while the house was foreclosed this was a nice quiet area for the wasps to build their hives.
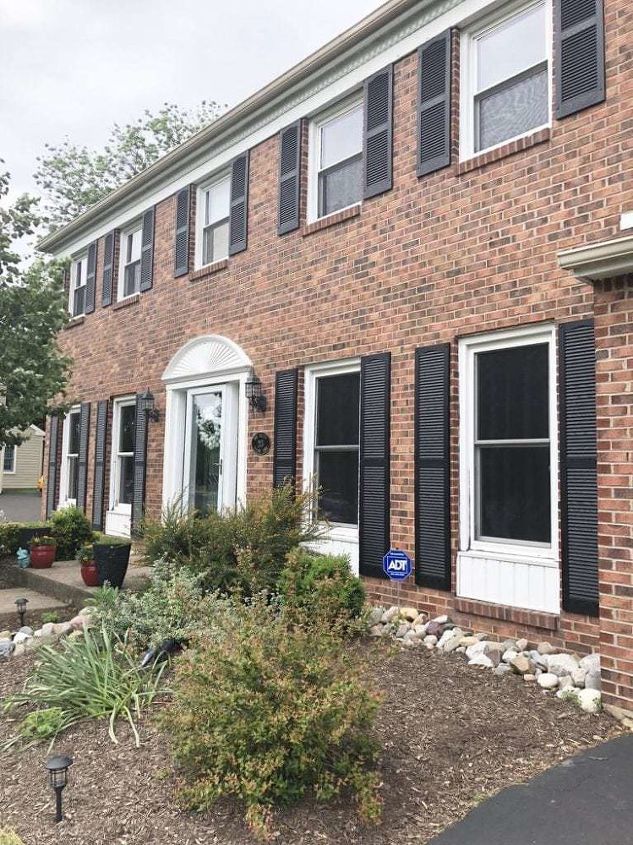
Installing the new shutters was a breeze. We followed the directions from the manufacturer. we drilled new holes into the mortar for the new shutters. I recommend that you have more than one drill bit on hand. We used 2 drill bits for this job. Since the mortar is tough, it wore down the bit somewhat quickly.
Each bottom shutter has 6 screws in it: top, middle, and bottom.
Each top shutter has 4 screws, two at the top and two at the bottom.
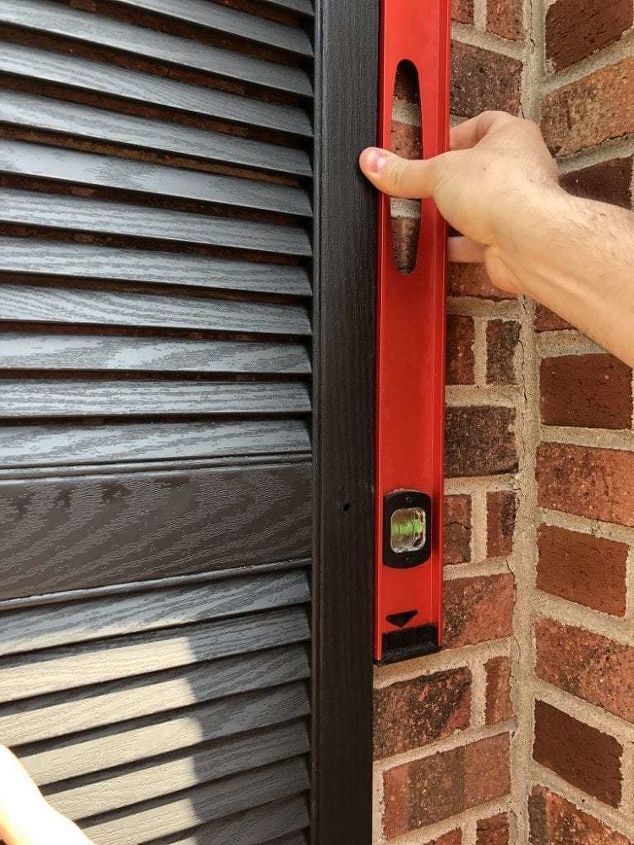
On the bottom we figured out it was best to screw the middle one in first, then use that screw to pivot the shutter on. Use a level to position the shutter so it’s perfectly straight. Then use the drill bit to drill the other middle hole. The top windows are smaller, so they were a little easier to manage.
This project took us 2 weekends to complete. But it was so worth it!
Resources for this project:
See all materials


Any price and availability information displayed on [relevant Amazon Site(s), as applicable] at the time of purchase will apply to the purchase of this product.
Hometalk may collect a small share of sales from the links on this page.More info

Want more details about this and other DIY projects? Check out my blog post!
Comments
Join the conversation
2 of 54 comments
-
The new black shutters truly look gorgeous, you guys did a great job. I am really hoping you resealed the brick in those places where new pieces were gouged out. Thanks for sharing.
-
what a difference those made. house looks fantastic! And I Found myself playing spot the pitty puppy in every picture. lol


Frequently asked questions
Have a question about this project?
I dont understand why you didnt just paint the existing shutters? Although, in retrospect, the whole wasp next thing suggests removing them was probably for hte best.