


Faux Tile Backsplash With Paint!
4 Materials
$2
1 Week
Medium
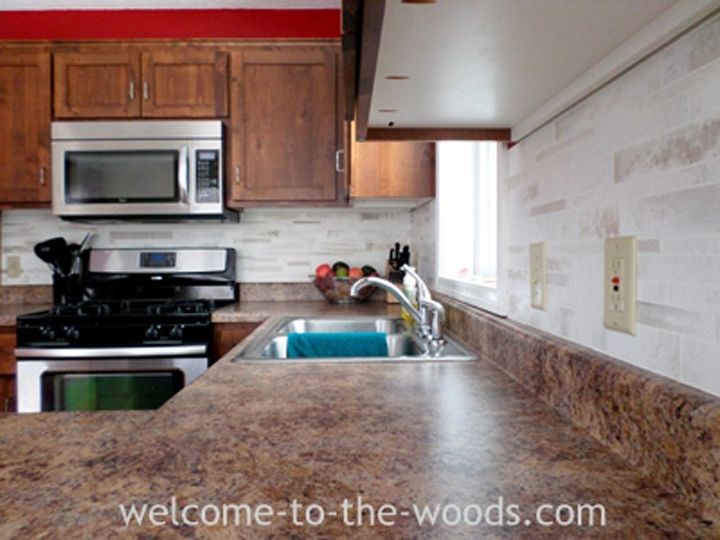
Hey all! Welcome to my kitchen. It's builder grade basic and the only personal touch I've made on it since moving in four years ago, is painting the walls red.
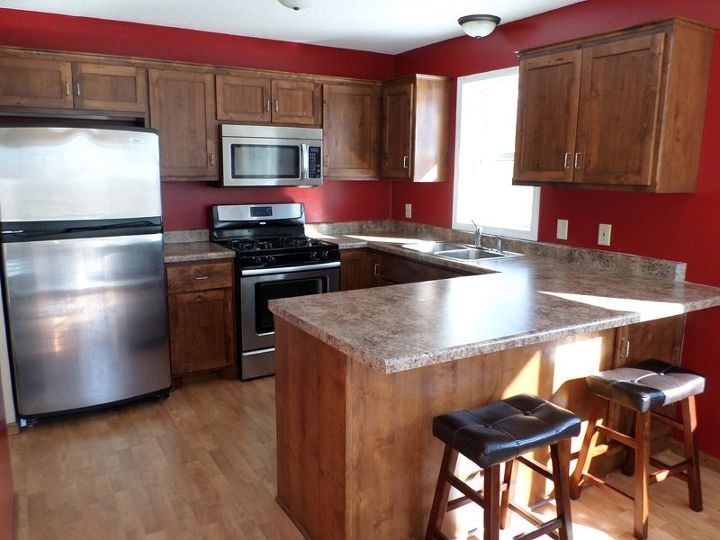
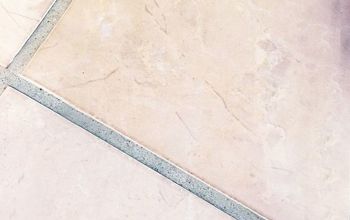
I was inspired by the blog Sawdust and Embryos to tackle a tedious backsplash project. I planned to create a faux marble tile affect using just paint! This project cost me a total of $2, believe it or not. First I prepped my walls, removed switch plates, and taped off the backsplash area.
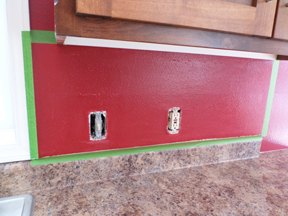
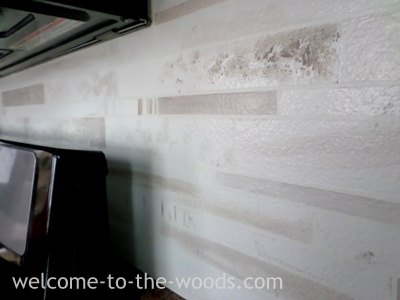
I sanded the wall because my red paint was glossy. Then I applied a primer and the first coat of paint. This coat is going to be the "grout" color so I was sure to pick paint in a flat, satin, or eggshell finish.
After this, it's important to let the paint cure for 3 days. The next step is to tape on painters tape, so if you don't let your grout color dry, the tape will cause it to peel off. While you're waiting for it to dry, go to Amazon and buy 1/8" thick painters tape.
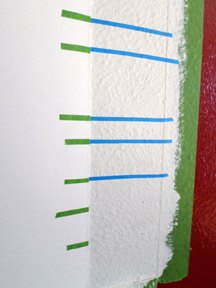
Now you get to the hard part. Not only is the taping process long (took me 4 hours) but it is difficult to ensure parallel and level lines. I utilized a trick that made this fairly easy! I taped lines on a piece of cardboard and used that as my marker. I made small pencil marks every foot or so as guidelines of where to tape. I used the bottom of my cupboards as a guide because they are installed to be completely level whereas your counters can loose their "levelness" with wear. This eliminated the need for an actual level or tape measure. I checked my lines when I was done taping and they were perfect!
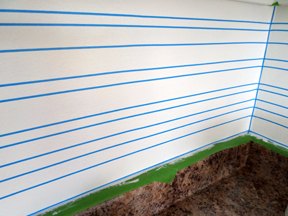
Then I arbitrarily placed lines to define the tile length all over the place. I didn't measure or think too hard because I wanted it to look random. I did check these lines against a square with my counters to make sure they were perfectly perpendicular. Don't forget to tape lines on the outside of the back splash area, in corners, and really anywhere typical tiles would have grout.
Another tip to ensure straight and crisp paint lines: after taping, run a damp, not dripping washcloth over the tape to activate the edge sealant (kind of like a temporary tattoo).
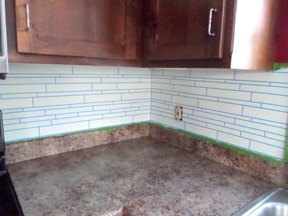
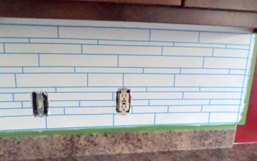
For the "tiles" I went with a high gloss finish. High gloss makes it look more realistic, gives it contrast from the grout lines, and is highly durable. I used a cabinet and trim paint because that stuff is meant to withstand great wear and tear. I picked a greige (grayish beige) color + white with small paint brushes to get the look of stone tiles. Remove Tape and You're Done! You'll want to remove the tape immediately after painting the "tiles" to ensure clean paint lines. Leave the tape for the outside edges on because it is layered under much more paint. For this removal, wait until the back splash has dried at least an hour and then scour the edges of the painters tape so it comes off clean.
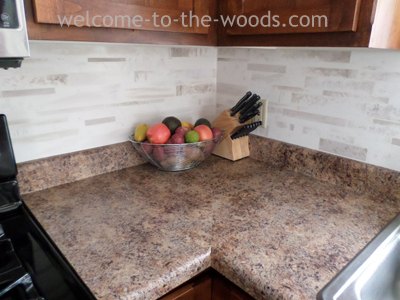
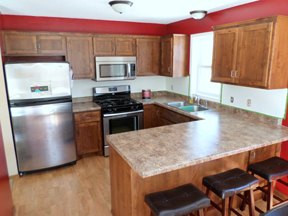
*UPDATE* since painting this backsplash, I also repainted the wall color in my kitchen and did a few other minor updates (like the outlet plates). See its full transformation here!
If you're contemplating doing this project, be sure to follow the blog link to find out exactly how to do it and learn more tricks to make it easier! Thanks for reading, check out more of my hometalk projects and share a note saying what you think.

Want more details about this and other DIY projects? Check out my blog post!
Comments
Join the conversation
2 of 214 comments
-
Very nice.... I’d love to have it done in my kitchen.... whenever you can come to Florida!!! 🥰🥰
-
Looks way better as a unified colour. Now about those kitchen boob lights...


Frequently asked questions
Have a question about this project?
I'd like to know about the "$2.00" comment too. All that tape and then the paint??
What is the distance between the lines?
How do I paint an outdated kitchen countertop