


How to Create a Fall Arrangement
$75.00
45 Minutes
Easy
This is a step by step tutorial on how to make a beautiful Fall arrangement of pumpkins, gourds, leaves and pheasant feathers. This is such an easy arrangement to put together, just follow along with my steps. I also have a step by step video tutorial on my blog that will guide you as well. arrangement arrangeflorals
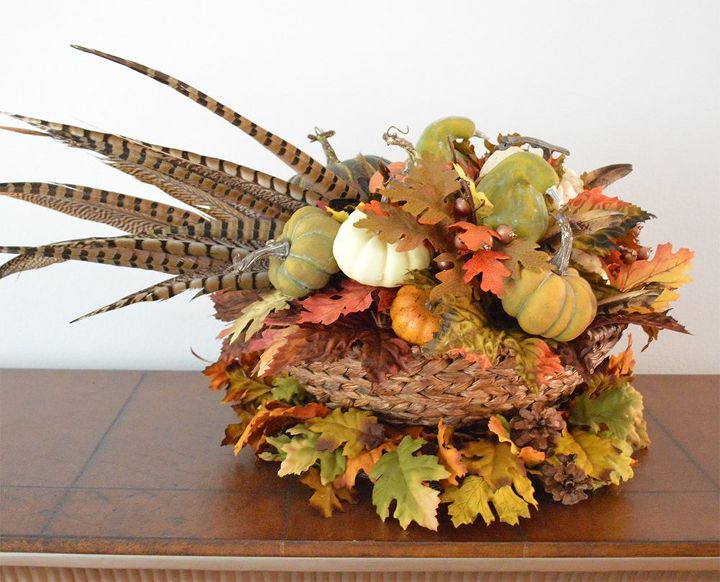
I'm sure those of you who have a traditional home have a place where this beautiful arrangement would fit perfectly. It looks lovely on a sideboard or a console table.
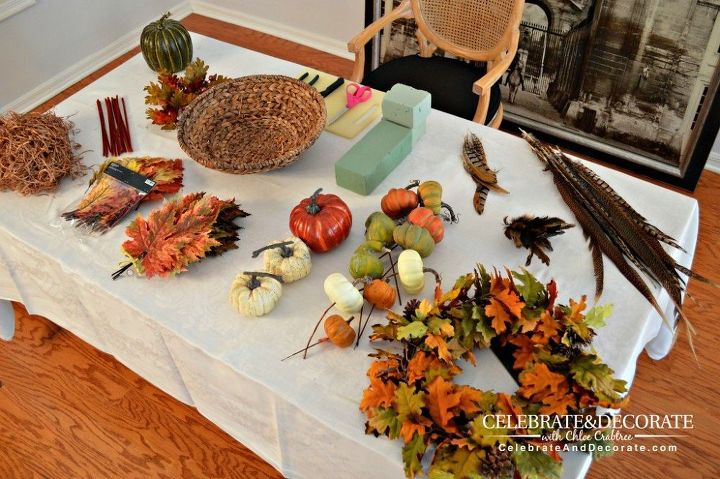
The supplies...
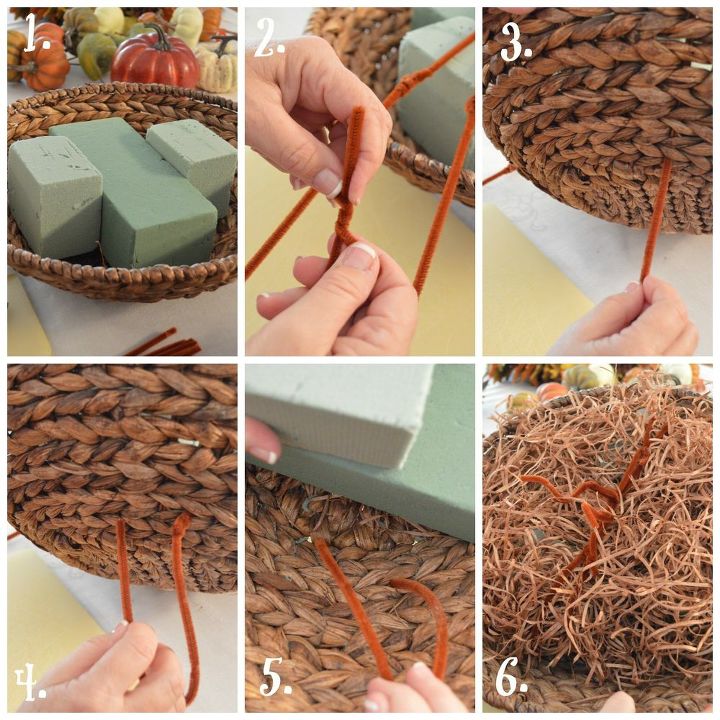
1. Cut one of the pieces of floral foam in half and put a full piece in the middle of the basket and one half on each side of it.
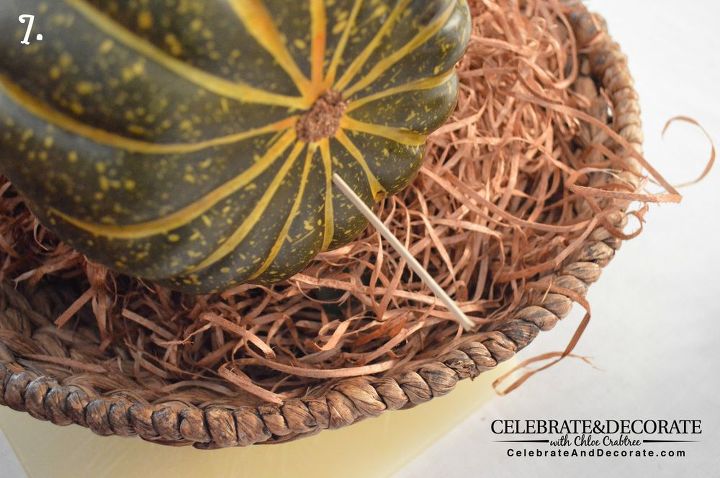
7. Taking your large pumpkins, use a wooden skewer or stiff wire and pierce it into the pumpkin and stick them down into the floral foam. Use the larger pumpkin toward what will be the back side of your arrangement.
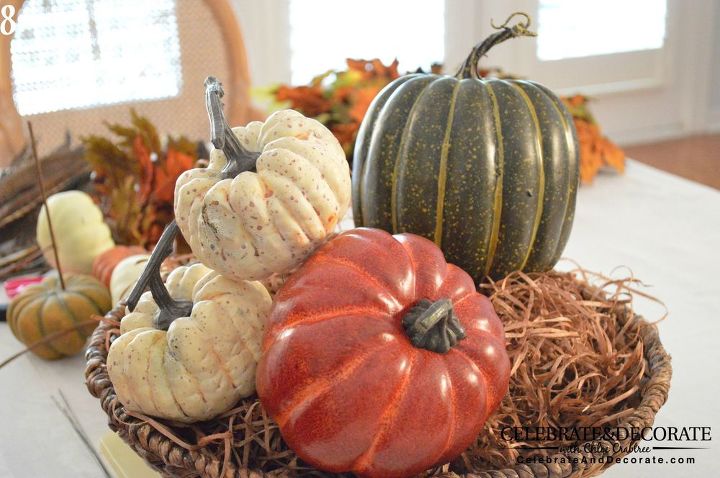
8. Add the other larger pumpkins in the same manner, but add them to what will be the front of your arrangement.
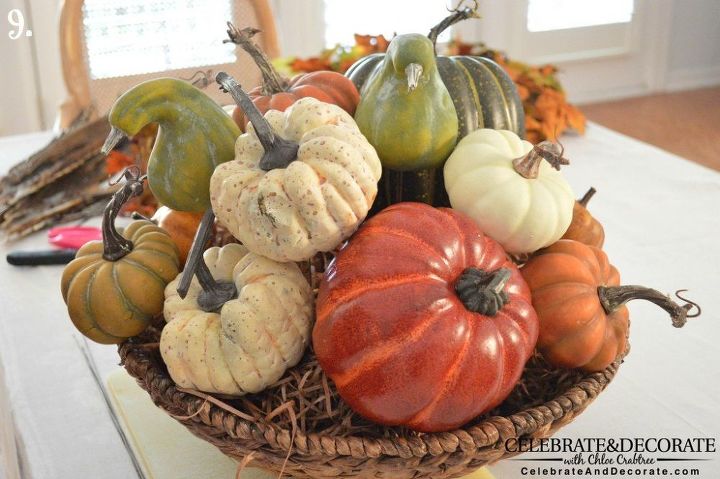
9. Now add the pumpkins and gourds you have that are on picks already. You will add these evenly around the basket leaving them a little higher in the middle than you do on the sides.
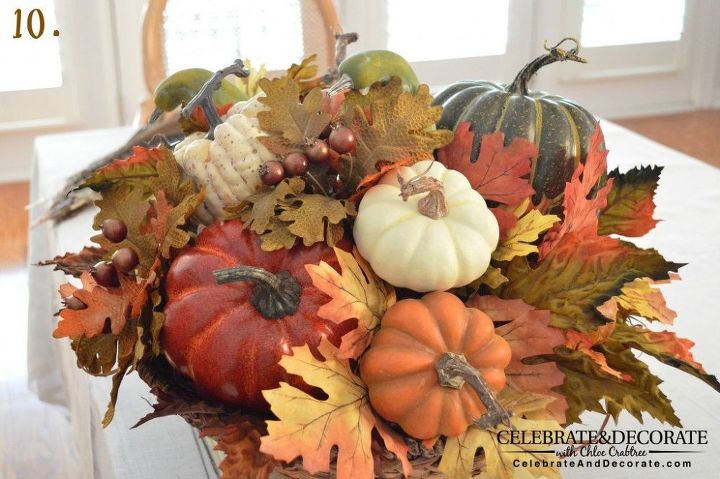
10. Next you will begin to add your leaves. I began with the three oak leaf and acorn clusters and added them toward the front and sides of my arrangement and then took the largest of the leaves and stuck them into the foam all around the top edge of the basket. Lastly, use your smaller leaves. These will likely be too short to anchor into the foam, so you can just tuck them in between the gourds and pumpkins or you can use floral tape to secure them to a wire so they may be anchored in the foam.
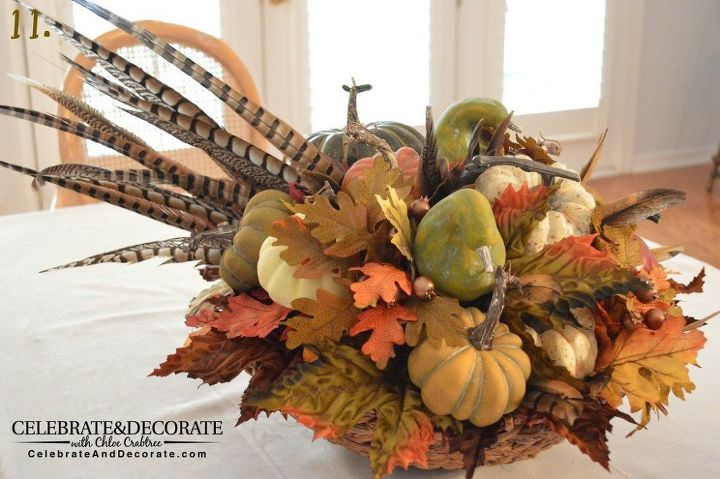
11. Finally you will add your feathers. Stick the smaller feathers in between your gourds and pumpkins randomly in the front and top side of your arrangement. Take your longer pheasant feathers and stick them into the foam at an angle right in front of the larger pumpkin. Your arrangement is finished! Sit back and admire your beautiful work!
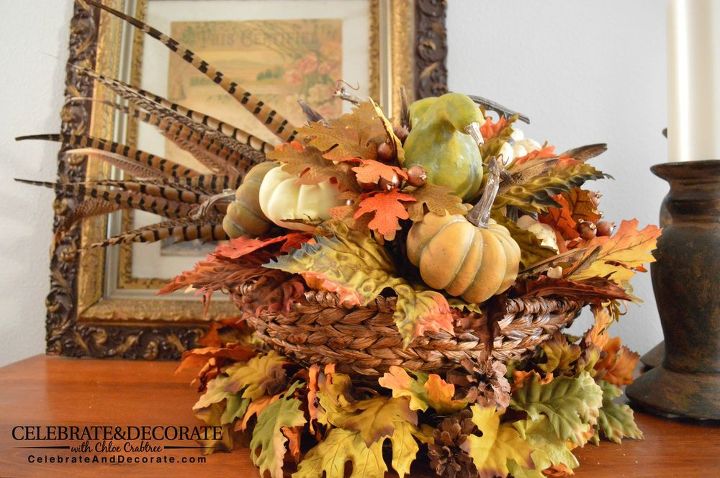
To finish off my arrangement and give it a little extra height I set it on top of a grapevine wreath that was trimmed with Fall leaves. I like the contrast of the leaves, then the woven basket and then the leaves and pumpkins and gourds tucked into the top of the basket. I hope I provided all the detail you need to recreate this arrangement yourself.

Check out my video tutorial by clicking through to my blog.

Want more details about this and other DIY projects? Check out my blog post!
Comments
Join the conversation
2 of 8 comments
-
Very nice job.
-
Very pretty and great tutorial and directions. Thanks!


Frequently asked questions
Have a question about this project?
How do I get to the video? Can't get there. Beautiful centerpiece. Love your creations.