


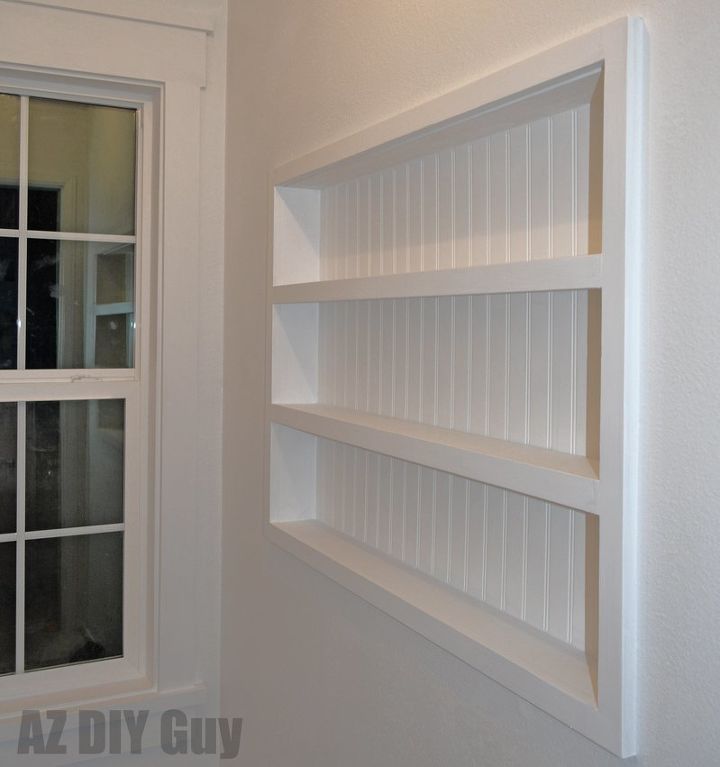
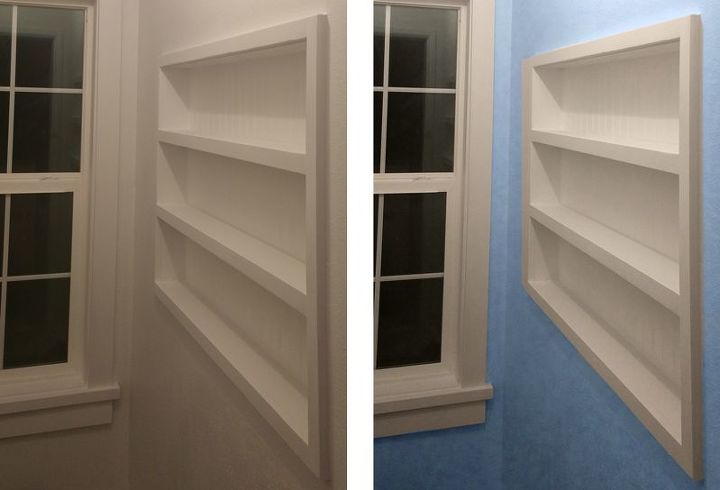
Built-in-the-Wall Shelving - Reclaiming Hidden Storage Space
Our daughter's closet has a large, blank wall on one side. It was a perfect spot for some added storage and display shelving for her little collections.
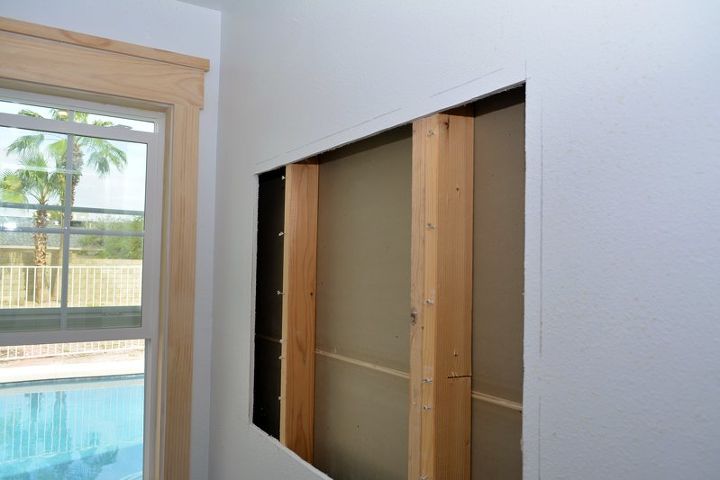
Since this was was not a load bearing wall, I could carve into it without worrying about the roof caving in or adding a header. I sliced open and peeled off the drywall, creating the rough opening.
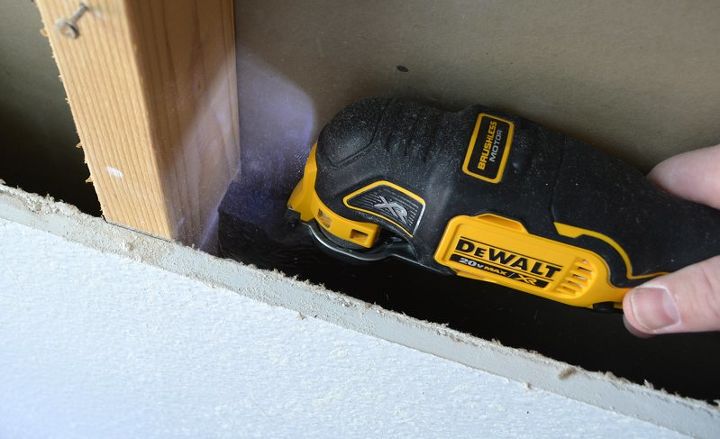
The studs got cut off with a oscillating multi-tool, below the edge of the drywall.
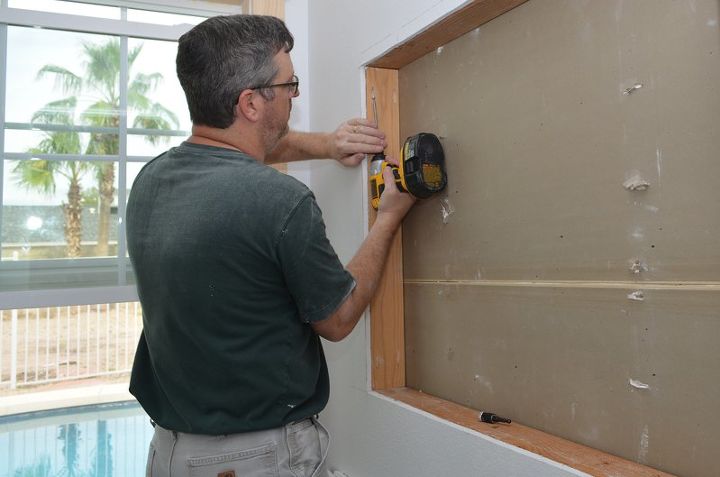
I wrapped the opening with 2x4s, just to replace some support within the wall. It got screwed into the remaining studs I'd cut off and ended up laying flush with the rough opening.
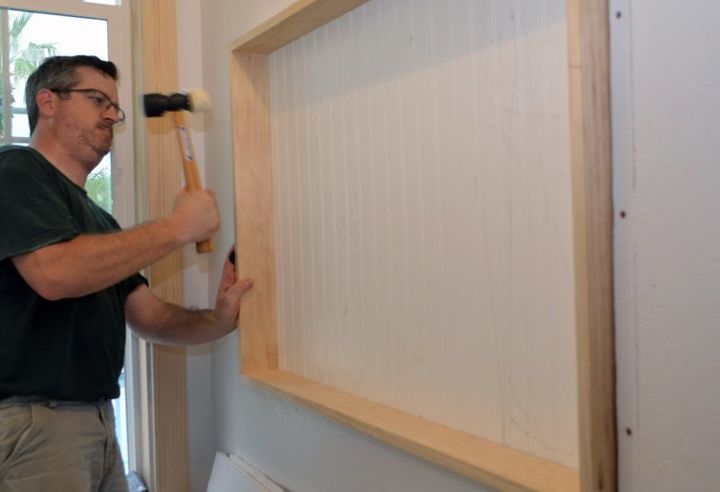
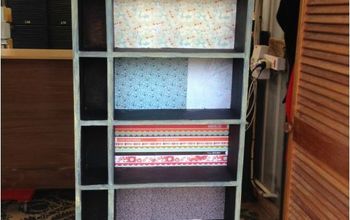
The basic shelving unit is a box, made from select pine 1x4s screwed together and backed with a piece of beadboard paneling. I made the whole thing a little to tight and had to persuade it into place with a rubber mallet.
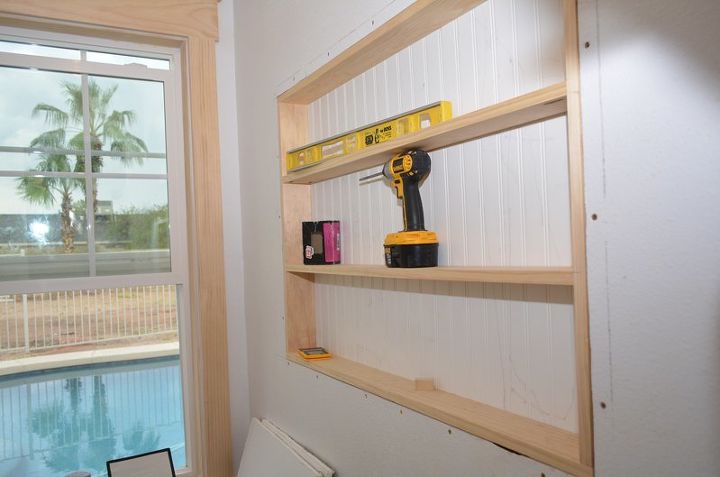
I added a couple more horizontal 1x4s with pocket holes and screws for shelving.
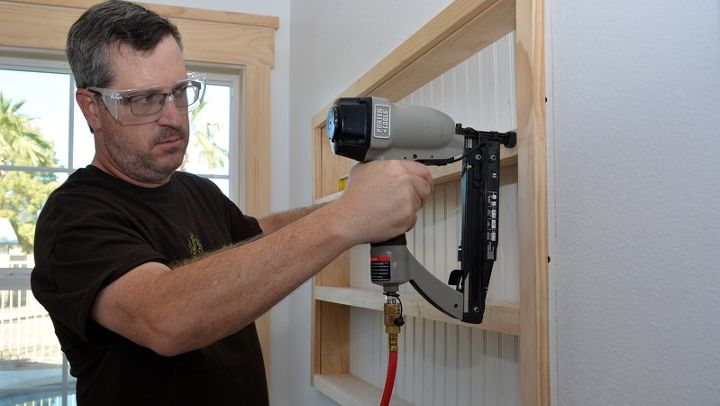
A face frame constructed from 1x2s gave the unit a heavier, finished furniture / cabinet kid of look. It also strengthened the shelves and squared up any slight warping imperfections. It got attached with 2" finishing nails.
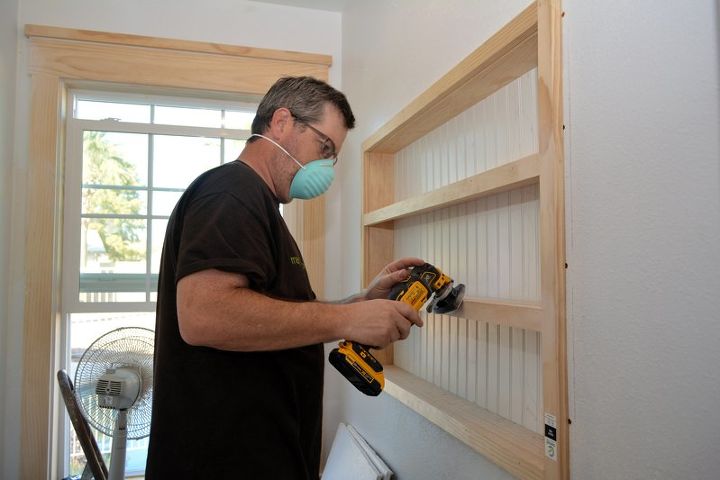
After some nail hole putty, I gave the unit a light sanding and slightly rounded the edges of the protruding wood. It would help keep the paint from chipping later and hopefully prevent injury if someone was to bump into it after tripping on kid stuff that will surely litter the floor of the closet in the future.
After some caulk and a couple good coats of primer, the piece is done. Waiting for final paint. It will get a gloss white finish. Our daughter is probably going to choose light blue walls as we complete the remodel. Here's a digital preview:
This can be a weekend, do-it-yourself project that's actually not that difficult to do. I've got a ton more step-by-step info on the blog with tools, techniques, and inspiration explained in more detail.

Comments
Join the conversation
-
I have wanted to do something like this for a long time. Great job! However, I wouldn't bother cutting existing studs, just make short shelves between them. Thanks for the excellent instructions.

-
My husband built a similar cabinet for my pretty Glasses. I had told him what I wanted and then one day I came home and it was ready to put on the glass sliding doors. It was lovely and handy! Nice memory for me now.


Frequently asked questions
Have a question about this project?
How do you know what wall's are load bearing or or witch ones aren't.
I've been thinking about doing this above the ledge to my basement stairwell, but I want to cover it with doors to cover miscellaneous plasticware. It's messy no matter what. But the doors can't be too big because there's not much room in the stairwell. How deep are these shelves?
Don't want 2 mess w/ load bearing studs! How can I decipher which r load bearing?