


Apothecary Cabinet Ikea Rast Hack #PaintJob #IkeaRastHack
When I was invited by Hickory Hardware and PPG Voice of Color to participate in the IKEA Rast Hack Challenge I accepted immediately because although it's the middle of winter, and we're freezing our butts off here in Minnesota, I knew my handsome handy husband and I could handle it .

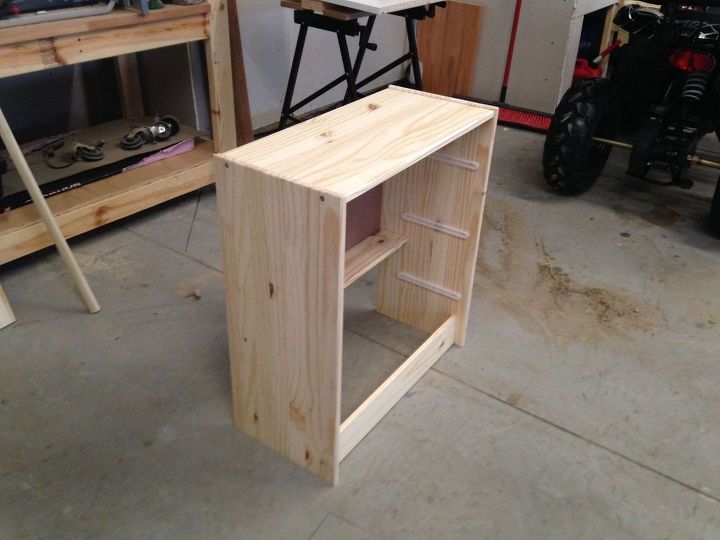
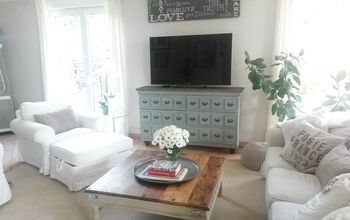
The IKEA Rast dresser is a very basic unfinished wood 3 drawer dresser. It's not exactly dresser size though, it's more like night stand or side table size.
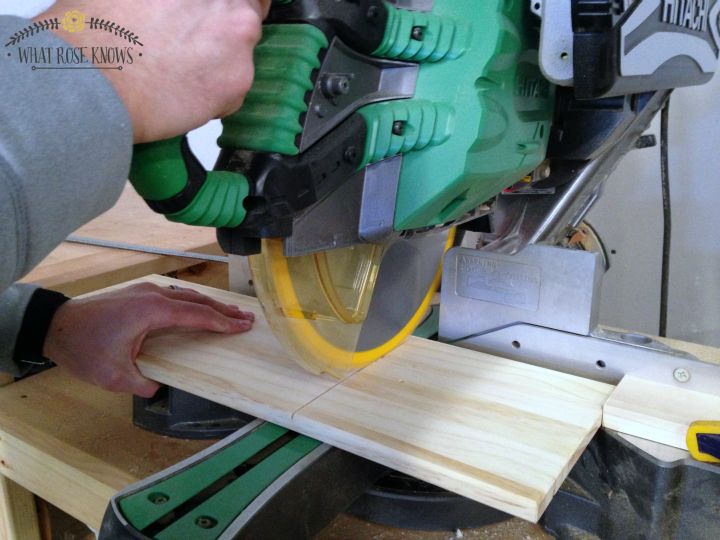
The first thing we did was assemble the dresser leaving off the drawer fronts to the drawers because in order to give the dresser an apothecary cabinet look, the drawer fronts needed a slight modification. My handsome handy husband clamped a piece of wood to 1/3 of the drawer width to the fence of the saw blade to give a consistent cut. Then he set the depth of the blade so that it would only cut about halfway through the wood. This way he was able to get a consistent cut depth and distance on each of the three drawer faces. To give more of a gap between the faux drawer fronts, he moved the piece of wood he had clamped to the fence down an additional blade width and passed the blade through again. This gave about a " overall space between the faux drawer fronts. This could also be accomplished with a table saw or router as well.
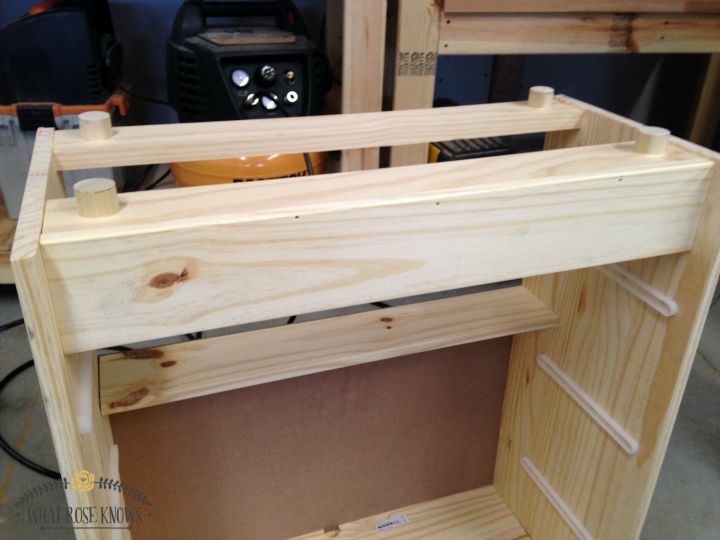
Since the bottom of the dresser is open, he added scrap wood (1x3) so there would be a place to attach the casters. He then added short pieces of a 1-1/8" hardwood dowels to attach the casters to the scrap wood.
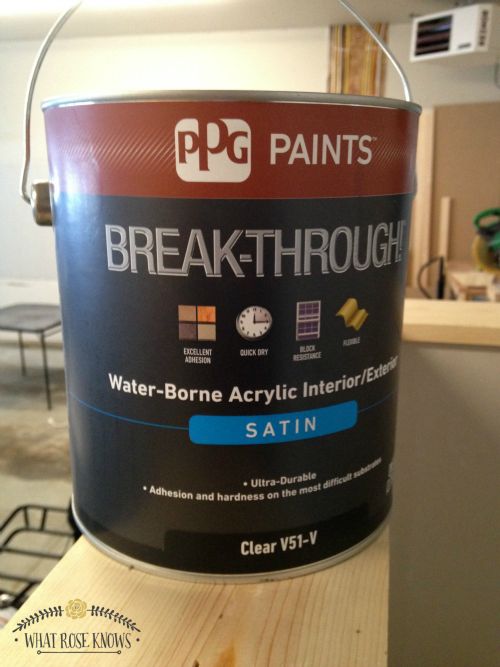
Scott from Prairie Vista Paints here in Rochester, MN highly recommended PPG Paints Break-Through! paint that ended up being fantastic to work with! This product adheres to just about anything including galvanized steel, masonry, laminate, concrete, plastics, and interior wood. The dry time was even quicker than chalk paint and clean up was simple with just soap and water. I didn't have to seal it afterwards either which is nice because it's one less step to deal with.
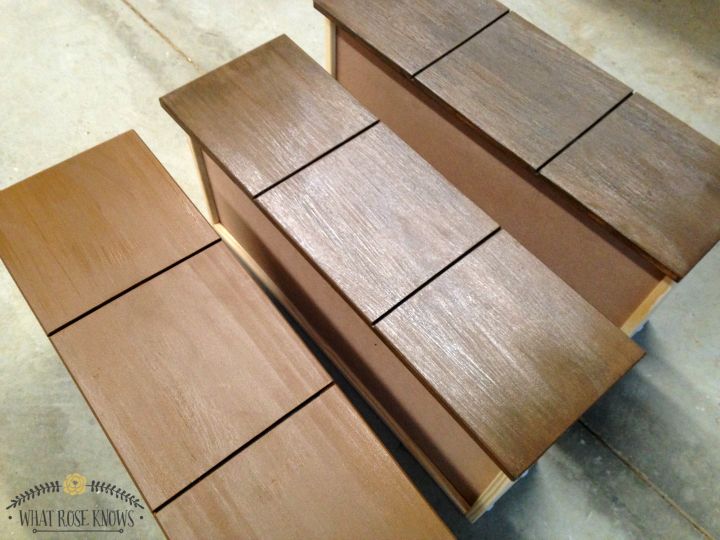
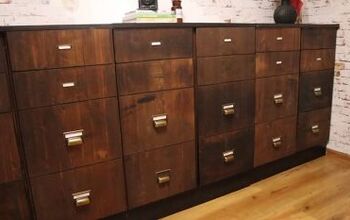
Before the brown color was completely dry, I went over the entire thing again with the black. I made sure to have very little black paint on my brush and just lightly brushed over the brown. On the image above, the drawer front on the left is just the brown paint, and the other two have the black layer.
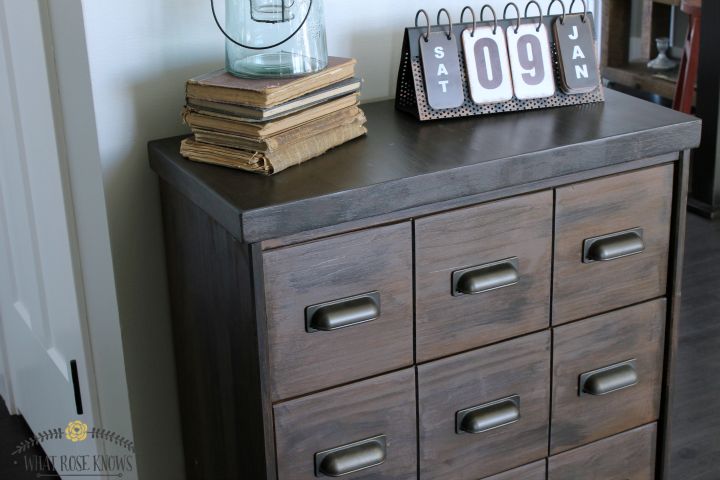
We also added a piece of butcher block to the top of the dresser to give it a more substantial and finished look. I added a few extra coats of the black paint to the butcher block top so it didn't blend in completely with the rest of the dresser.
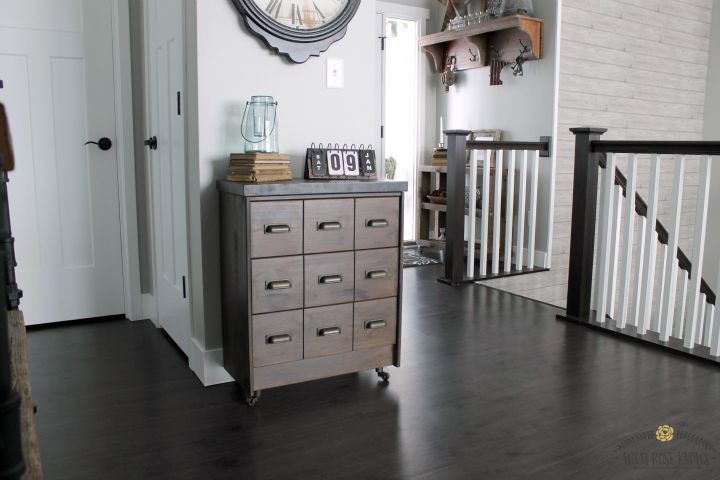
The result is a vintage look apothecary cabinet that fits perfectly in the space and was completed in just a few hours!
See more images and read more details when you click the link below!

Comments
Join the conversation
-
Nice
-
It’s beautiful! Would love something like that. Btw your floor color is amazing too.


Frequently asked questions
Have a question about this project?
Where did you get the drawer pulls? They are EXACTLY what I have been looking for!