


Creating an Inviting Entry on a Budget
3 Materials
$20.00
1.5 Hours
Easy
So we all have seen the front entrance that looks grand and we oh and ah over it wishing we could create that same look...and then we have that rear entry that needs a little help because we want it to be inviting too not to mention a tight budget.
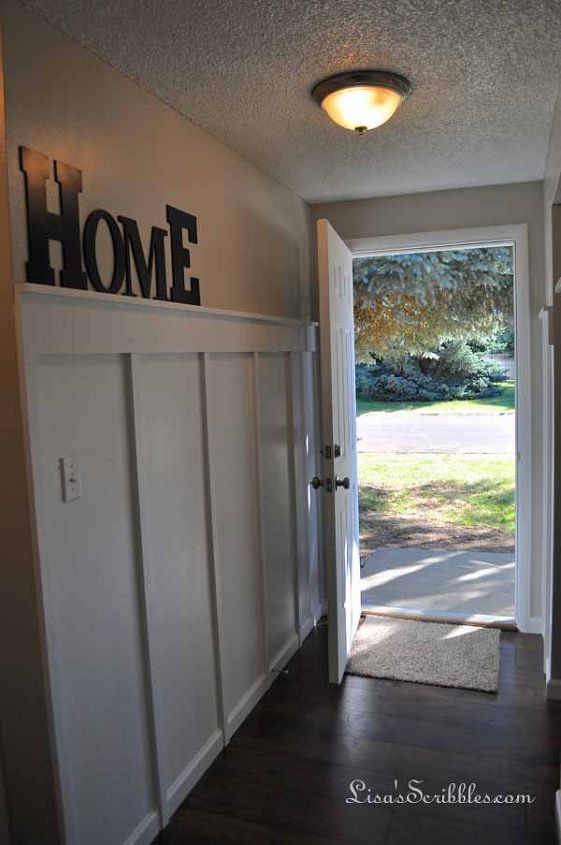
So we all have seen the front entrance that looks grand and we oh and ah over it wishing we could create that same look...and then we have that rear entry that needs a little help because we want it to be inviting too not to mention a tight budget. Well lucky you! I'm going to show you both a cute front entrance and rear at different houses using the same method, but a little differently and all for under $20!
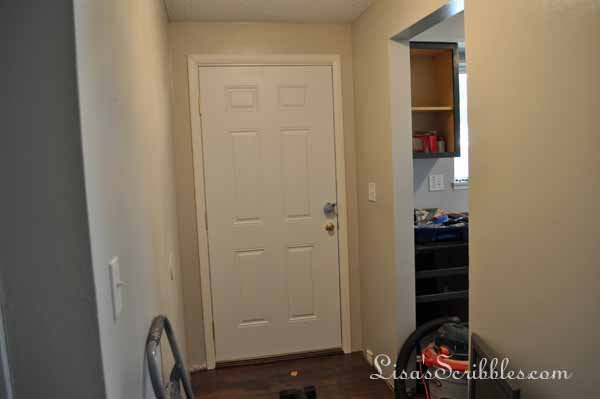
Here's what I started with, your basic plain boring hallway. It was on the dark side too since the door didn't have a window.
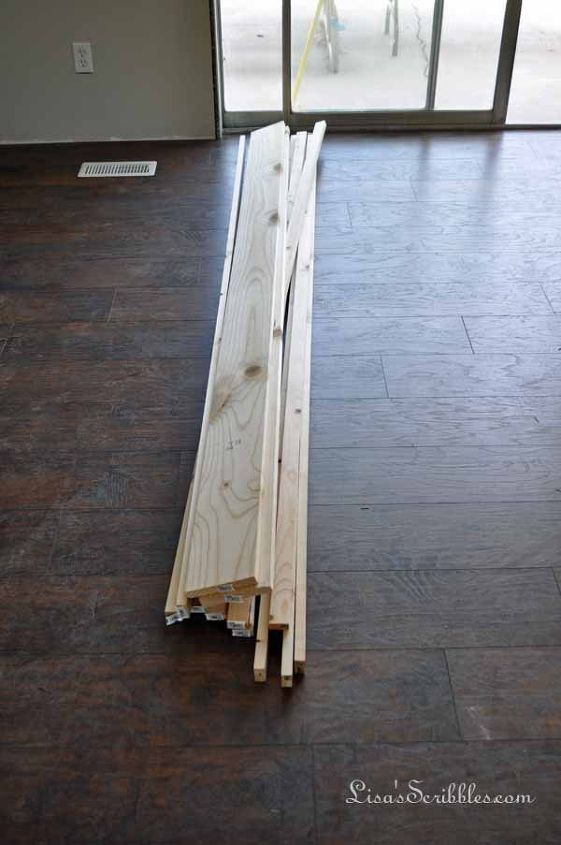
The overall process was pretty easy and cheap, like in it only costing around $20 for the materials. Now keep in mind I already had the paint, nails etc. I started off with a pile of lumber, pine or common wood and furring strips.
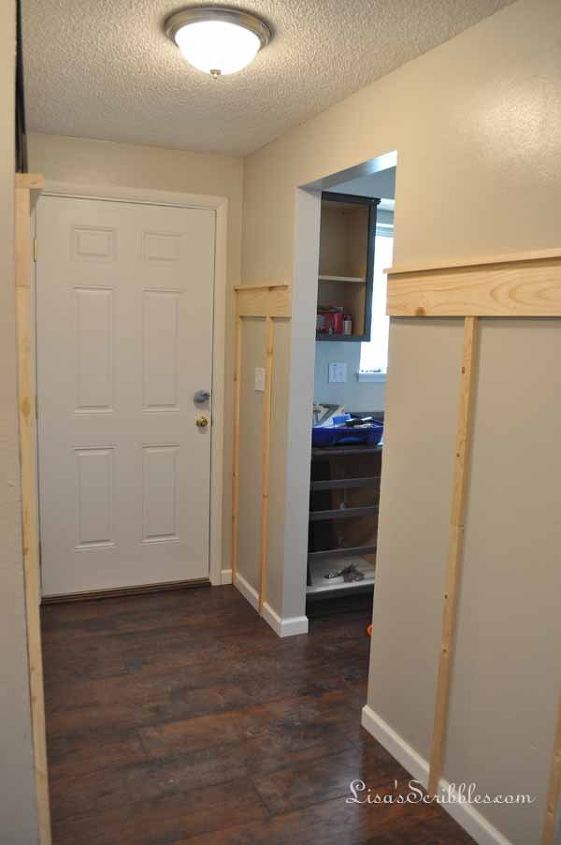
I cut to length and tacked them up using a nail gun, and level. I did not glue. Why? Because I wanted it to be easy for the new owner to change things out later down the road if they wanted to. Nothing like having drywall come off with the boards and being frustrated, believe me I know that feeling.
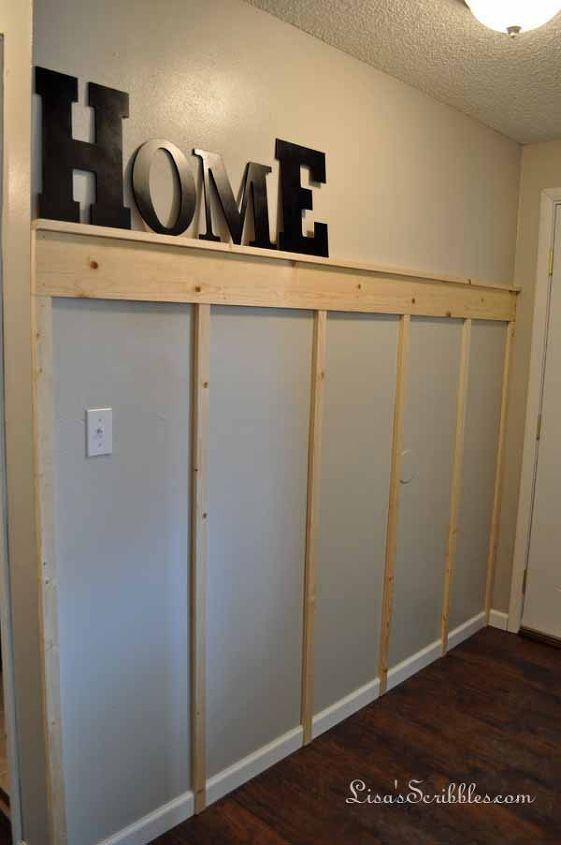
I know you're probably noticing that I used the furring strips all the way down and cut my baseboards to fit it. There's no special reason for me doing this then it's what I wanted since the two surfaces would have had different thicknesses. I wanted it to be somewhat smooth, and this was the way I could achieve it.
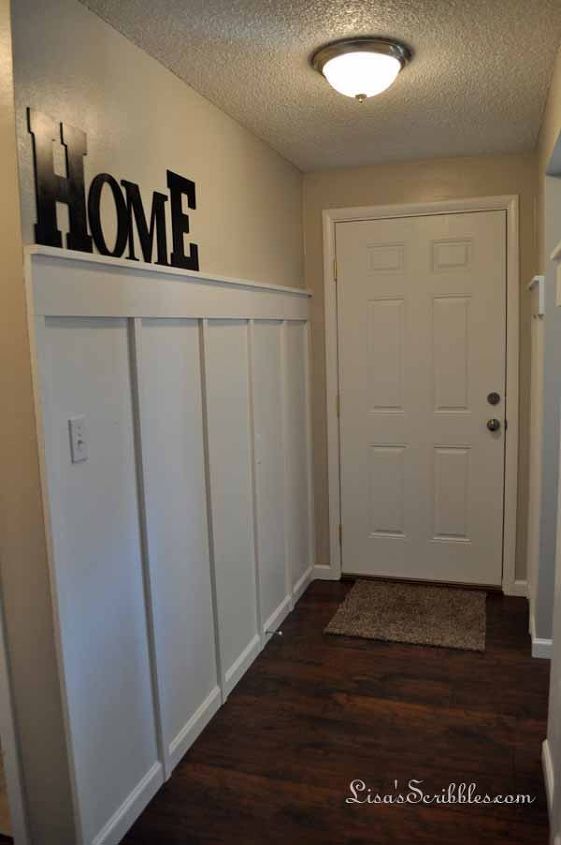
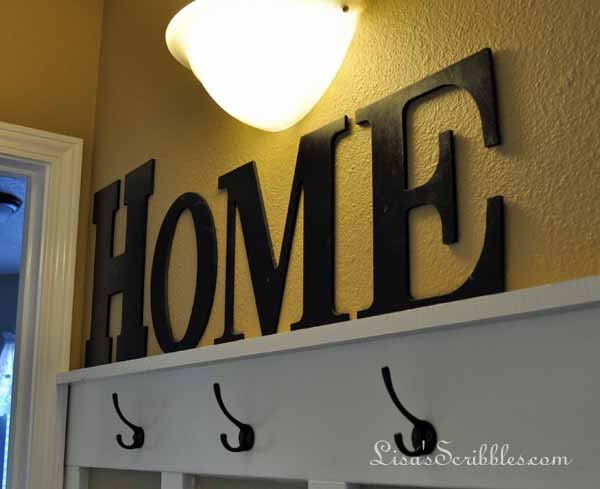
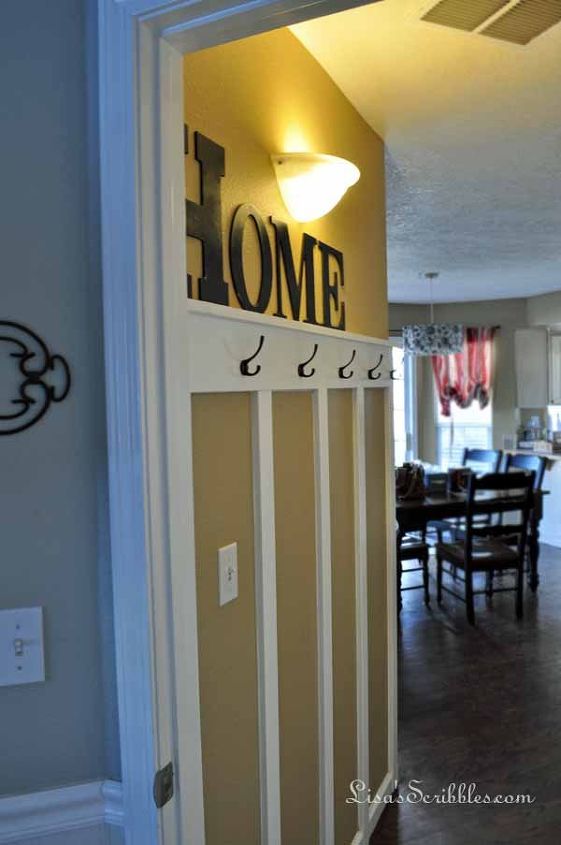
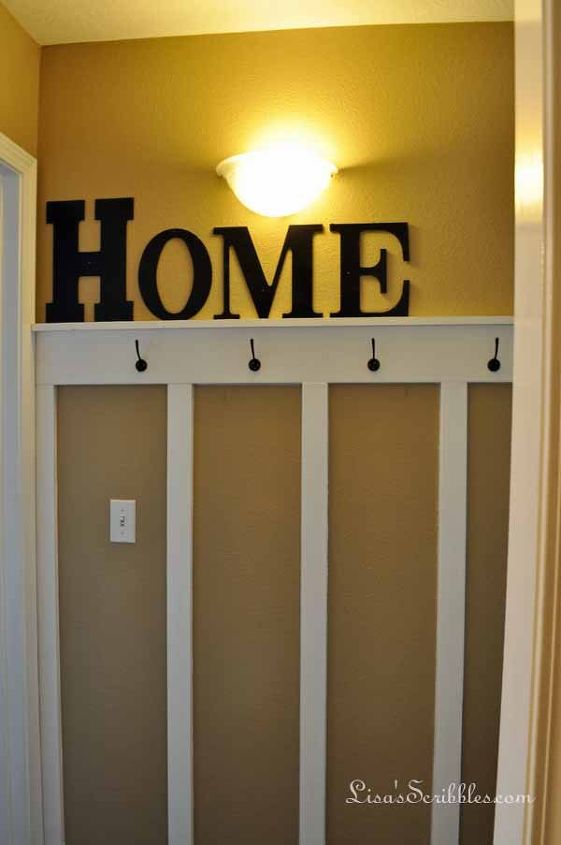
Again adding my own special touch to the project, I purchased the precut letters from Hobby Lobby and painted them black. Cute right? I then caulked and finished painting out the wall in a white gloss, and stood back to enjoy the view. Warm, inviting, and I left them with a good start to add hooks or a bench.

I'd come in if they offered.
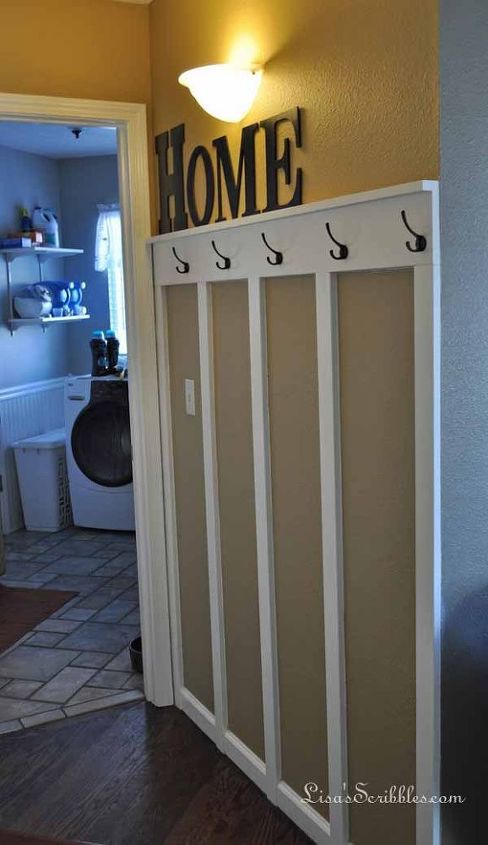
Since I did this at the Wanna be Remodel and liked it so much, I decided to add this same theme to my back entry.
This time, I chose not to paint it all, just the furring strips and top modelings.
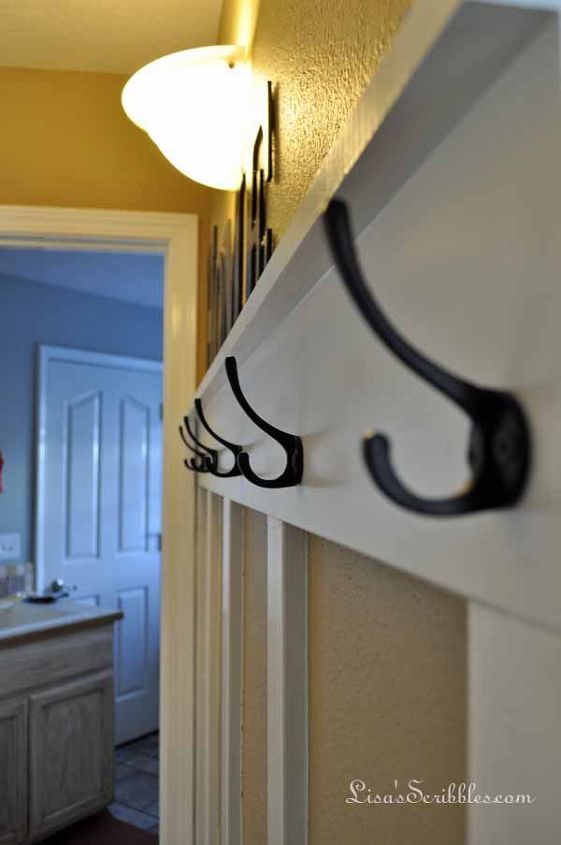
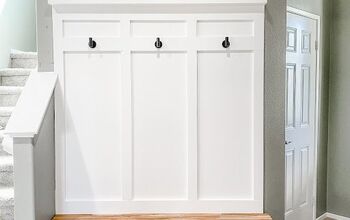
I also added hooks and this has become a well-used stop to hang coats, purses, backpacks and whatever else needs to be hung!
I only added the batten board look to the one wall because I have a hall bath on the opposite side with a pocket door. I thought it best not to nail the pocket door in place as it might make it a little embarrassing when guests were over and wanted to use the toilet. Smart choice I think. :P

Want more details about this and other DIY projects? Check out my blog post!
Comments
Join the conversation
2 of 23 comments
-
Love this project. I will give it a try. Thanks for sharing.

-
Looks cool, nice job.


Frequently asked questions
Have a question about this project?
Love this. Would like to do this on my front entryway walls. But I don't want the "orange peel" wall texture to show through under the white gloss paint. Any tips to smooth the walls?