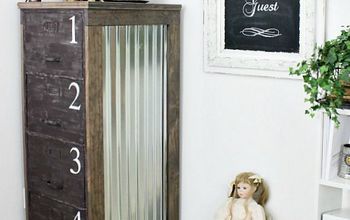
Mismatched Metal File Cabinets Get a Makeover

ScavengerChic
by ScavengerChic
7 Materials
A couple of months before Christmas, my youngest son tells me that he really needs a bigger desk. The old, "This end up" desk he's been using since he was about 5, is no longer cutting it. If you have any "This end up" furniture, you know that it lasts forever. So if you're waiting for it to wear out, that is just not going to happen.
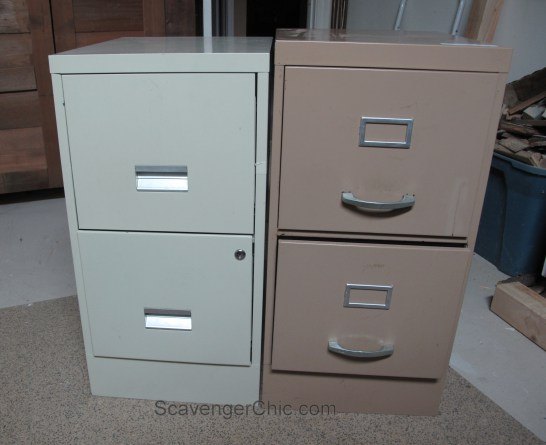
Eventually I decided to make a desk from metal file cabinets. They not only give great support, but they are full of usable storage.


I was on the hunt. After my first thrift store, I came up with the file cabinet on the left for $15. This wasn't going to be as hard as I expected. Four more thrift stores later, I finally stumbled across the one on the right. Using my crude measuring stick, the length of my arm, I figured out that they were pretty darn close to the same size. Unfortunately, the second one was $10 more,$25...SOLD. I was not in the mood to go to 5 more thrift stores.


It was only after I got them home and set them side by side that their differences really became apparent. Obviously, the one on the right is a bit taller and the handles are not quite the same and the one on the right has a bar between the drawers.


I was not deterred.
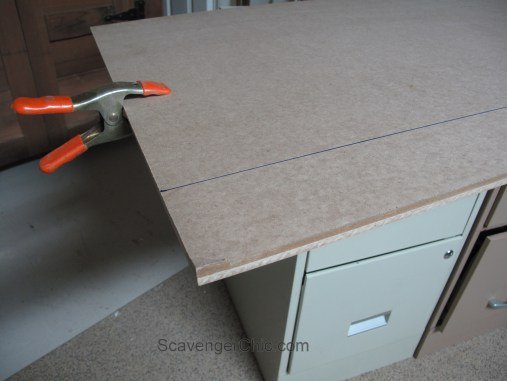
The easiest part to begin to tackle these mismatched file cabinets was the sides. After a bit of measuring, I figured out I would need at least 36 feet of molding just for the sides.


After a quick trip to Home Depot I found 2x4 sheets of 1/4" mdf. I bought 2....I would cut my own trim.


Clamped the two sheets together to get the cutting done in half the time.


Two and a half inch and three and a half inch strips were cut from the mdf. I have found that even though mdf cuts very nicely with no splintering, it leaves a fine coat of sawdust on everything! I'm just warning you, if you can cut your wood outside, it might not be such a bad idea.
With molding cut, started to lay out my sides. The 3 1/2 inch pieces were used for the top and bottom and the 2 1/2 inch strips were the longer strips.


Note: Even though the file cabinets were 2 different heights, the side molding was cut as if they were exactly the same. The lighter file cabinet on the right will have molding that extends past the top of the cabinet.
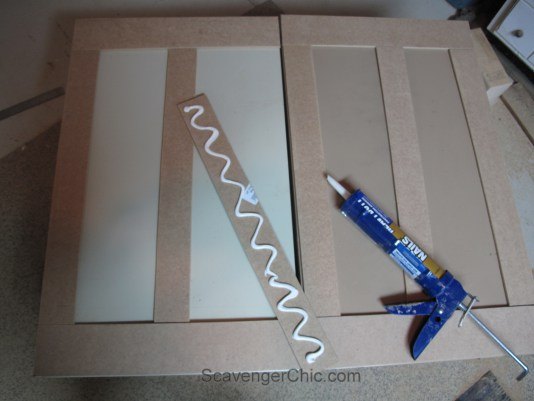
Sand the sides of the trim completely before adhering with builders adhesive. Let the first side dry before repeating the same process on the other side.


Cut, sand, glue, cut, sand, glue...
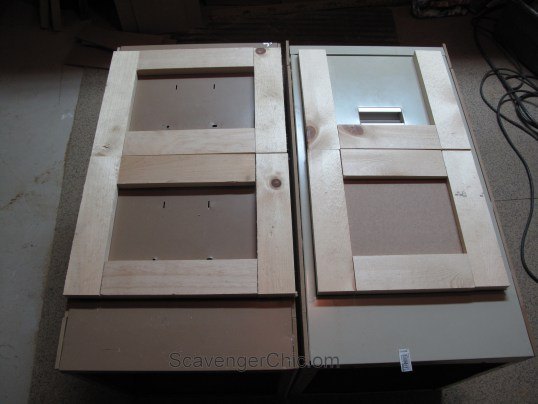
Now on to the fronts. Anything that stuck out, was removed from the file drawers.


The trim for the drawers was cut from about 16 feet of 1x3 lumber. I originally cut the trim to cover only the drawers (like the right cabinet) but I liked it better going all the way to the side edges (cabinet on the left) so that the trim covered the rough edges of the side pieces.
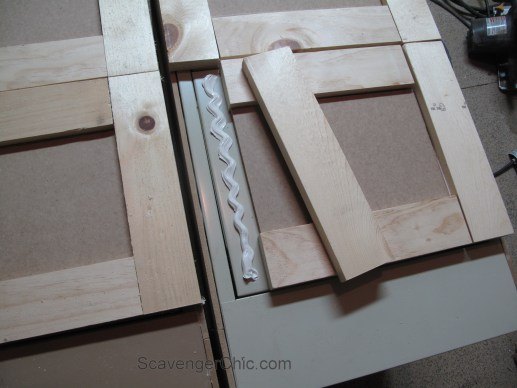
Smaller pieces of mdf, part of the same wood that the side trim was cut from, were used to fill in the fronts, hiding all of the previous holes.


More sanding and more gluing. When using the builders adhesive for the drawers, put the glue on just the drawer or you'll end up gluing your drawer shut.


Use a paintable caulk to fill in any cracks and crevices.
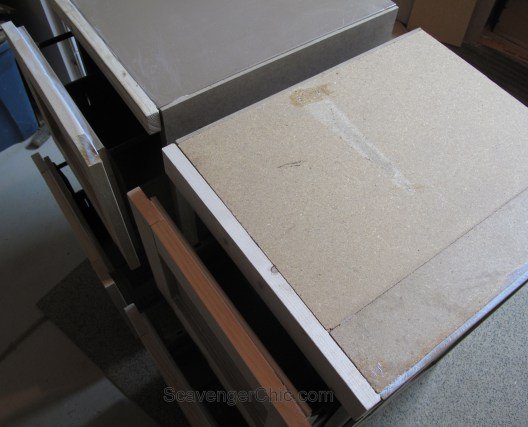
The last step to matching up these two mismatched cabinets, was to add a piece of wood to the top of the shorter cabinet. This was a piece of old particle board shelving. I don't really recommend particle board, but it was what I had in my scrap pile.
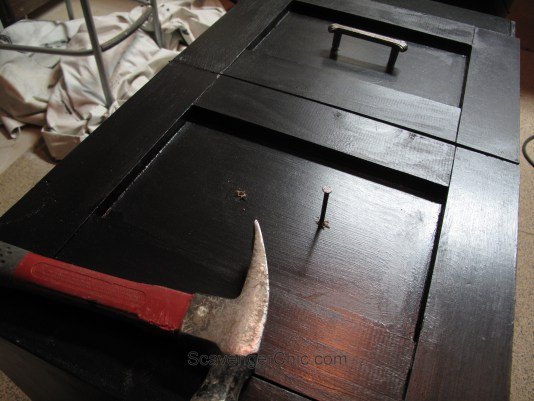
After more sanding, the cabinets were painted with a semi gloss black paint.


For the handles, drilled the wood with a regular drill bit then finished off the hole with a nail hammered through the metal
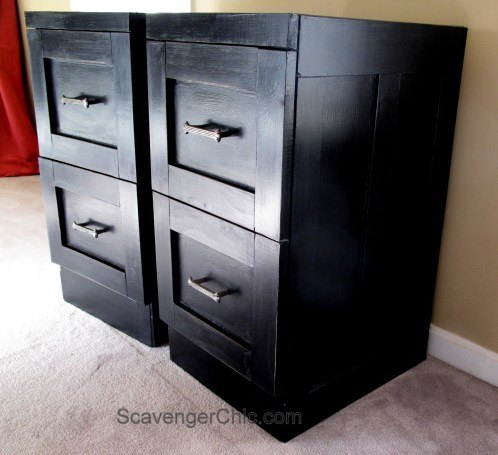
You would never know these two file cabinet were metal and non-matching.


You can find the tutorial for the top of the desk and see the finished project here.


http://scavengerchic.com/2016/01/21/desk-made-from-old-metal-file-cabinets/


And for more pictures and the complete tutorial for the file cabinets make sure you click on the link below.
ScavengerChic
Want more details about this and other DIY projects? Check out my blog post!
Go
Frequently asked questions
Have a question about this project?
3 of 4 questions
  • Michelle Michelle on Jan 24, 2016
    Ok, it's very cool, but for a desk, how do you put a chair to it? Is there a substancial overhang i missed ?
  • Joann Reynolds Joann Reynolds on Sep 26, 2019

    Where and how does the child sit at the desk or did I miss something?

  • Carole Carole on Aug 22, 2021

    Beautiful piece of furniture! Can he sit at it?

Comments
Join the conversation
2 of 107 comments
  • Anna Anna on Aug 22, 2022

    I am using two short mismatched file cabinets below the library table I use as a free standing island in my kitchen. Each drawer gives me lots of space for related items (blender and all accessories; ditto a food processor). I despaired of finding a way to make it all "work." You have given me that!!! Much appreciated. Wish me luck!

  • Lynn Lynn on Aug 22, 2022

    Great timing with this post--we are about to do the same thing with several file cabinets surrounding two corner desks--our updated home office! Looks awesome!!

Next