


DIY 4-Sided Drop Cloth Teepee
$20
3-4 Hours
Easy
I have this thing with not knowing what to get my kids for their first birthdays; they usually have enough toys and clothes especially with older siblings already around. Luckily I realized early that I can make them something that will get far more use than toys :) They love to hide and play in tight spaces, so I decided to make it a tradition to make teepees as first birthday presents. The teepee I made this time around started out as a canvas drop cloth and 4 pvc pipes.
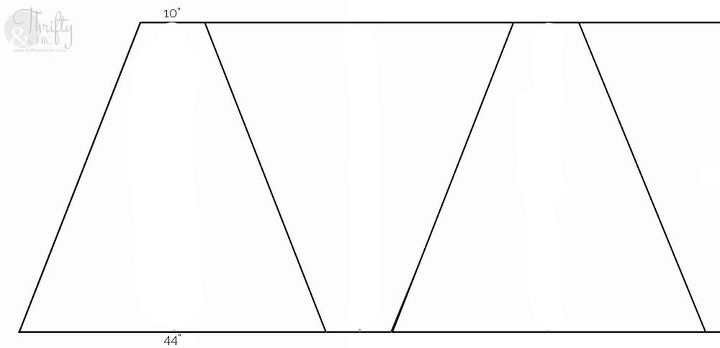
First step was to take the drop cloth and make the panels for the teepee. I used a narrow drop cloth meant for hallways for this to save on time, thus eliminating the need to hem the tops and bottoms and additional measurements.
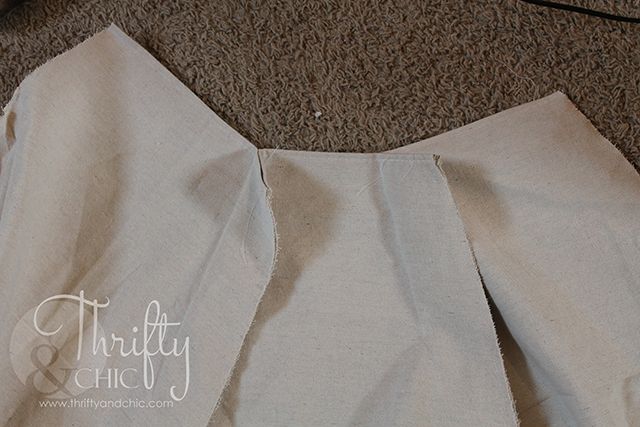
Once the panels were cut, I attached them to each other while making a pocket to fit the pipe through.
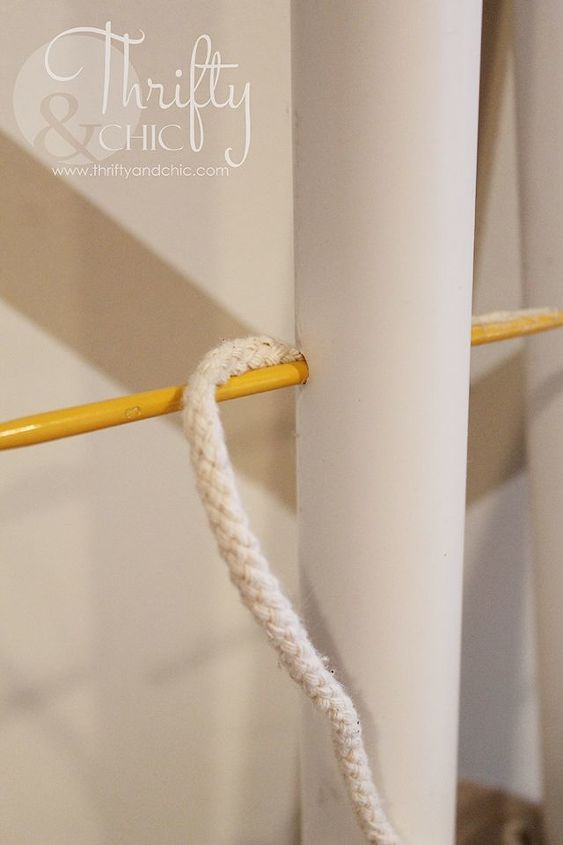
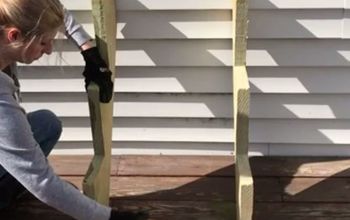
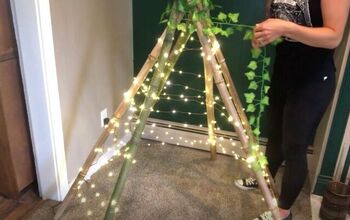
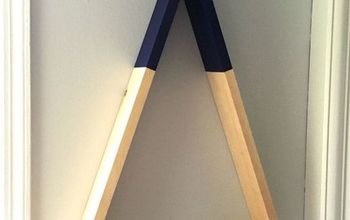
Next step was to get the pipe ready. I spray painted the pipes, drilled holes through each of them, and then threaded some rope through the holes connecting the pipes together.
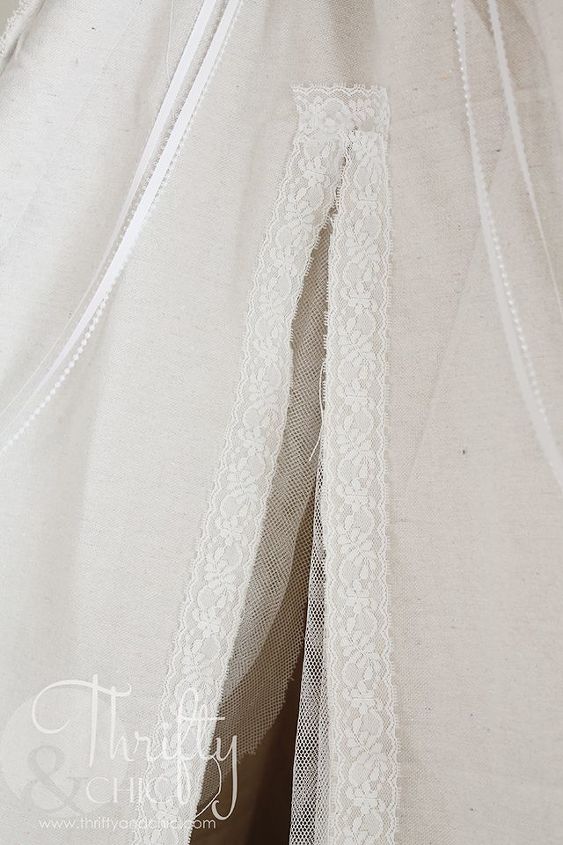
After sliding the finished panels onto the pipes, I added embellishments.
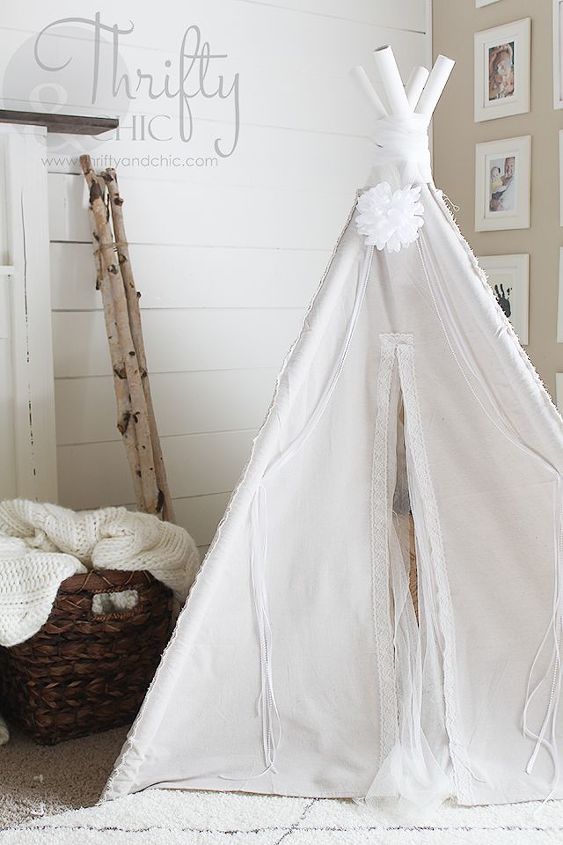
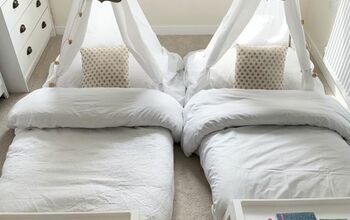
Here's the finished look! I kept the hems raw to give it a more shabby chic finish.
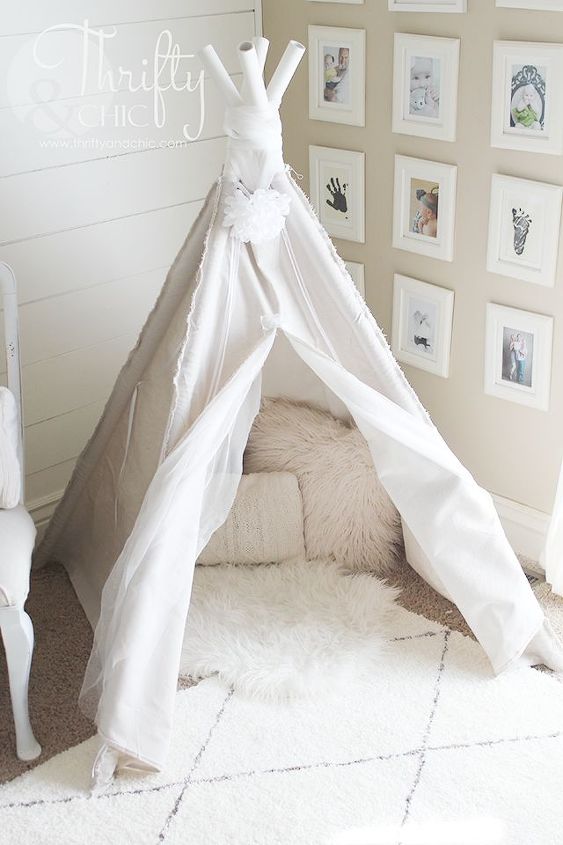
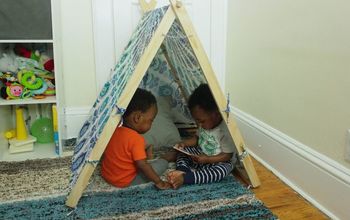
And here it is opened. This is decent size tent. We had 6 kids in it the other night. It's a great little play space. It's amazing how kids love tight little spots like this!

Want more details about this and other DIY projects? Check out my blog post!
Comments
Join the conversation
3 of 22 comments
-
Love this idea. I use pvc pipes for curtain rods.
-
I'm going to make a teepee for my grandson! Wow! Love this idea! Didn't know that pic could be so useful!


Frequently asked questions
Have a question about this project?
Does it fold for storage?