


DIY Spray Painted Doorknobs: Ugly Brass to Beautiful Oil Rubbed Bronze
On my quest to update and upgrade our standard, boring construction grade home I have now come to a point where the ugly brass door knobs and hinges need to be changed. This is one of the last projects on my list for my son's bathroom renovation (woo hoo!! I'm almost done!!), but ultimately it involves the entire house since eventually I want a brass free home.
Now I could go out to the store and blow hundreds of dollars on new, beautiful knobs and hinges but we don't have the cash for that. Up-cycling and saving hundreds of dollars is more the style in my household anyway. If it can be done, we will do it.
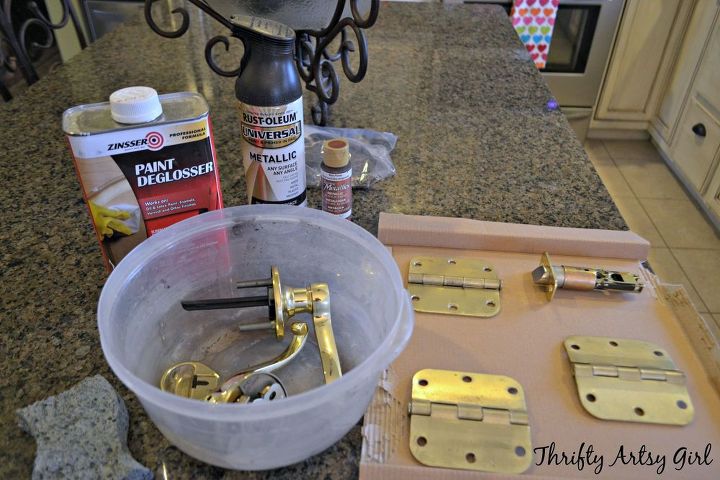
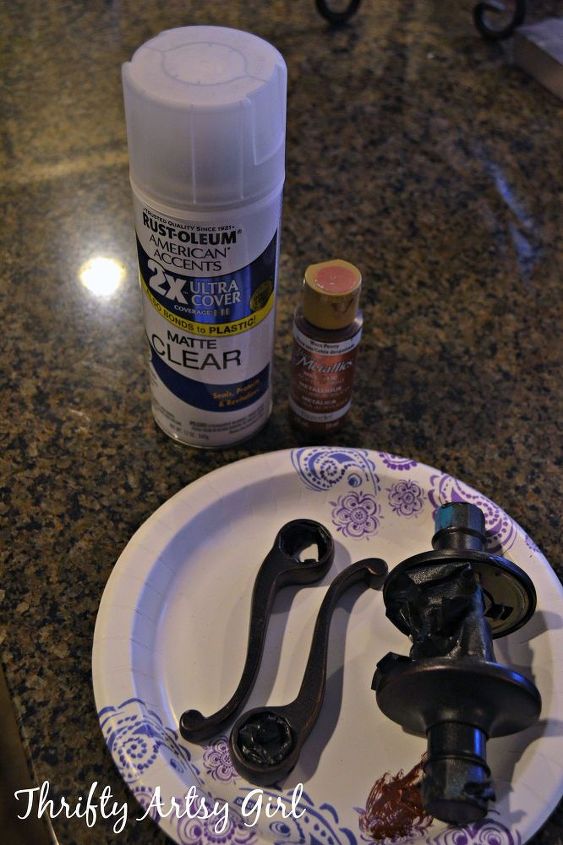
First things first I removed all the knobs and hinges and other parts from the door that I wanted to spray paint. There are many ways you can "prepare" your metal items for spray paint from sanding to just a wipe down. We chose to use paint deglosser because we wanted the spray paint to have the best possible chance to stick and stay forever. Ok, maybe not forever but it would be a shame if the paint started wearing off just because we were lazy and just wiped off our metal pieces.
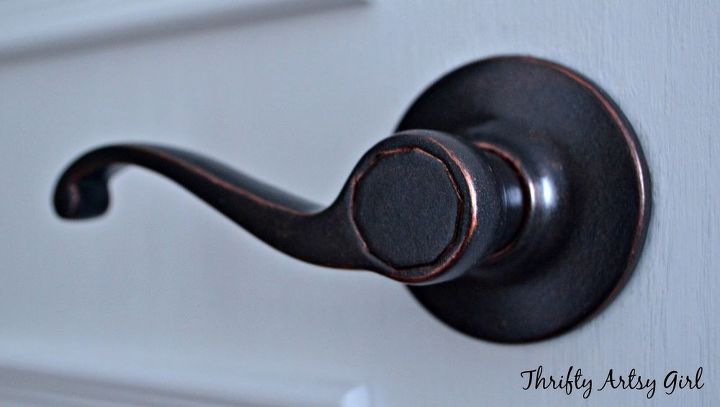
After my knobs and hinges were dry I brought up the knobs to put touches of worn penny paint on. The hinges would be just fine the way they were since I just wanted them to be dark oil rubbed bronze, no need to do anything more with them than to hang the door back up. I gathered my supplies for this part of the project: a paper plate, worn penny paint, the knob and a small detail paintbrush.
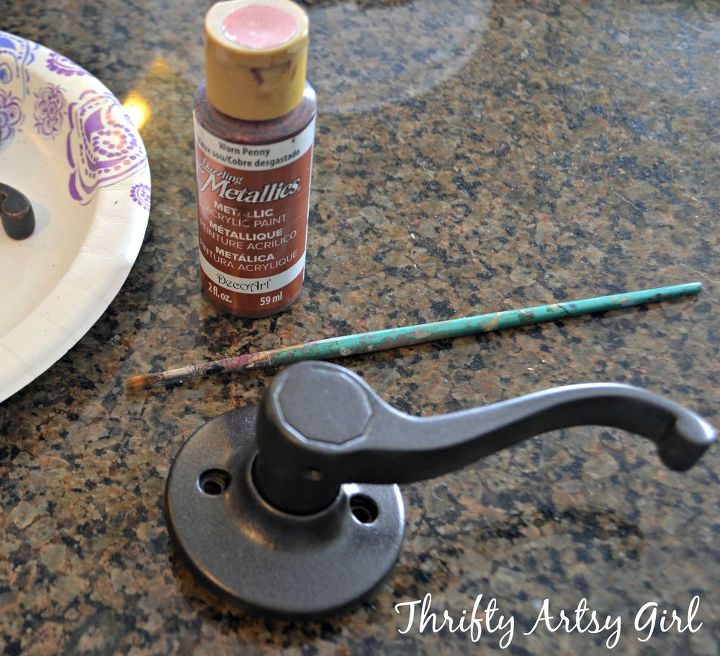
To start I put a dab of copper paint on the plate and dipped my paintbrush and just barely painted the edges of the lever part of the knob.
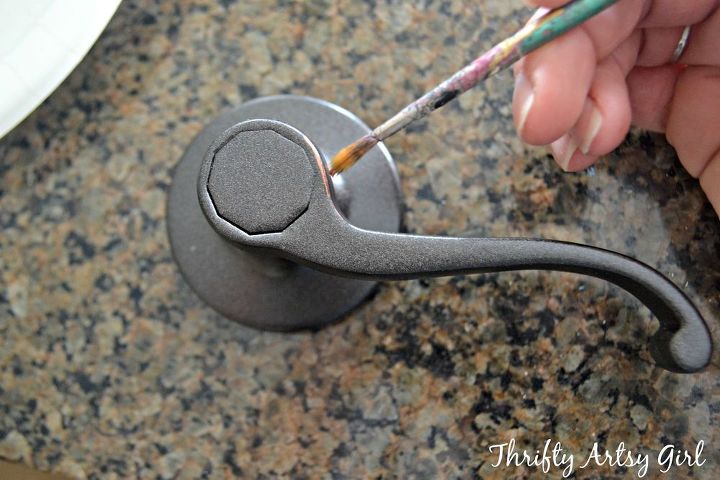
After I had painted a small section I rubbed the paint with my fingers to soften the look and to fix any "mistakes". I also thought it made the copper parts look more natural, like it had been worn that way instead of just been painted on. When I paint artistically I tend to paint a lot using my fingers so it's only natural that I would use this technique for this project too.
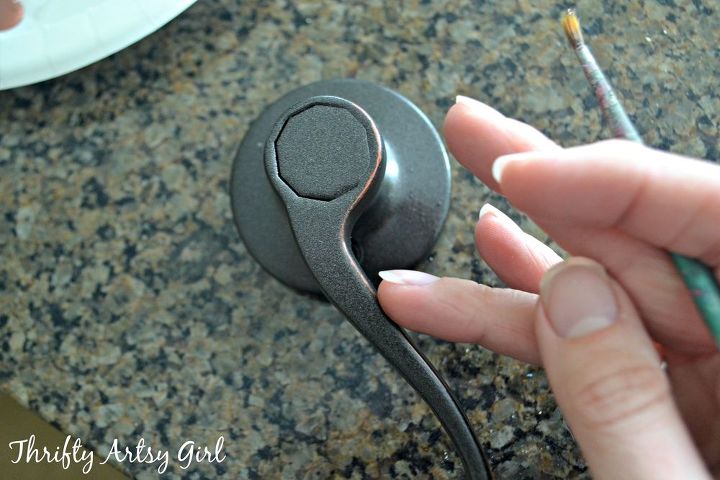
I found there is a lot of room for error while I was painting my copper paint. You do not have to make it look absolutely perfect because oil rubbed bronze is worn to look the way it looks. It's not a perfect look. You can go back over parts and use the good old fashioned spit and rub technique if you truly don't like how a section turned out. It's only paint and can be fixed if worse came to worse.
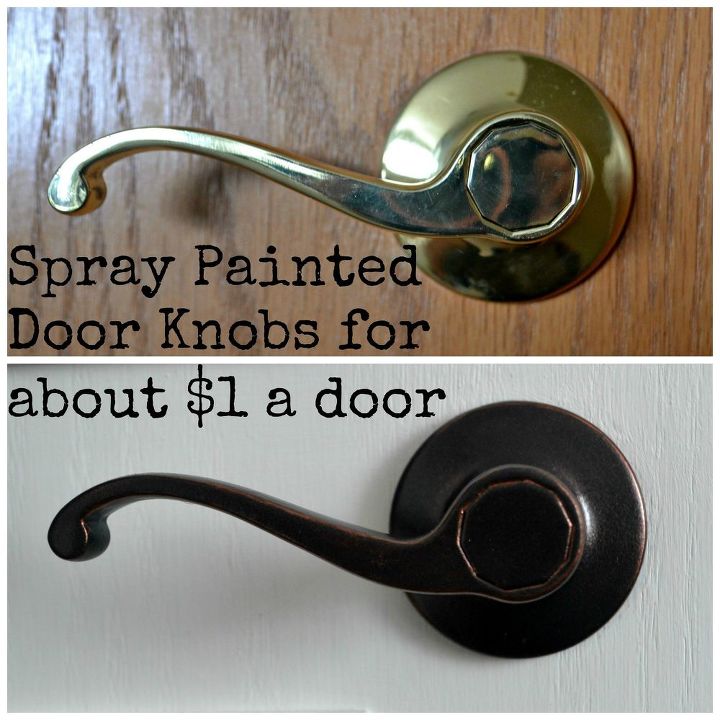
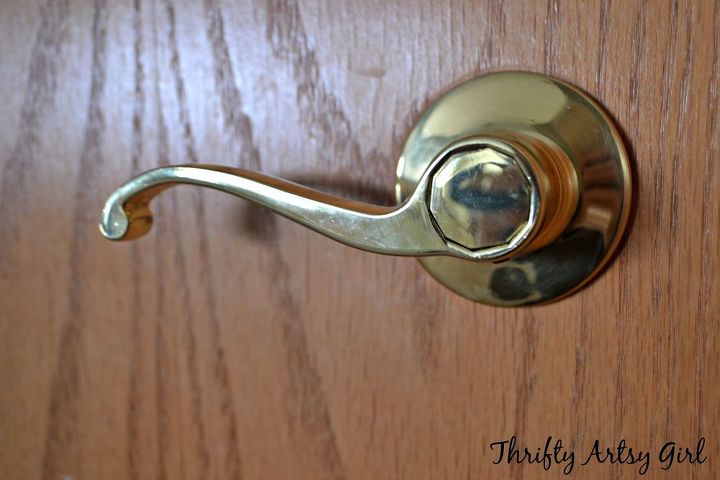
Here's a before picture of my brass knobs (as if you could forget).
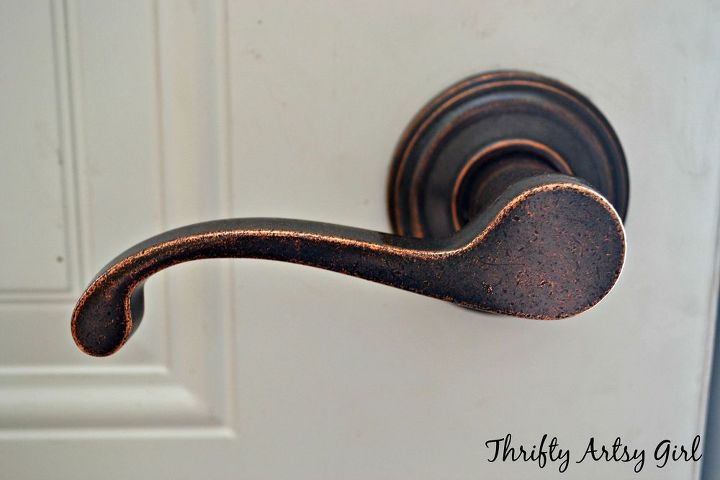
Here's the after. Ahh so much better!
I am over the moon with the results of my painted doorknobs. They look a million times better (and more expensive) than the ugly, outdated brass doorknobs. This project literally costs around $1 a door since I can reuse the paint and other products on all the other knobs, hinges, strike plates, etc. that I have left to do. So this paint project has saved us hundreds of dollars, but it does take some time. If that's the trade off, it is one I will gladly take. Now to just get the gumption to do all that deglossing and painting 14 more times!

Want more details about this and other DIY projects? Check out my blog post!
Comments
Join the conversation
2 of 82 comments
-
Thank you so much for sharing the step-by-step. Truly a great way to update the brassy stuff! The end result looks warm and rich. Very nice.
-
Great job giving these handles new life! I like the copper accent.


Frequently asked questions
Have a question about this project?
Would this work on shower faucets, n bathroom sink faucets? I have a home near Houston, but recently relocated to Georgene to help my daughter. We are renting and the bathroom fixtures are the old gold look, yuk! I really don’t want to replace them.
If I skip the copper penny paint step, do I still need to spray a clear coat as the last step?
What brand was the copper paint?