


Going to the Dogs--DIY Dog Crate Nightstands
My sister asked me to come over and help her with some storage ideas in her bedroom and closet. The first thing I noticed when I walked in the bedroom was that she didn't have any nightstands. I asked if she would like some nightstands and pointed out that it would provide some extra storage. She is very minimalist and doesn't like a lot of furniture, so I knew she would say no. The dogs sleep beside the bed and she didn't want nightstands in the way. I didn't push it, but a couple weeks later she texts me asking if I would make some nightstands. Totally knew that was coming. Sometimes I just have to plant the seed and wait :)
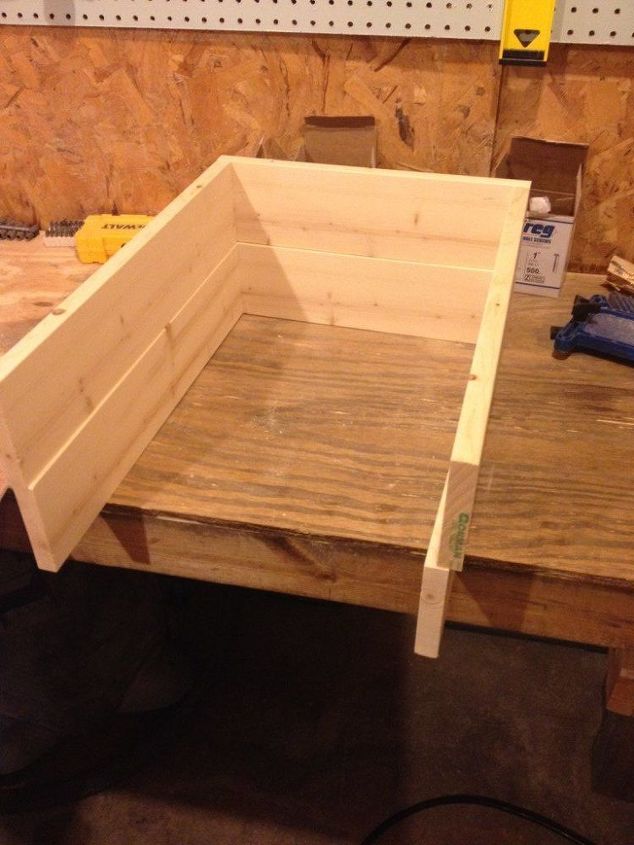
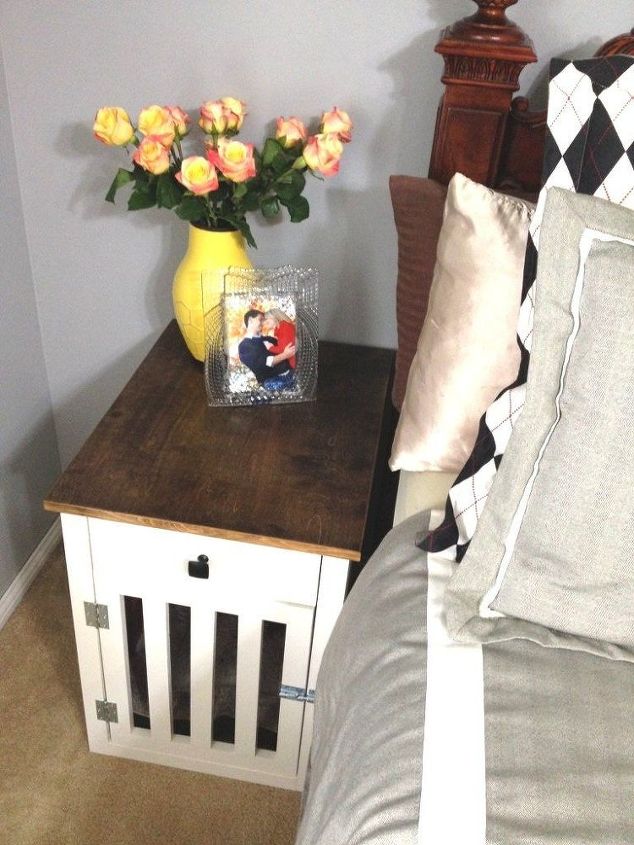
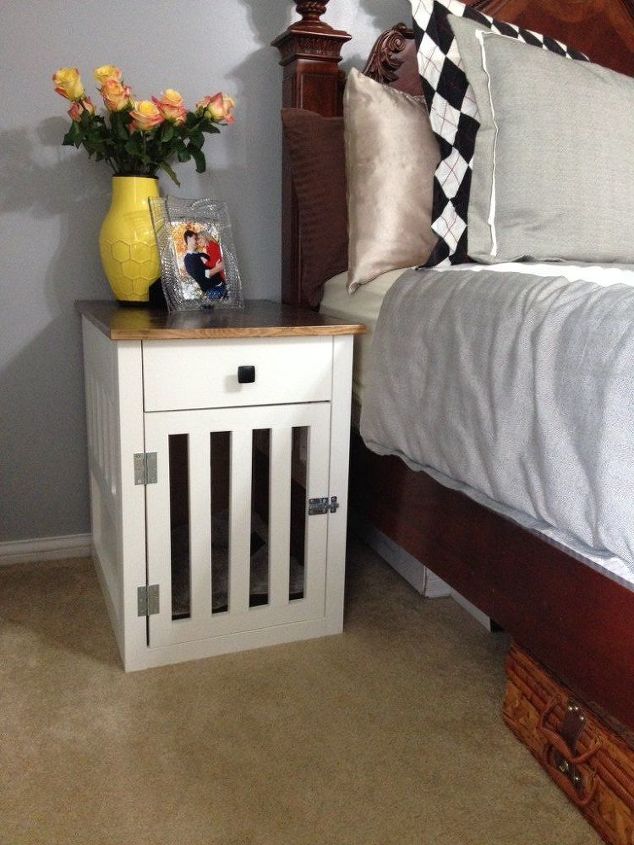
She wanted a dog crate nightstand like this one from Ana White. But just like with the fireplace I made her, she wanted it customized. She gave me the dimensions she wanted and I modified the plans and added the drawer. You can pretty much follow Ana's general plan for the crate (adjust measurements as needed for your particular size). Please see blog post below for more details. To add a drawer, just make the top piece on both sides a 1x6 piece, add wood drawer slides, and make a simple drawer to fit the space.
She wanted a dog crate nightstand like this one from Ana White. But just like with the fireplace I made her, she wanted it customized. She gave me the dimensions she wanted and I modified the plans and added the drawer. You can pretty much follow Ana's general plan for the crate (adjust measurements as needed for your particular size). Please see blog post below for more details. To add a drawer, just make the top piece on both sides a 1x6 piece, add wood drawer slides, and make a simple drawer to fit the space.
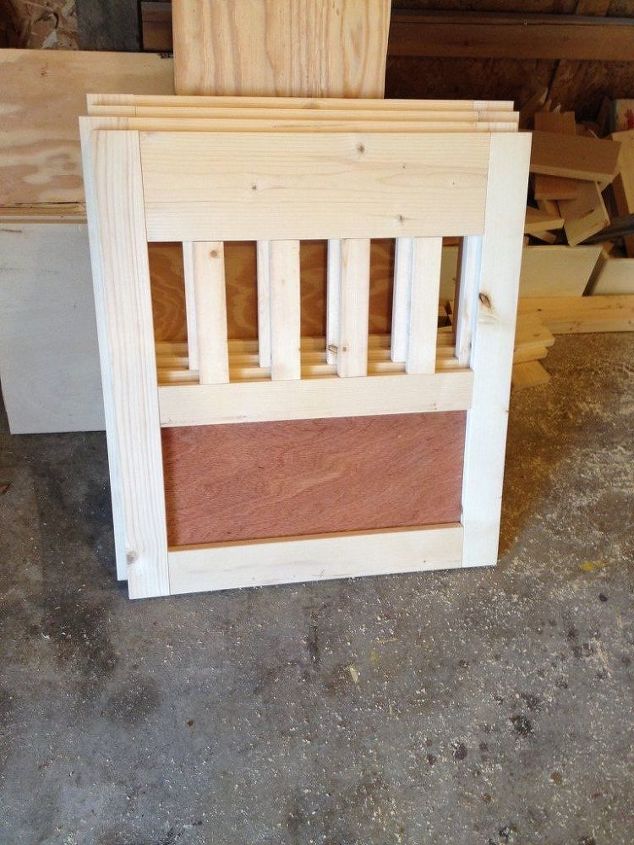
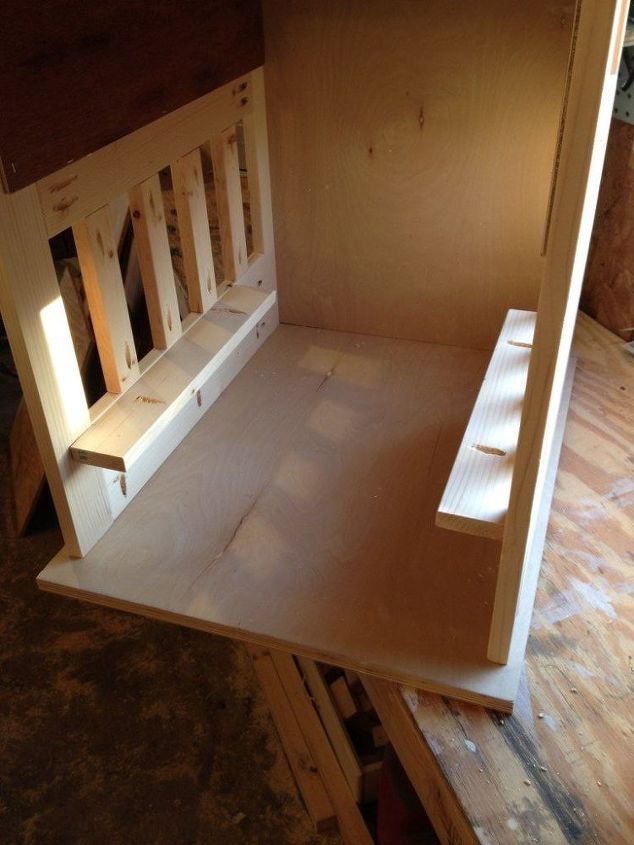
I also used a solid piece of plywood for the bottom and the back. Ana's version had "bars" in the back to match the sides.
I made a simple drawer to fit in this space and I made the sides and back just deep enough to where they wouldn't rub on the top when you slid it in and out. I stapled 1/4" plywood on the bottom, so don't forget to add this in the drawer height as well. I used a 1x6 piece for the front. Below are the two "drawers" before attaching the front 1x6 piece and the 1/4" plywood bottom.
I also made a door to fit the opening once the drawer was installed. I painted the bottoms white and stained the top. I didn't paint any of the inside because I didn't want the dogs chewing on anything and eating any paint.
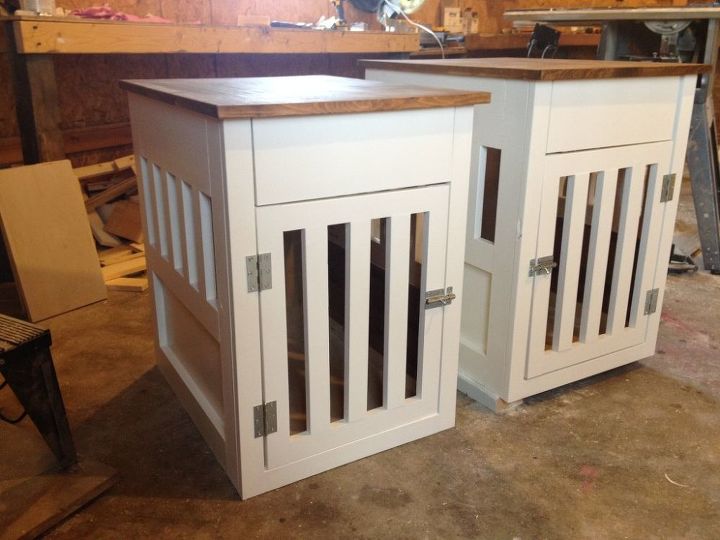
Add a simple knob, two hinges, and a latch to the front and it's done!
And now, I present Sissy's two dogs, Rufus and Wally!
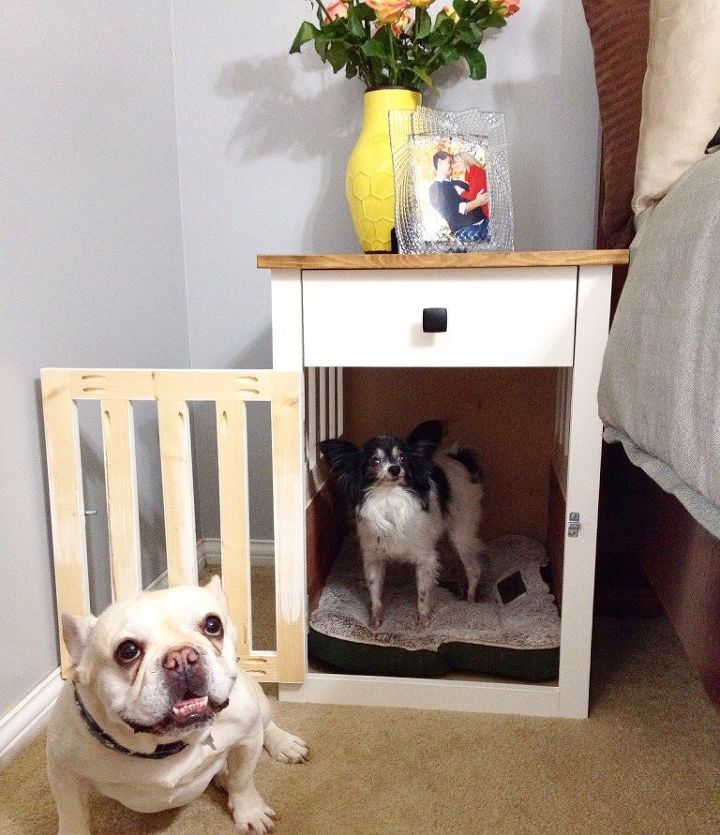
I think Rufus is a little more excited about the new crates than Wally. But my sister and her husband seem to like them, too. Which is more my concern than if the dogs like them haha.

Want more details about this and other DIY projects? Check out my blog post!
Comments
Join the conversation
2 of 65 comments
-
Great idea, especially if you have a pooch who poops in the bedroom. Keeps one from stepping in poo in the dark.
-
Love what you did it's beautiful and your pet is close by.


Frequently asked questions
Have a question about this project?