


How To Paint Glass and Metal

6 Materials
Do you have a glass or metal project that you’d like to paint? Maybe you have a shiny, smooth surface that you’re worried about tackling. Come see this tutorial to learn our tips and tricks for getting better adhesion on smooth surfaces!
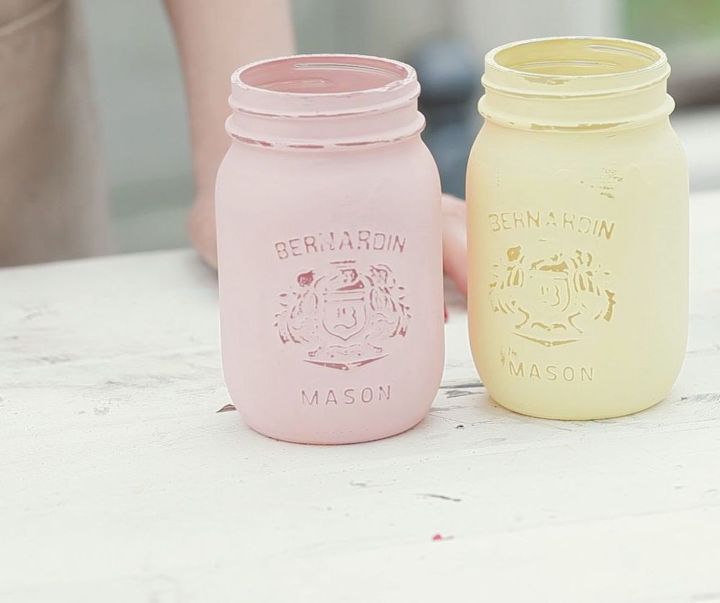
In this tutorial company co-founder, Rosanne will paint and distress some mason jars to show how to prepare smooth surfaces like glass and metal to improve adhesion. If you'd rather watch a video, we also have a video tutorial available towards the bottom of this post!
In this tutorial company co-founder, Rosanne will paint and distress some mason jars to show how to prepare smooth surfaces like glass and metal to improve adhesion. If you'd rather watch a video, we also have a video tutorial available towards the bottom of this post!
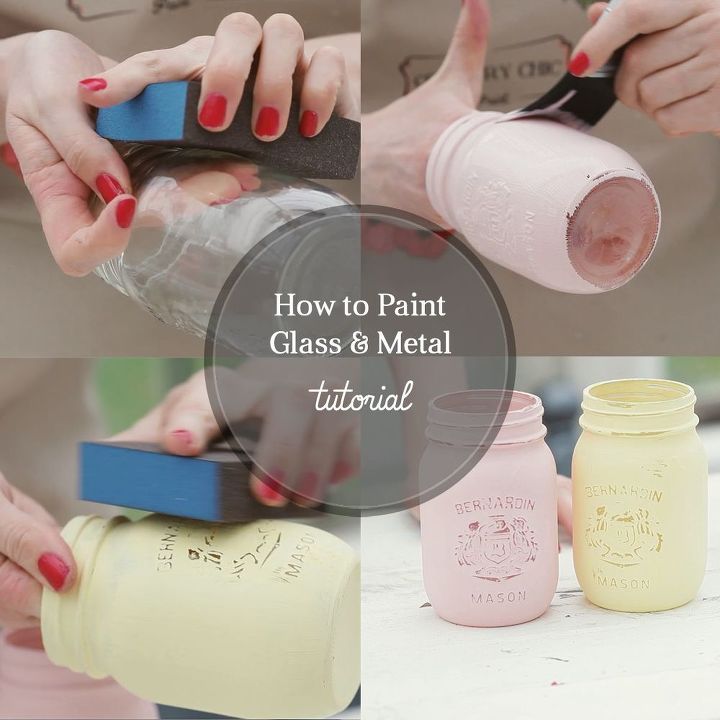
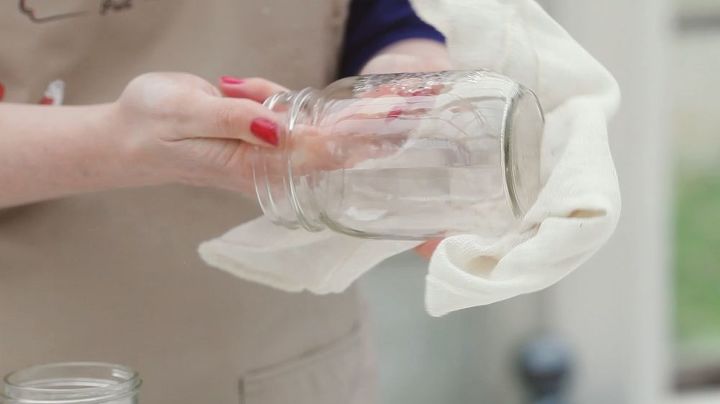
Step 1) Clean your surface
The reason it can be difficult for paint to adhere to smooth surfaces is because they are very non-porous and there is no texture for the paint to grip onto. Follow these quick tips to make sure your paint will last for years to come!
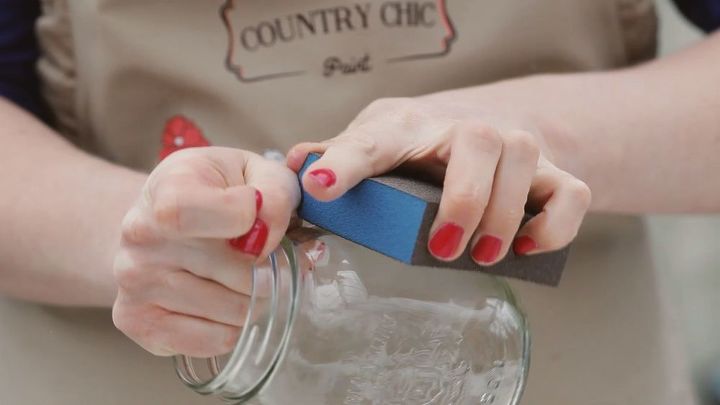
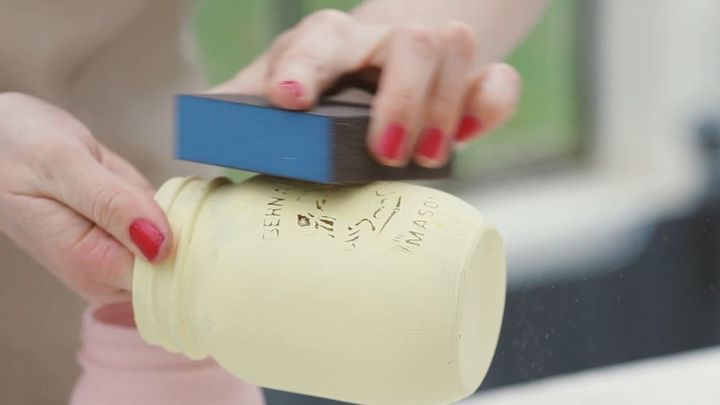
Step 2) Scuff sand your surface
Wait until your surface is completely dry, then use a coarse sanding block to lightly sand the entire surface of your piece. This will give your piece a bit more to grip on to and will lead to better adhesion. Make sure you use a clean cloth to wipe away any dust this creates before you move on to the next step.

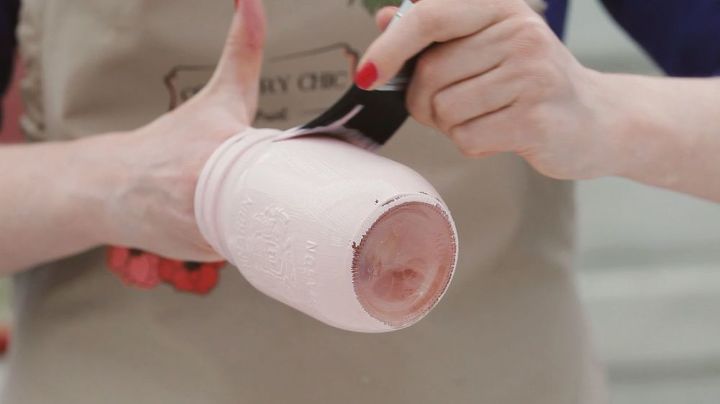
Step 3) Apply a thin coat of paint
We recommend choosing our All-in-One Decor Paint for tricky surfaces like glass and metal as it has even better adhesive qualities than our chalk-based paint. Remember that two thin coats of paint are always better than one! If you paint thick coats, they will take much longer to cure and they won’t adhere as well to your surface, so start with one thin coat all over your surface.
Step 4) Add a second coat if needed
For most colors you’ll find that just one coat is sufficient, but if you’d like to add a second coat you can do so after letting the first coat dry for about 1-2 hours.
Step 5) Distress your piece
If you like the shabby chic, distressed look, you can use 120 grit sandpaper to distress the raised areas on your piece. Make sure you let the paint dry for a few days before starting this process! Gently rub any corners or accent areas that would naturally get more wear and tear with your sanding block until you’re happy with the look. Use a clean, dry cloth to wipe away any dust this creates.
Step 6) Seal your work
For maximum durability, we recommend sealing your finish with our Tough Coat. You can learn more about how to apply Tough Coat by clicking here: http://www.countrychicpaint.com/pages/tough-coat-tutorial
{
"id": "3367119",
"alt": "",
"title": "",
"video_link": "https://www.youtube.com/embed/FwBIqKXqUbA",
"youtube_video_id": "FwBIqKXqUbA"
}
{
"width": 634,
"height": 357,
"showRelated": true
}
Watch this video to see our company co-founder, Rosanne painting mason jars!
Comments
Join the conversation
2 of 12 comments
-
Love it


Frequently asked questions
Have a question about this project?
What would the process be for terracotta pots?
How do you not get brush marks?
What is All in One paint? Acrylic?