


Marimekko Stair Transformation
10 Materials
$75
2 Days
Easy
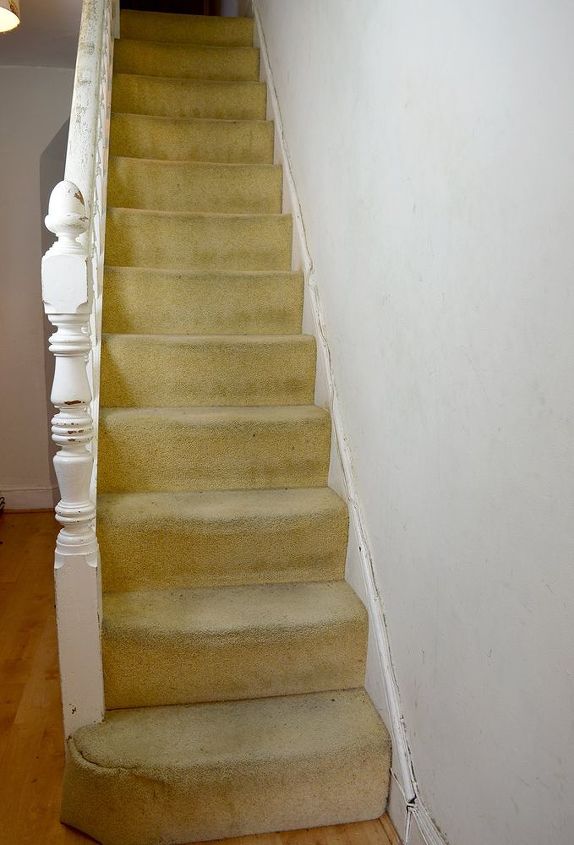
I didn't like the boring beige carpet on my stairs it was just a dust and dirt trap. I decided to give my hallway the wow factor by ripping up the carpet off the stairs and wallpapering them. Now they make me smile every time I open the front door.
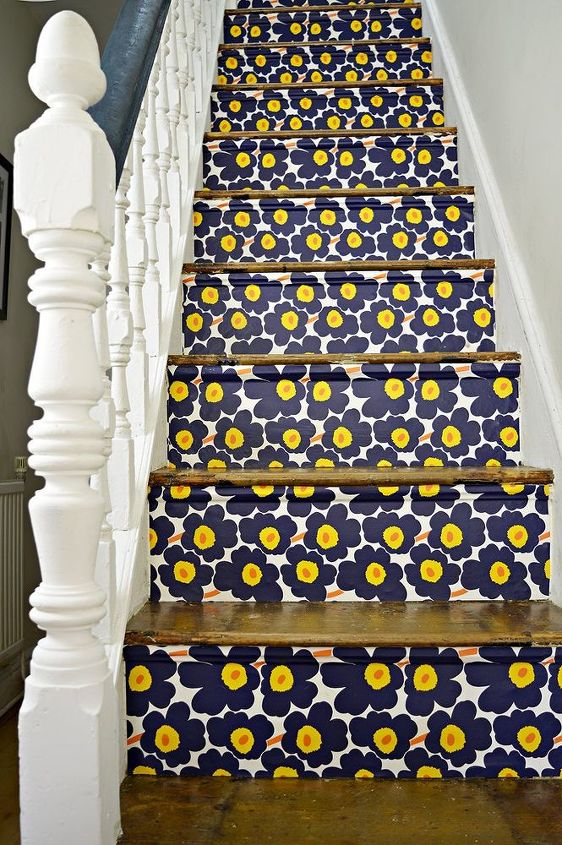
I have a bit of a thing about Marimekko the Finnish textile designers, especially their iconic UNIKKO poppy print. Therefore I decided that I would use Marimekko wallpaper for my stairs.
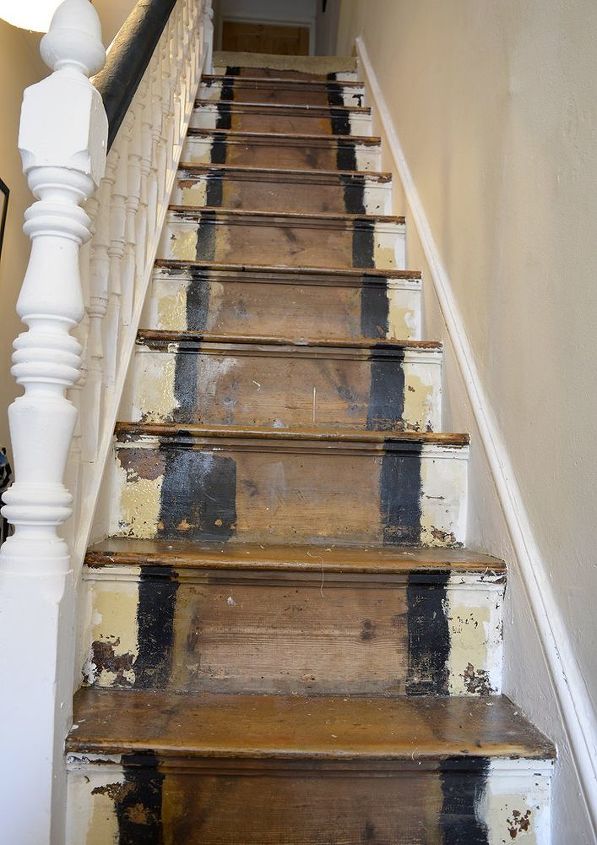
Before wallpapering the stairs I had to remove the old carpet. As the stairs were going to still be in constant use, I cut the carpet and removed it one step at a time. That is so that I could insure all carpet grippers and nails were removed before people started walking on the stairs. I just used a stanley knife, claw hammer and pliers to do this.
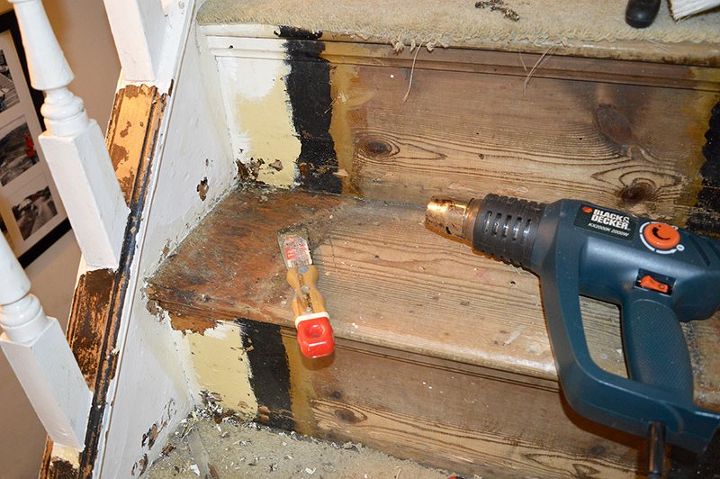
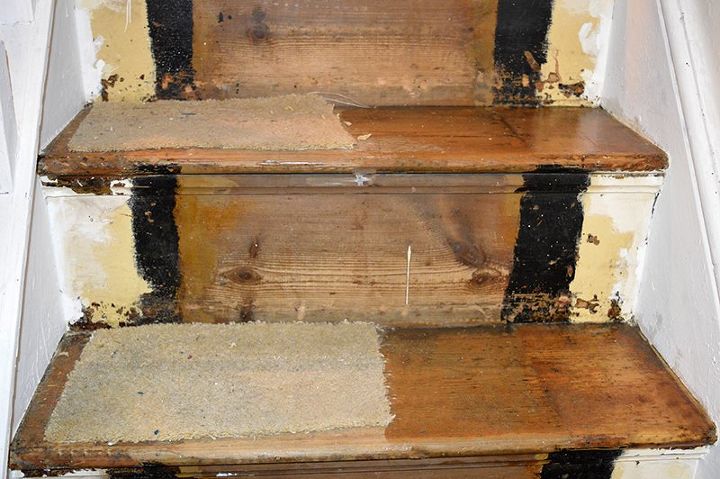
Next using a heat gun and a scrapper I removed the paint off the top of the steps. I then sanded them down with a hand electrical sander. As I was going to be wallpapering the risers, I didn't need to strip the paint off these.
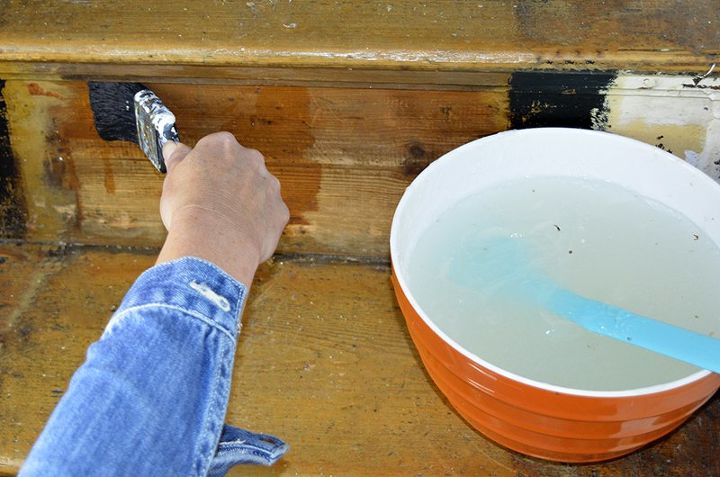
I then varnished each step with 2 coats of varnish. This took a little while as the steps were in constant use. They are old victorian steps which are rather steep so I couldn't varnish every other step whilst in use. Instead I varnished down one half and then the other when that half was dry.
To prepare the risers for wallpapering I keyed them by covering them in wallpaper paste and then leaving them to dry. This helps the wallpaper adhere to the wood.
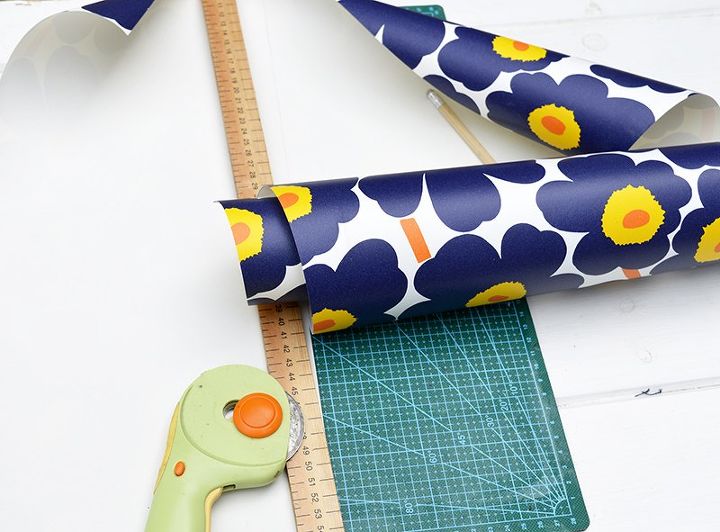
I cut the wallpaper to the size of each riser. You will need to think carefully about what wallpaper you use and how the pattern flows. The wallpaper I chose worked just as well either way up. Which meant that I could cut my wallpaper length ways and thus avoid any joins on the steps.
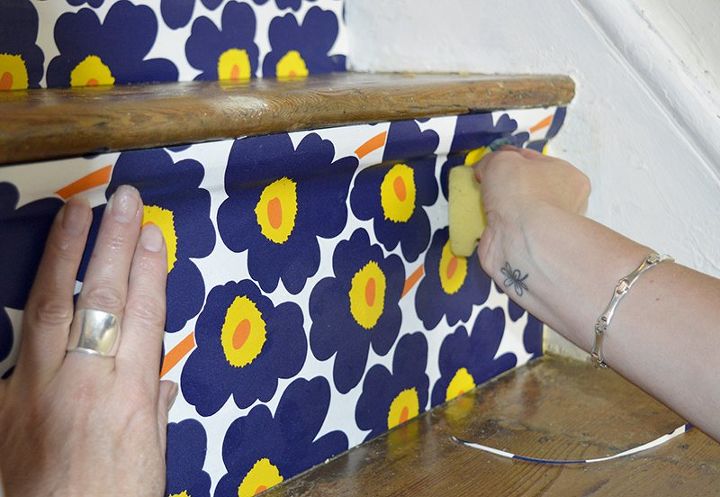
I used wallpaper paste to attach each piece to each step, positioning it carefully and using a damp sponge to make sure the wallpaper went into any groves. There are a few more details on my blog.
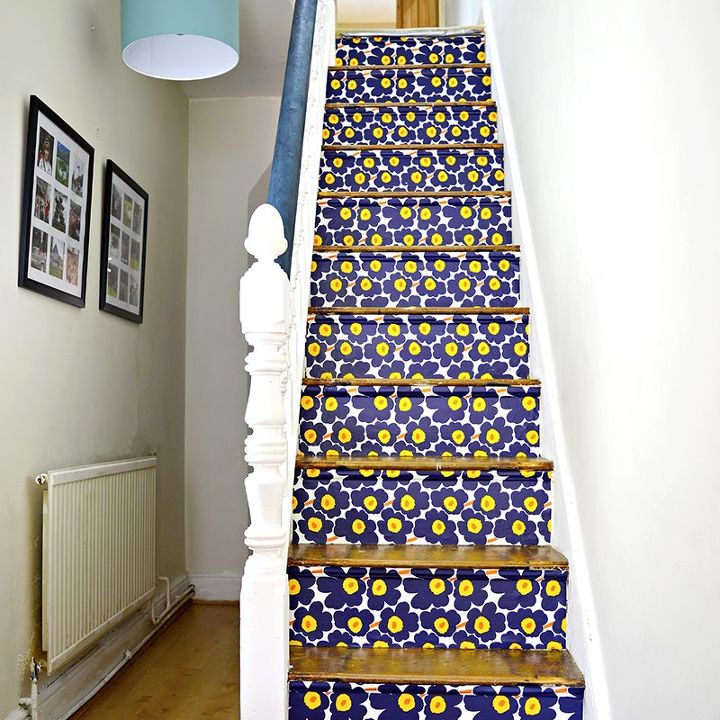
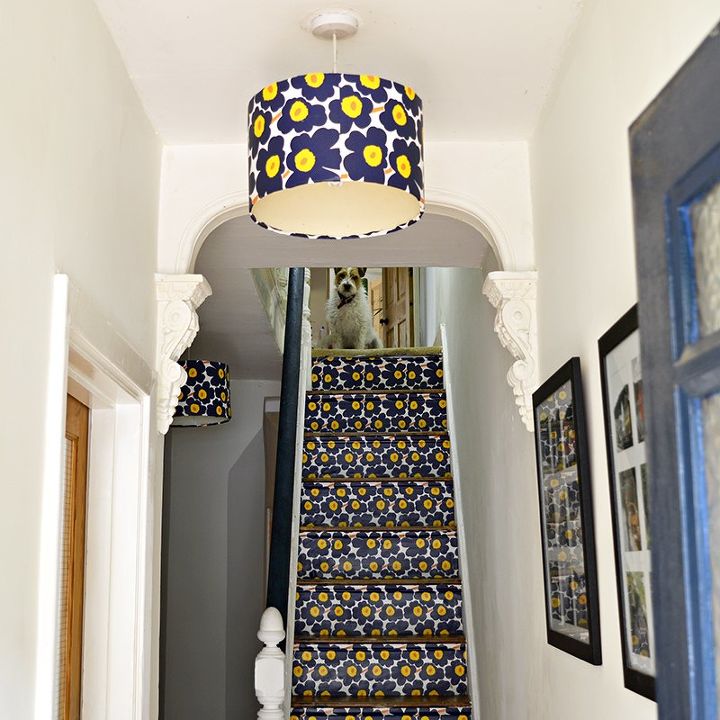
I also gave my banister and railings a fresh coat of paint. I painted the banister blue to match the wallpaper. I noticed my old white banister got grubby really easily and I was hoping this wouldn't happen with the blue one.
I love my new fresh bright looking hallway. The great thing about this is that now that I have done all the prep work it will be very easy to change the wallpaper if ever I feel like something different. I don't see that happening for a while. I use a lot of wallpaper to upcycle with in my house ( click here to see them), but funnily enough I don't have much on my walls.
Resources for this project:
See all materials


Any price and availability information displayed on [relevant Amazon Site(s), as applicable] at the time of purchase will apply to the purchase of this product.
Hometalk may collect a small share of sales from the links on this page.More info

Want more details about this and other DIY projects? Check out my blog post!
Comments
Join the conversation
3 of 283 comments
-
I wouldn't do floral wallpaper, I saw a project on this order and they painted or papered to look like books and I just loved it.
-
Oh no


Frequently asked questions
Have a question about this project?
How does the wallpaper on the light shade hold up with the heat from the bulbs?
will the wallpaper last with shoes kicking it etc? What type did you use? I’m thinking something very heavy duty. After all that work, I’d want to know this was going to last a long time. Great idea tho
Did you do anything to the runners to make them slip resistant? I am very clutzy and wonder if the runners are slippery at all?