


Industrial Chic Attic Bathroom Renovation

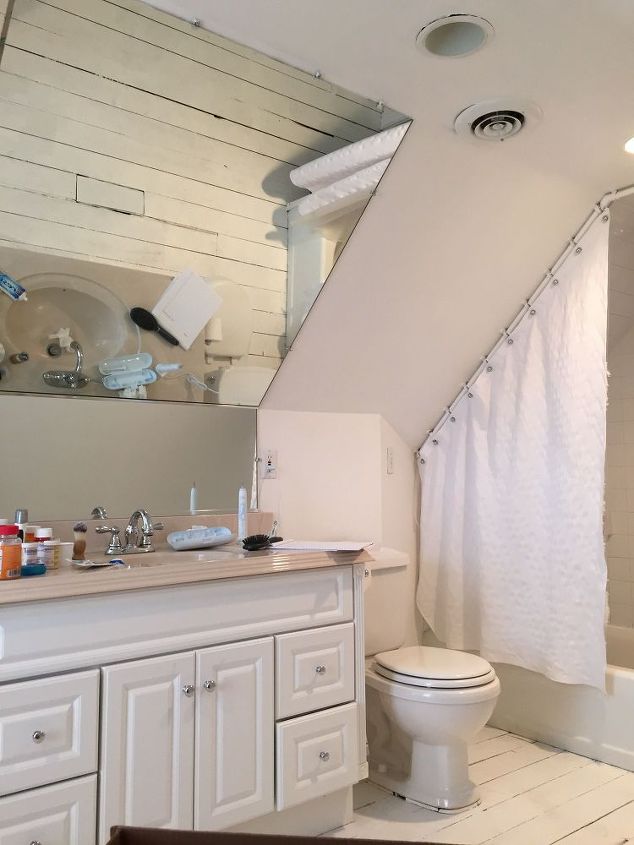
*Update: we were featured on Apartment Therapy!* Bryan & I just completed a big bath renovation for some clients here in Columbus, and we're so excited to share before & after photos with you! If you've been following us on Instagram @beginninginthemiddle, we've been using the hashtag "cmcbathreno" to track our progress. Our clients purchased their beautiful home earlier this year, but there was one room that needed some love: the upstairs bathroom. It's the only bathroom on the 2nd floor, and feels like an attic because of its sloped ceilings. It is a great size, especially for an old home, but the layout and finishes made it feel awkward and dated. Here's what the space used to look like from the entrance.

The vanity, toilet and shower were all off to the right...and awkward, to say the least. Every time our clients leaned over the sink, they bumped their heads.
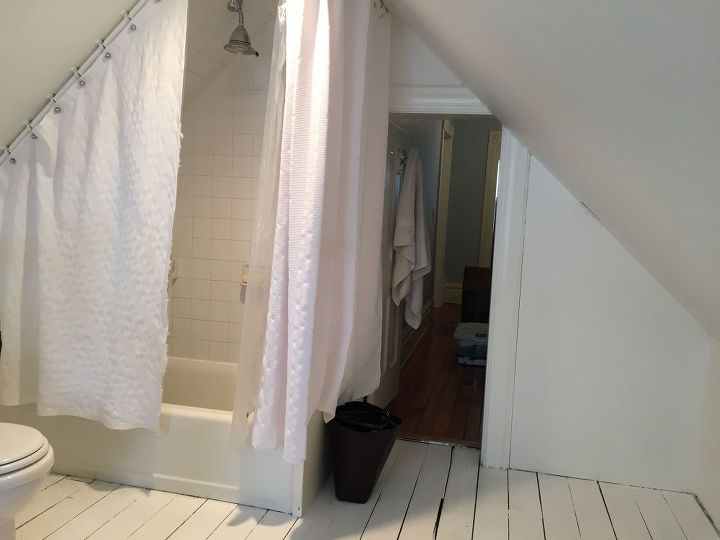
And the shower... oh, the shower!
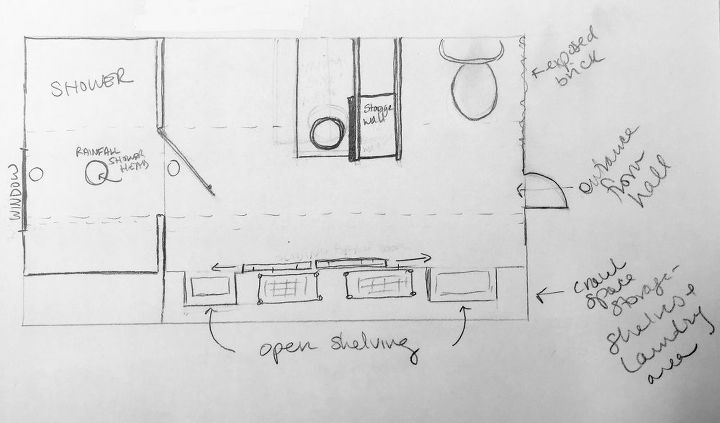
Here's a sketch of the old layout to bring it all together
Our clients' biggest requests were: 1- Ditch the tub and replace it with a shower that's more comfortable to use (and prettier, of course!). 2- Create a sink/vanity/mirror situation that doesn't involve bending backwards and bumping heads. We got right to work and spent a few days coming up with design ideas. Here's a sketch of what we came up with.
We moved the shower to the back of the room, which allowed us to double its size and install a rainfall shower head for our clients. Since one of them is 6'10", this was super important! We added lots of storage to the space, and turned the vanity so that our clients could stay out of the slopes when brushing teeth, etc. Here's how it all turned out. This is the new view looking into the bathroom.
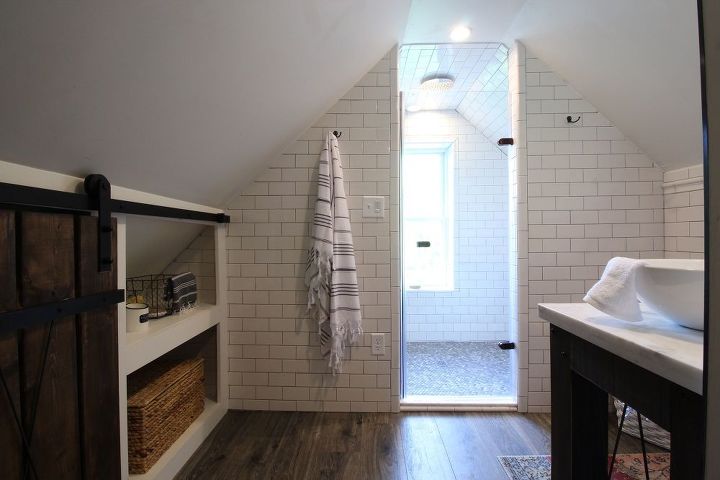
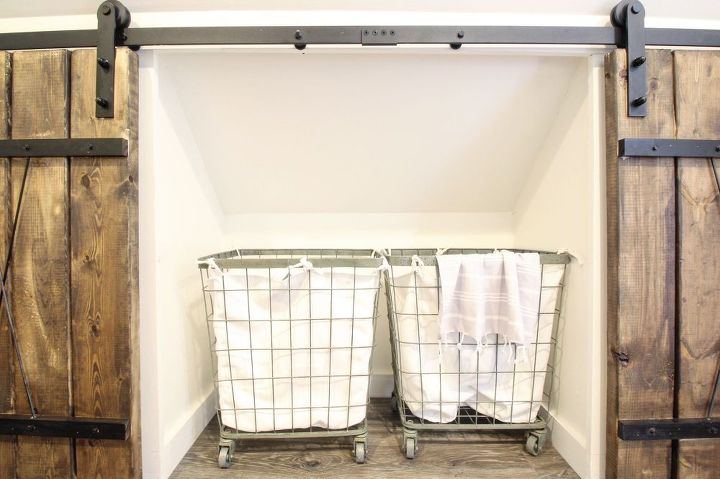
On the left side of the room, there was unused knee wall space that we turned into built-in shelves and a laundry nook. We customized everything to fit their unique space.

Bryan made these awesome mini barn doors, and left gaps in between the wood for air flow.
We found these perfect laundry carts that easily slide in and out.
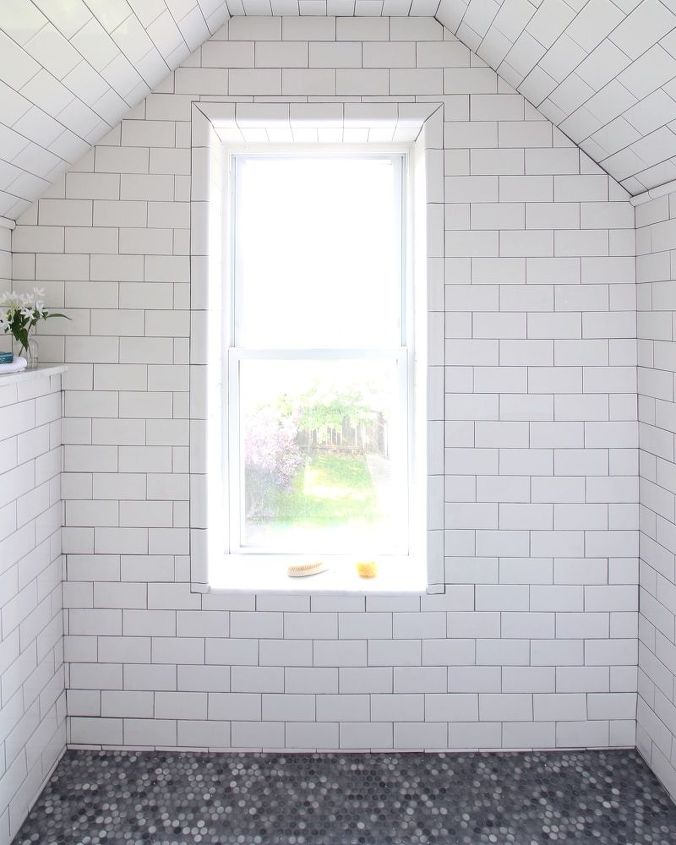
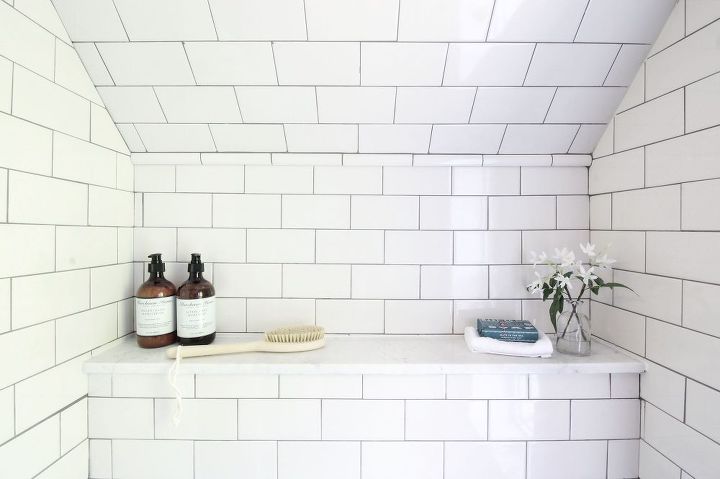
We tiled the shower walls with crisp, white subway tile and the floor with grey penny tile. We added marble shelves to tie it all together.
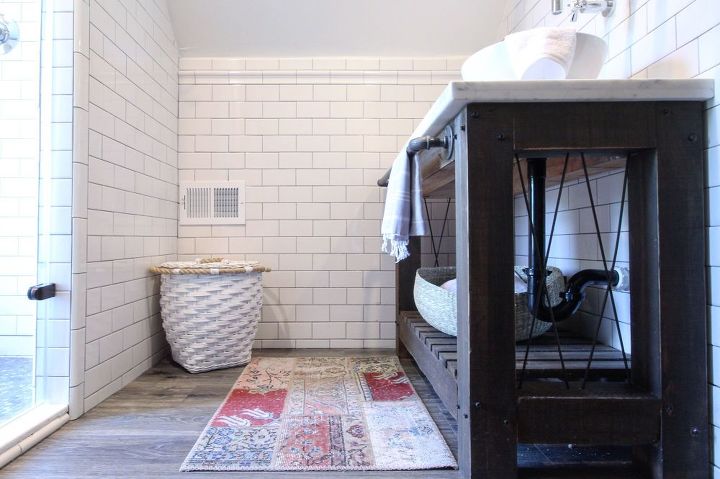
We replaced the old vanity with a custom vanity that Bryan built out of cedar 4x4s and pipe. We stained it with a mix of classic grey and dark walnut stain, and added a marble top that we cut and installed ourselves. We installed the sink off to the right so our clients wouldn't have to worry about bumping their heads anymore, and offset the mirror with a brass sconce.
We built in extra shelves to the dividing wall between the vanity and toilet. You can never have too much storage!
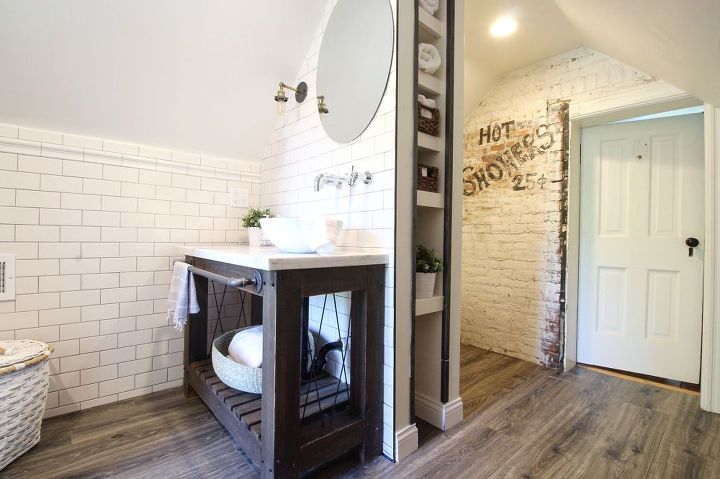
The brick wall was something we found during demo. We couldn't get all of the paint off, so we worked with what we had and hand painted a vintage sign on it.
Check out the blog for LOTS more details and photos of this project! Also, be sure to follow us on Instagram @beginninginthemiddle for updates on all of our projects.
Comments
Join the conversation
-
Beautiful! I have seen bathrooms that were in need of this renovation. I will definitely share this.
-
I have slanted walls also but mine start from the floor. I have no idea how to hang a mirror on the slant and my bathroom is small. I do hit my head also trying to wash my face and also the water goes off to the side of sink , never in it! If I did mirrors like shown, my face would be stuck right on mirror also! Just wondering. Don’t have a mirror up sg all.


Frequently asked questions
Have a question about this project?
So you remember the ratio you used for the stain?