


DIY Beaded Hanging Basket
5 Materials
$20
1 Hour
Easy
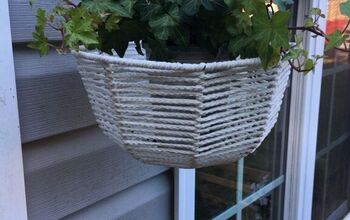
This week I had the exciting honor of participating in the Summer Blogger Challenge. For this season, we created projects using in Bloom beads by Bead Design. I went straight to the garden for my project, and updated an ordinary hanging basket with a splash of dazzling summer color!

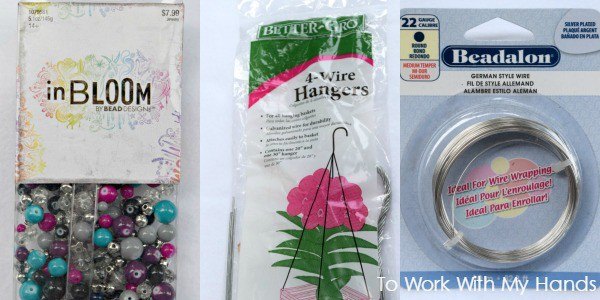
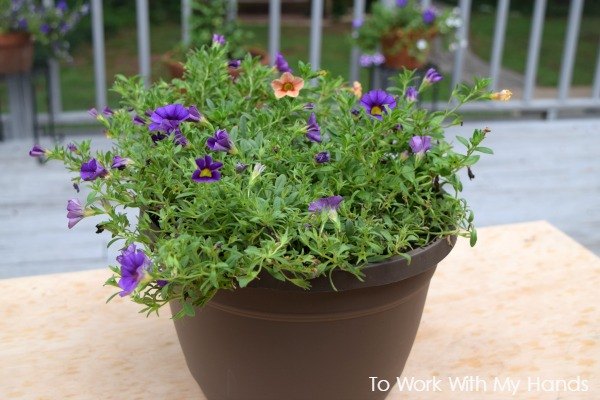
I started with an ordinary plastic hanging basket, a packaged wire hanger, a roll of 22-gauge jewelry wire, a pretty pot of Calibrachoa, and of course, the beads!
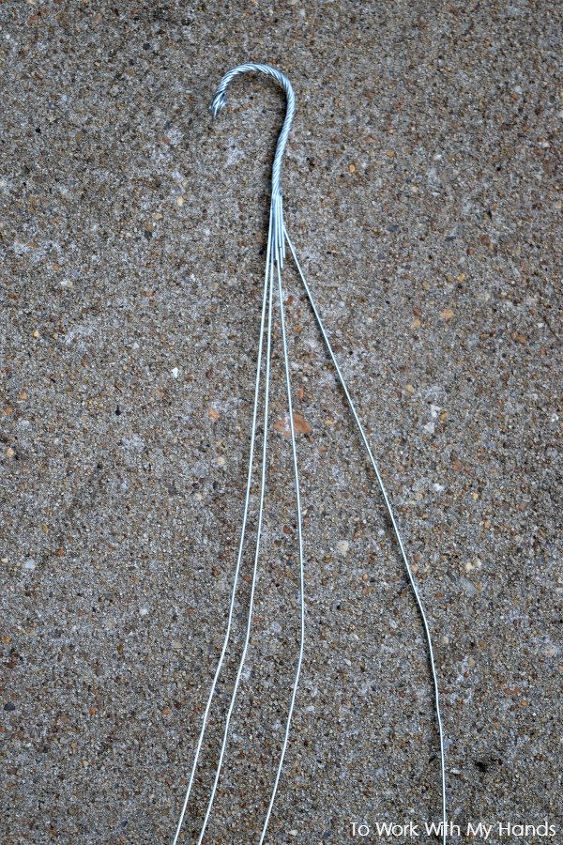
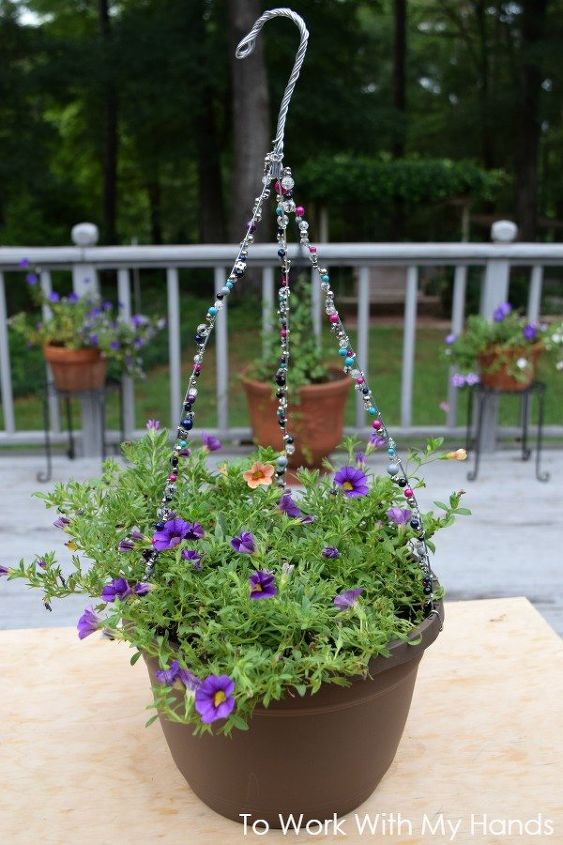
Because my pot only needed 3 wires for the hanger, I simply snipped the fourth one off.
The plastic pot had those really nice hangers that clip on and come off easily - without destroying the pot - so it was a breeze to take them off and prepare the new hanger. I found a chair and got comfy stringing beads. I chose a random pattern, so the work went quickly. This was the most time-consuming part of the entire project, but only took about half an hour. I strung enough beads to match the length of 3 of the hanger wires.
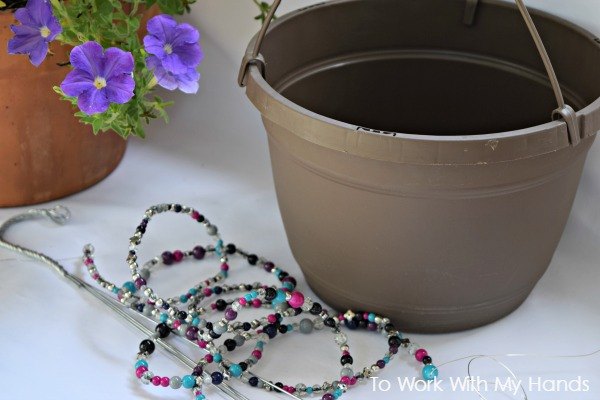
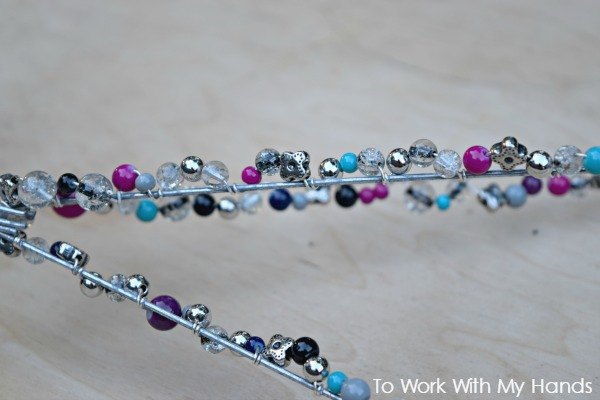
Next, I wrapped the strand of beads around the wires on the hanger, giving it a nice twist around after every third bead. This attached the beads to the wire hanger and kept them from sliding around along the jewelry wire. Stopping 2 inches below the end of the hanger wire, I twisted the jewelry wire around the hanger wire a few times to secure it, clipped the end, and repeated the process for the other two hanger wires.
Then it was time to fill the pot with flowers...
and attach the hanger by running the final two inches of bare wire through the holes on the pot rim, and twisting it into the inside of the pot.
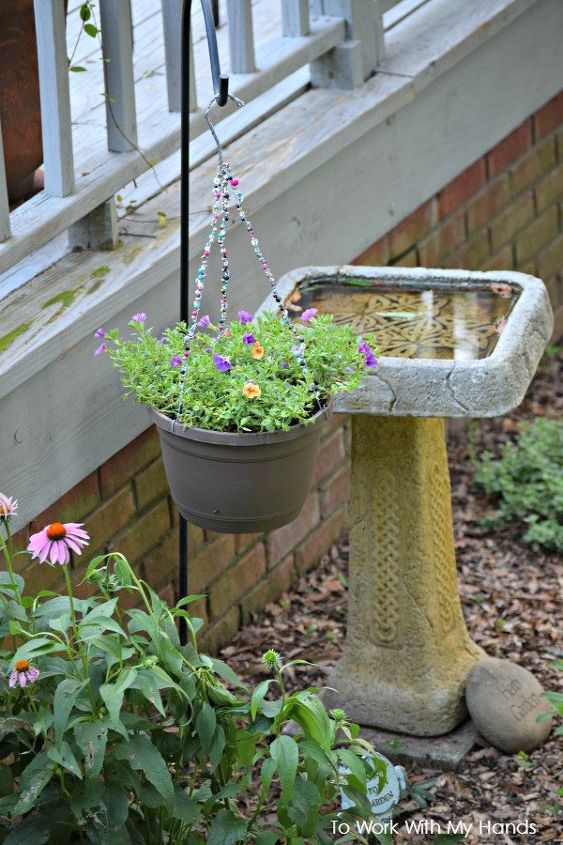
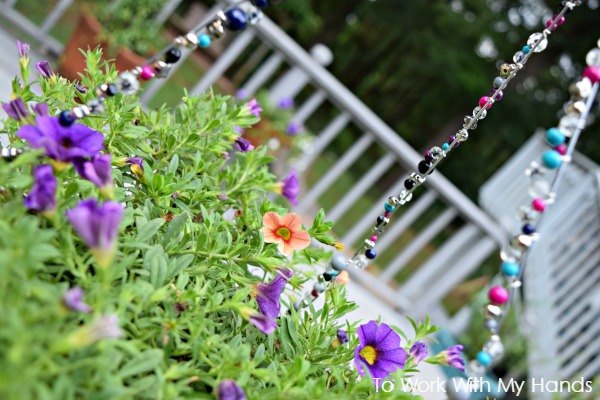
I loved how it turned out and the sparkly addition it lends to the summer garden area.
The best part of the challenge was taking a basic craft item and coming up with a fun and creative way to use it. I loved this challenge and because I joined 7 other bloggers to do it, I now have 7 more ideas for my extra beads! Visit the blog for snapshots and links to their fabulous projects too!
{
"id": "3876230",
"alt": "",
"title": "",
"video_library_id": "8565",
"thumbnail": "https://cdn-fastly.hometalk.com/media/2017/07/31/3876230/diy-beaded-hanging-basket.jpg"
}
{
"width": 634,
"height": 357,
"showRelated": true,
"noautoplay": ""
}
Resources for this project:
See all materials


Any price and availability information displayed on [relevant Amazon Site(s), as applicable] at the time of purchase will apply to the purchase of this product.
Hometalk may collect a small share of sales from the links on this page.More info

Want more details about this and other DIY projects? Check out my blog post!
Comments
Join the conversation
5 of 24 comments
-
Karen, I'm tickled that this is something even I am able to do and I will :)) but, I can't take my eyes off that birdbath ! Thanks , nice photo.
-
Nice! I need to use all the beads I have to make something. This is a really cute idea.


Frequently asked questions
Have a question about this project?