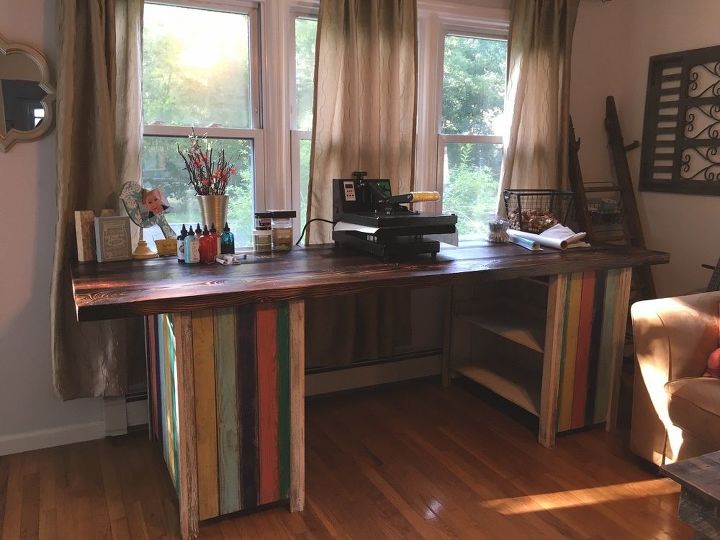
Pallet and Staging Plank Workstation

20 Materials
$60-75
2 Days
Advanced
Hey guys! Rob here! In our house we work with the space that we have. Our living room is also Court's office/studio, so I made her a tall desk out of a metal frame and an old door last year -- she also has a bookshelf that's packed out, a side table that is filled, 3 Rubbermaid cabinets and 2 Rubbermaid storage bins. Needless to say, Court has needed an additional work station for a little while now, so I came up with a design that is multi-functional and gives her extra storage.
Because I sort of jumped into work on this project, I didn't get a chance to take a supply photo so here is a list of the supplies I used:


-pallet boards (18)


-staging planks (4)


-miter saw


-table saw


-wood glue


-trim nails


-beadboard


-measuring tape


-clamps


-biscuit joiner/biscuits


-rubber mallet


-pocket screws


-palm sander/sandpaper


-torch


-brush sander (or grill/wire brush)


-satin Polycrylic


-Behr exterior flat acrylic paint


-Minwax paste finishing wax
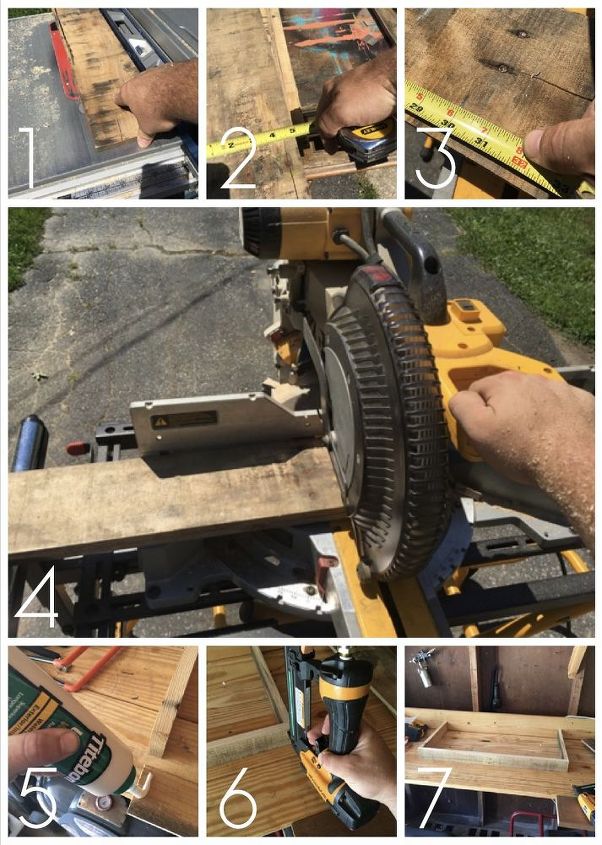
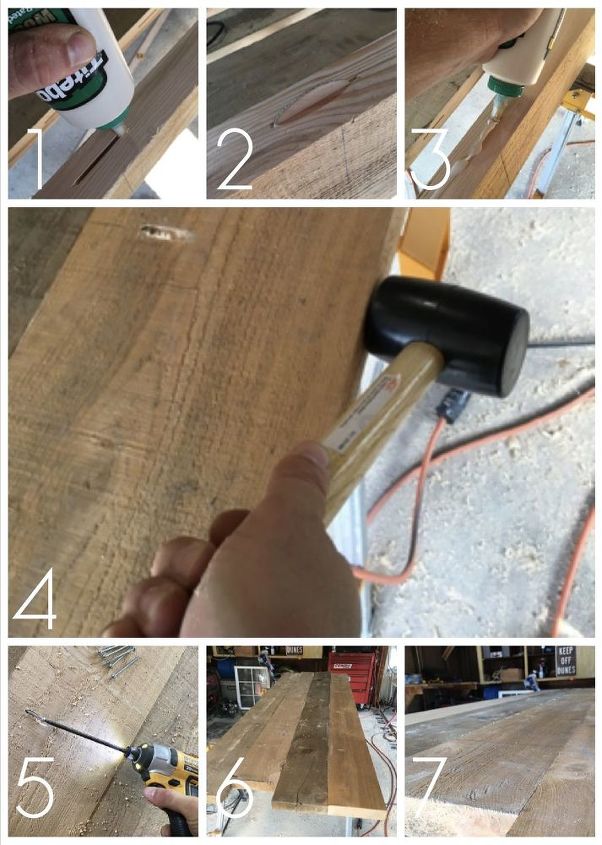
STEP 1: Make the shelves


(Photos 1&2) I knew I wanted my finished shelves to measure 30” wide by 15” deep for this project so I started using a table saw to rip 18 pallet boards to 5”.


(Photos 3&4) Then I cut all 18 boards to 30” in length on a Miter saw.


(Photos 5-7) After that, I needed to cut the frames that the shelves would sit on. Each frame consisted of a 30” piece and two 14” pieces, and I assembled them using wood glue and trim nails.
Next, I fastened the shelves to the frames also using wood glue and trim nails. In total I made 6 shelves.
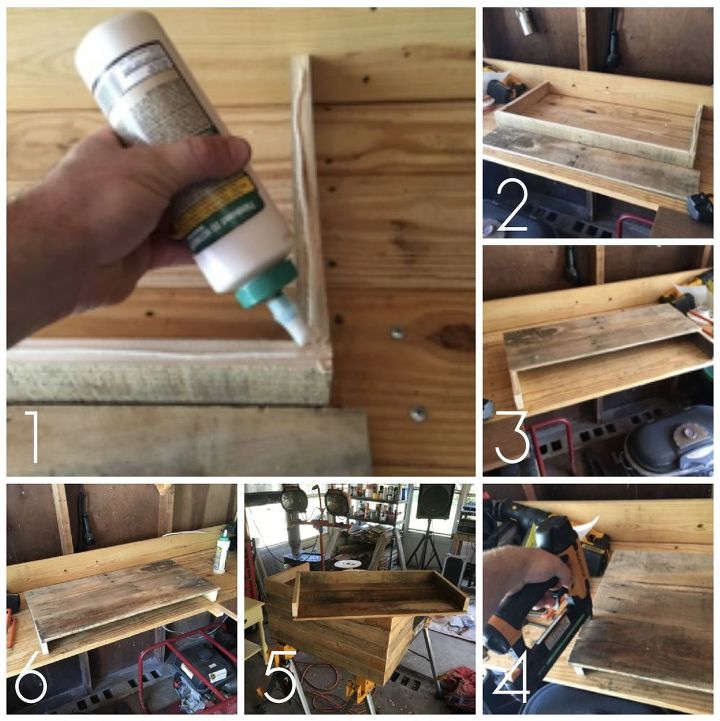
STEP 2: Assemble shelves into bookcases


To make the bookcase I used beadboard from some old storm shudders I had laying around.


After disassembling the shudders, I cut my boards to 30” long.
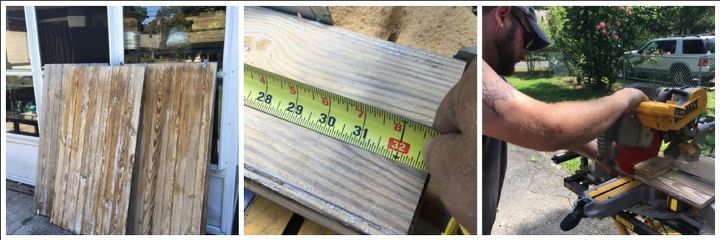
(Photos 1-4) Once I had all of my wood cut it was time to assemble the shelves. I started by laying two shelves on the ground and clamping a piece of beadboard to them to hold it together. Then, I laid out the remainder of the board I would need to make up that side. I scribed the last board and ripped it on a table saw to make it the right width.


(Photos 5&6) Then I glued and nailed the board to the shelves.


(Photos 7) After the one side was assembled, I flipped it over and repeated for the other side...Bo decided to help me out here.
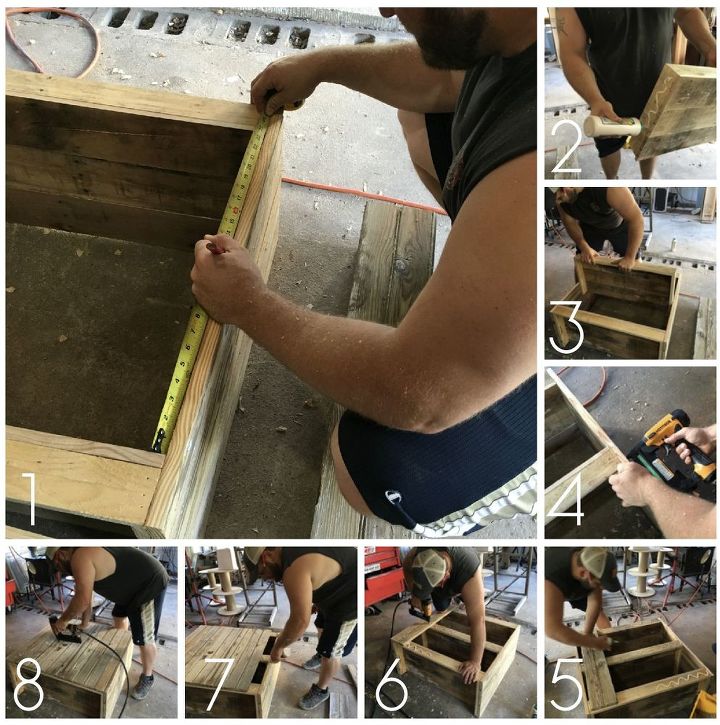
(Photos 1-4) Next, I laid the bookcase face down and marked where I wanted to middle shelf to sit. Then I glued the sides of the shelf, slid it into the bookcase, and nailed it in place.


(Photos 5-8) With the bookcase still face down I glued the back of the shelves and added beadboard to form the back of the bookcase.
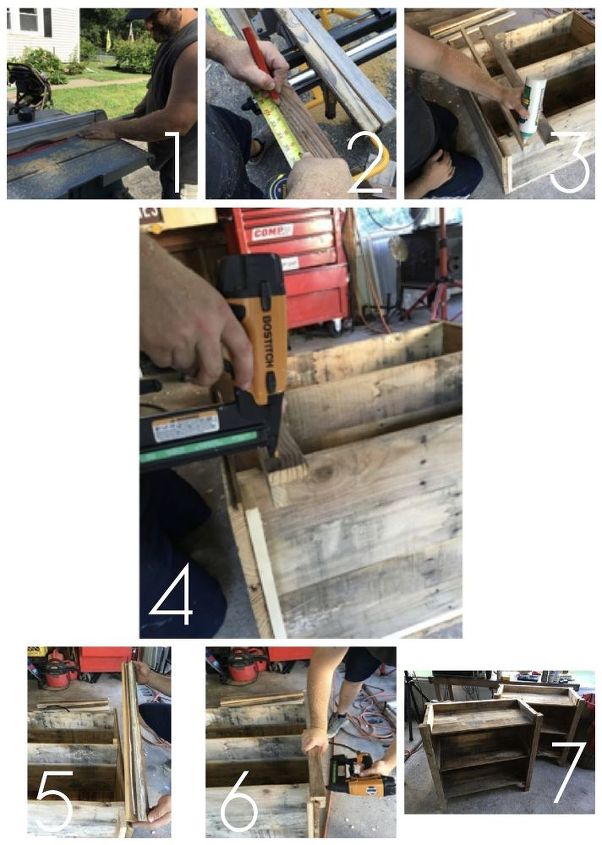
(Photos 1-4) Then I made legs for the bookcase using a 2” rip and a 1 ¼” rip, both cut to 32”. I assembled them together for a “corner” using glue and nails.


(Photos 5-7) I then glued and nailed the legs to the corners of the bookshelf.
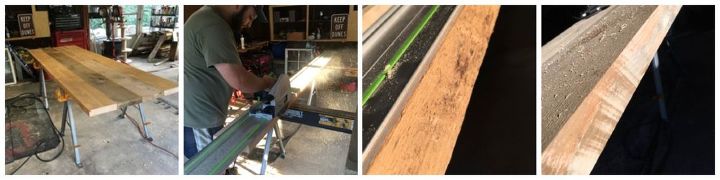
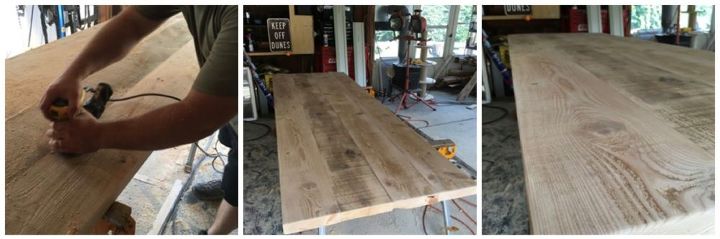
STEP 3: Make the tabletop


To build the table top I used 2”x9” staging planks that I bought from a local building supply.


Using a track saw, I cut the edges of the plank to create a straight, joinable edge. I understand most people don’t have a tracksaw readily available, but you can substitute a regular skillsaw and a straight edge or long level to get nice, straight cuts.
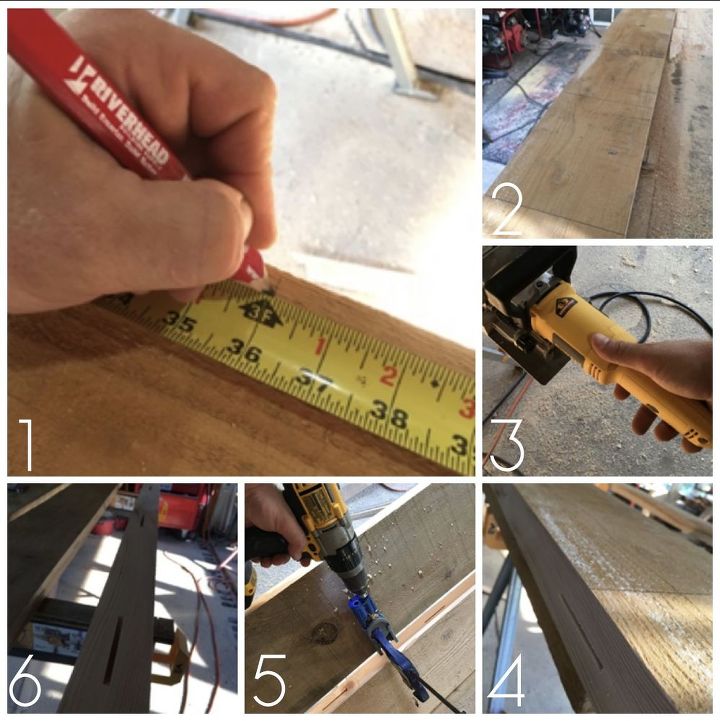
Typically I would just glue the edges of the boards and clamp them together at this point to make the table top which would require letting everything set up overnight while the glue cures. Since I am in a time crunch and need to finish the same day, the following steps were added to keep the project moving along. I ended up using a biscuit joiner and pockethole screw to hold the work together.


I marked each board every 12” to lay out where I would insert the biscuits, then I cut the slots with a biscuit jointer. After that, I drilled the pocket holes on the side of the board that would be facing down once the table is assembled. Ensure that your pocket holes won't interfere with the biscuits.
Then, I put glue in each slot and inserted the biscuits. Once the biscuits were inserted, it was time to glue the edge of the board.


Next I laid the boards next to one another so that the biscuit holes were aligned. Using a rubber mallet, I beat the boards together until the seam was tight. After that, I added the pocket screws.
Once I had completed my joinery, I cut the ends of the table top.
STEP 4: Finish the tabletop
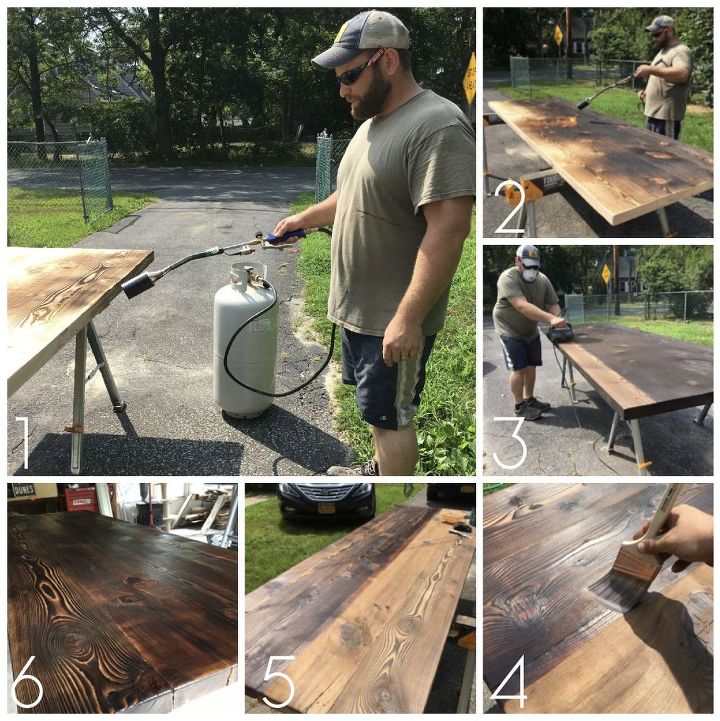

To finish the tabletop, I start by sanding rough and uneven spots with a palm sander using 60 grit media. I also used the palm sander to ease the edges.
NOW THE FUN PART!


I decided to get an old worn look, so I knew I was going to torch the tabletop. This is one of my favorite finishing techniques; it really brings out the grain character of the wood, and I get to play with fire.


WARNING: FIRE IS DANGEROUS. DO THIS IN AN OPEN AREA AWAY FROM ANY AND ALL STRUCTURES, VEHICLES, SMALL CHILDREN AND PETS. ENSURE THAT THERE ARE NO FLAMMABLE LIQUIDS IN THE AREA.


(Photo 3) After torching, it is now time to brush the charring of the wood. I use a Makita brush sander but this can also be done with a grill brush (this is more time consuming but also a very inexpensive).


(Photos 4-6) The final step to finish is to add three coats of Satin Polycrylic Finish. I chose this because it is water based, easy to clean up and is the clearest finish available.
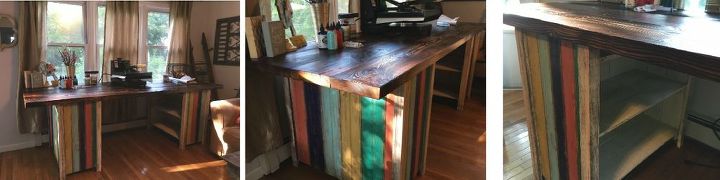
Court absolutely loves her new work station! She did all of the painting on the bookshelves using samples of Behr exterior flat acrylic paint -- her method was doing a quick whitewash-method where she lightly coated the beadboard on the outside of the bookshelves, then once dry, quickly and lightly sanded, then applied a thin coat of Minwax paste finishing wax using an old rag. She did the corners and shelves with a vintage white.


We left the workstation in 3 pieces because of how heavy the entire unit is. The cool thing with the bookshelves is she can have them facing in or out. She's going to grab a bunch of wire baskets to store all of her work stuff and we're considering installing an accordion gate or something like it to the front in order to keep Bo out. All in all, I got major brownie points with this project!
Suggested materials:
  • Pallet boards (18)   (on hand)
  • Staging planks (4)   (local building supply store)
  • Miter saw   (on hand)
See all materials
Frequently asked questions
Have a question about this project?
Comments
Join the conversation
4 of 20 comments
Next