


Painted Modern Chair With Gold Foil

by
Zest it Up
9 Materials
We found these chairs at a garage sale and gave them a little TLC before placing them in my front courtyard! Time to turn these into a bright and cheerful pop of color for some curbside appeal!
Photo cred: Anya, http://www.anyamcinroy.com/home
URL: zestitup.com
Photo cred: Anya, http://www.anyamcinroy.com/home
URL: zestitup.com
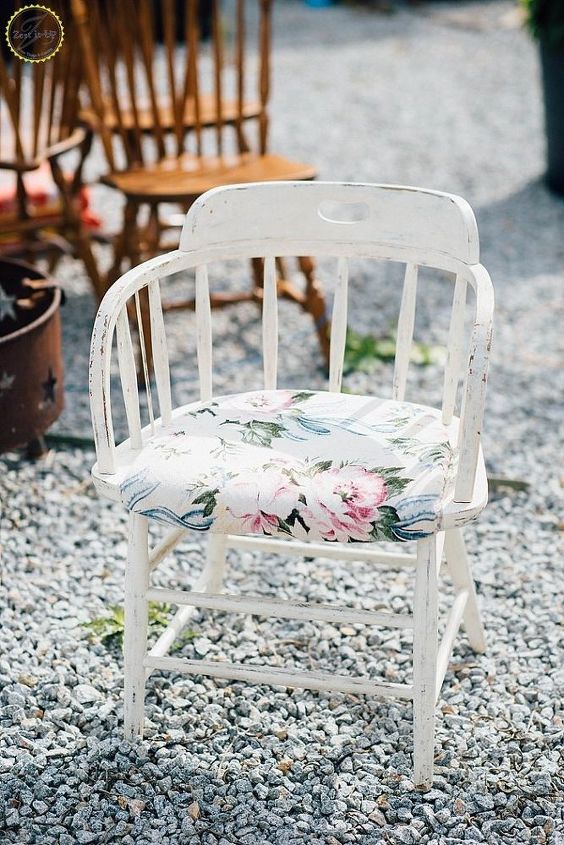
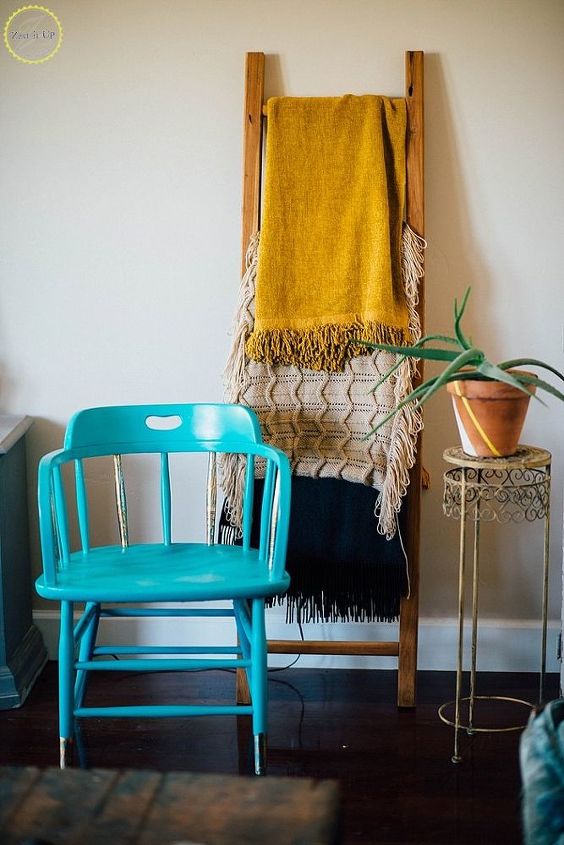
Here is the original chair that I snagged at a garage sale. I love the barrel shape of these cuties! There are two chairs even though these pictures only show one.
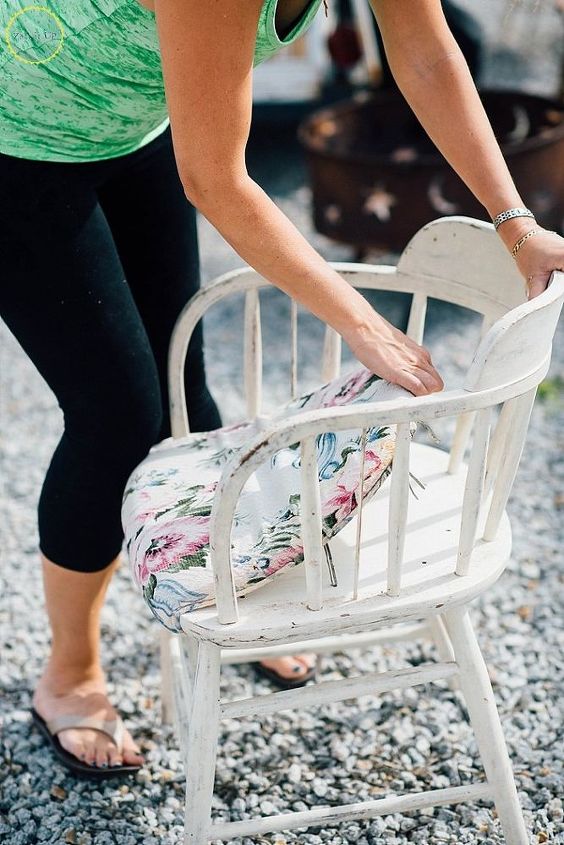
Remove the creatively placed floral pillows that somebody decided to attach using long metal brads! Haha! Obviously these were applied during previous DIY project!
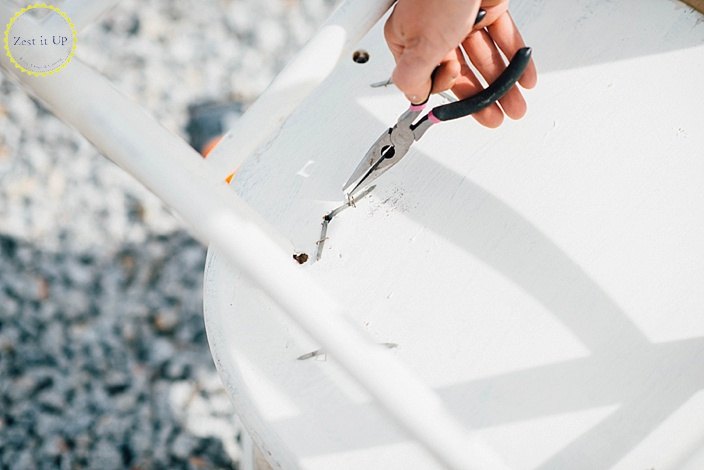
Make sure to remove all the nails using the needle nose pliers.
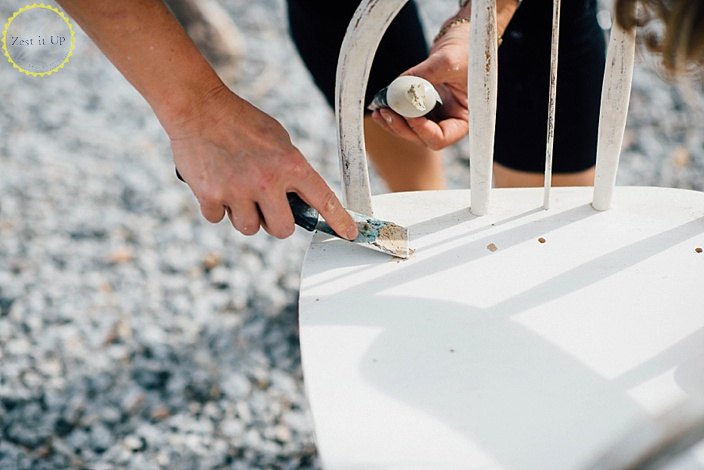
I decided that a bit of wood putty would cover up the unfortunate holes and give my chair a much cleaner appearance. Make sure to let the putty dry. You do not want any moisture under your paint coat!
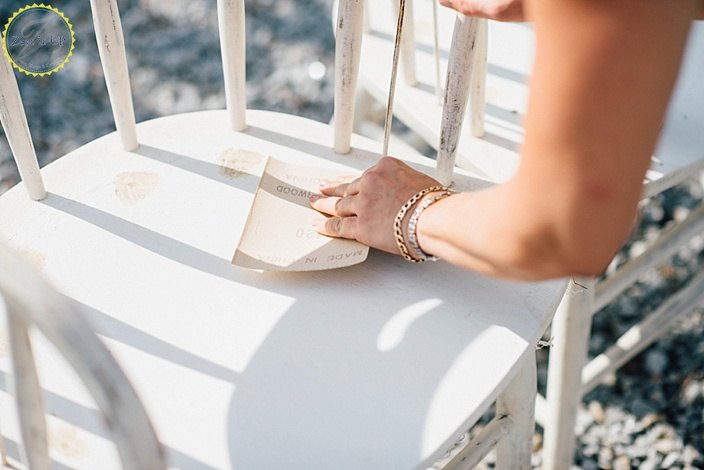
After filling the holes, I sanded the putty down to make sure they look pretty and smooth in the end!
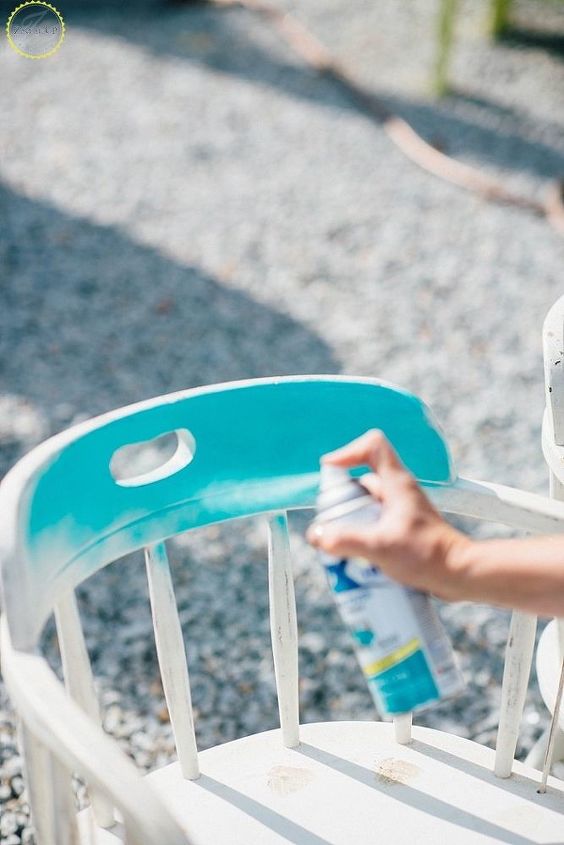
Since these chairs were destined for my front courtyard, I wanted to use Rustoleom's Paint + Primer solution. You can choose any color you want!
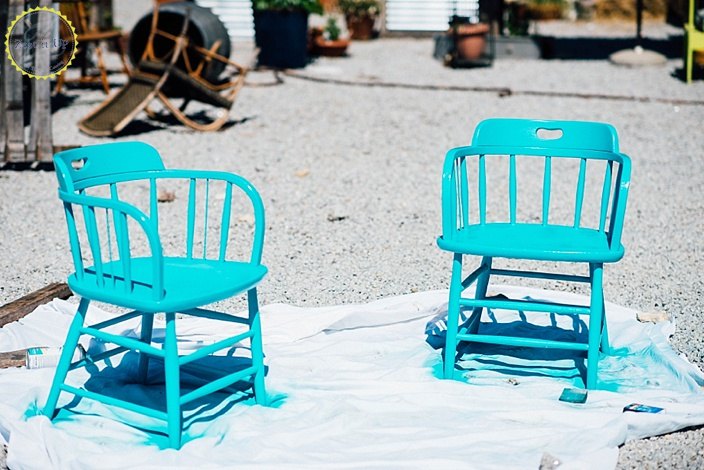
Make sure that you create multiple, light layers of paint. The result will be a lovely coverage without any yucky drips. Give the paint time to dry between light layers. I love the gloss finish of this aqua blue!

Now, time for a little fun. With such a cheerful color, these chairs were begging for even more fun. Enter my desire to play with gold foil. Could I have simply sprayed the feet and some of the spindles gold? Absolutely! But, this awesome gold foil from Martha Stewart (readily available at Michael’s Craft Stores), was begging for some experimentation. I had never done foil before, and the feather-light sheets of metal were just too tempting. Besides, who could resist that almost peacock texture to this foil?
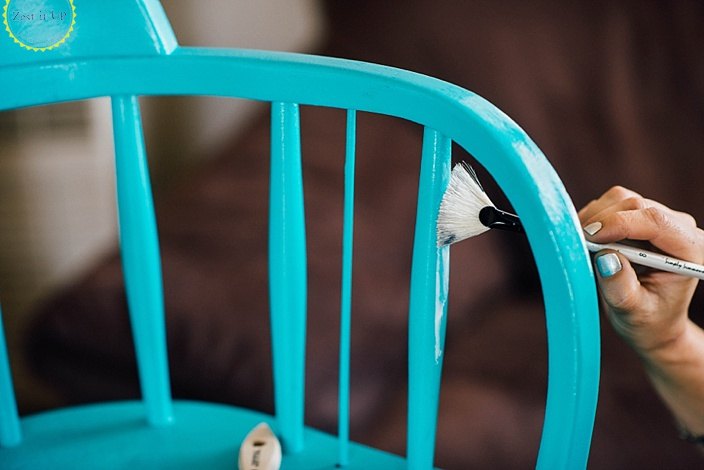
I started by applying the adhesive to a small area at first. Let it dry for a few seconds, until it becomes nice and tacky.
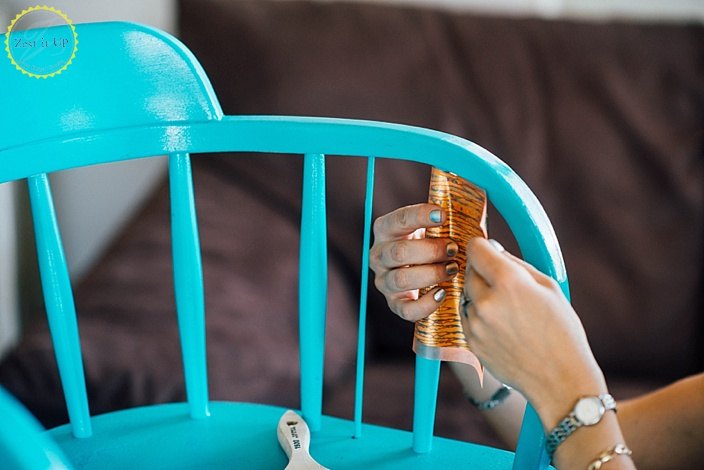
Grab a piece of paper-backed foil, and get ready to carefully press it to the adhesive and give it a gentle rub. Since I was working with such skinny spindles, I found it easier to cut the foil down to size a bit. As long as the foil is backed with the paper, it is easy to cut.
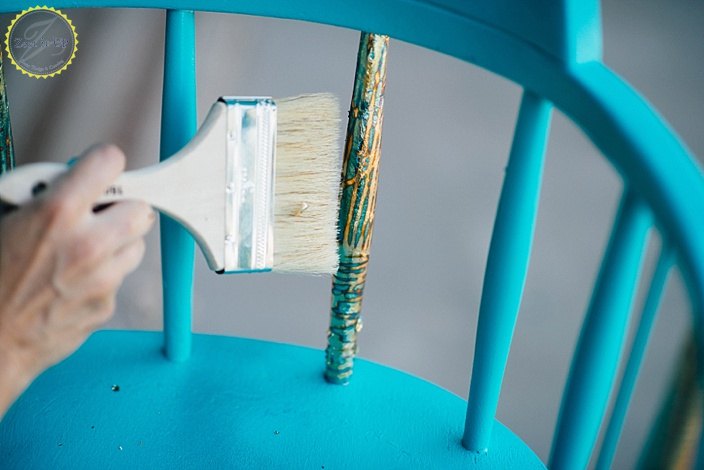
Let the foil dry in place and then take a soft brush to gently brush away any loose pieces and to burnish the metal.
The last step would be to give it a spray of clear coat to protect the foiling. This is optional, but since these chairs will be outside, I figured a little extra protection is always welcome!
Want more details about this and other DIY projects? Check out my blog post!
Comments
Join the conversation
2 of 22 comments
-
Beautiful!
-
I love that colour. It's so warm and vibrant. The gold really sets it off. Beautiful.


Frequently asked questions
Have a question about this project?
pls, what means TLC? thanks in advance!