


Make an Easy Wooden Cornice

I recently started trying to figure out what my vision is for our next home. I know that I want to try and stick with the character that the house already has (it’s a 112-year-old farm house) but just put some life back into it without it being just a mish mosh of random stuff. It’s exciting to think of starting over on a new “canvas” but with that, I want our new home to be classy and sophisticated, yet cozy and represents us and who we are. One thing that I’ve decided on is new window treatments; I don’t want to take my current window treatments with us (especially the cheap curtain rods) so I’ve decided that in most of the rooms at the new house, I’ll likely make window cornices. I’ve seen them around as padded pieces with a patterned fabric and I still may stick with that concept in some of the rooms, but overall, I love this simple look which will allow me to have more fun with the curtains themselves.
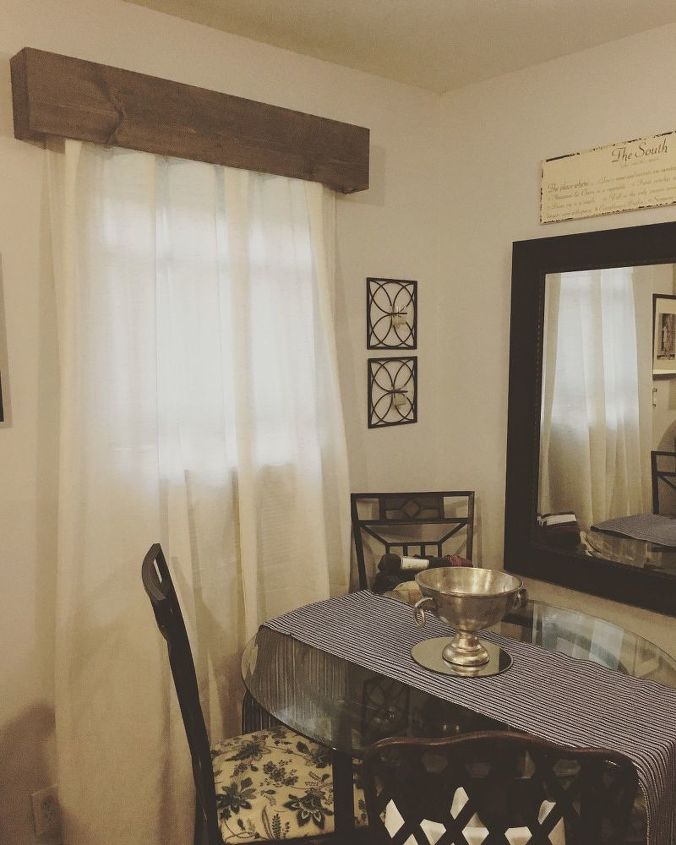
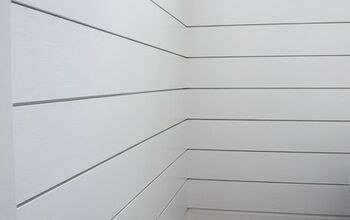
I think this cornice livened up my "dining corner" in our kitchen and added a classy touch without being over-the-top.
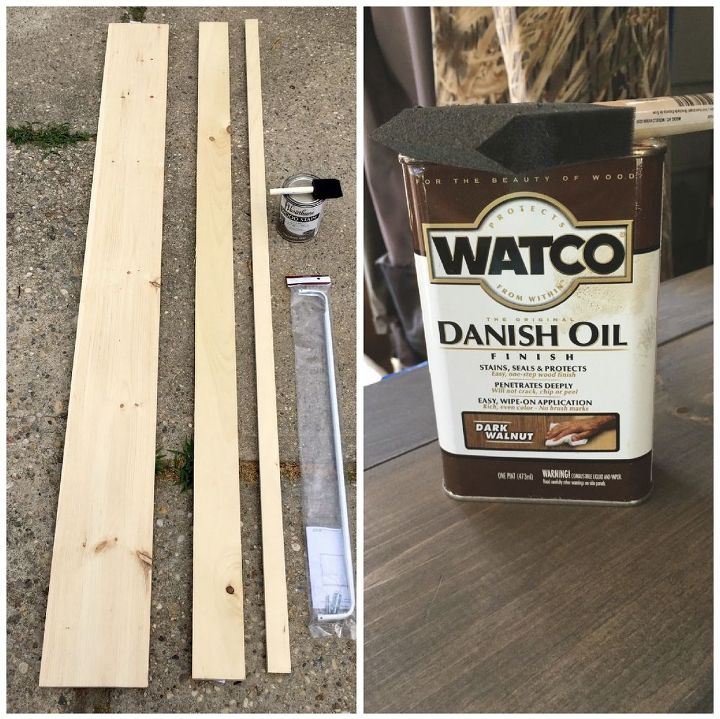
SUPPLIES:
-1x8-6 ft. common board -1x4-6 ft. common board -1x2-6 ft. common board -weathered gray stain -sponge brush -Danish oil -measuring tape -pencil -curtain rod Not pictured: -fine grit sandpaper -chop saw -Kreg pocket-hole joiner kit (with screws) [alternative: brackets and screws]
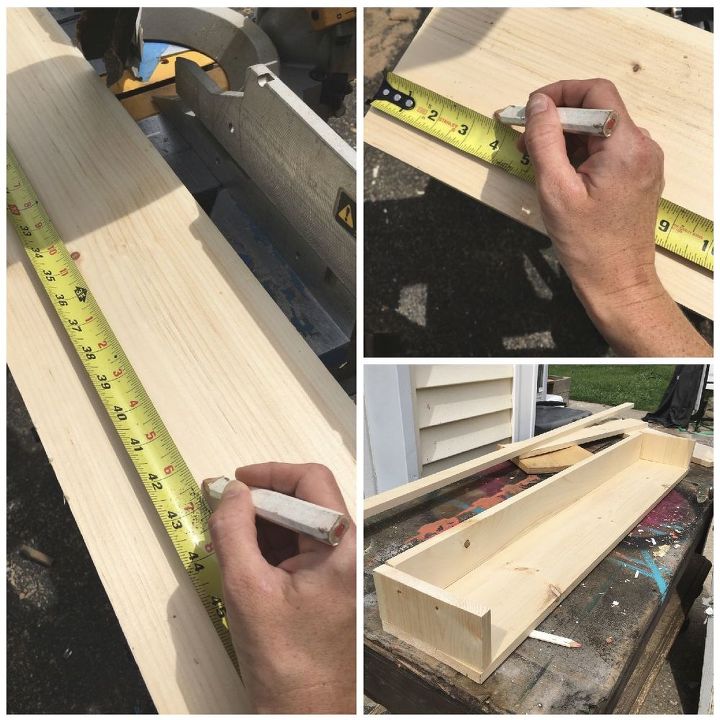
STEP 1: Measure window, measure wood & cut Wood
First thing is first—I measured my window from left to right of the CASING and added 6” to my measurement. *Note: if you don’t have casing around your window, just measure the width of the window itself and add 6” to the number you get. The casing around the window in my [current] kitchen is 36.5” wide so I cut my 1x8 piece of wood at 42.5”. This will be the front of my cornice box. Then, it was time to cut what would be the sides of my cornice box. I took what was left of the 1x8 board I had just cut my front out of and cut TWO (2) pieces at 3.5” each. After that, I laid the front piece of my cornice box down, sat the two side pieces up and measured just inside the 3.5” sides from left to right. Then, I cut the 1x4 board and the 1x2 board to that same measurement. *Note: the 1x2 is only going to be used to support the entire cornice box.
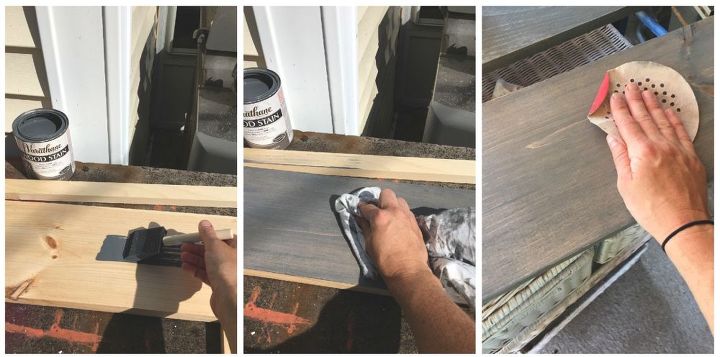
STEP 2: Stain wood pieces
Next, I finished all of my boards with weathered gray stain using a sponge brush and rubbing off the excess with a rag. I wanted a shabby chic look and I love gray as a nice neutral, however, I didn’t feel like it was dark/rustic enough so….
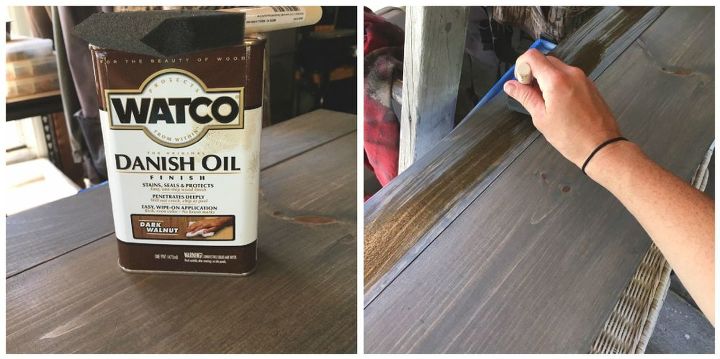
I used a sponge brush and quickly applied a few streaks of Danish oil, hoping it would darken the wood up without it being TOO dark. It didn’t make a huge difference but I could tell that it did, in fact, dark up the gray just a bit. Before adding the Danish oil, I felt that the wood was a little more on the slate blue side.
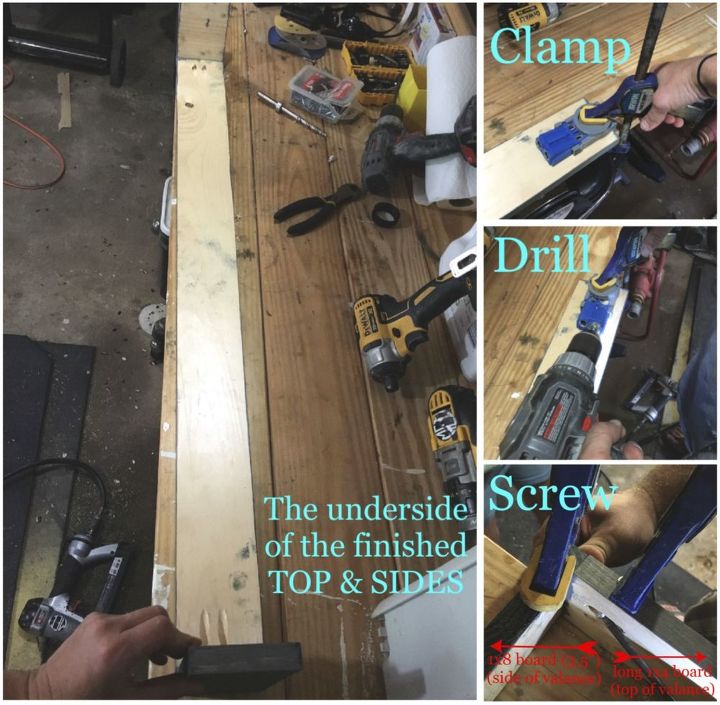
STEP 3: Join top & sides of cornice
*Disclaimer: I will try my best to explain how we did Steps 3&4 but it’s very difficult to put into words. Please feel free to comment should you have any questions! After my stain dried (with the help of Rob), I started putting together my cornice box. He suggested I first join the top and the sides of the box so with his guidance, I clamped a Kreg jig pocket-hole joiner onto my 1x4 board and the work bench in order to keep them still. Then, using the joiner, I drilled two holes on each end of the UNDERSIDE of the 1x4 board and screwed in 1.5” screws, going from the inside corner of the 1x4 where I drilled the holes, into the 1x8 short pieces (these were the two 3.5” pieces).
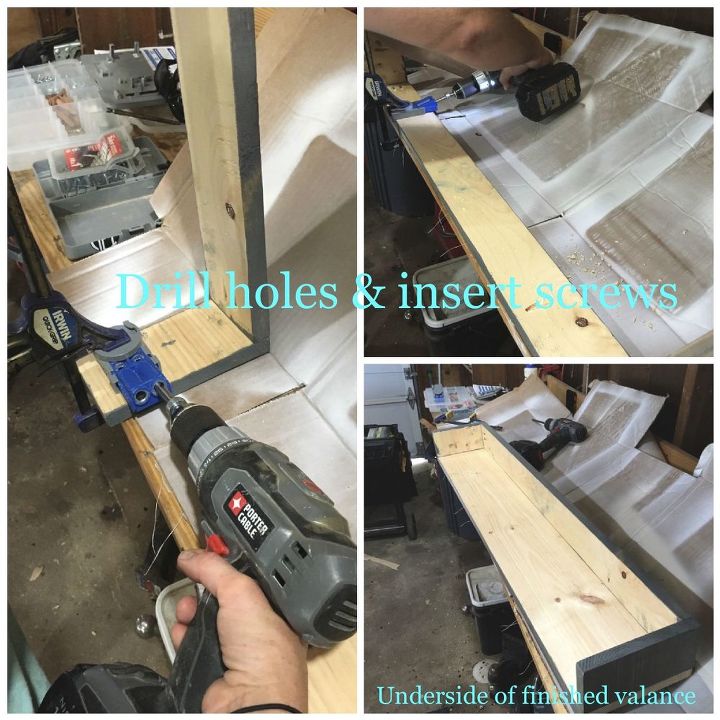
STEP 4: Join front of cornice
Next, Rob and I repeated the method of step 3, however, we stood the finished product of step 3 up on each of it’s short sides and drilled two holes from the inside. Then, we drilled three (3) holes down the length of the side farthest from us (see top right picture to see placement). Now, the cornice box was officially complete and we just needed to install it.
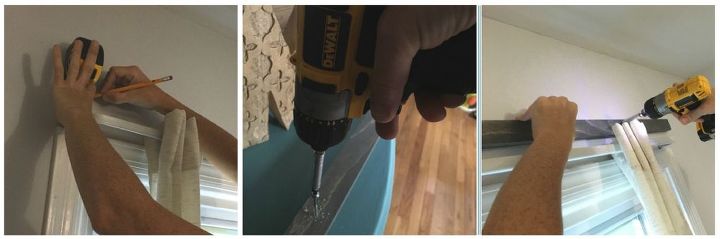
STEP 5: Install the curtain rod and hang
Finally, I installed the curtain rod according to the instructions that were included in the package. Then, I measured from the top of my window casing how far up I wanted my cornice to hang from and marked the wall, on the left and right above my casing. Next, I started the screws on my 1x2 piece of wood so that I would haven't to struggle with it overhead. Once the screws were started, I put the 1x2 board on the marks I had made on the wall, centering it to my window casing, and finishing drilling the screws into the wall.
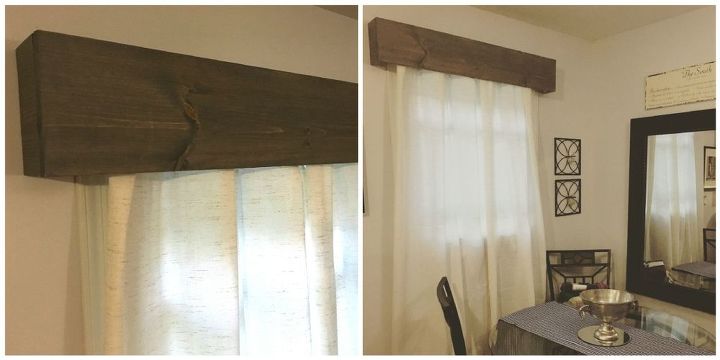
I am sooooo happy with how this turned out! Knowing how fairly simple this cornice was to make, I definitely will be making more for our new house.


Comments
Join the conversation
-
Oh, wish some of you girls lived close...I took my cornices from another house and did not like them in this'n......???? Have 2 wide and 5 not so wide...Even the thrift store would not take them..They were professionally made and most people do not know what a cornice is {when I had my yard sale..} Just don't know what I will do with them...They are down to "freebies" now....Maybe outdoor planter boxes, if I turned them upside down?
-
Really suits your space. Totally “for me.”


Frequently asked questions
Have a question about this project?
how to fasten to the wall?