


Easy DIY Drawer Organizer
I recently repainted and refinished a vintage ladies writing desk that I had rescued from the local Goodwill. It turned out beautifully but to really call my desk complete I thought it needed some organization.
I could just envision any pens or pencils getting lost in the back of the drawer as soon as the drawer was shut. This desk needed dividers (and something to hide the splotch in the bottom of the drawer).
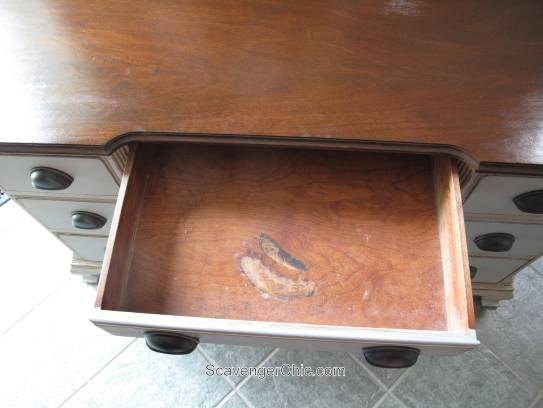
Before I went any further, I decided to line my drawer with this vintage looking wrapping paper I picked up from Home Goods. The wrapping paper protects the wood and covers my splotch.
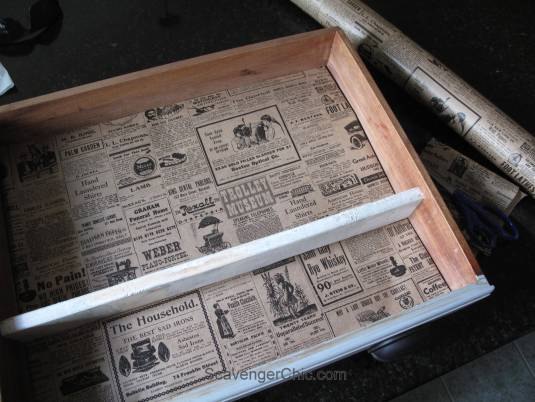
You can sketch out how you want your dividers or just wing it as you go along. I prefer the winging it method.

Working off of the first horizontal board, I kept cutting wood pieces to fit. Just think of it as one big puzzle. Sand your pieces as you go.
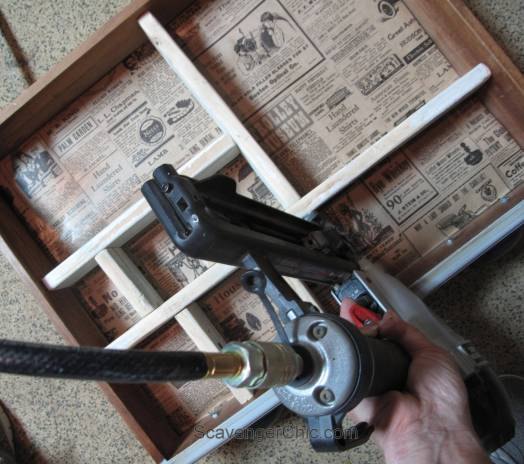
If you don’t have a nail gun, your pieces could be glued into place but having a nail gun makes this project super easy. Just a couple of finishing nails wherever there is a joint. Do all your nailing while the boards are still in place.
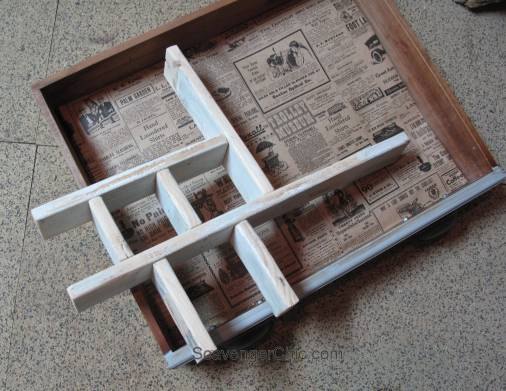
Now that my dividers are all attached, it can be taken out of the drawer in one piece. I used this opportunity to do a few more nails on the underside to make sure each joint had at least 2 nails.
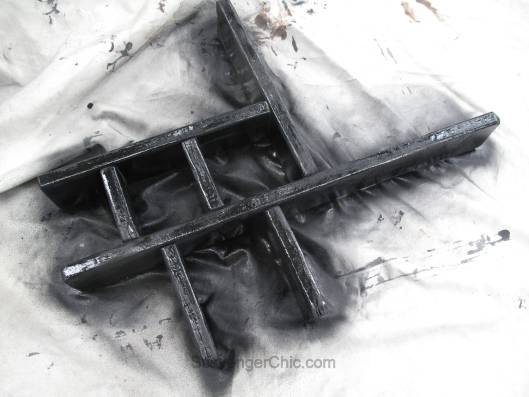
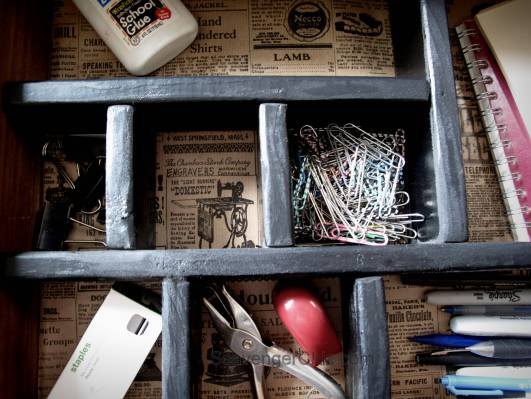
A quick spray paint and this drawer divider was complete. I chose black to match my wrapping paper but any color you choose will be perfect if you even decide to paint it at all.
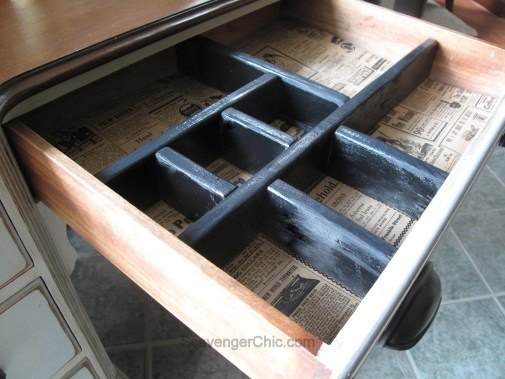
The divider fits snug, but it’s not glued in so if I ever need to change the paper or remove the dividers it would be easy to do.

Want more details about this and other DIY projects? Check out my blog post!


Frequently asked questions
Have a question about this project?