


Putting up a Building for a Solar Installation

by
Rhonda S
9 Materials
$15000
12 Months
Advanced
We moved this functional but small building out of the corner of the property to make space for a building we built DIY from used oilfield pipe. We've constructed it in stages, and have done almost all labor ourselves. These early stages took nearly a year to complete.
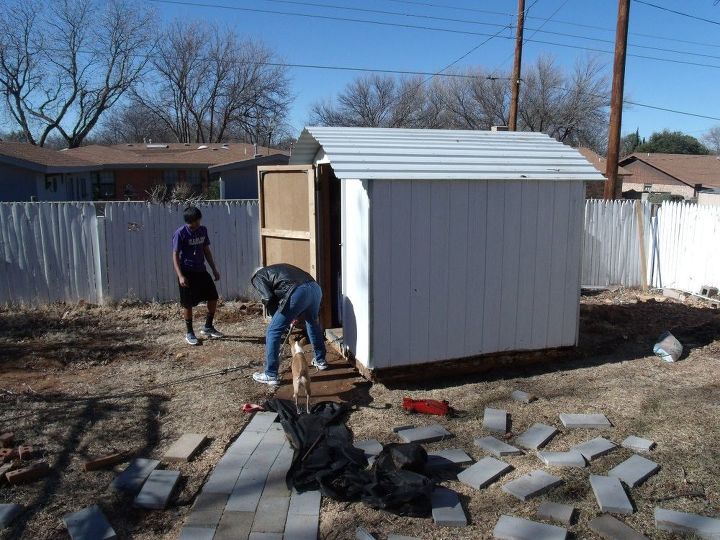
Husband and son use chains and a come-along
We knew what we wanted to do, but the first step was to move and sell the skid mounted building that occupied part of the footprint. It was a good little building, but not big enough to hold the panels we had in mind. So we pulled it to the alley, and the buyer came to load it onto his truck to haul away.
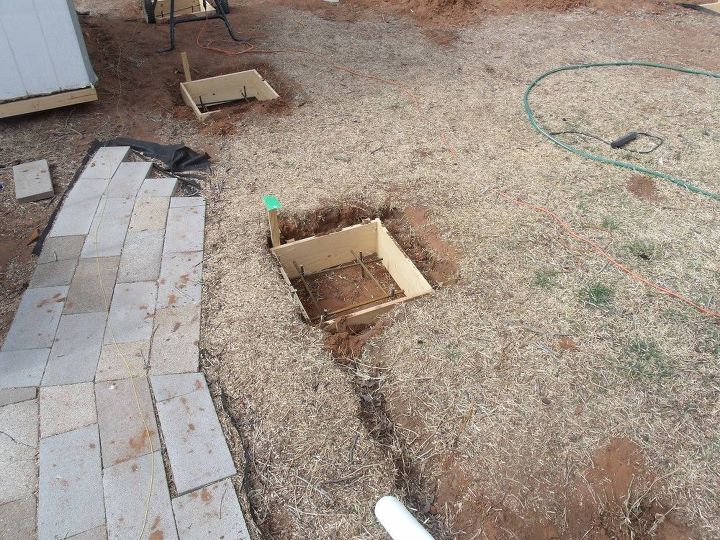
Boxes built out of 1 x 6s are below grade.
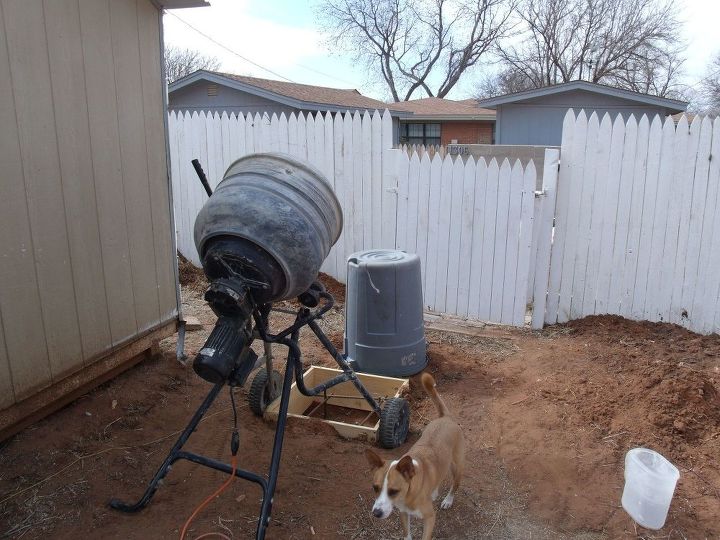
Step two was to dig footings and use a portable concrete mixer to pour concrete boxes that would anchor the posts that support the weight of the roof. We used "quickcrete" for this portion to make sure we had the proportions right. We could have mixed the cement, sand, and gravel less expensively, but getting this right was crucial.
We put rebar in the boxes to reinforce the concrete, and buried heavy J-bolts to mount the plates to which the posts are to be welded.
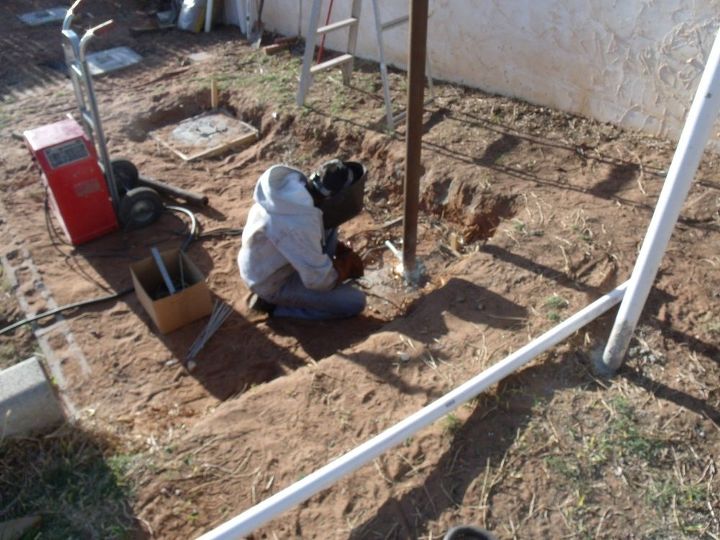
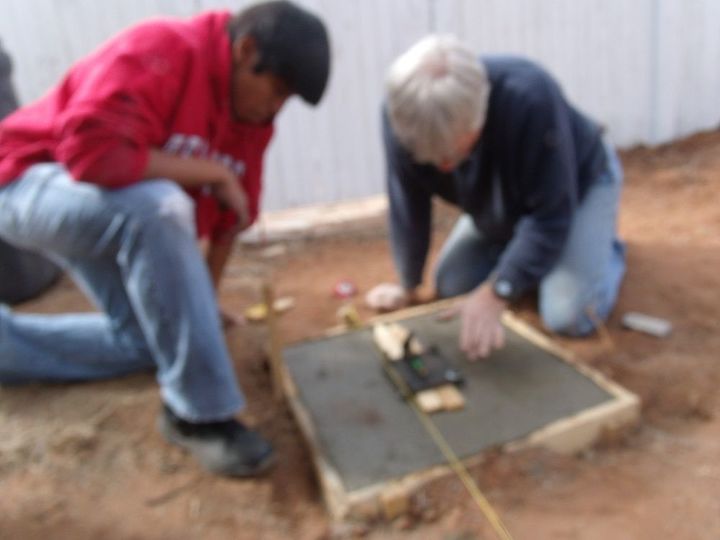
We worked at leveling out the area where the slab would be poured, and then while we worked together to hold a post plumb and in position, my son tack-welded the posts, then we welded each post solidly to the base plate set earlier.
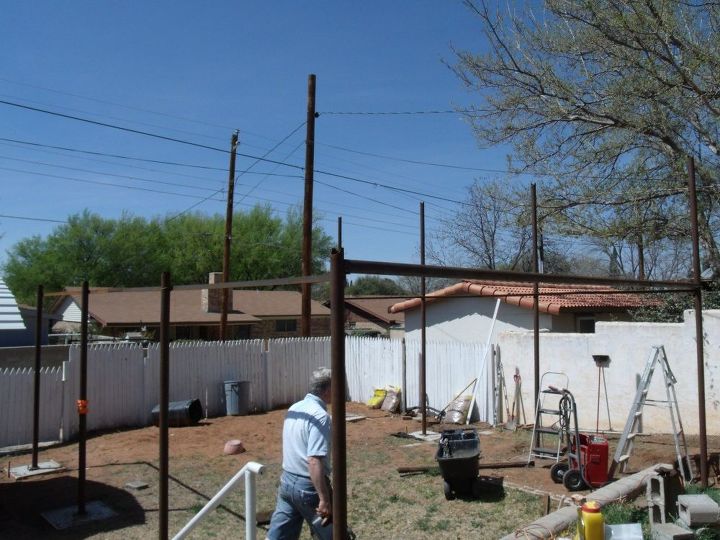
The six posts are in. Angle iron is welded to tie the posts together. It isn't the structural beam, but it makes working on those beams easier. Notice that the posts on the north are much taller than the posts on the south. This is to establish the shed style roof line. The angle is to take advantage of the sunshine here in Texas.

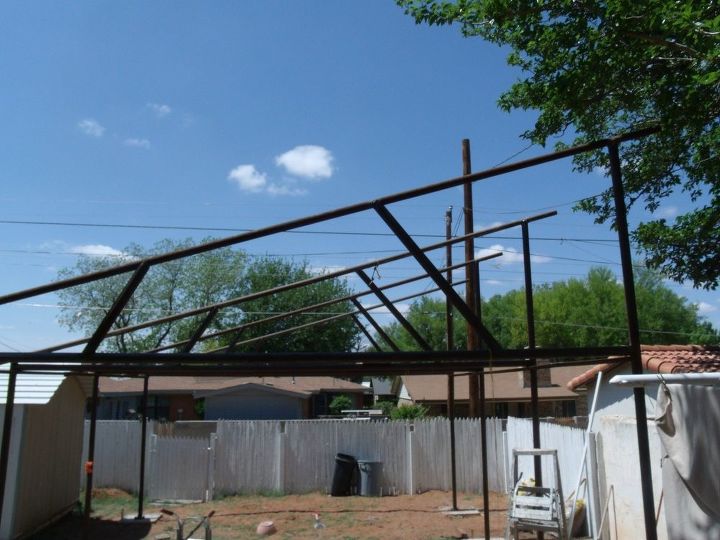
After the uprights and cross beams were in place, we had to brace. The uprights had u-shaped notches in the tops to accomodate the shape of the round cross beams. In addition, we put level beams above those temporary angle iron pieces to provide the strength the building would need. You can see the first indications now of what the shape of the building will be. There is still lot of bracing to be done.

In addition to the bracing, we put in c-shaped steel channel called purlins to work as the surface to which the siding and the solar panels could be attached. We used 4 and 6 inch purlins, welded in place.
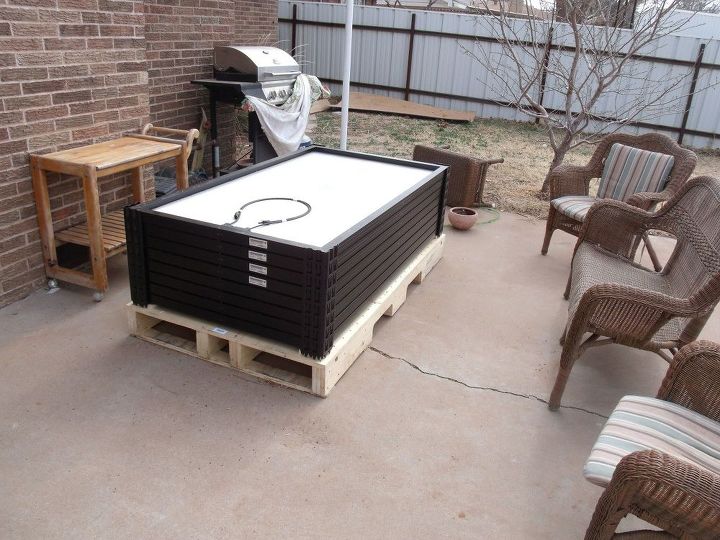
We ordered the solar panels from www.sunelec.com which come loaded in pallets. 8 panels come on one pallet from this company. Other outlets may have different delivery systems. Each of our panels was mounted in its own aluminum frame. We used a total of 32 panels. We installed the inverter, put in wiring, completed the contract with our provider, and went on line with our system in December 2012. The system was creating electricity even before we poured the concrete pad that would be the floor of the shop.
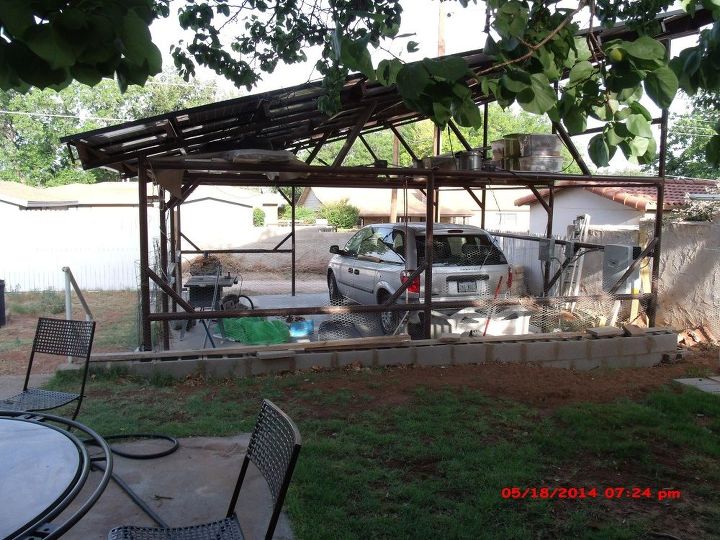
In the last photo, you can see the concrete floor has been poured. You might also notice we replaced the back fence and moved the gate to make space for a driveway we poured separately . While we poured the footings for the fence and the driveway itself we did hire the slab done. That concrete pouring and finishing for the slab is the only labor we hired done, because we wanted a nice smooth concrete surface, and we know what our limits are for that type of finish work. I took photos of that step and of lifting the panels into place, but can not locate them. Should I track them down, I will load them to the post. We have already begun to benefit from the carport and storage above, even though there is no siding on the building. Another stage of "lost " photos are those we took of roughing in plumbing so that one day we will have a changing room with shower and toilet as well as a utility sink, and possibly a kitchenette for a real man-cave workshop. Once the permits were approved and rough-in inspected, we contacted our concrete guy. This is where the project progress stalled, until my husband retired. I will post the next stage as it is completed. Note: I listed the cost as $15,000 but the solar section was only about $7500. 9Most people would put the panels on an existing structure, and would likely not put in quite as many panels as we did,which would affect the total price.) The rest of the cost would be attributed to the structure that is destined to be a shop. We also got a sizable portion of that cost back as a tax credit. We have not paid an electric bill in 4 years, and some years we actually net about 400 to 600 dollars. We are not "off the grid." We feed the grid in the daytime and use from the grid at night. This arrangement requires a contract with the electrical provider, so be prepared to do some paperwork! We have it to the point now where we are putting up sheathing on the exterior. We will post more when we are closer to done with that stage. Happy Building, everyone!
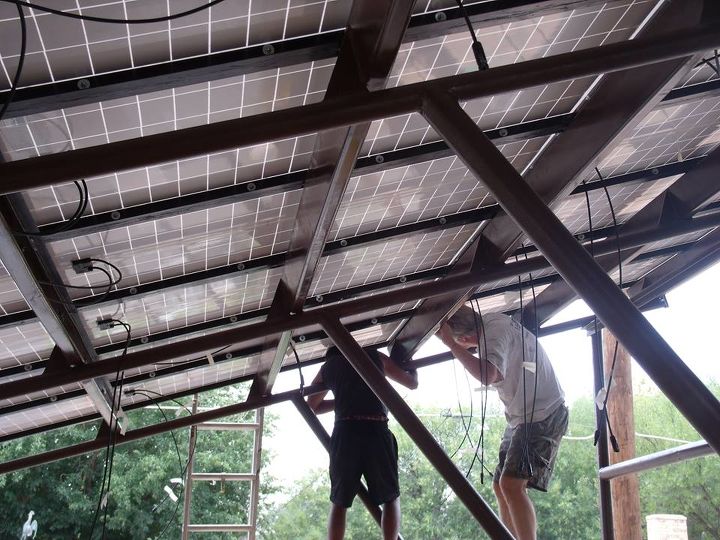
My guys putting panels in place.
ADDED AS AN EDIT: I thought people would glance at this and say "That's nice. Maybe I should investigate solar for my own home. " I didn't anticipate some of the great questions about more technical aspects of the project. So here is a bit of added info. If you are here for the geek stuff, this will help wet your appetite, but every site and circumstance is so individual that we are not able to address the problems individuals would likely face. My husband is an engineer, and did the calculations and research needed for the project. We bought the panels from Sun Electronics (www.sunelec.com). They are a clearing house for new and used solar panels. Our particular panels are "Grade B." That means they are not cosmetically identical. There is variation in color from panel to panel or from cell to cell within a given panel. This is strictly a cosmetic flaw, and does not affect the function of the panel at all, but it does reduce the price. Our panels were new. We bought a Sunny Boy inverter from a private source on e-Bay. It was brand new in the box, but 4 years old. It had never been installed. It was still under warranty. We checked with Sunny Boy before we bought it to verify the warranty. Our system is rated to produce 6.750 KW per hour in full sun.. We do not reach that because we were not willing to cut down the apricot tree that sits just east of the structure, and also because building codes that limit the maximum height for our tall wall to 15 feet. Your site codes might be different. We don't get full sun until 10:30 or 11 AM, but we still produce about 5.5 KW per hour or average of 30 KW per day on a sunny day. (most are sunny here.) The range is 18 to 40 KW in a single day. We have reached 10,000 KW in a year a couple of times, and nearly that every year. A note about wiring for your contract: You will be required to have an inverter that will cut power off if the grid goes down so that you don't flood power back into a system that may have downed wires or repairmen working on it. The way our system is wired, that means that our house goes down, too. If power goes out on the grid, power goes out on our house. We can, and probably will, correct that wiring flaw at some future date, but it hasn't been a big concern. I grew up with short power outages, so while it is an inconvenience, it isn't pressing enough to address. You CAN put the interupter between your house and the grid, but it was more convenient for us to put it between the panels and our feed out. Another question that I didn't address is the meter. Our electric meter doesn't exactly run backwards, but that's how we think of it. In truth, our meter senses which way the electrons are flowing. If they are coming from the grid into our house (at night for example) then we are charged at the end-user rate. If we are producing more electrons than we are using in the house during the day (as is typical) the meter senses that the electrons are going back out to the grid, and it credits us at the rate the electric company pays us under contract. If you need to be off grid, you will need storage devices (batteries) and that will add enormously to the cost of your installation. Another very technical note: The inverter will also have to match the power wave form specs from the power company. Ours does this through sensors built into the inverter, and it was approved by our power company at the time of making the contract. Finally, go to the National Renewable Energy Lab website. It is an excellent site. PVWatts link on that site will help you figure the angle of inclination and other issues that determine how much power you can get for each rated KW you buy. Our building codes limited us to a 15 degree inclination. Optimal for our site, latitude, state, etc. is more like 32 degrees. Siting the structure for individual locations will be dependent on trees you don't want to sacrifice, the latitude of your home, and building codes. All that does need to be taken into consideration before you commit to a plan. That may require professional help, but if you are fortunate enough to have family or friends who will work with you, you can avoid that expense. Our experience as a DIY family is related to our nearly 40 years together working on smaller projects, building up experience and skills to take this on. Also note that over the years as appliances needed to be replaced, we upgraded to high effeciency appliances. We have LED lights in every fixture in our home purchaed on eBay. We open windows and use fans instead of running our air conditioner on pleasant days. We turn off the lights in rooms not in use. We are conservative, but have never felt like we were deprived of comfort. I don't mean any of this long edit to be a discouraging note. The opposite: Take your time to develop the plan, muster your resources of family and friends, and be willing to expect a long process. If you can do all that, you can do ALL THIS. :)
Comments
Join the conversation
2 of 61 comments
-
Wow! Fantastic! You have put a ton of work into this yourself! Thank you far sharing. The photos add a lot, too!
-
Wow..cool project..an sola..i only have 8..but its enough i get sun untill 1.30.then it moves to the back..but i still get some power .This means washing is done in mornings if garden needs cut i do it all before the sun moves...ive noticed i save so much..i bet yours works cool..my hubbie also workd it out..im not good with things like that...but he was right..i love sola power..loved reading an seeing your project ..well done .Thank you for shareing 👍👍


Frequently asked questions
Have a question about this project?