


Pan Protectors --- Make Your Mrs Happy! (by Doing the Cooking Yourself

4 Materials
We bought some nice new (expensive) stone coated pans and I didn't want them getting scratched or looking untidy so I decided to make some simple protectors for them
OK I have edited this as I keep getting the same questions!!!!!
1) Yes you can use bubble wrap/pot holders/waffle/whatever BUT plastic will melt/you have to BUY some of those/this site is about making stuff or adapting stuff, I don't want what everyone else has got from the dollar shop.
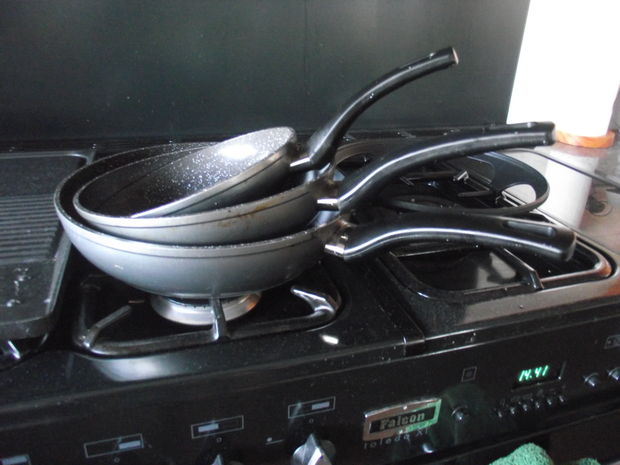
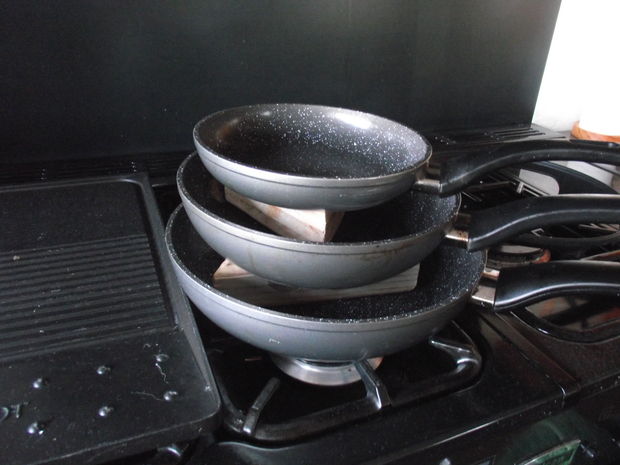
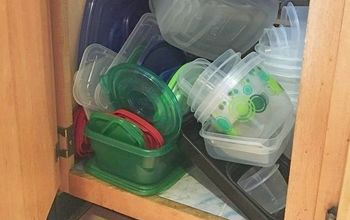
2) They don't take up any more room like this, look at the last 2 pictures, without them the handles sit higher
3) Wood will not scratch pans (otherwise your wooden spoon would, let alone a metal one) if wood scratches your pans you have cheap arse pans!!
4) The wood will not char/burn, common sense says that after you use a pan you will either wash it or wipe it out with a cloth/paper towel (which is how you SHOULD treat properly seasoned pans) so it may be warm but not red hot!!!
RANT OVER --unless there are more of the same questions!!!!!!!!
Tools and Materials
A Saw (I used a table saw as I have one)
Hole Saw (although a drill/fostner bit will do)
Router (a file or plane will do the job)
Some timber off cuts I used Macrocarpia 50mm thick
OK I have edited this as I keep getting the same questions!!!!!
1) Yes you can use bubble wrap/pot holders/waffle/whatever BUT plastic will melt/you have to BUY some of those/this site is about making stuff or adapting stuff, I don't want what everyone else has got from the dollar shop.
2) They don't take up any more room like this, look at the last 2 pictures, without them the handles sit higher
3) Wood will not scratch pans (otherwise your wooden spoon would, let alone a metal one) if wood scratches your pans you have cheap arse pans!!
4) The wood will not char/burn, common sense says that after you use a pan you will either wash it or wipe it out with a cloth/paper towel (which is how you SHOULD treat properly seasoned pans) so it may be warm but not red hot!!!
RANT OVER --unless there are more of the same questions!!!!!!!!
Tools and Materials
A Saw (I used a table saw as I have one)
Hole Saw (although a drill/fostner bit will do)
Router (a file or plane will do the job)
Some timber off cuts I used Macrocarpia 50mm thick

Step 1: Use one of these or a handsaw

Step 2: Drill/cut a hole in the centre

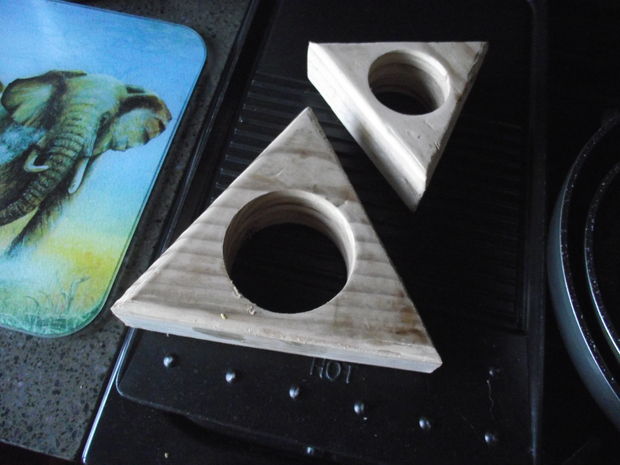
Step 3: Chamfer the edges
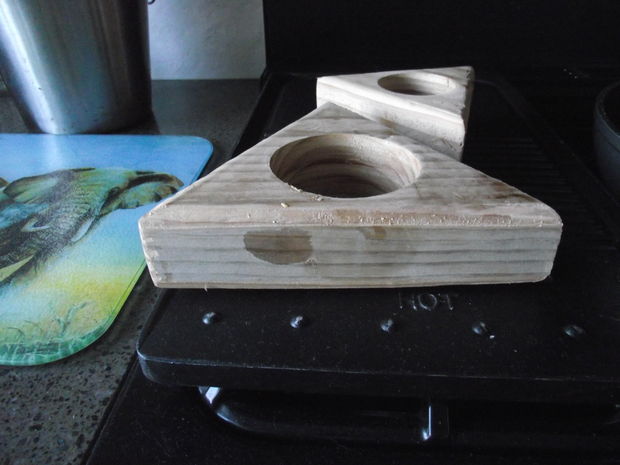
Step 4: And Voila, from this
Step 5: To this
As they say "Robert's your mother's brother"
Resources for this project:
See all materials


Any price and availability information displayed on [relevant Amazon Site(s), as applicable] at the time of purchase will apply to the purchase of this product.
Hometalk may collect a small share of sales from the links on this page.More info
Comments
Join the conversation
3 of 207 comments
-
Not a question but a statement... Those pieces of wood will scratch your pans as well. Try rubberized shelf liner instead.
-
I used rubberized shelf liners cut to fit. A lot easier.


Frequently asked questions
Have a question about this project?
Love the pans. Where did you get them?