


DIY Fillable Lamp - Christmas in August With Lamps Plus and Hometalk
A few weeks ago I entered a chance to partake in the Hometalk and Lamps Plus Holiday Design Challenge. I recently found out I had been chosen to participate in the contest and quickly began brainstorming on how I was going to decorate the lamp. I can't even tell you how excited I was and I'm actually shocked I kept it a secret this long! Anyways, the rules were pretty open - we had free range to design the inside and/or outside of the lamp, so I decorated both!
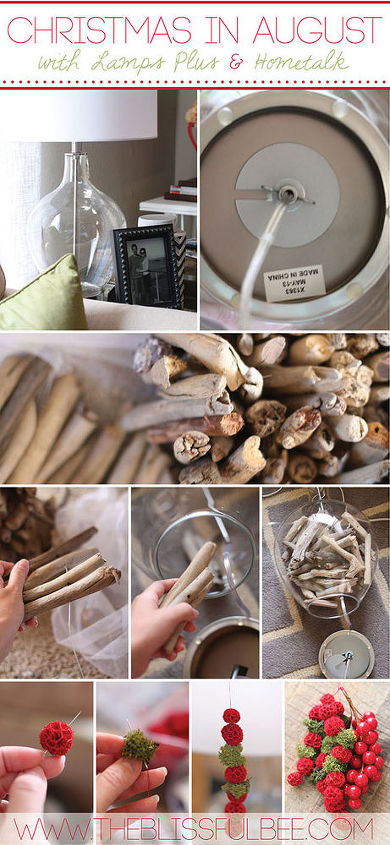
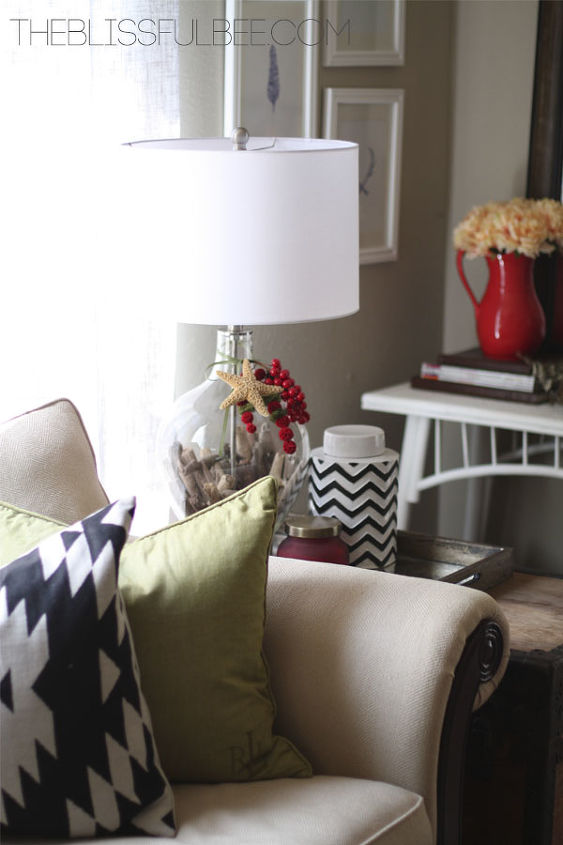
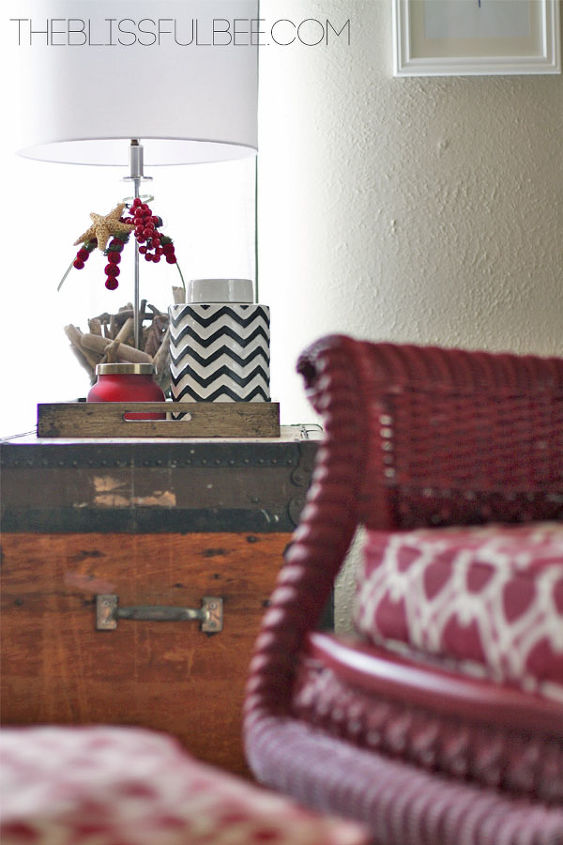
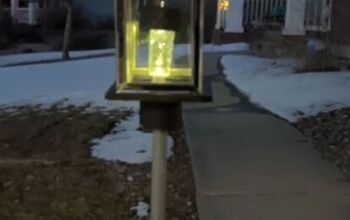
When I first began shopping for this project, I went to Garden Ridge thinking they might have some Christmas decor that I could incorporate. I quickly realized this wasn't going to work. As much as I love Garden Ridge and their Christmas isle, I just thought it would be too much of an obvious choice. I wanted to challenge myself, and like I said, not design anything too over the top or cheesy. I was going to face this challenge with an attempt to not use ANYTHING from the Christmas isle.I eventually stumbled upon the isle where you can find the "natural elements". Bingo! This was exactly the isle I was looking for! I grabbed some moss, beach accessories, a berry bunch and some decorative red accents. At this point, I was still missing the ONE thing I had been planning to use all along - driftwood. I later found myself at Home Goods and guess what I found?? An entire bag of drift wood. Score!Step By Step:1. Take the lamp shade off and unscrew the bottom part of the lamp.
2. Once the lamp is separated, you can begin filling it with your decor (through the bottom of the lamp while it is gently placed on its side.) The driftwood I used came packaged as a garland, so I had to cut the wire and un-string the garland first. I then placed the desired amount of driftwood through the bottom of the lamp base.
3. I then screwed the lamp back together and sat it up straight.
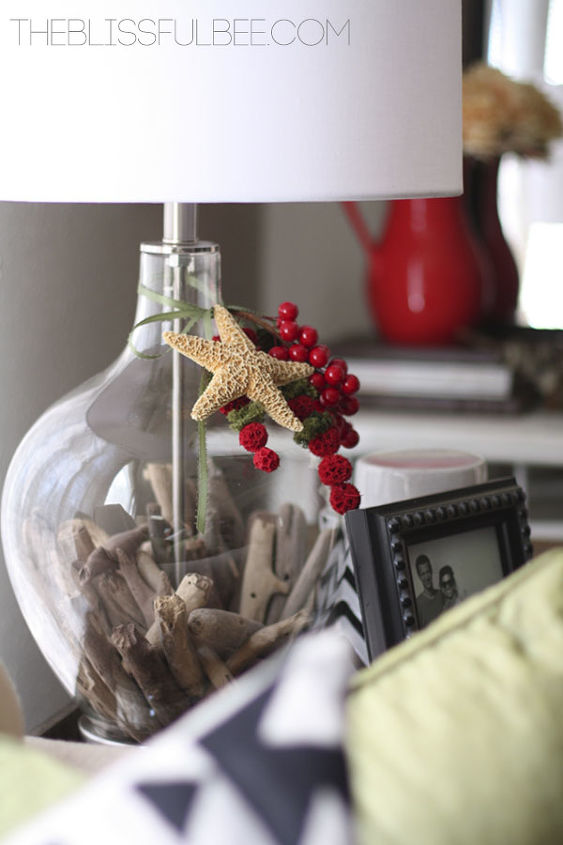
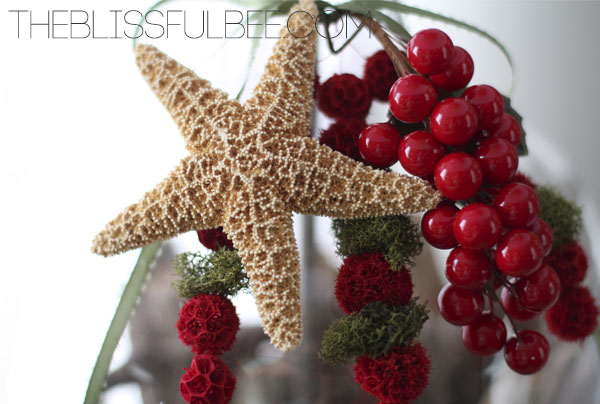
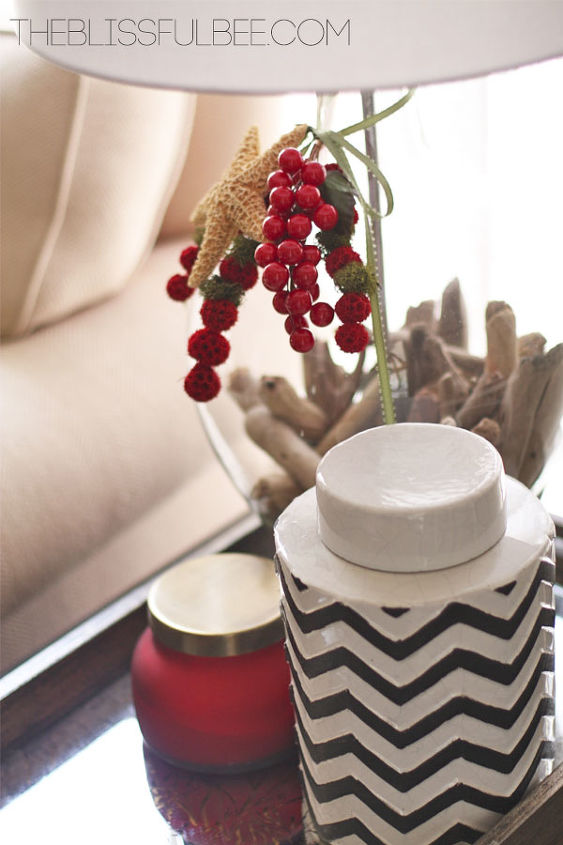
4. Next, I had to string the moss and decorative red accents together. I used a needle and thread and alternated the red and green accents. Once they were finished, I added the red berries to the bunch and also included a starfish to top it all off.
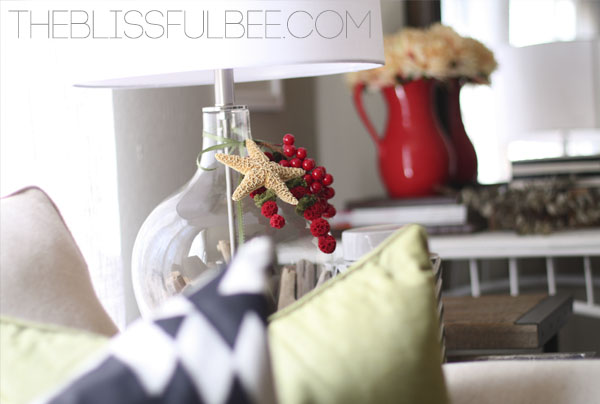
5. With a decorative ribbon, I tied them all together and wrapped it around the neck of the lamp.And that's it! You're all done:)A BIG thanks to Hometalk and Lamps Plus for choosing me to participate!! I'll be crossing my fingers that I'm one of the three winners!!!
When I first began shopping for this project, I went to Garden Ridge thinking they might have some Christmas decor that I could incorporate. I quickly realized this wasn't going to work. As much as I love Garden Ridge and their Christmas isle, I just thought it would be too much of an obvious choice. I wanted to challenge myself, and like I said, not design anything too over the top or cheesy. I was going to face this challenge with an attempt to not use ANYTHING from the Christmas isle.I eventually stumbled upon the isle where you can find the "natural elements". Bingo! This was exactly the isle I was looking for! I grabbed some moss, beach accessories, a berry bunch and some decorative red accents. At this point, I was still missing the ONE thing I had been planning to use all along - driftwood. I later found myself at Home Goods and guess what I found?? An entire bag of drift wood. Score!Step By Step:1. Take the lamp shade off and unscrew the bottom part of the lamp.
2. Once the lamp is separated, you can begin filling it with your decor (through the bottom of the lamp while it is gently placed on its side.) The driftwood I used came packaged as a garland, so I had to cut the wire and un-string the garland first. I then placed the desired amount of driftwood through the bottom of the lamp base.
3. I then screwed the lamp back together and sat it up straight.
4. Next, I had to string the moss and decorative red accents together. I used a needle and thread and alternated the red and green accents. Once they were finished, I added the red berries to the bunch and also included a starfish to top it all off.
5. With a decorative ribbon, I tied them all together and wrapped it around the neck of the lamp.And that's it! You're all done:)A BIG thanks to Hometalk and Lamps Plus for choosing me to participate!! I'll be crossing my fingers that I'm one of the three winners!!!
Hometalk and Lamps Plus Holiday Design Challenge
Hometalk and Lamps Plus Holiday Design Challenge
Hometalk and Lamps Plus Holiday Design Challenge
Hometalk and Lamps Plus Holiday Design Challenge
Hometalk and Lamps Plus Holiday Design Challenge
Hometalk and Lamps Plus Holiday Design Challenge
Hometalk and Lamps Plus Holiday Design Challenge

Want more details about this and other DIY projects? Check out my blog post!
Comments
Join the conversation
2 of 12 comments
-
Love the coastal touch. Very elegant!
-
I have a lamp like this that I have filled with the driftwood from the lake in my backyard! So obviously I adore this! Now I know I can add some red and moss for Christmas to give it a whole new feel! Really nice!


Frequently asked questions
Have a question about this project?