Don't Cut the Concrete Slab - Drill a Tunnel Under It Instead

Rhonda S
by Rhonda S
6 Materials
$7.00
4 Hours
Medium
Problem: 50 year old galvenized pipe is failing, and replacing it requires getting under, over or around a 12 foot wide concrete patio. We decide to go under with a long steel pipe, a sledge hammer, and a garden hose with brass "jet" nozzle.
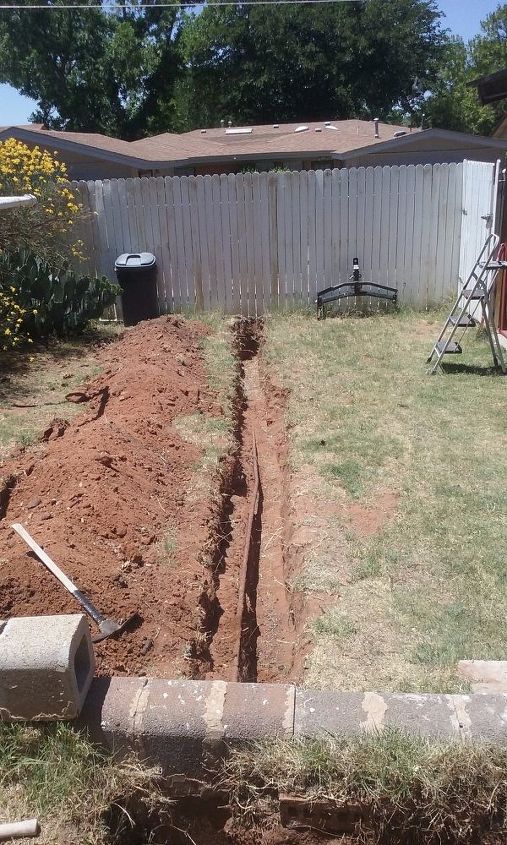
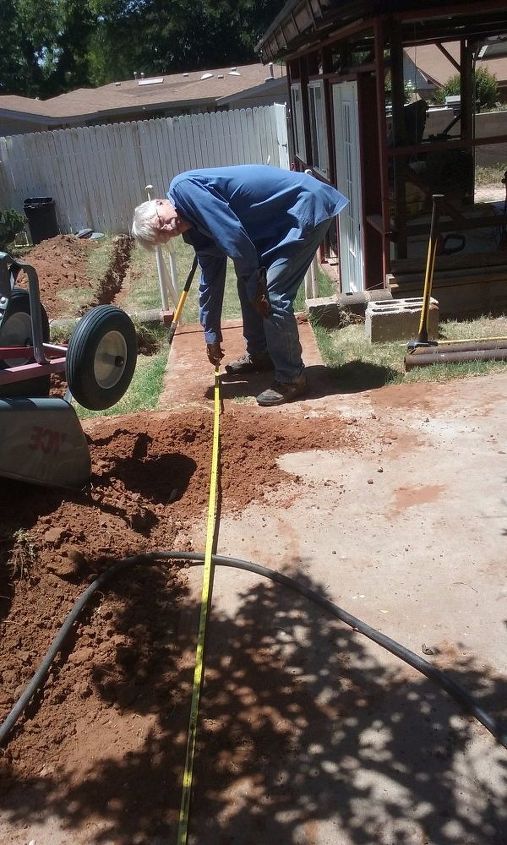
Te easy part - old fashioned shovel work
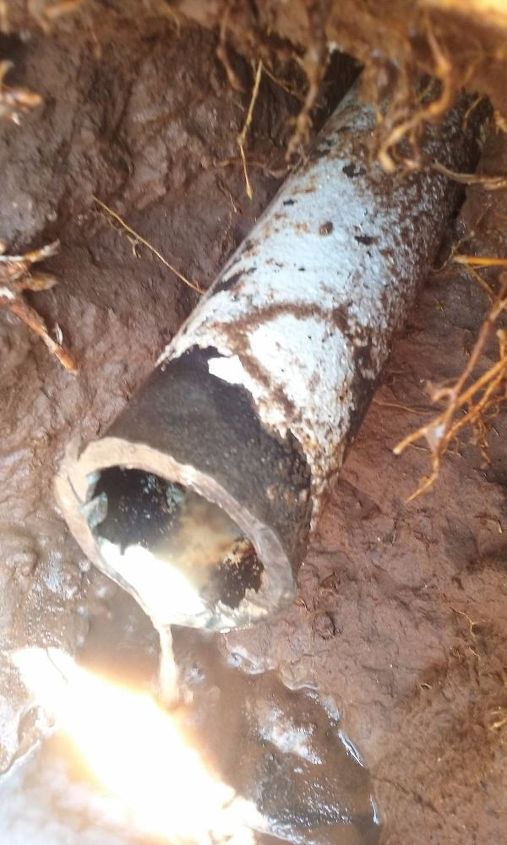
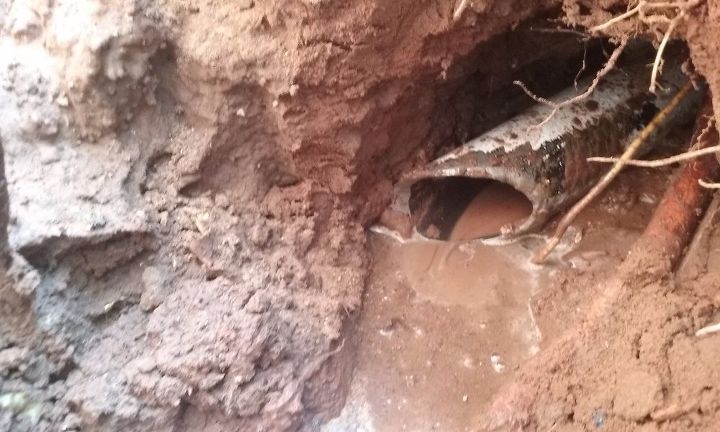
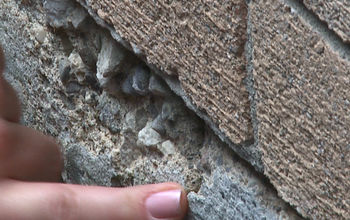
Our supply line runs to the house through the yard. The line goes under the retaining wall that divides the lower west side of the yard from the upper east side, then on to the house. Its path takes it under a 12 foot wide concrete patio slab to a small flowerbed near the door where it ties in to the copper pipes that go under the house slab. There is an old turn-off valve there in the flower bed that had stuck open, and until we started digging it out, we didn’t even know it was there.


We were committed to this as a DIY project. We have had experience with plumbing a cabin, and had done smaller repairs in other homes we have owned over the years. My brother, a master plumber, is never more than a phone call away if we need advice.


We discussed cutting the slab, somehow trenching around the slab and tying in to our water supply somewhere in the kitchen, or hand digging a tunnel under the slab.


Trenching around the slab and tying in somewhere else seem most problematic.


Cutting the slab would require that we rent equipment we have no experience using and we would still have to dig a trench in the cut-out. I was pretty sure I would NOT like the results of the repaired concrete the least.


Hand digging the tunnel sounded like the most dangerous and most physically difficult of our options. We had recently tunneled under the slab elsewhere to replace orangeberg pipe that had collapsed, and we were not looking forward to another experience like that.


I had read about “boring machines” that could dig tunnels under slabs, but the chances of getting someone with one of the machines to our house on our time scale and budget seemed unlikely.
it really is 12 feet....
I decided to check YouTube to see if there were any great innovators and do-it-yourselfers out there who had done anything similar.


We found a couple of different videos that were quite helpful. One had a fellow with a hose and a jet nozzle, who simply ran it at full pressure under his walk way, drilling a hole with water. Another was of a fellow who installed a PVC pipe under his walk way without cutting the concrete. He beveled one end of the pipe by cutting it off at an angle so it cut the soil better. He drove it into the dirt with a two pound hammer, then pulled it out, knocked the dirt out, and put the sharp end back into the resulting hole and drove it in again. After repeating that process many times, he had a hole all the way under his walk. He left the pipe in place to act as a conduit for his electrical lines. It did not damage his walkway at all.


Our problem was one of scale: One fellow's walk was less than three feet across. Our patio is 12 feet wide. We knew we needed to direct the hose, and could not keep it in line over a 12 foot distance. We were concerned that we would simply shatter a plastic pipe putting it in that deep. We have sandy soil with random stones and some tree roots. We also have ready access to long steel pipes, so that’s what we used as our cutting tool: We used a 1.5 inch interior diameter (just under 3 inch exterior diameter) steel pipe 9 feet long and sharpened on one end for the majority of the cutting, then Tom welded on a 4 foot extension piece so that the pipe would span the entire width of the patio.
The cutting end is beveled to cut better
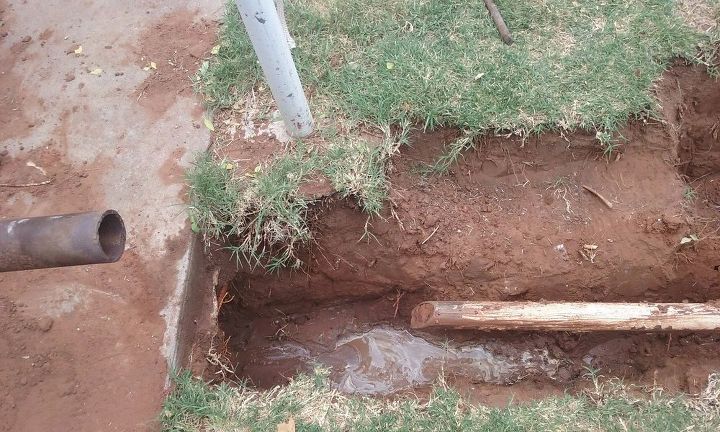
We had to remove blockes from retaining wall
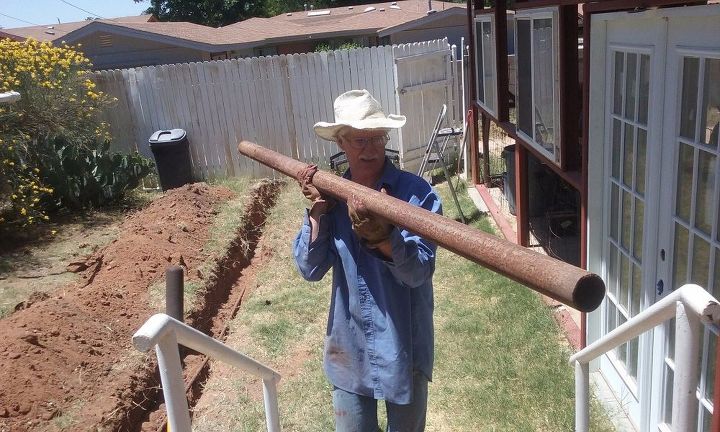
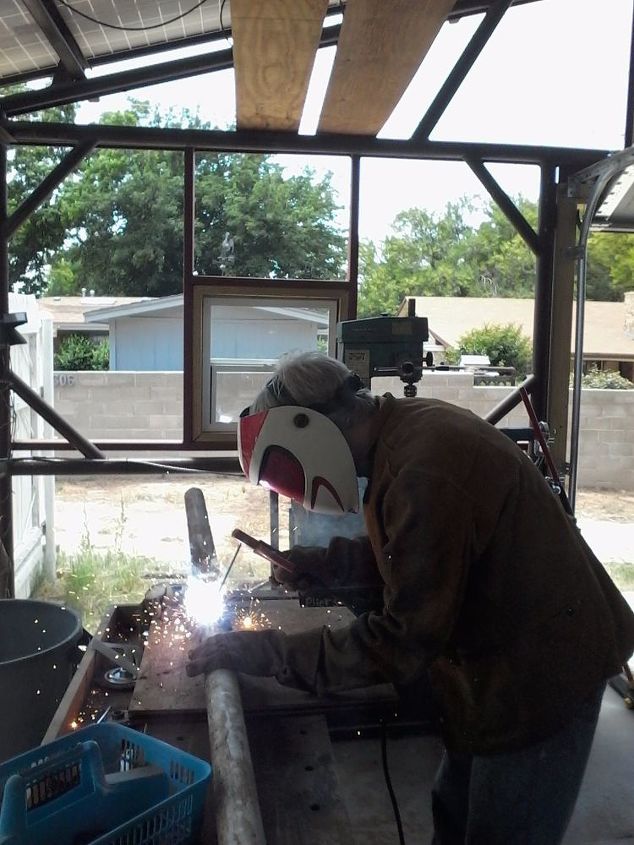
welding the extension to the 9 foot pipe
Tom would hit the pipe with a six pound sledge to drive it in about 6 inches until it stuck, and then while he took a break, I would turn the water on and flush the dirt out of the pipe


We used a garden hose with an inexpensive “jet” nozzle. At first we ran the hose up the pipe to get the dirt at the cutting end wet, and then pulled hose out to drive the pipe in. Next we pulled the pipe out and flushed the dirt out with the hose. That was going really well, really quickly, until we had to add the extension, then the hose started hanging up, so after a few cycles of putting the pipe in the hole, running up the hose, and then withdrawing the hose to hit the pipe, it occurred to us that we could leave the hose in, and let it wash out the “tailings” (cut dirt that lodged inside the pipe). Instead of turning the water off at the nozzle, I turned it on and off at the faucet. We still had to take the pipe out a couple of times, but we cut our 12 foot tunnel in less than 4 hours, with two short breaks. That includes the time we didn’t get the piped lined up quite right, and wound up drilling a second bore-hole that came out about a foot farther south than we expected. We did not feel like we were working terribly hard, though Tom was swinging the sledge, so he was really getting a better workout than I was. Tom was able to strike the pipe without hitting the hose, so that’s one way we were able to work faster. We got hung up for a short time on a bunch of roots, and I think we pushed some rocks out of our way. Mostly the tailings were sand.


We debated whether to leave the steel pipe in place as a conduit or replace it with a similar diameter PVC pipe. I thought the new supply line would go through which-ever we left to shore up the tunnel. I was concerned that if we don’t leave something, the bore-hole tunnel will likely collapse before we got back to run the new pipe the next weekend.


While I was off pursuing my job the next day, Tom had some time on his hands, so he went out to see about pulling the pipe out of the tunnel. He had not purchased a replacement PVC pipe to act as the conduit, but when he took the pipe out, the tunnel kept its shape. Since he did have the supply line, he went ahead and put it in. By the time I got home, all connections were flushed, dried, cleaned, and glued and he was testing the system for leaks. After giving it a good test, we buried all but the emergency cut-off valve, for which I prepared a housing. (link to housing post here: http://www.hometalk.com/diy/repair/plumbing/housing-for-house-water-supply-cut-off-valve--21062661 )
The end we pounded
The cutting end breaks through
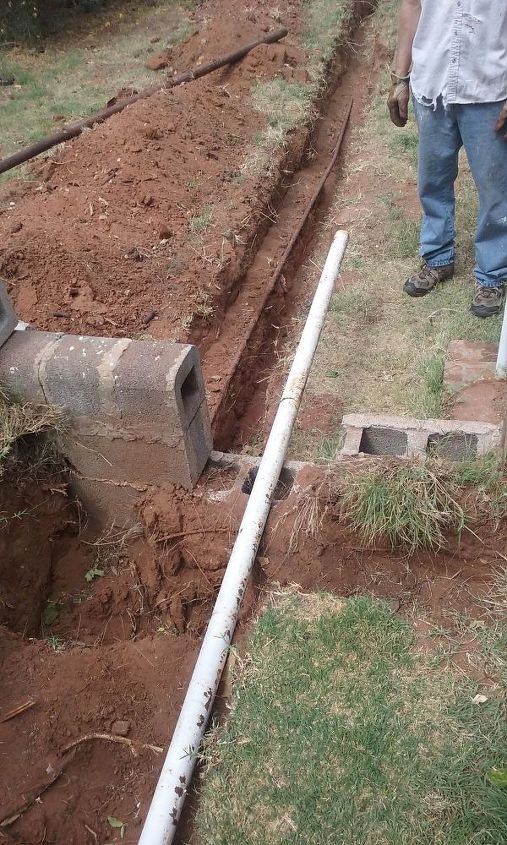
Note that we did not remove the old supply line. It is simply parallel to the new one, except for portions he cut out to have access to the copper pipe.


If you want to do something like this, be aware that rocky soil is going to be more difficult. The bigger the rocks, the less likely you will be able to use this technique. Very large roots might also stop you. If your soil is clay or sand, you might be able to use a PVC pipe since the water jet will do most of the drilling, and the pipe is really to direct it. Even if you are going to have someone else glue up the supply line pipe, this step will save you time and money over hiring it done.


My husband put a YouTube video together to show the process. His idea of a joke was to call it Horizontal Drilling Co. The video is here: https://www.youtube.com/watch?v=-xc0ZN-tgu0


What-ever you do, but sure to get below frost lines and observe codes in your own community. Note that the project is marked moderately challenging. The complelxity of the problem was not a challenge, but for a couple of 60+ year olds, it was a busy afternoon. The drilling took about 2 hours, plus prep work and welding of the extension.


Happy drilling!
Suggested materials:
  • Used oilfield steel pipes   (on hand)
  • Garden hose   (on hand)
  • Brass "jet" water hose nozzle   (Tractor Supply, but any garden supply)
See all materials
Frequently asked questions
Have a question about this project?
Comments
Join the conversation
2 of 10 comments
  • Brian Sparks Brian Sparks on Sep 21, 2018

    You can get heavy duty pipe couplers that are meant for driving well points deep into the ground. No need to weld plus you can take it apart if needed.

  • Rhonda S Rhonda S on Dec 04, 2018

    Good to know! Thanks!

Next