


Stair Risers + Wallpaper Border

by
Karen Dunnam
3 Materials
$3
6 Weeks
Easy
An easy and beautiful fix for shabby stair risers.
EDIT: the new headline says "boring," but in fact the risers were nothing but. Scratched, gouged, would have been a challenge to refinish or paint.
Looks like HomeTalk has reformatted things, so my explanatory text has gone away. Briefly:
--measure risers' width and height
--pick up a border to come close in height, in sufficient length to do all the steps plus some extra. This border was 50 cents for 5 yards, and I found five rolls of it at the ReStore.
--determine placement
--cut to fit length
--loose skirt board on some steps enabled me to work the paper inside, providing a nice clean finish
--protecting the work area, spray the backside with adhesive
--place on riser, lightly press down
--enjoy!
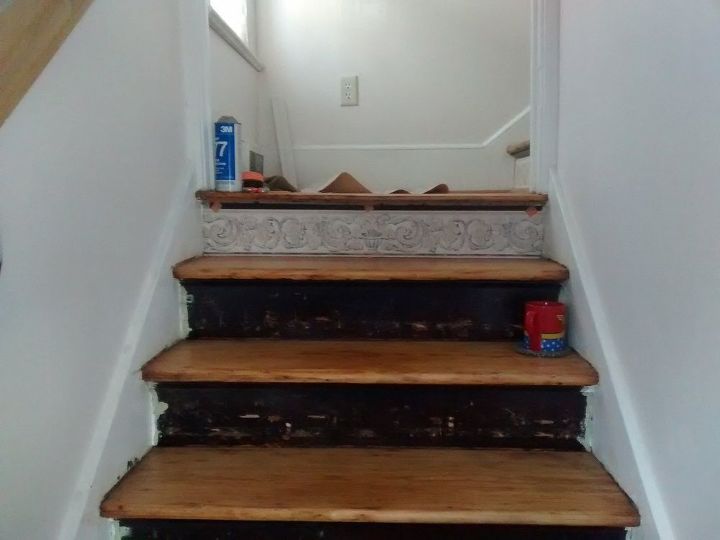
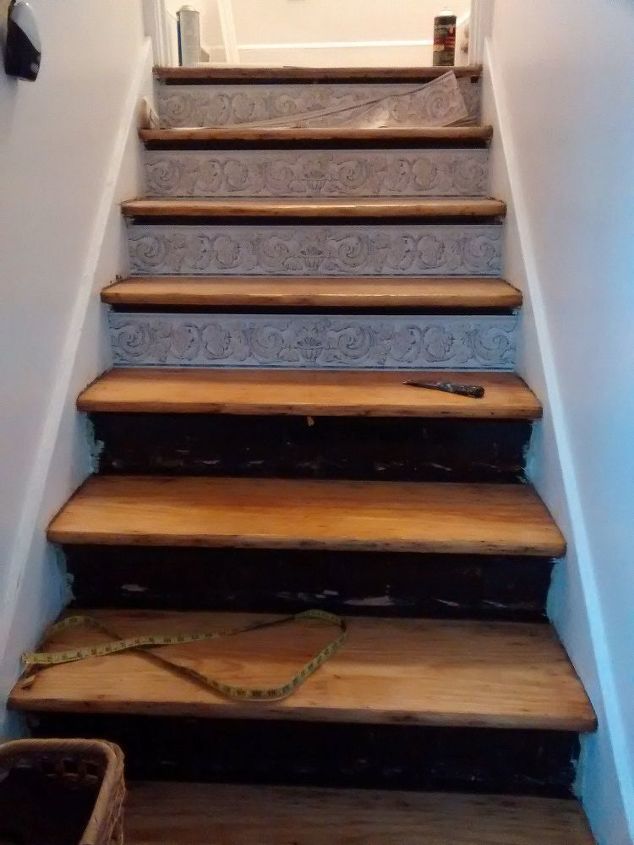
I did the lowest step first, proceeded with other home renovations, then returned to complete the remaining steps about five weeks later. Actual time is about 5 minutes each...1920 house, measure measure measure!

Beautiful, inexpensive, easy!
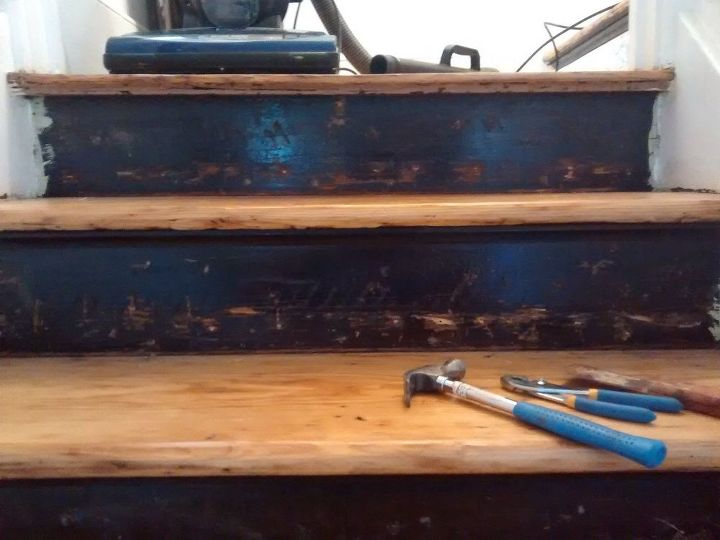
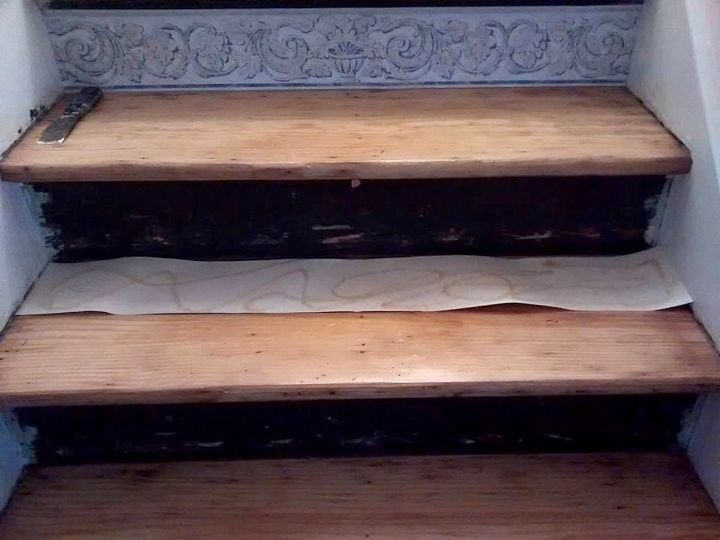
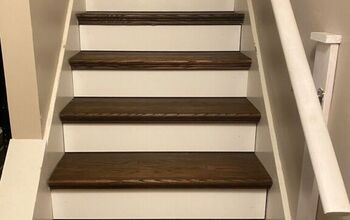
As shown in the Before picture, the stair treads refinished beautifully-- but the risers looked terrible. My new old house was almost completely made over; I'd walk in the front door and see the nicely refinished flooring...and the disconcerting dark brown risers.
Made of thin pine, it would have been a challenge to strip and refinish them, or sand and paint, or replace the boards. There are 16 steps in the two runs of stairs.
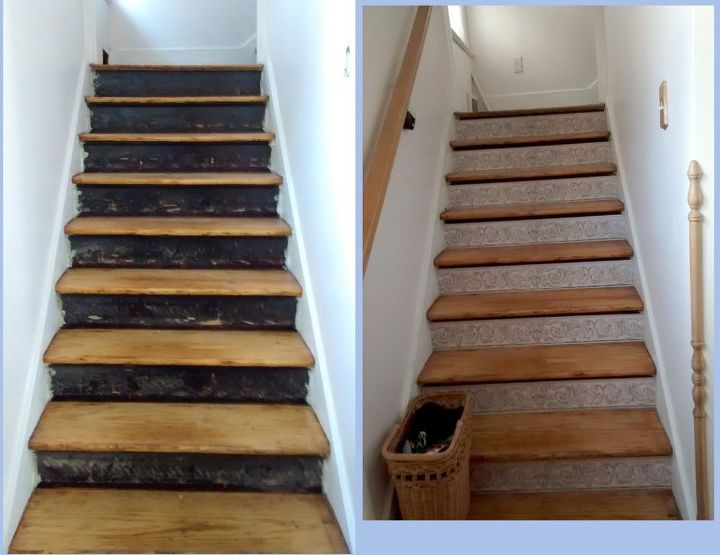
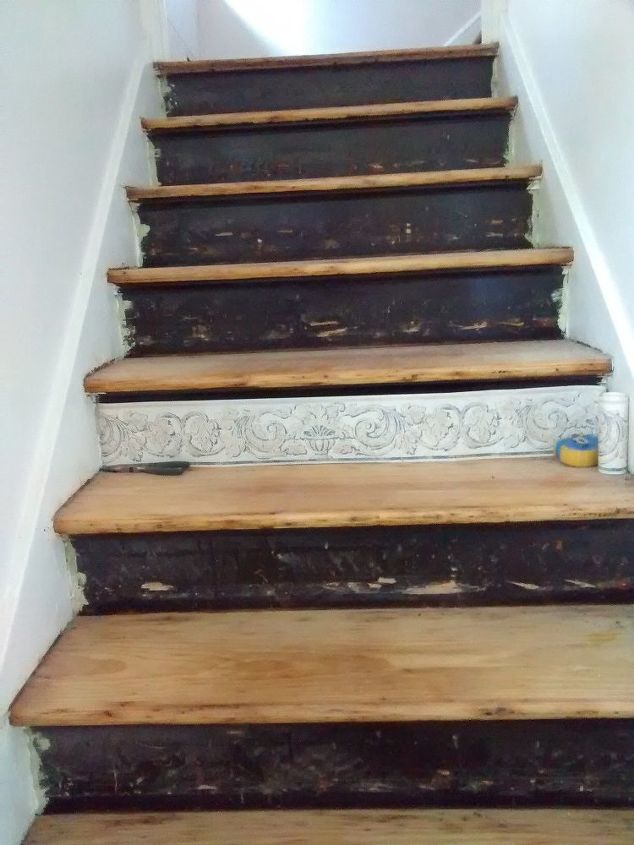
Before & after
The idea came from a DIY home improvement site. I wanted something inexpensive and easy, and ideally it would draw attention to the beautiful refinished flooring.
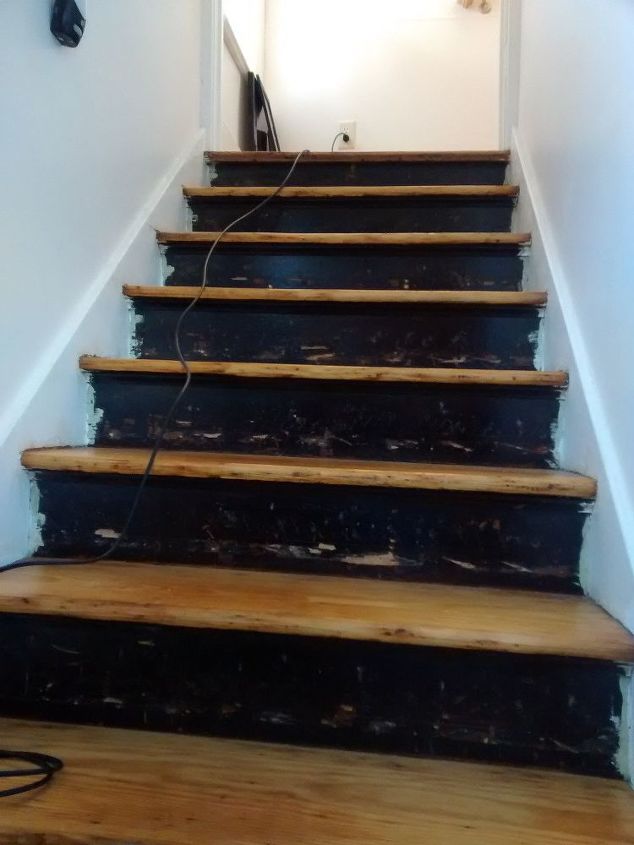
Before: gouged paint, blotchey surfaces
First I measured the border height needed, 5-1/4". The risers have a quarter-round molding along the upper edge which I left in place.
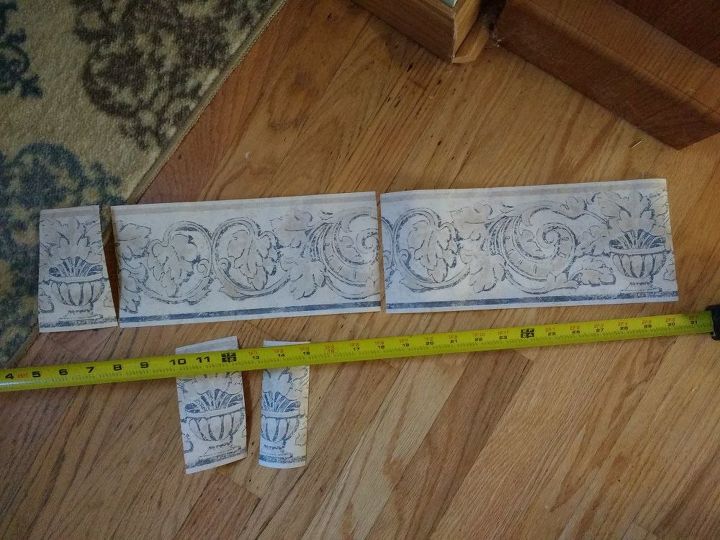
The basket motif appears about every 38"
Then I went shopping! A local Habitat ReStore is in a former wallpaper store; the inventory included several racks of 5-yard border rolls for 50¢ each. I went digging through them to find a design and color scheme I liked.
Found this lovely French blue scroll design, exactly the right height. With 16 risers, I needed at least 4 rolls, and I found 6. Total price: about $3.00
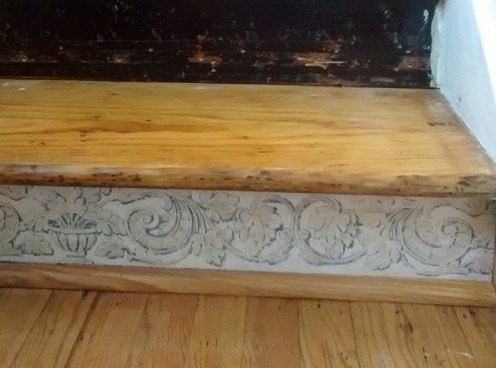
Bottom step with molding trim, hides a gap
I initially completed the lowest step in the living room to make sure I liked the project. There's a gap between the flooring and the steps, so I trimmed it out with an extra piece of the floor molding used throughout the house.
Determining the layout was easy, as the design has an attractive basket motif. I used that as the center of each riser.
Pulling the carpet nails and staples
No need to finish the surface to be covered, however, each riser had several staples and nails remaining from the previous carpeting treatment. This required bright lighting and a variety of tools to get them all out.
Actual time: about 5 minutes per riser
Using the basket motif as the middle of each strip, I cut them to the approximate width. The nine lower stairs are about 37-1/4" wide, and the seven upper steps are just about 36".
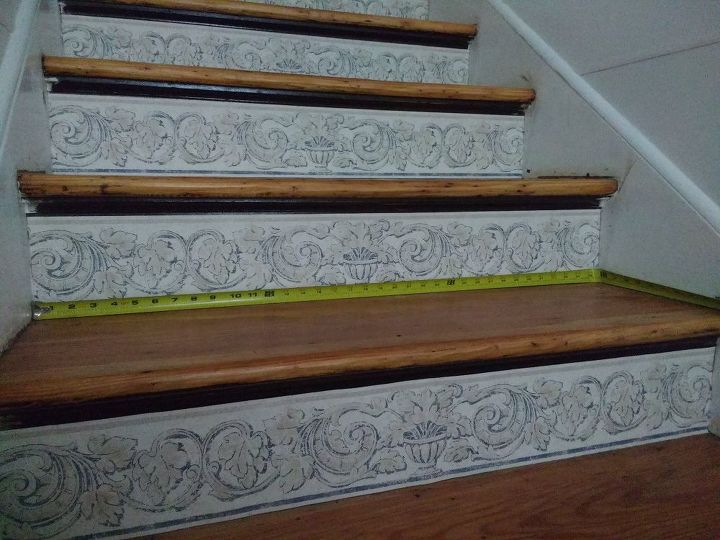
Upper steps are just about 36" wide
I marked the center of each riser panel with a small piece of masking tape.
To align the strips, I folded each one in half, making a light crease at the top of the basket.
It just took 6 weeks to find the time
Held the strip in place, and pencil-marked the wall edges where it would be trimmed.
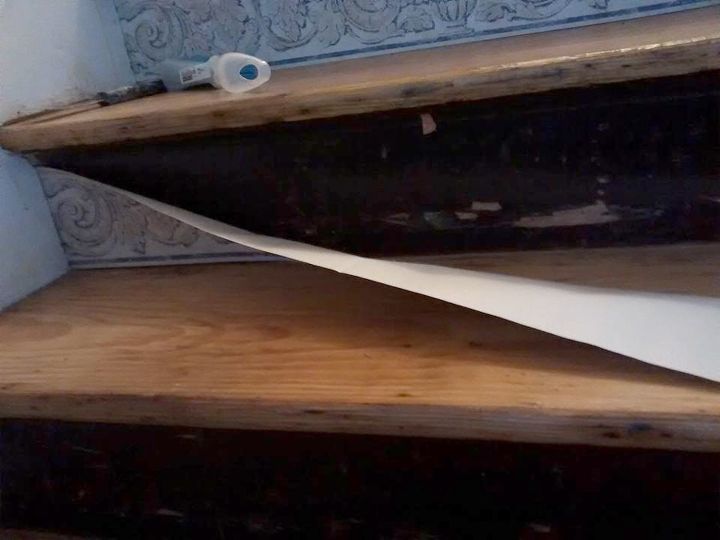
Skirt wall gap allows the paper to fit within
Several risers had a gap by the skirt board, so I worked the paper end into it.
Spray adhesive applied, ready to position
With a newspaper backdrop to protect the floor, I applied the spray glue, then held the strip in place, smoothing down the ends.
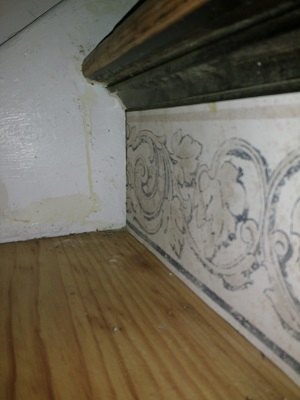
Close-up: skirt board, tread/paper interface
The spray adhesive holds the paper flush against the riser.
Another benefit: I don't notice the boo-boos on the skirt board. (The floor refinishing contractor and/or painter left some imperfections.) Sometimes you have to go with the "ten yard rule," AKA the "galloping past" rule. Unless you are lying on the stairs holding the camera very close to a visual irregularity, you're not going to notice it when you have a pretty French border print to distract you.
Wallpaper blade to help with adjustments
The spray adhesive is re-positionable for about 15 seconds, then grows tacky.
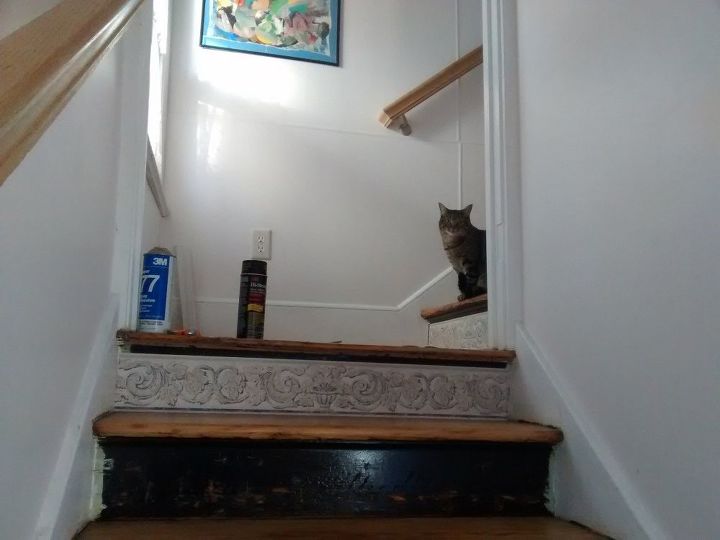
My lovely assistant Pixie
The final touch : a coordinating area rug on each landing.
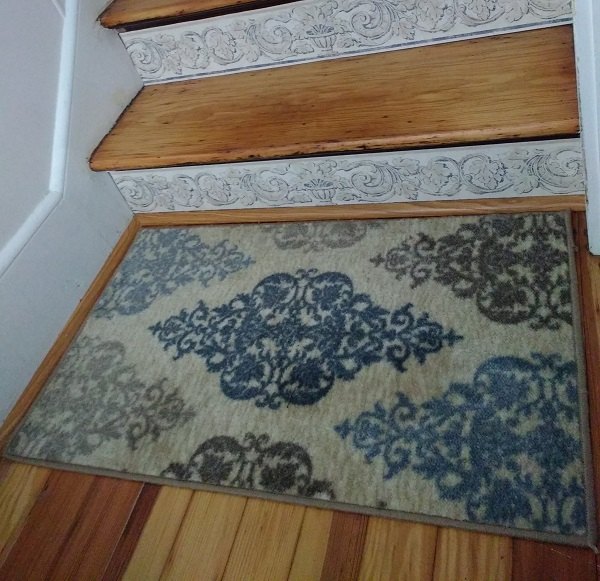
Found at a K-Mart
Several followers have asked about or suggested a sealant. I did not do this, as it would have required a lot more crouching on the stairs than I wanted to invest. The treads are 11" deep and the paper border is not exposed to any wear & tear.
The spray adhesive holds the paper firmly, and I have not experienced any dirt working its way underneath. My household does not have kids or indoor shoes. I like the look of the two border stripes and did not see a need to trim out every step as I did with the bottom one (as shown in the last photo).
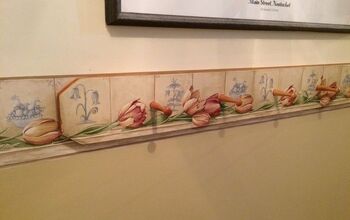
Other Hometalkers' posts have appeared as ideas. I particularly like this one, using boards that are cut to fit and then stenciled. http://www.hometalk.com/diy/paint/updated-staircase-11230300
Comments
Join the conversation
2 of 65 comments
-
On a similar note - I covered a wooden coat rack with the border, poly'd it and lined it up. I attached it with brass wood screws.
-
Wow, does that look nice.
Shopping for border for my dining room, I am discovering what a heckuva bargain I got at the ReStore.


Frequently asked questions
Have a question about this project?