


DIY Whitewashed Terra Cotta Pots

by
Love & Specs
5 Materials
$65
1 Hour
Easy
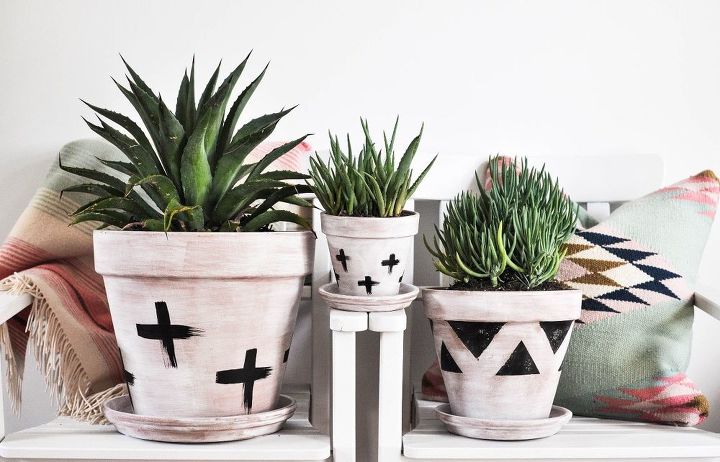
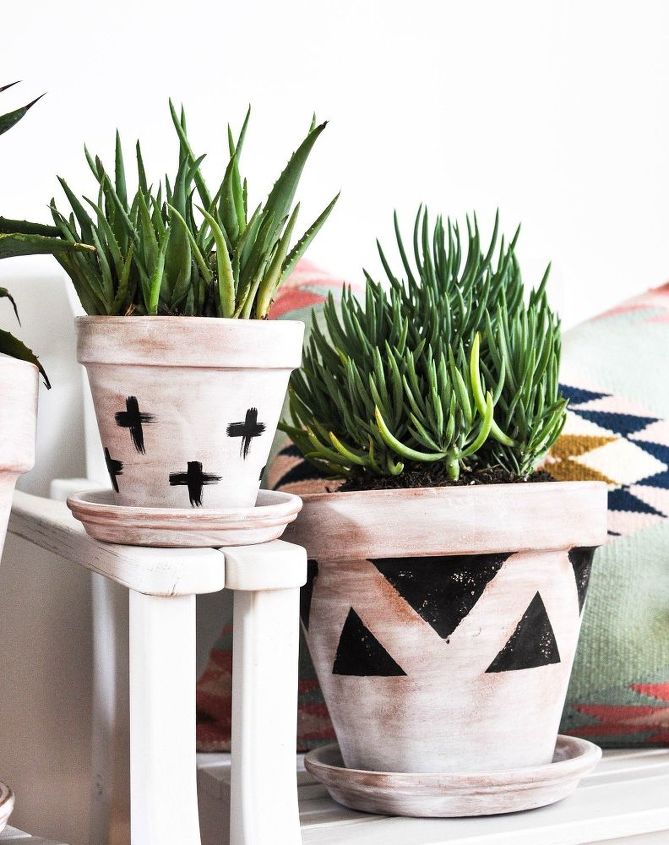
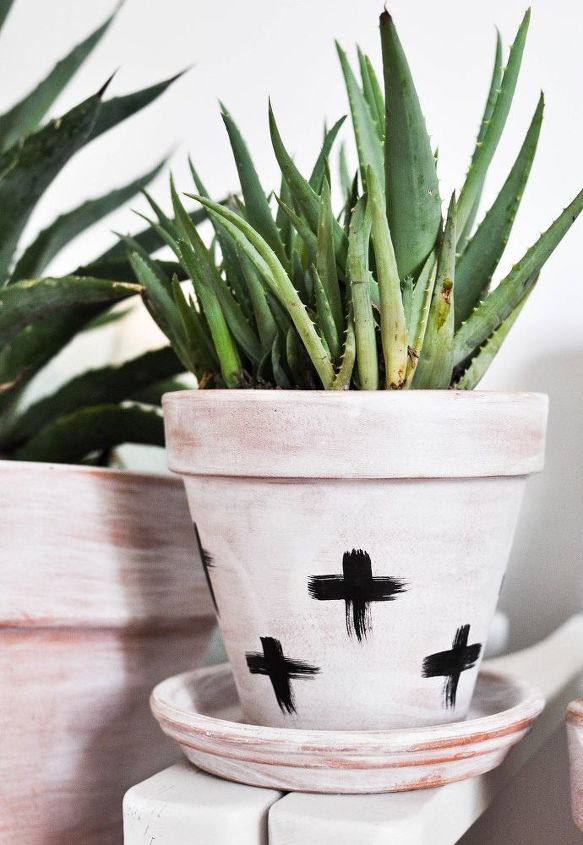
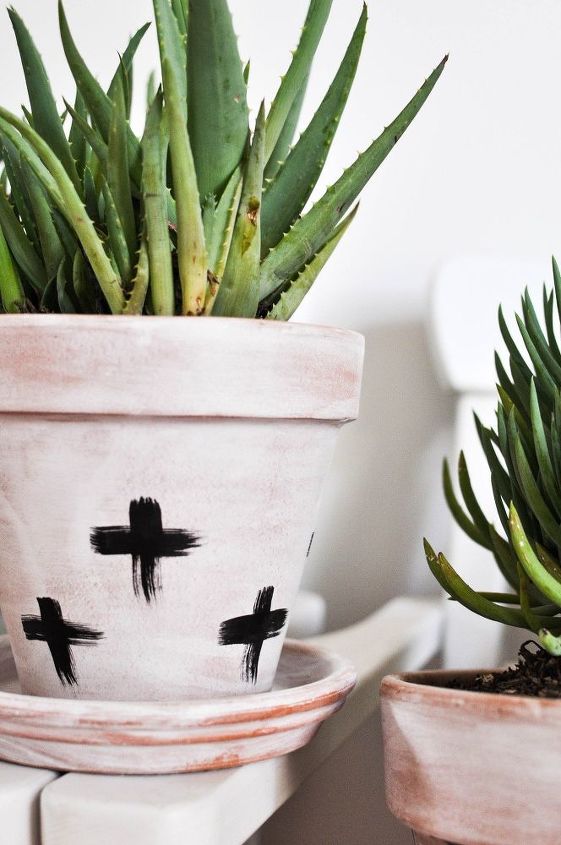
I love the look of whitewashed terra cotta pots. The weathered appearance with just a hint of the orange popping through is perfect for Southwestern decor lovers, and so easy to execute. In this DIY, I also added black Swiss crosses with durable outdoor acrylic paint so my pots could withstand the elements outside!
Sand your terra cotta pots and saucers with your sanding sponge and wipe clean with water and a rag. Let any wet spots dry completely.

Fill an old bowl with equal parts water and your Chalked paint. Stir until thoroughly mixed.

Dip your brush into your whitewash mixture, and when you pull it out of the mixture make sure to squeeze a little bit of the excess liquid off of your brush on the inside of your bowl.
Brush your whitewash mixture onto your terra cotta pot using your large chalk brush, brushing horizontally around the pot. You want the strokes to be as smooth and seamless as possible, so if you have to brush over the same spot twice that's ok. Imperfect coverage is what we're looking for here, so go wild!

Once you've brushed over the entire interior and exterior of your pot with your whitewash, allow to dry for no more than one minute.
Grab your old t-shirt and lay a flat stretch of t-shirt over your hand. Wipe your whitewash off of your pot with your t-shirt, wiping in the same direction as your brush strokes. Make sure your t-shirt doesn't wrinkle up on your hand. Keep it as smooth as possible.
Allow to dry and if you're happy with the pots as is, just repeat the process on your saucers!
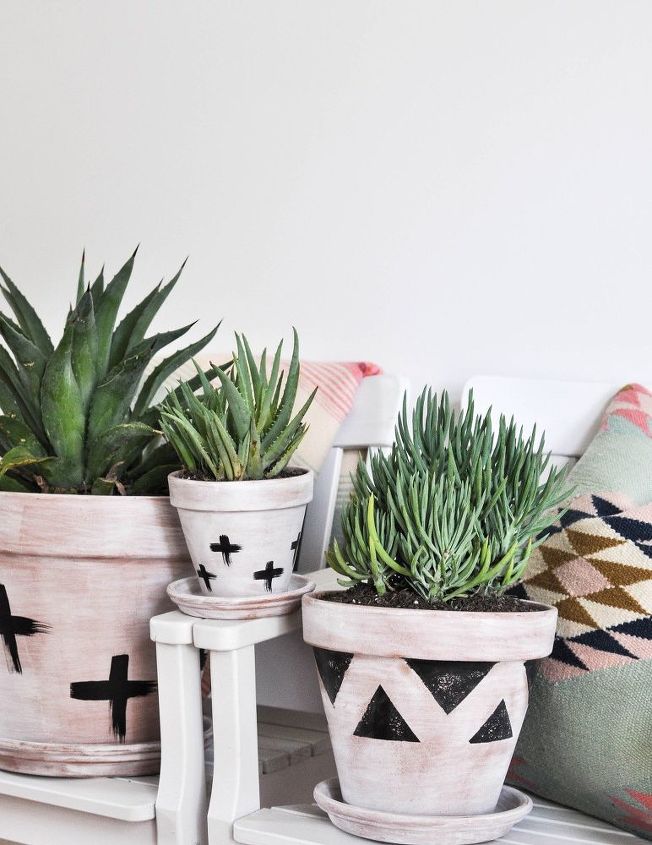
To create the distresses Swiss cross pattern that I made on mine, squeeze a little bit of your outdoor acrylic black paint into a plastic cup.
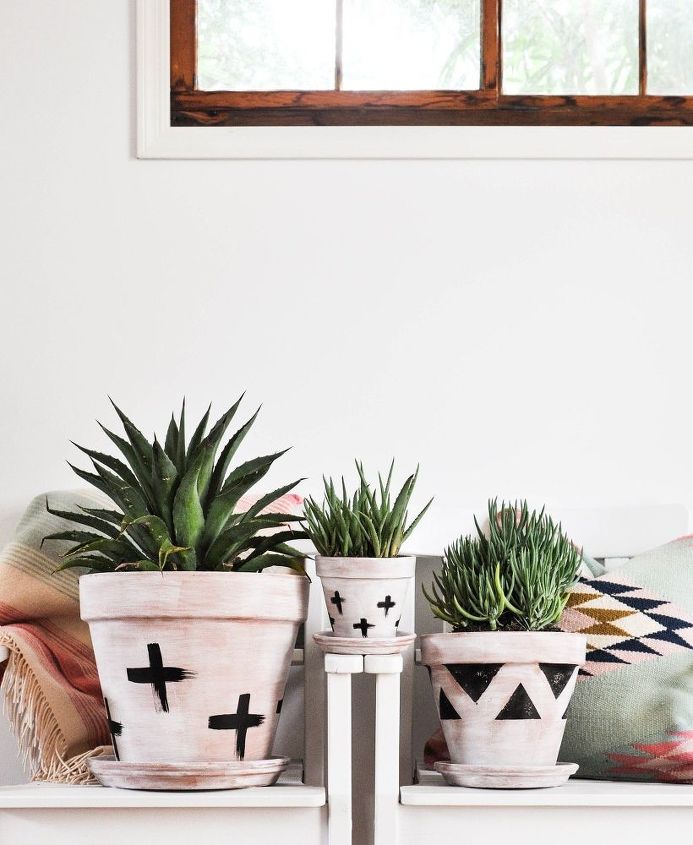
Dab any size medium stiffness paintbrush that you prefer into your black paint, making sure to get as much excess paint off of the brush as possible. If you have too much paint on your brush, your Swiss crosses won't get that distressed look.

Brush your crosses onto your whitewashed pots lightly, creating an imperfectly distressed, but equilateral cross. The key here is not pressing down on the pot with your brush too hard.
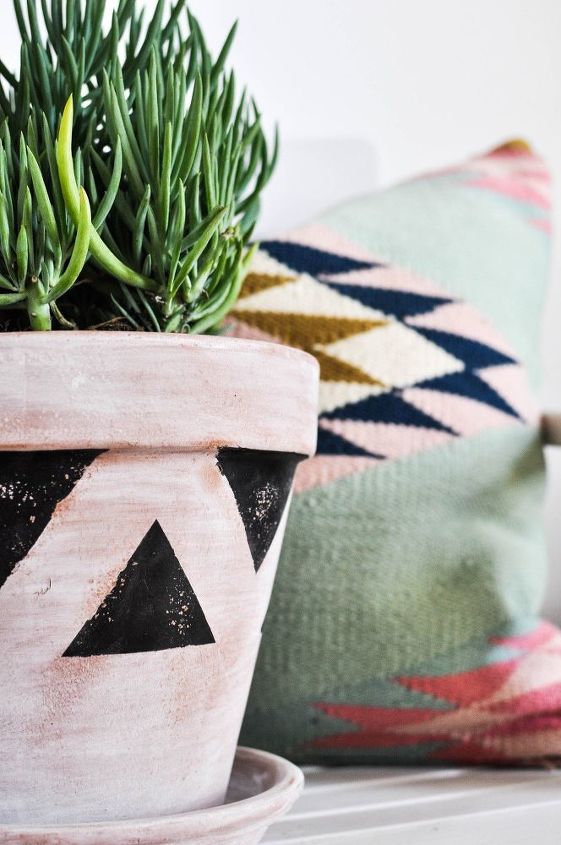
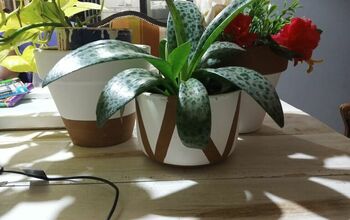
For the geometric-patterned pot that you see below, I used painters tape to tape off my pattern and filled my triangles in with the same black paint. Once it dried, I distressed the triangles with my sanding sponge.
Want more details about this and other DIY projects? Check out my blog post!


Frequently asked questions
Have a question about this project?