


Herringbone Stenciled Wall

by
Abbey D
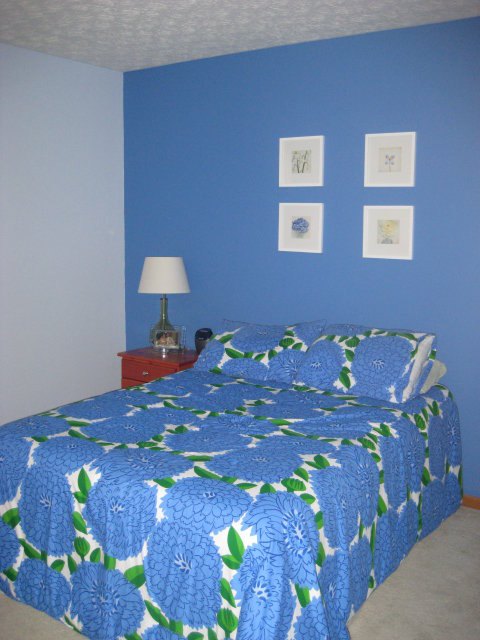
At our old house, we wanted to do something fun to our son's room that was different and unique. We didn't have a headboard for his bed yet, but I knew I wanted to get creative. I started with the simple guest bedroom below, but as we made our son's room into a nursery, we needed to move him over to the guest bedroom.
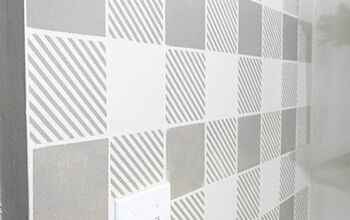
We started by painting the whole room a very soft gray color and picking out a simple navy blue and white striped duvet cover for the bed. From there, I picked out several different shades of paint and picked up a stencil from Royal Design Studio and got started.
We started by painting the whole room a very soft gray color and picking out a simple navy blue and white striped duvet cover for the bed. From there, I picked out several different shades of paint and picked up a stencil from Royal Design Studio and got started.
I worked a little every few days for several weeks to get my stenciling done. Stenciling with multiple colors can be very time consuming and at the time I was 30 weeks pregnant, so my back could only take so much.
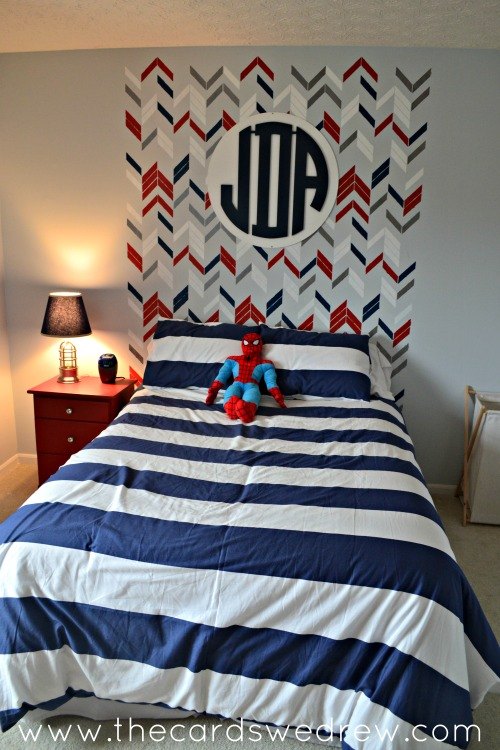
I stenciled the pattern on the wall and used stencil adhesive and painter's tape to help hold the stencil in place. I had originally intended to do the whole wall, but I just didn't have it in me and I decided it looked kind of neat like a headboard.
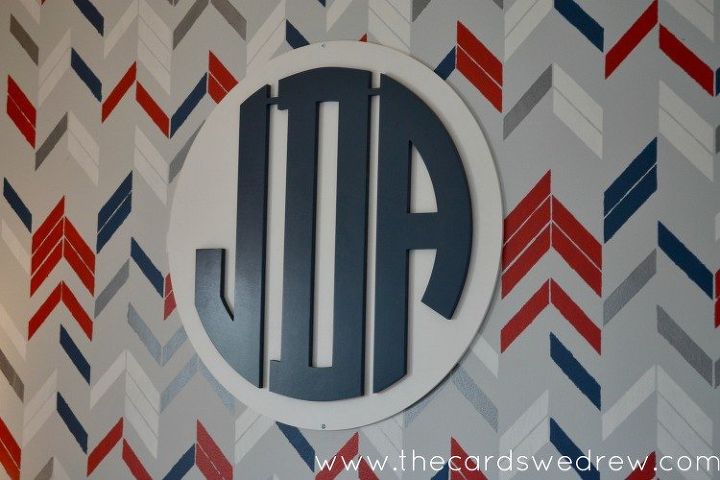
I added a fun monogram name sign to the center of the stenciling. You can see that I used a bright red, navy blue, white, and a metallic silver for the wall. I kept the color pattern the same.
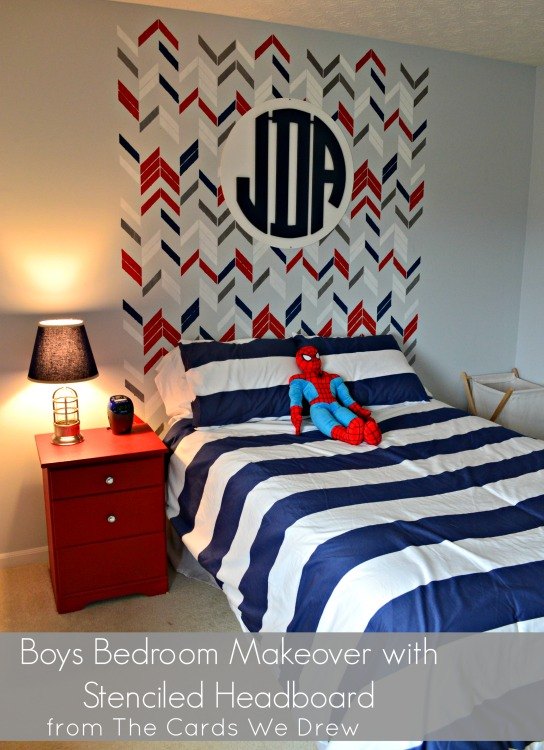
Once I was done stenciling, I got the rest of the room together and it turned out to be a really cute little boy's room.
Want more details about this and other DIY projects? Check out my blog post!
Comments
Join the conversation
2 comments
-
Great idea!
-
Love it! Love the colors you chose too!


Frequently asked questions
Have a question about this project?