


DIY Jewelry Organizer

by
Tamara S
2 Materials
Hidden behind a colorful piece of art in my bedroom, I made a jewelry organizer for $21.50!
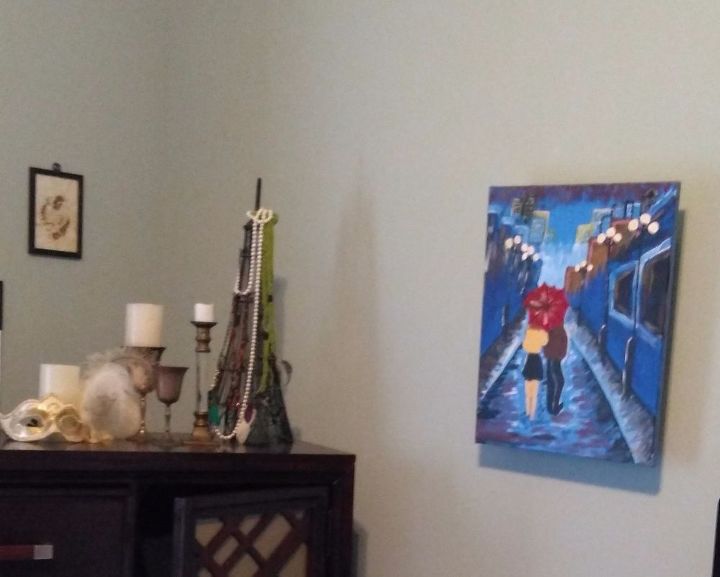
Ran out of space for my jewelry on my Armoire Eiffel Tower and didn't have room for more clutter. So I took the painting I did at "Painting with a Twist"-and turned it into a hidden jewelry organizer.
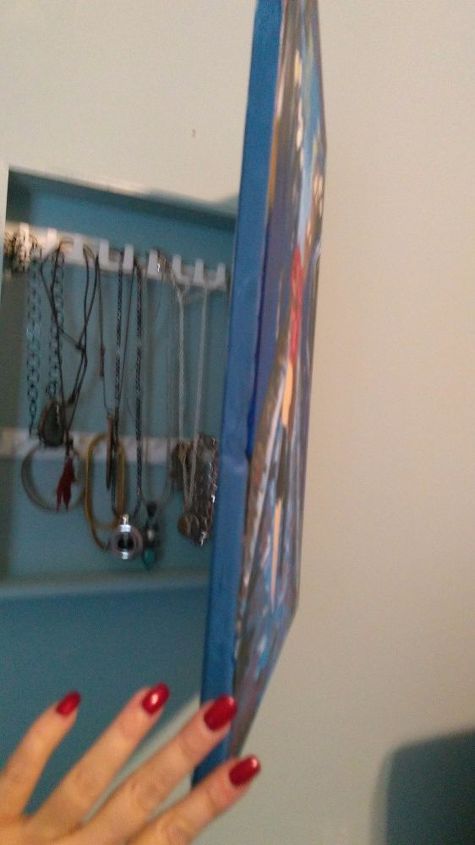
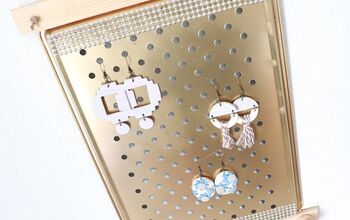
I bought a unfinished shadow box (19.50) with a hinged lid and applied plastic jewelry organizing self-adhesive strips (9.99). Attached the box to the wall using screws and the brass wall hanging brackets the box came with.
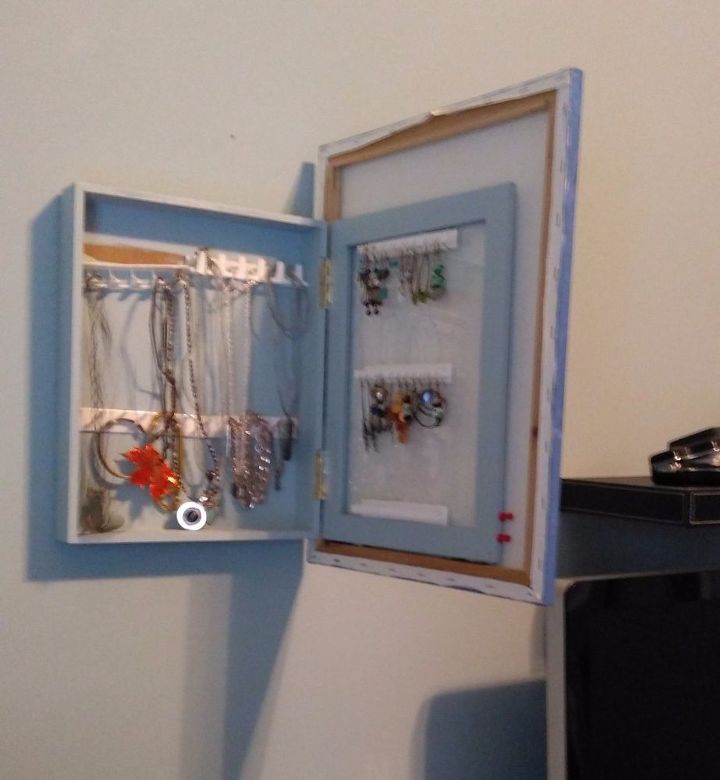
Painted the box to match the wall coloring and put self-adhesive velcro strips to the box front to attach the painting. I did need to use heavy duty glue to the top strips that held my heavy jewelry-note it coming loose in this photo. I used the velcro to secure the painting in case I get bored and want to swap it out for another painting-because while it was fun to paint at a shop that allows you to paint with friends with wine, it sure isn't fine art. Jewelry organizers like this with mirrored fronts start at $100 for one this size up to 3-400.00 for the large sized with draws and locks. The first photo is the completed look as it hangs today. Hardest thing was to wait for the paint and glue to dry, so I could hang it! Another idea would be use the shadow box alone and add a matting to the front with your favorite photo(s) and forgo the organizer strips on the lid where I've hung my earrings.
Comments
Join the conversation
2 of 6 comments
-
Beautiful multi-purpose, gorgeous decor, genius organizing!
-
Thanks


Frequently asked questions
Have a question about this project?