


How to Transform Those Empty Beer Bottles in Beautiful Decorations

1 Day
Easy
With the holidays coming and really at any other time of the year is great to display our own made décor pieces!!
The cost is very affordable, we already have the bottles, right? and gathering some ribbon ,pine cones ,flowers or any other craft element available we can create beautiful decorative bottles in no time. How easy and exciting is that!!
The cost is very affordable, we already have the bottles, right? and gathering some ribbon ,pine cones ,flowers or any other craft element available we can create beautiful decorative bottles in no time. How easy and exciting is that!!
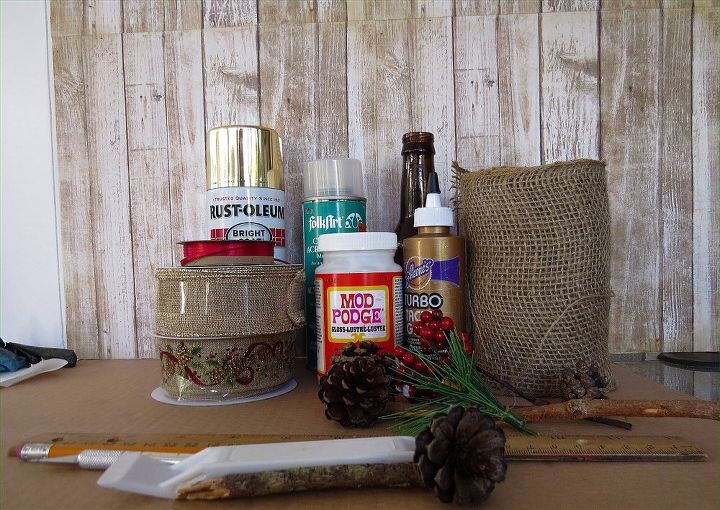
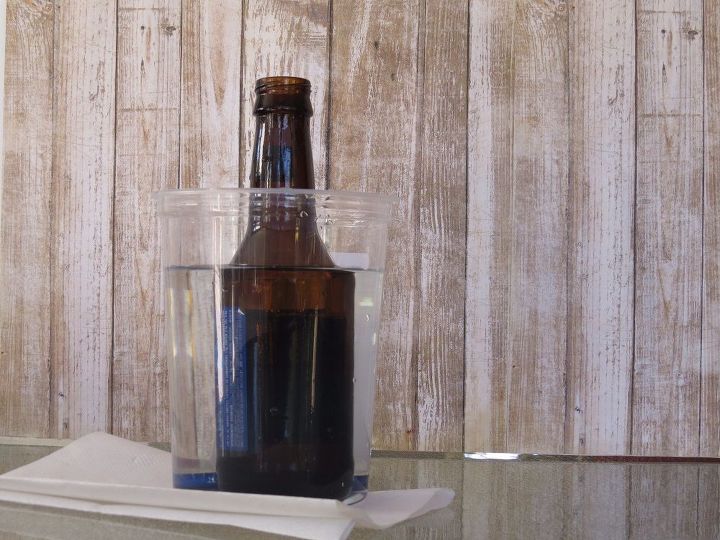
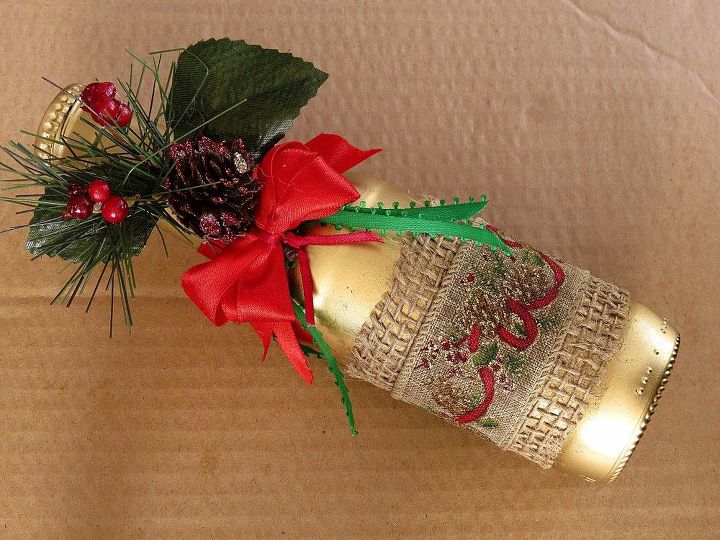
1-I started by removing all the labels in the bottle, you can use the soaking in water method or remove them with a scraper, make sure you also remove all residue inside and outside the bottle and let it dry completely.
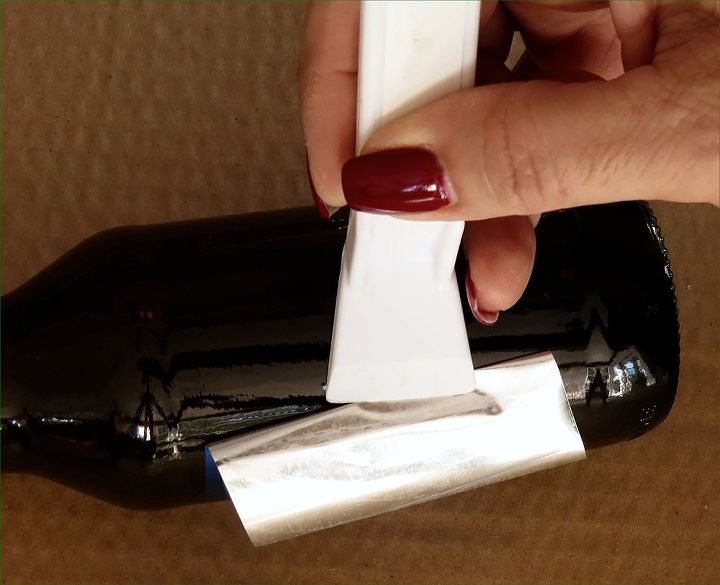
The labels can also be removed with a scraper, use goo gone if the glue residue stays on the bottle.
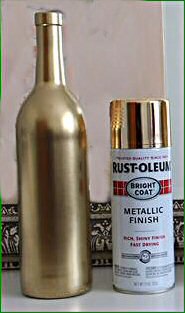
2-Paint the bottle using spray paint or acrylic paint making sure you cover it completely. Let it dry for 3 hours.
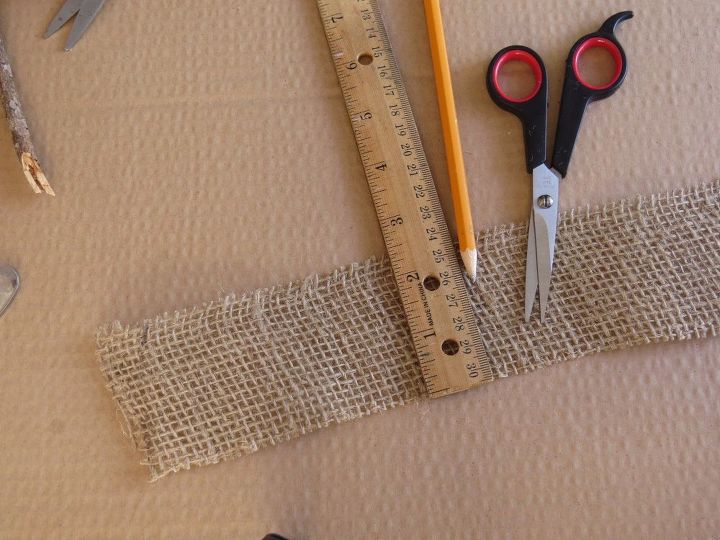
While the bottle dries measure and cut the fabric and ribbon according to the design You’ve chosen for the bottle, (when wrapping the bottle around remember to measure the fabric a bit longer to allow it to overlap).
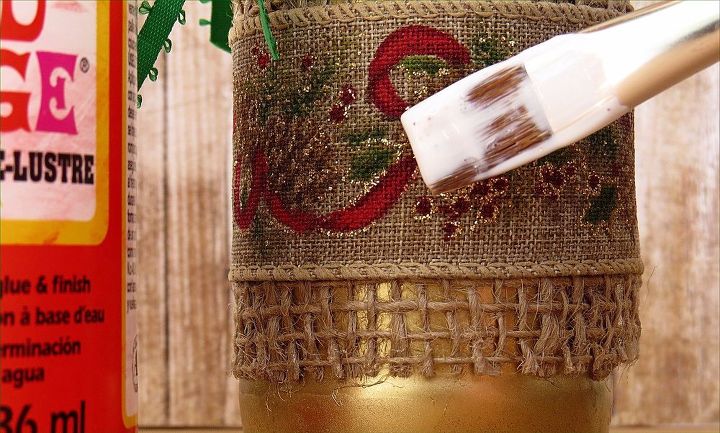
Once the bottle is completely dry proceed to cover it with Mod podge (you can also use glue) and

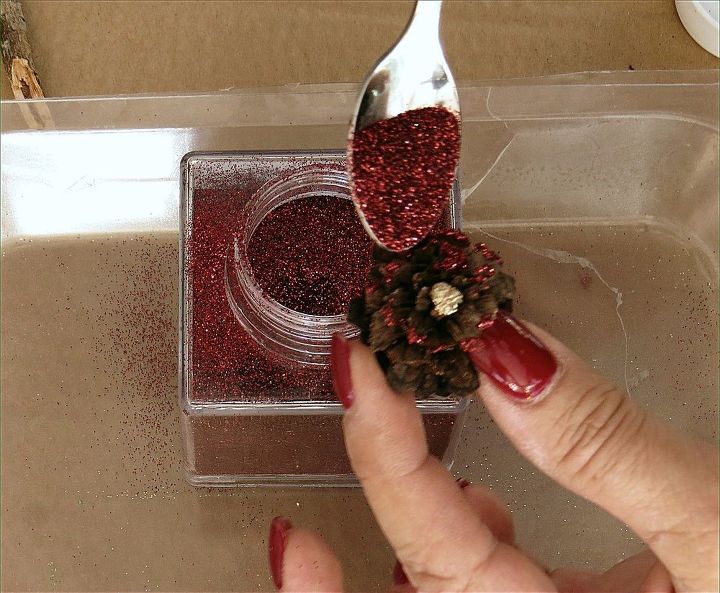
As I was thinking about the holidays already, I gathered some of the pine cones and pine foliage from my craft supplies and applied some glitter to the edges of the pine cones and sprinkled them with glitter. Set them aside to dry completely….
Here is where you can get creative mixing colors and elements to accent your bottle!
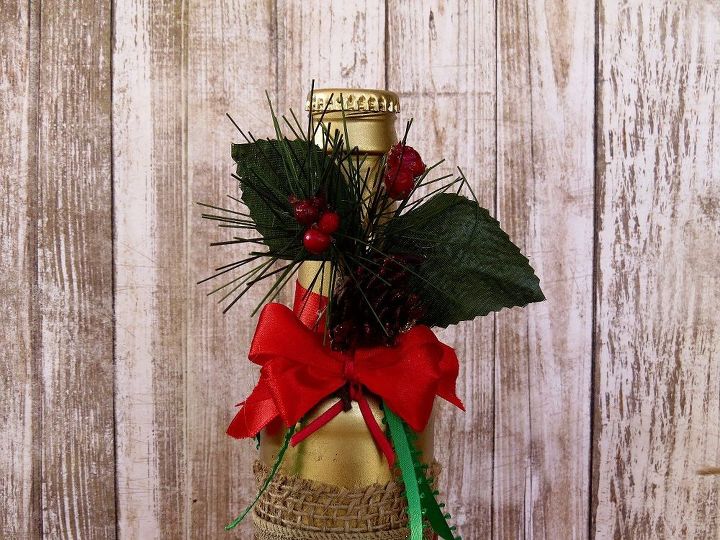
Add ribbons and bows to your decorative element and adhere it to the bottle using hot glue or regular glue. Let it dry for 2 hours at least ..
Make sure you let dry all the elements completely before let the bottle stand.
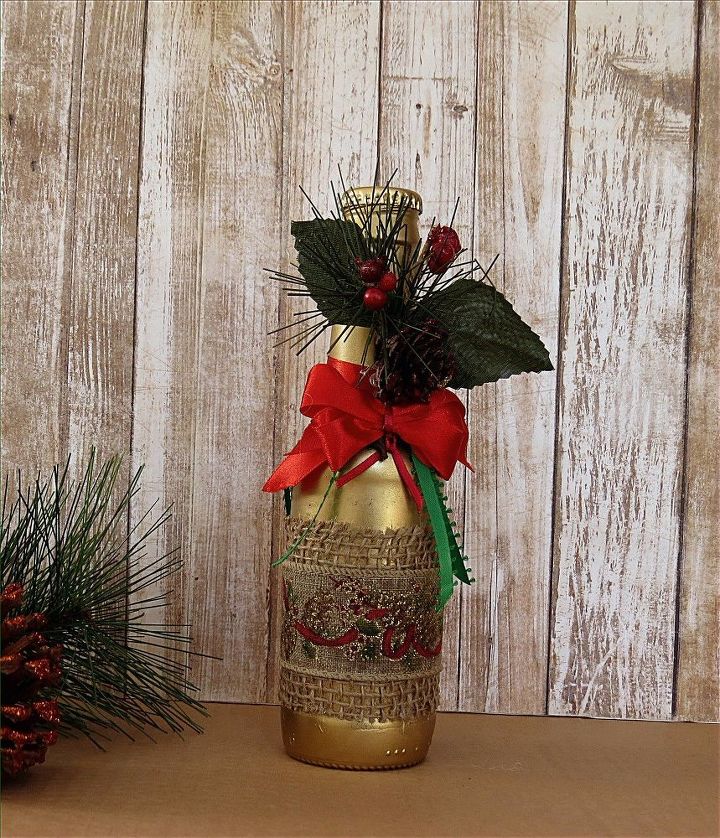
.. and Voila!! You have an amazing piece to add to any home décor!
Comments
Join the conversation
2 of 32 comments
-
Have zero restaurants within 25 miles and I don't drive - but.... there IS a friendly bar n grill 7 miles away! Hadn't thought about that! Thanks!
-
Really adorable! Love it!


Frequently asked questions
Have a question about this project?