


DIY Before & After Bathroom Sink and Ceiling Upgrade

We badly needed to remodel our bathroom sink and ceiling but didn't want to break the bank. Here is how we remodeled our entire sink area on a budget!
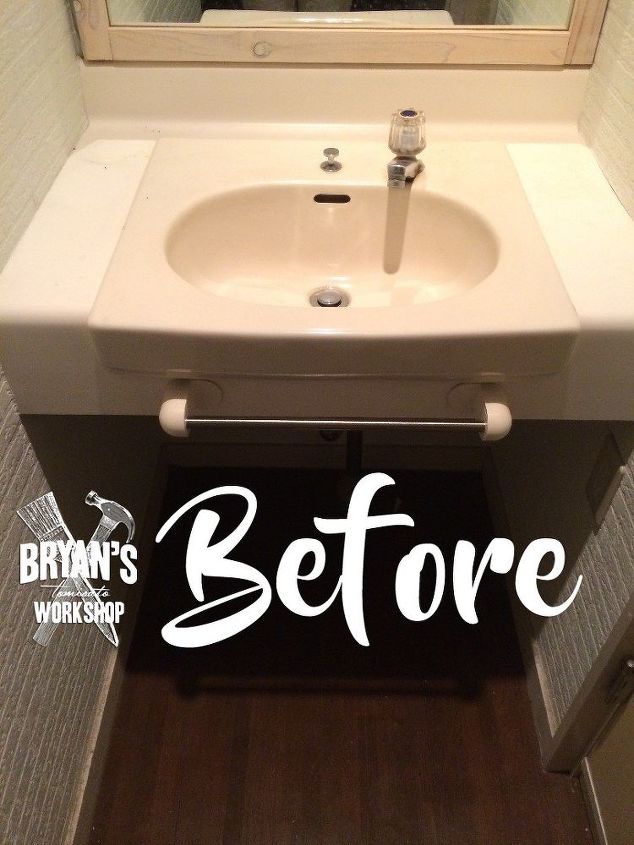
Check out this 30 year old sink!
Here's what you'll need for this project:
- faucet
- mini mosaic tiles
- epoxy mortar and grout
- plastic primer
- acrylic paint
- sponge
- cedar wood
- drill
- screws
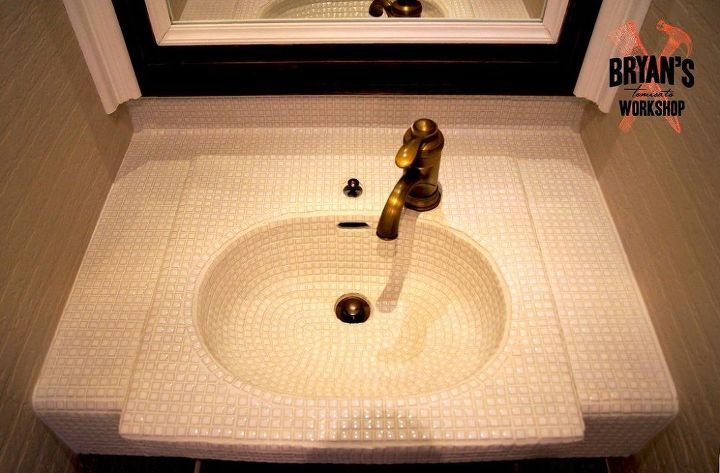
I found a new faucet and drain at an incredible price. Double check the hole sizes in your sink so the new hardware fits.
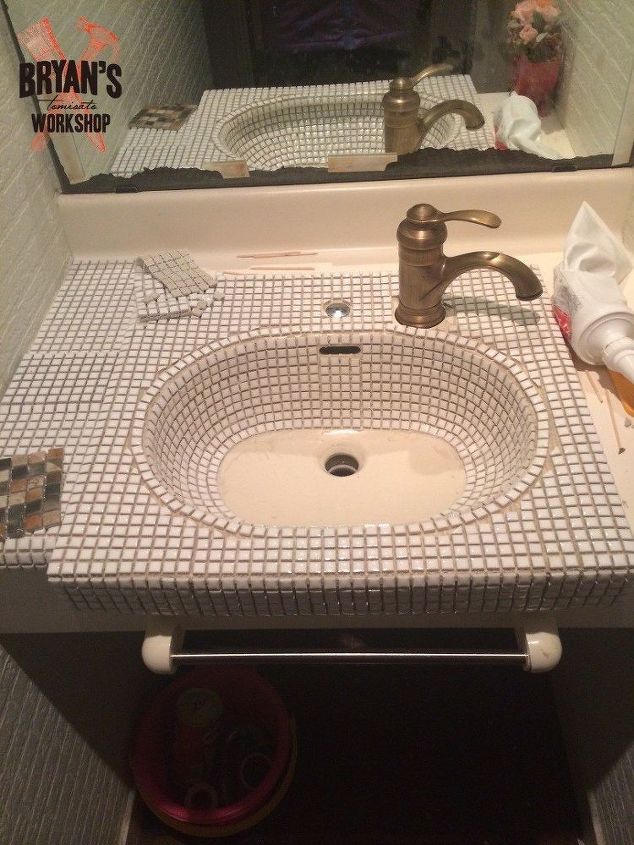
Mini mosaic tiles! These came in squares on a mesh making them easy to work with. We used epoxy mortar and grout to install all of the tiles. Epoxy mortar and grout is:
- Stain proof
- It inhibits the growth of stain-causing mold and mildew
- Has antimicrobial protection.
- Ideal for installations at wide temperature ranges.
- Uniform color—no blotchiness or shading.
- Easy to maintain, cleanable to the original color.
- Tough, durable, and crack resistant.
- Chemical resistant
- Non-sagging
It is not as difficult as it looks to do this.
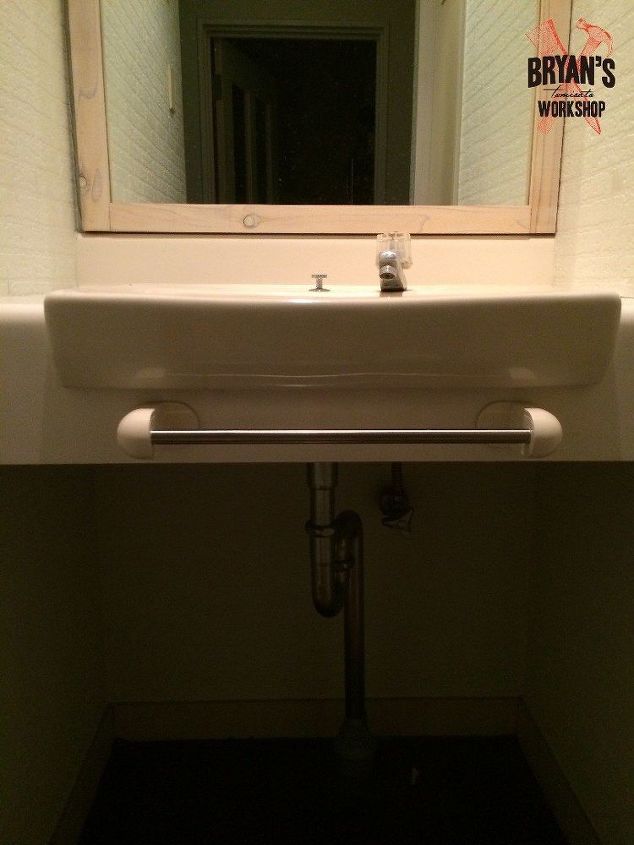
Check out the water damage on that mirror!
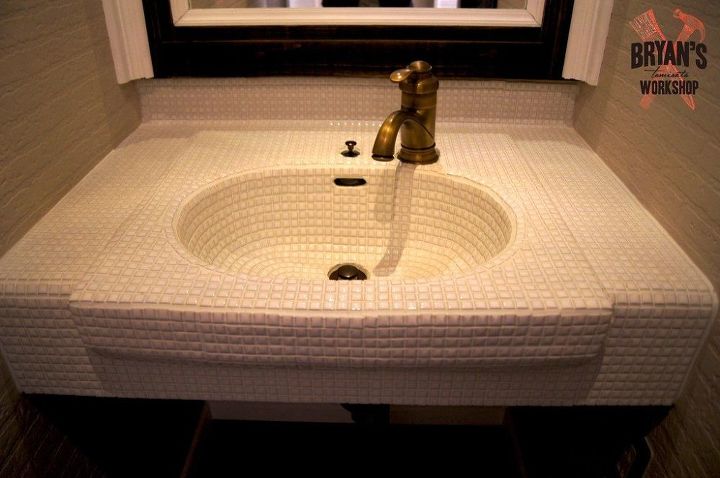
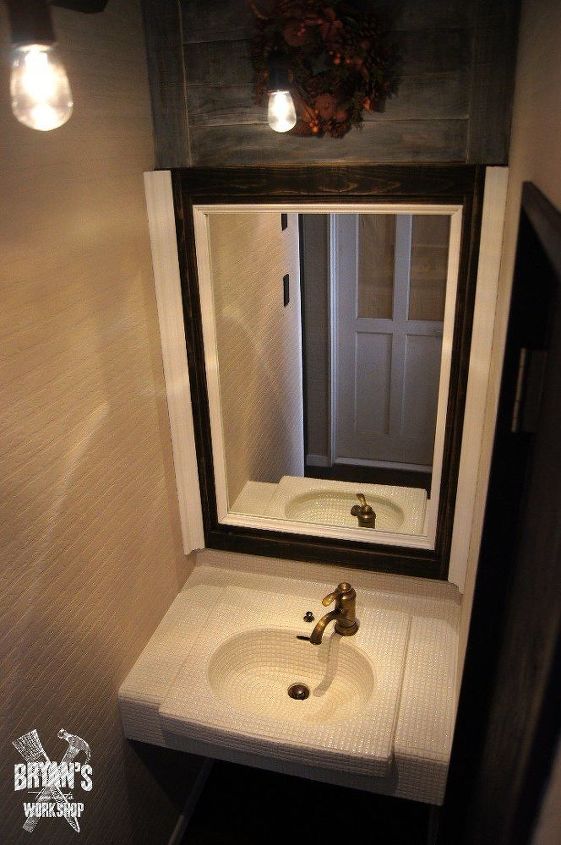
The finished sink! It's been over a year since we tiled this sink and it has been extremely easy to keep clean. All dirt and grime roll off of the grout with only water and a cloth.
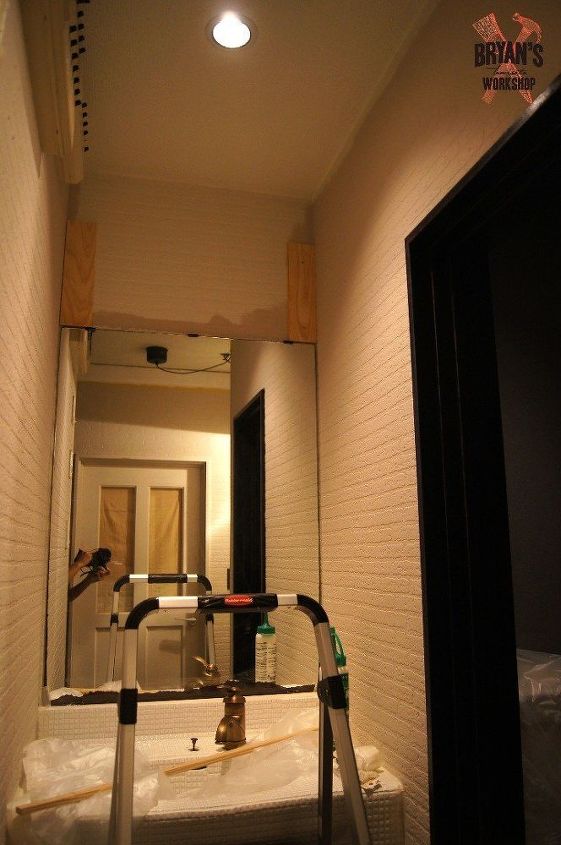
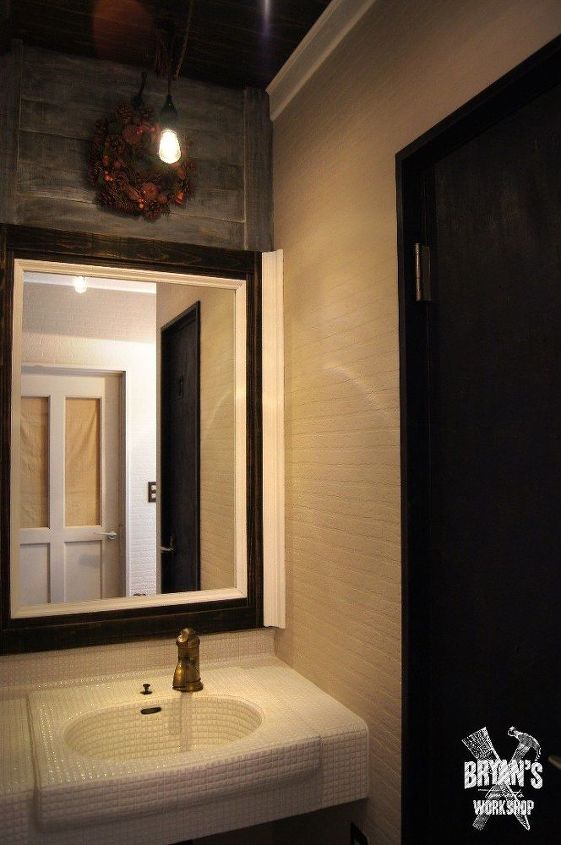
It's time to start the wall, ceiling, and mirror frame. Those boards above the mirror are attached to the studs in the wall.
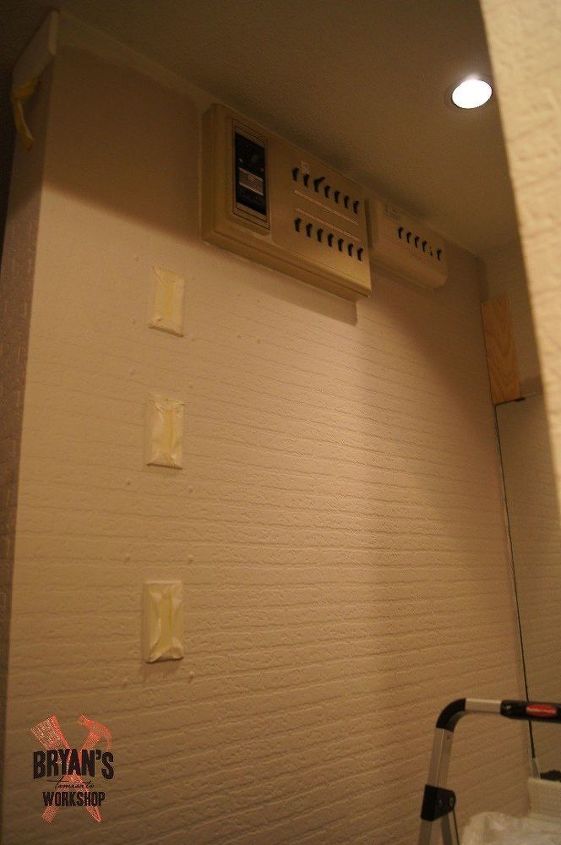
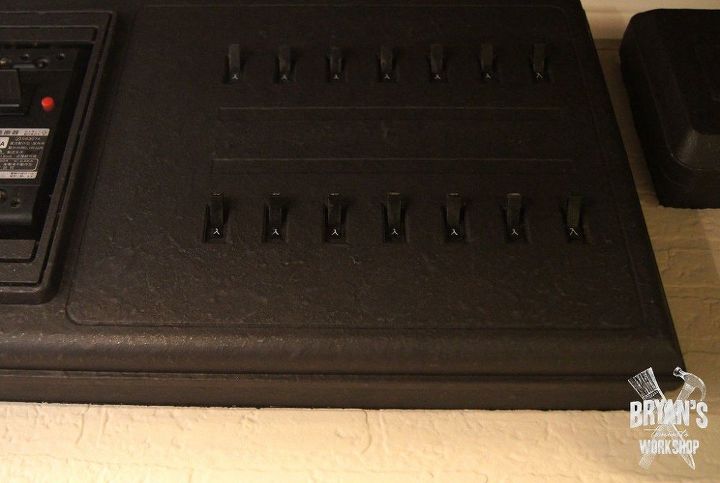
It's texture painting time!
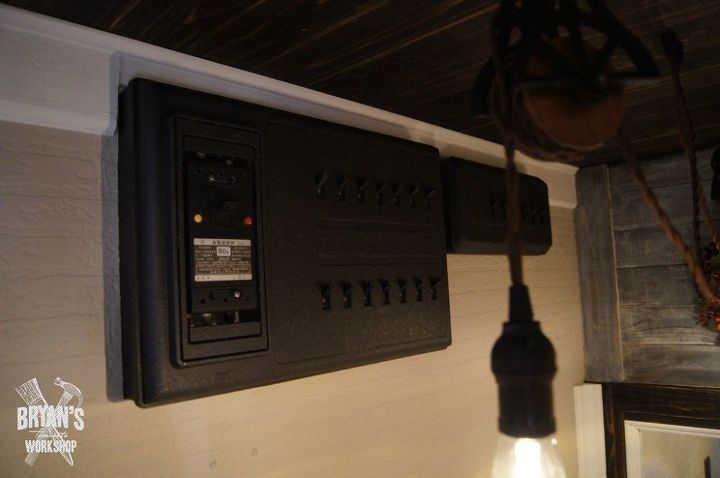
I used a plastic primer and then gave my circuit breaker panel a textured metallic paint job using acrylic paints and a sponge.
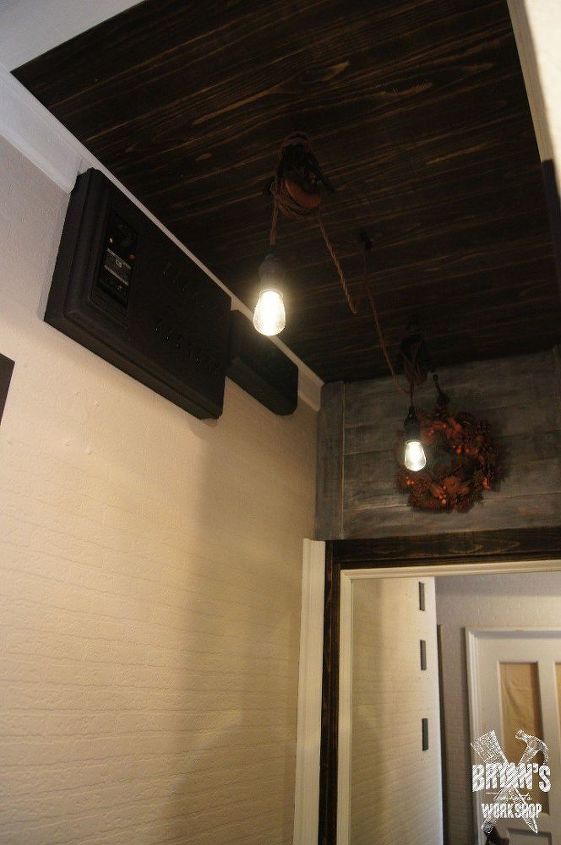
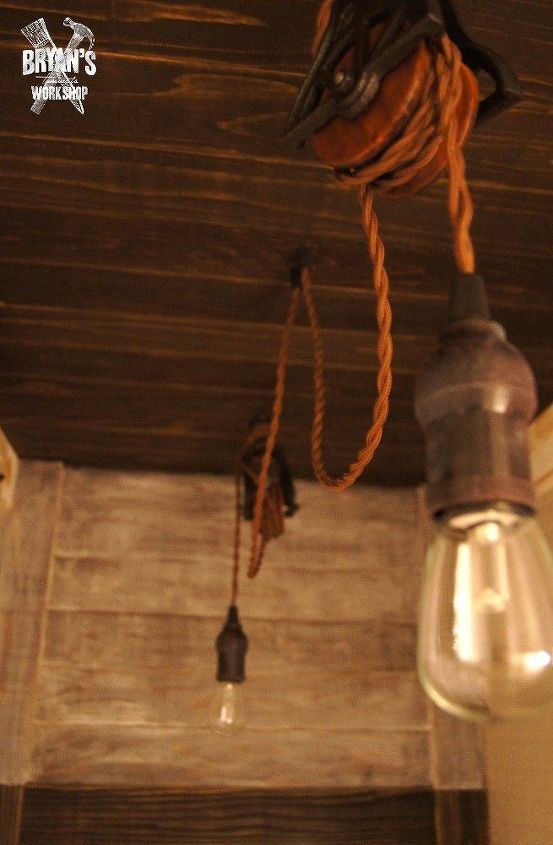
I used Japanese cedar wood for the wall, ceiling, moldings and baseboards. The boards running across the ceiling are held up by the ceiling molding and not actually attached to the ceiling. The molding is secured to the studs.
*Use caution drilling into your wall and always be cautious of electrical wires.
The boards on the wall above the mirror are attached by the ends to wood secured to the studs under them.
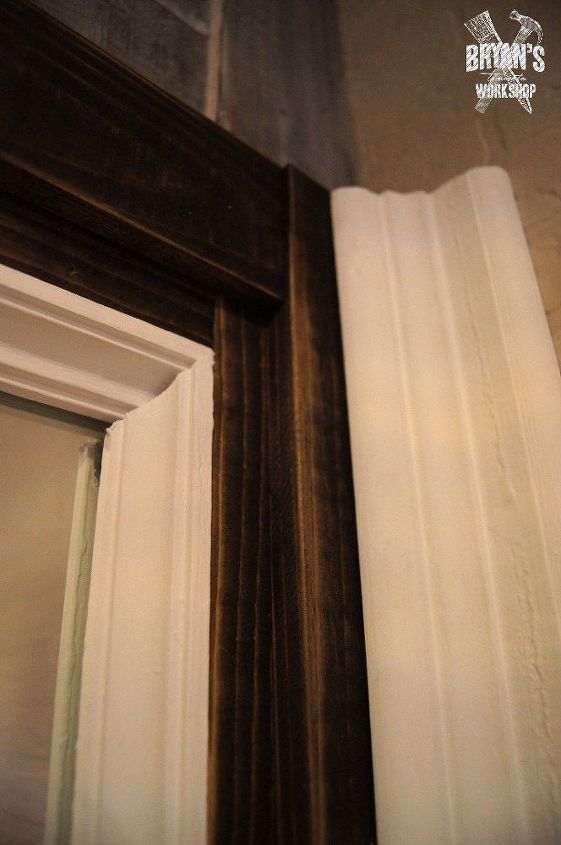
I built these frames out of cedar wood and wood molding I bought from my local wood shop.
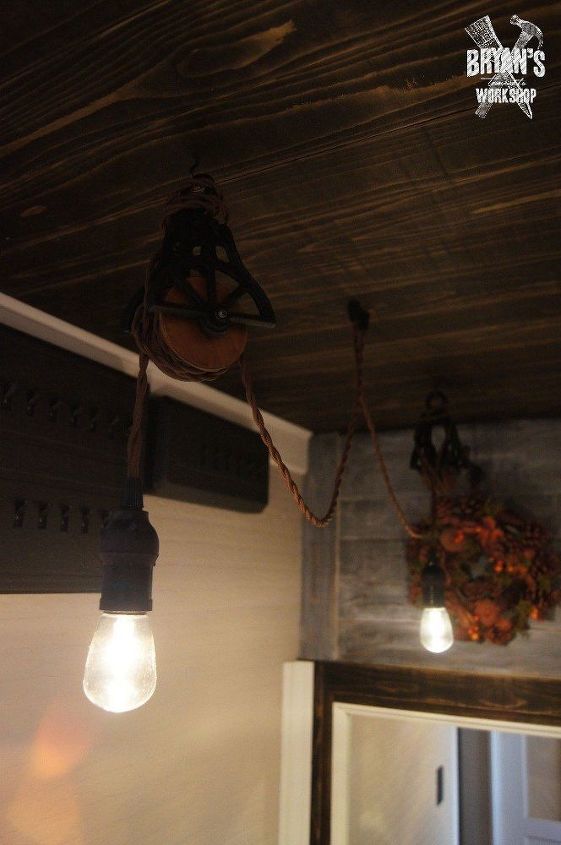
I wired two lights bulbs into the ceiling on antique looking wire and wrapped the wire around two pulleys I found on sale.
*Use caution working with electricity.
Stop by Bryan's Workshop on Facebook to see what I'm working on next.
Comments
Join the conversation
-
Love it! You explained everything to a 'T'. Where does one get Japanese cedar wood, that's gorgeous?
-
Unique. Reminds me of something you’d see in Italy.


Frequently asked questions
Have a question about this project?
How did you keep the ceiling boards up, while putting up the molding, if the boards are not nailed into the original ceiling?
Looks beautiful but how did you keep the boards on the ceiling up, if theyre not nailed to the original ceiling?
Hi Bryan. I started something like this for my counter top; however, never finished as was so difficult. Do I use grout to stick tiles in sink? Thanks as absolutely beautiful!