


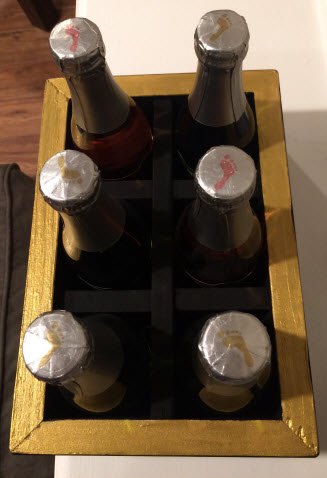
Kate Spade Inspired Bottle Holder
4 Materials
$5
2 Hours
Easy
This project was inspired from a pack of holiday cards that I fell in LOVE with from Kate Spade (my favvvv brand). I wanted to create a piece of decor to display some cute mini champagne bottles I found for our NYE party. So.. this wooden holder idea came about and I mixed it with the confetti dot design from Kate Spade..and voila!
This holder is super easy to cut and assemble (it took about 30 minutes from start to finish) and fun to decorate for whatever occasion you may have. It makes a great host(ess) gift too! AND an added bonus: the dimensions are easy to modify, so you can hold other types of goods like beer bottles, cups, food, and so on!
This holder is super easy to cut and assemble (it took about 30 minutes from start to finish) and fun to decorate for whatever occasion you may have. It makes a great host(ess) gift too! AND an added bonus: the dimensions are easy to modify, so you can hold other types of goods like beer bottles, cups, food, and so on!

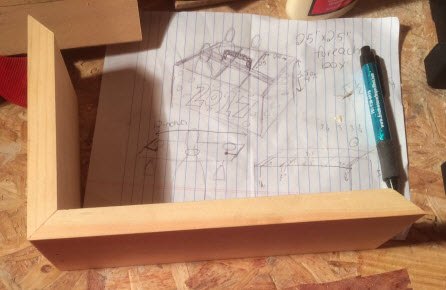
Create the diagram for your box. You'll need to know the thickness of your wood pieces that you are going to use. For ours, we decided to use thicker pine board for the outer frame, and thinner pallet wood for the inner slats. I say we decided, it was more of a what scrap wood do we have lying around!! For a free sample diagram, visit out full site here!
Now that your have your frame dimensions, make the necessary cuts to create your frame. You will need 2 sides and 2 ends. Assemble the frame using a bead of wood glue and a couple of nails on either side.
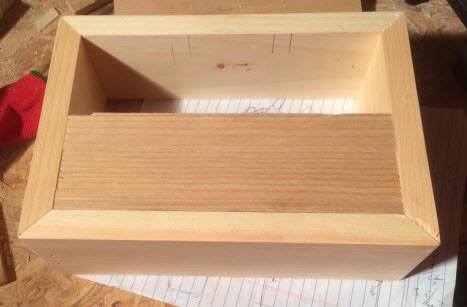
Time to add a bottom to that frame!! Since we were using scrap pallet wood for the inside, we did not have a piece wide enough for the base so we improvised and trimmed down 2 pallet slats to fit. If you have a wide enough piece of wood lying around, 1. lucky you! And 2. cut this piece to the needed width and length, and attach to the frame.
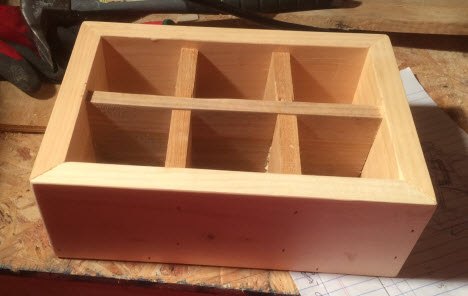
For the inner dividers, start by cutting the middle length piece (aka the spine). This should be cut to the same length as you did for your bottom. Mark the center of the box on either side piece so you can easily line it up when affixing. Once cut, secure into the box using glue and a couple of nails through the bottom and sides. Now, you need to cut 4 pieces the same size (providing you have all of your measurements correct and the center piece is in the center!).
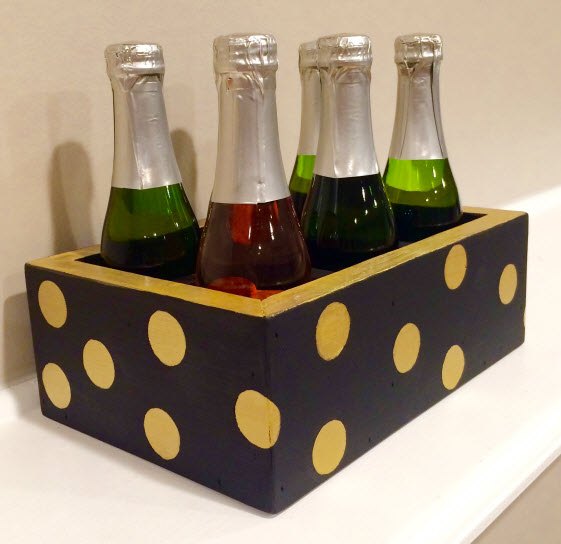
Lightly sand your box so that you round out any sharp corners. Then... it's time to decorate! I recommend using acrylic paints since they are suuuper easy to paint onto wood. Here is how I decorated mine with the confetti dot design!
For more detailed steps on how to build, and tips for creating smooth corners visit our full post here!

Want more details about this and other DIY projects? Check out my blog post!
Comments
Join the conversation
2 comments
-
I’ve always wanted one, but could never afford it!


Frequently asked questions
Have a question about this project?