


DIY Skateboard Shelfs

by
Rachel Metz
7 Materials
$30
45 Minutes
Medium
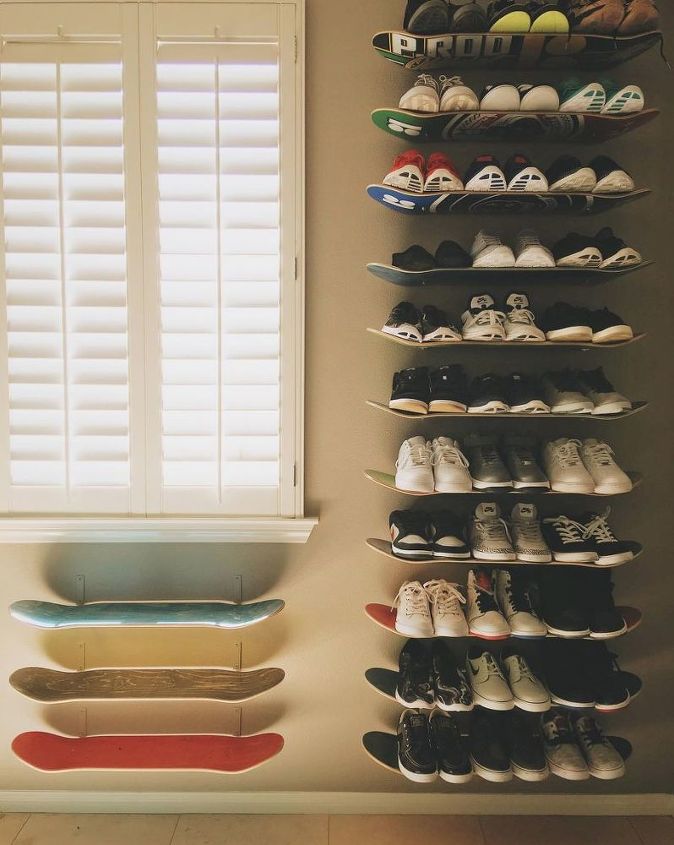
Skateboard shelving comes in handy for unique storage! Perfect touch for any home with a skater in it! These are beyond simple to install and I have them all over my home. If you don't have new skateboards you can use, recycle old ones. Let's get started!

Materials are listed below.
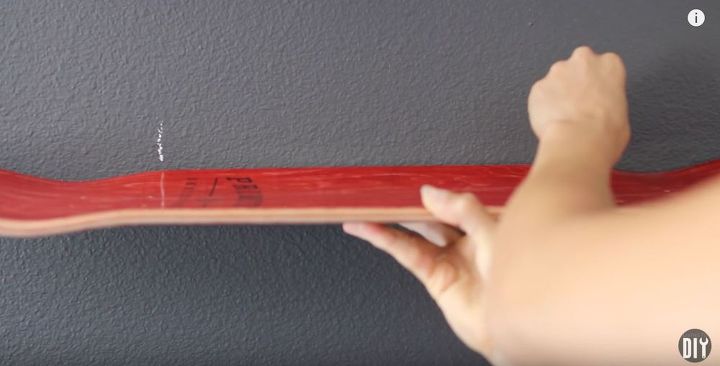
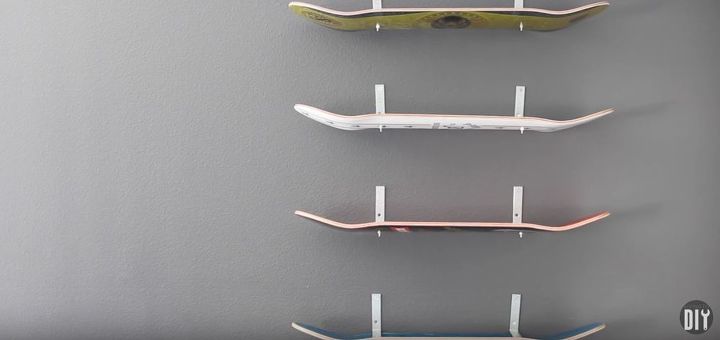
Step 1: Mark with chalk above the skateboard holes where you want this shelf to live.
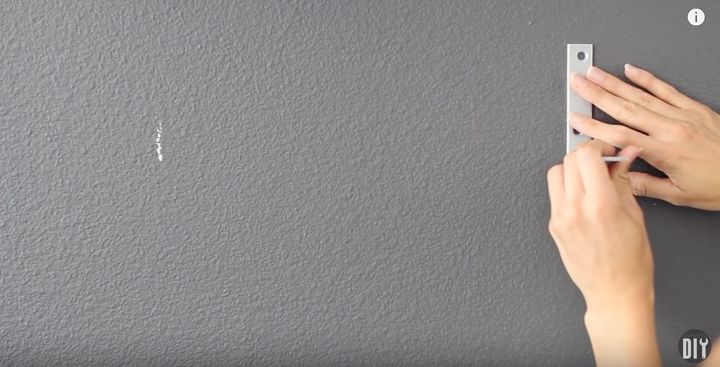
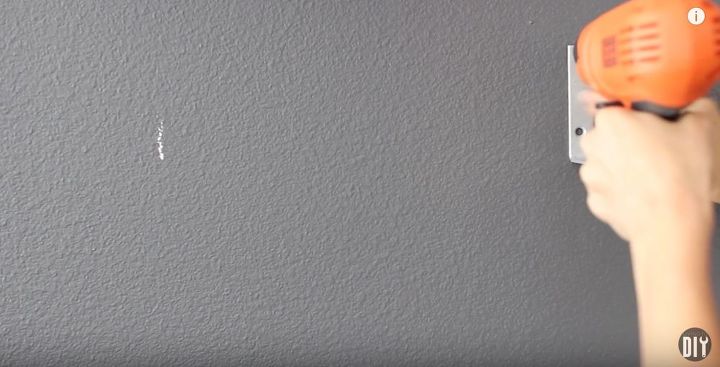
Step 2: Place your bracket right below the chalk mark and screw into the wall!
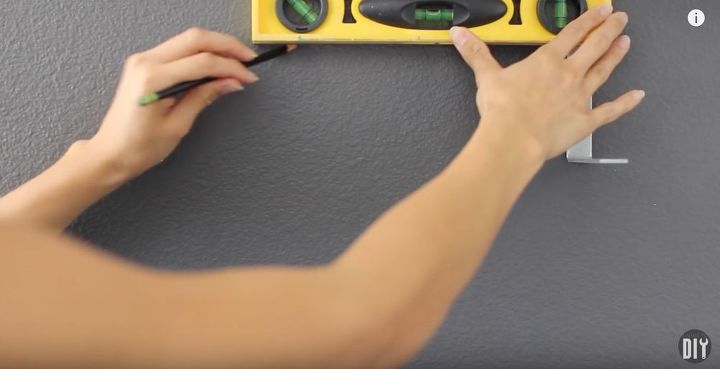
Tip: If you have a level and are terrible at hanging like me, you can run it across with a pencil to ensure 100% you aren't going to step back after all said and done then be bummed since it's not level.
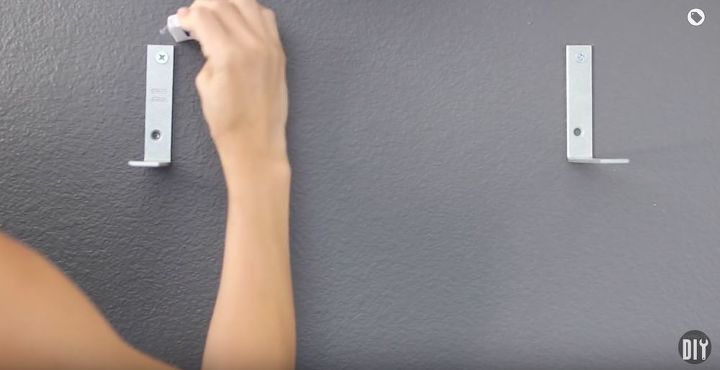
Step 3: Screw in the other bracket at the top and use an eraser to remove the pencil marks if you did my tip from above!
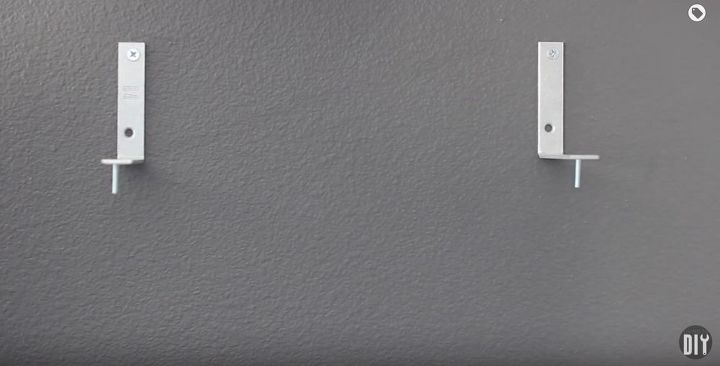
Step 4: Insert both flat top screw.
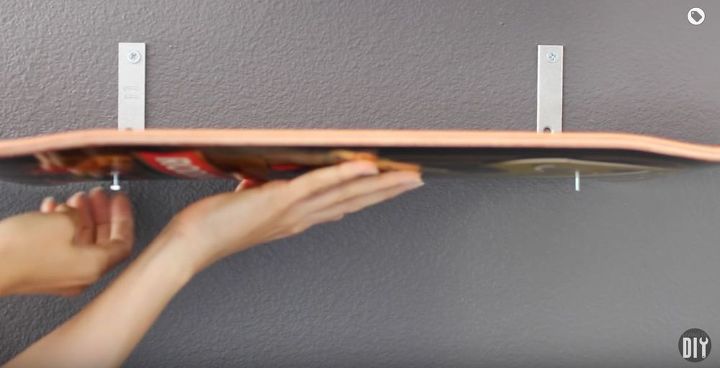
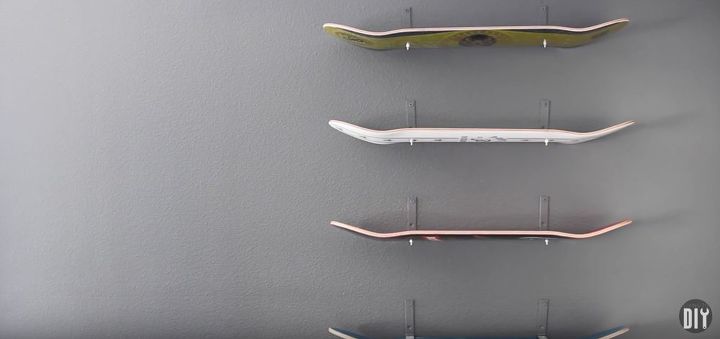
Step 5: Place the skateboard below the bracket and screw the hex nuts on (this is if you are hanging it high and people can look up to see it, you want the graphic to show). Place the skateboard above the bracket if you are hanging it low so you just have the top of the board - in my opinion it looks cleaner!
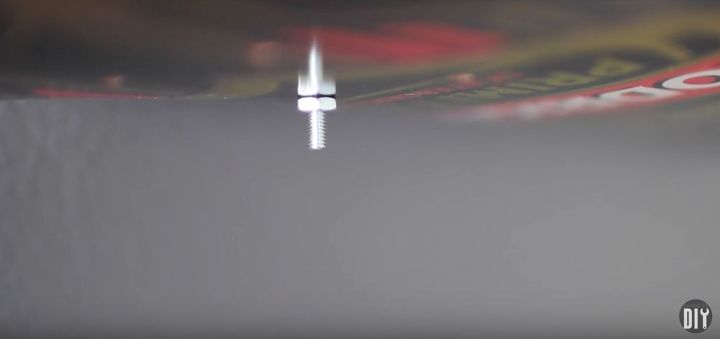
Step 6: Ensure the hex nut is screwed as tight as possible. Step 7: Before painting the metal the color of your wall... After!
Step 7: You can paint the top of the brackets to match your walls!
This is after! You can go as crazy as you want or as not so crazy, your call! I love mine though and hope you enjoyed it as well.
{
"id": "3669275",
"alt": "",
"title": "",
"video_link": "https://www.youtube.com/embed/lZR6_tHJlYw",
"youtube_video_id": "lZR6_tHJlYw"
}
{
"width": 634,
"height": 357,
"showRelated": true
}
Comments
Join the conversation
2 of 25 comments
-
Dang, he's got alot of shoes!!! Nice job!
-
Yes if I can find the skate boards!


Frequently asked questions
Have a question about this project?
What size is the l brackets?