


Conversation Heart Topiaries (Valentine's Day Decor)

February is a few days away and that means love is in the air! I've seen all kinds of Valentine's Day topiaries floating around online and decided to try my hand at these cute Sweethearts/conversation heart topiaries. We want to help you DIY, so some of the materials in this post are linked to sellers. Just so you know, Hometalk may collect a small share of sales from the links on this page.
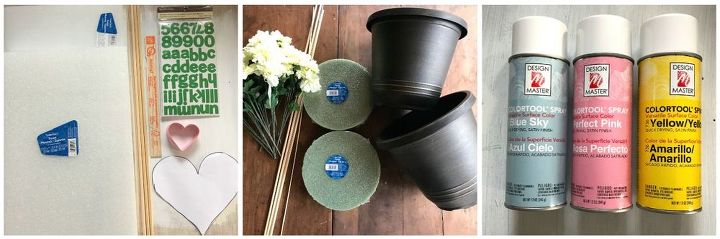
SUPPLIES:
- styrofoam boards (I used 15/16"x11 15/16"x17 15/16" for my large hearts and .3"x11.8"x26.8" for my small hearts.)
- Reflection Alphabet Stickers (in the scrapbook section of Michaels) - (This is the only spray paint that I know of that is safe on styrofoam. For my first attempt at this project, I tried using a styrofoam primer and regular Rustoleum spray paint for color but even with the primer, it still melted the styrofoam.)
*Not pictured:
- butter knife
- wire cutters
STEP 1:
Cut out hearts First, I used my to cut out the small hearts out of the thinner sheet of styrofoam.
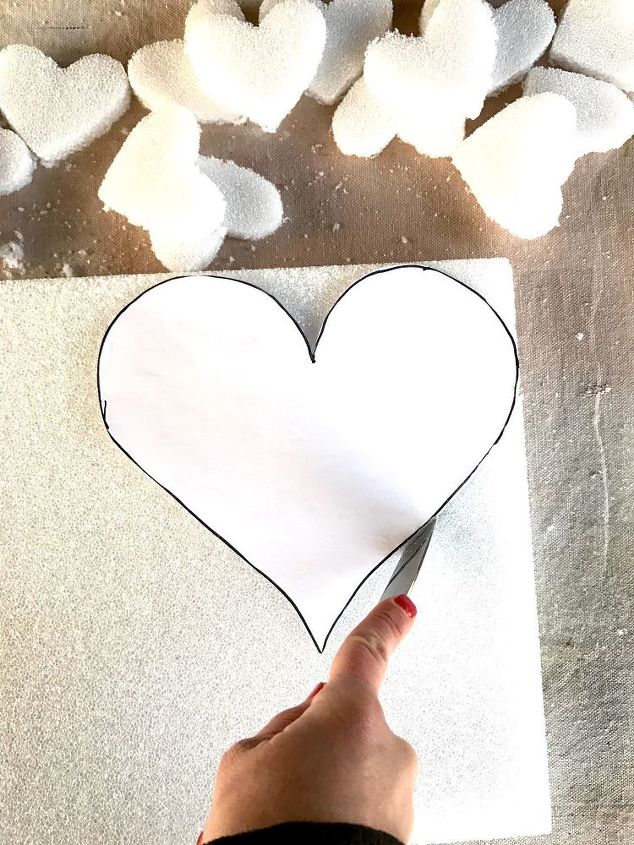
Then, using a butter knife, I cut out my 6 big hearts out of the thicker pieces of styrofoam. *Note: I would recommend NOT using smooth foam. I tried that the first go at this project and regular styrofoam was a game changer!
STEP 2:
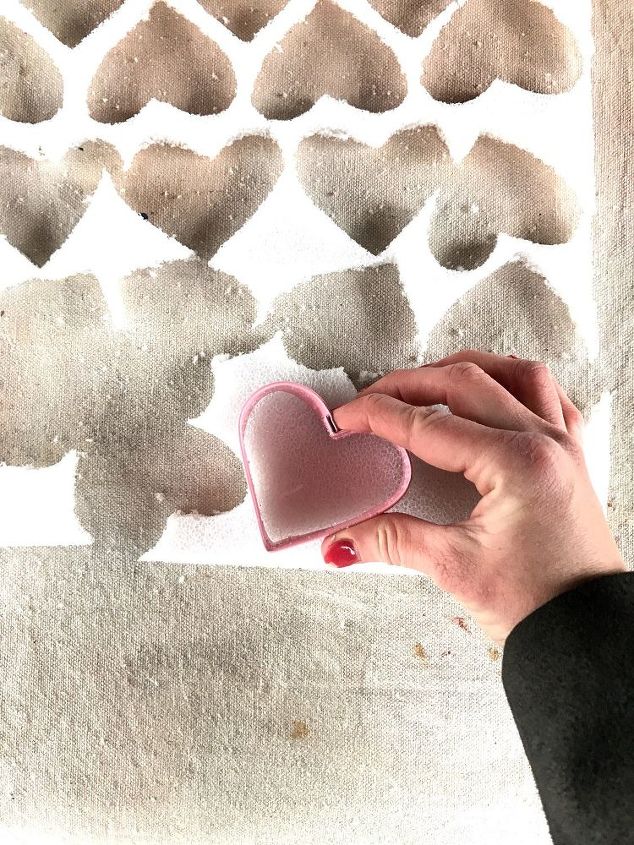
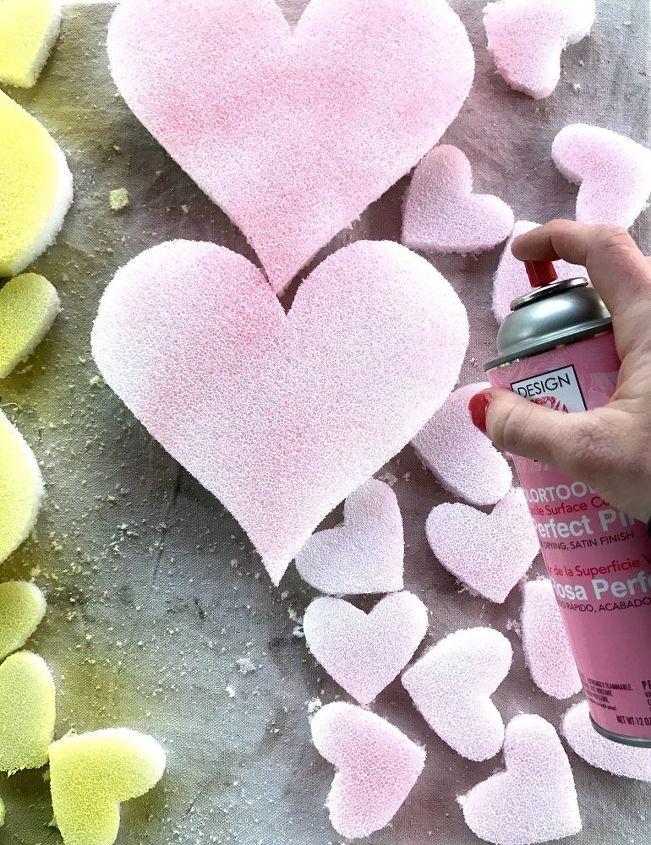
Spray paint back of hearts Next, I divided up my small hearts and separated my 6 big hearts into three groups, spray painting each group of hearts a different color. This made a big difference with the styrofoam.
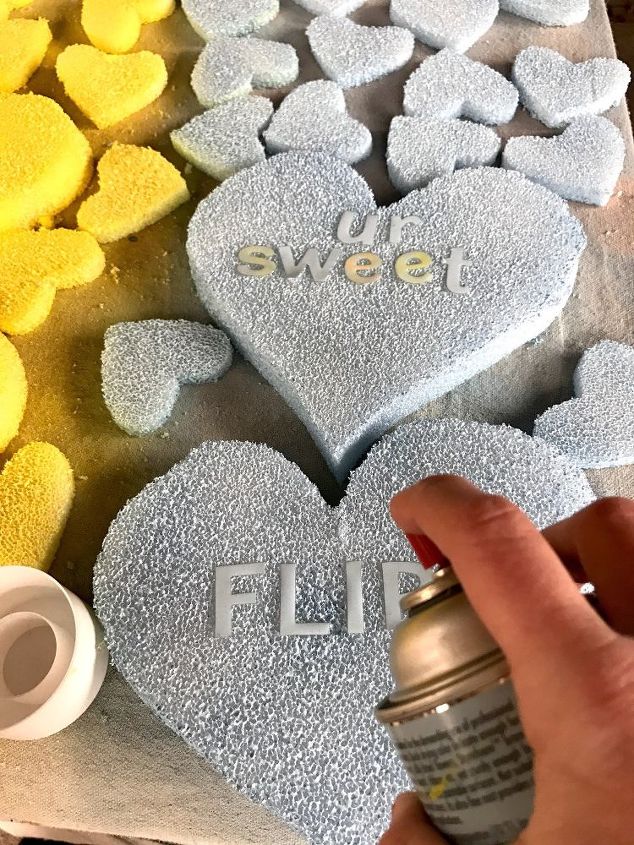
STEP 3: Add words/phrases and spray hearts.
After the backs of my hearts were completely dry, I flipped them over and added alphabet stickers to create words and phrases for my conversation hearts. Then, I .
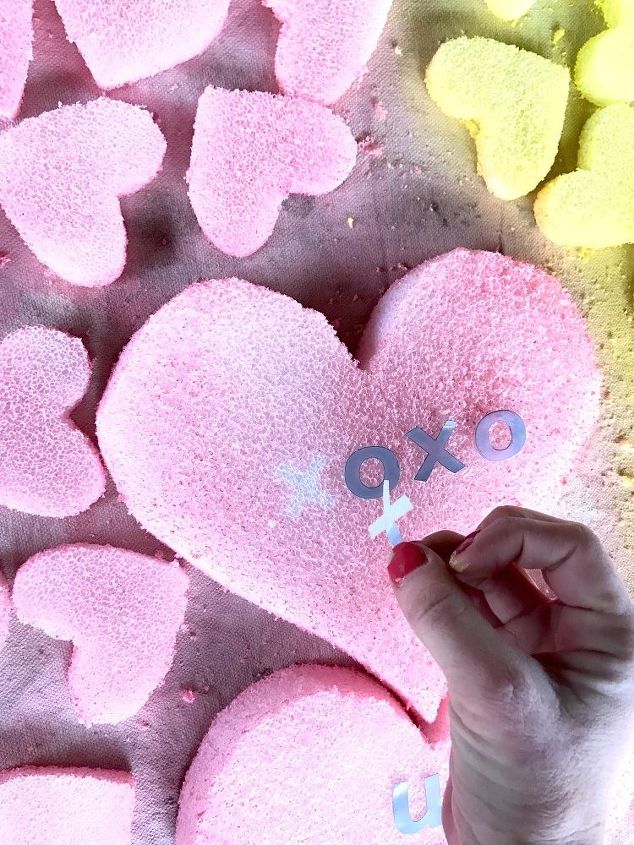
STEP 4: Remove letters Once the front sides of my hearts were completely dry, I removed the alphabet stickers to reveal the words/phrases that I had spelled out.
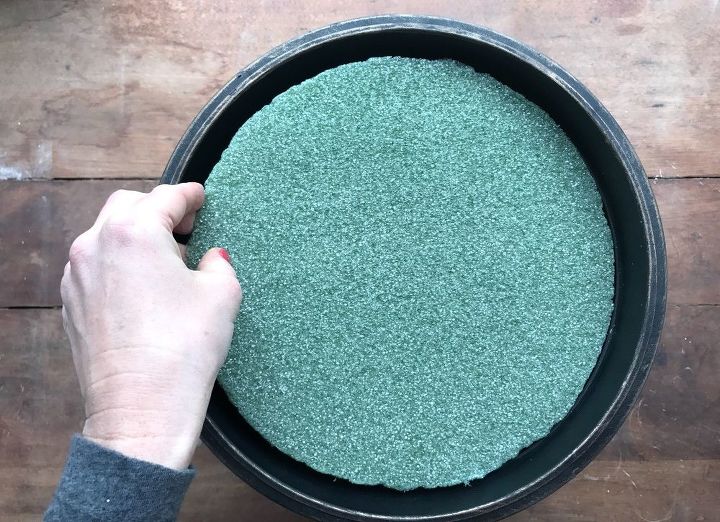
STEP 5: Create topiaries Finally it was time to put the Conversation Heart Topiaries together. First, I inserted a 10" styrofoam round piece snuggly into each of my .
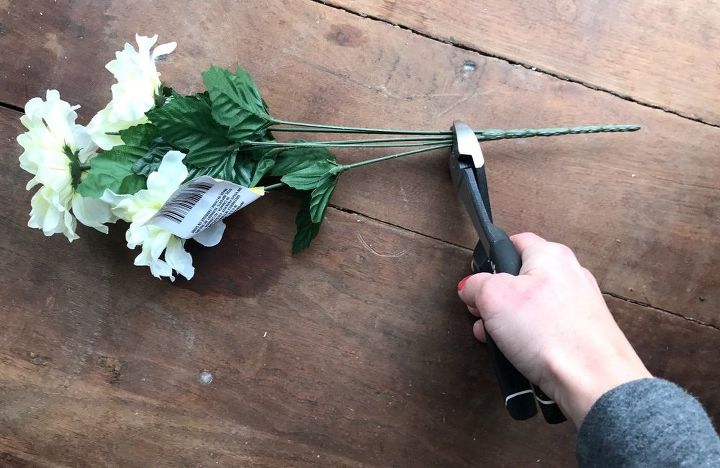
Then, I cut my artificial flower bunches so they were single stems. This part would change according to what type of flowers you want for your topiaries.
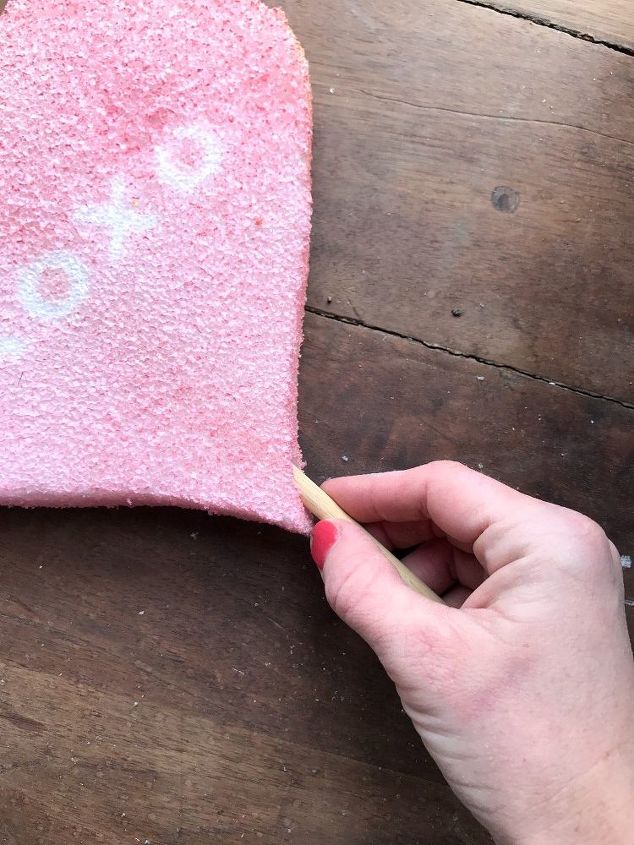
Next, I inserted a single wooden dowel into three of my big hearts (one of each color). Again, I would recommend doing this with a thin dowel instead of the thick one I used. It was a little bit of a pain trying to push the thick dowel through the styrofoam without busting out the front or back and messing up the hearts. Once my three big hearts were inserted on the wooden dowel, I inserted the dowel into the styrofoam round that was in my planter pot.
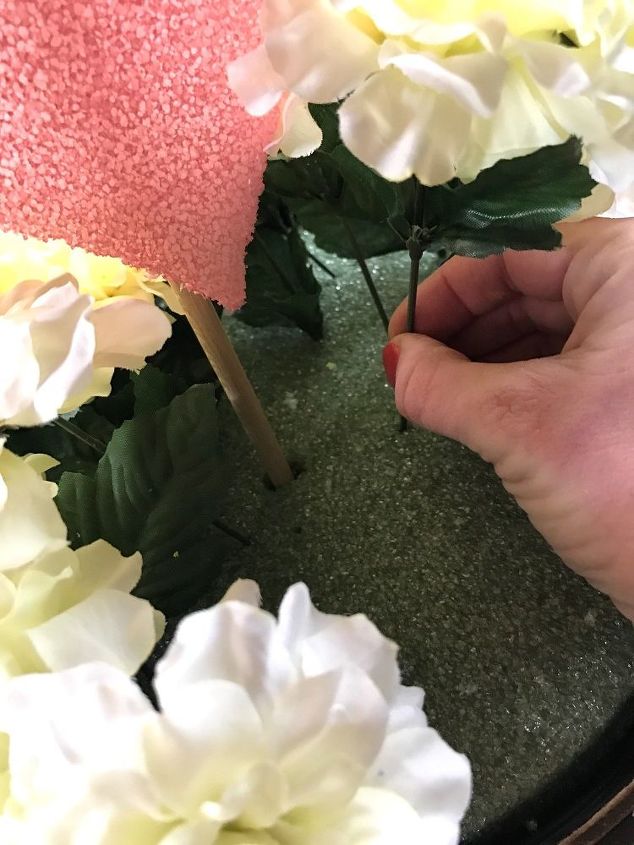
After that I inserted the individual flower stems into the same styrofoam round. The supplies for this project added up quickly so I tried to cut costs by getting flowers from my local Dollar Tree which did not have a very good selection so I got the best they had. If I could do it all over, I would get artificial monkey grass or something bushy like it in order to make the pot look nice and full.
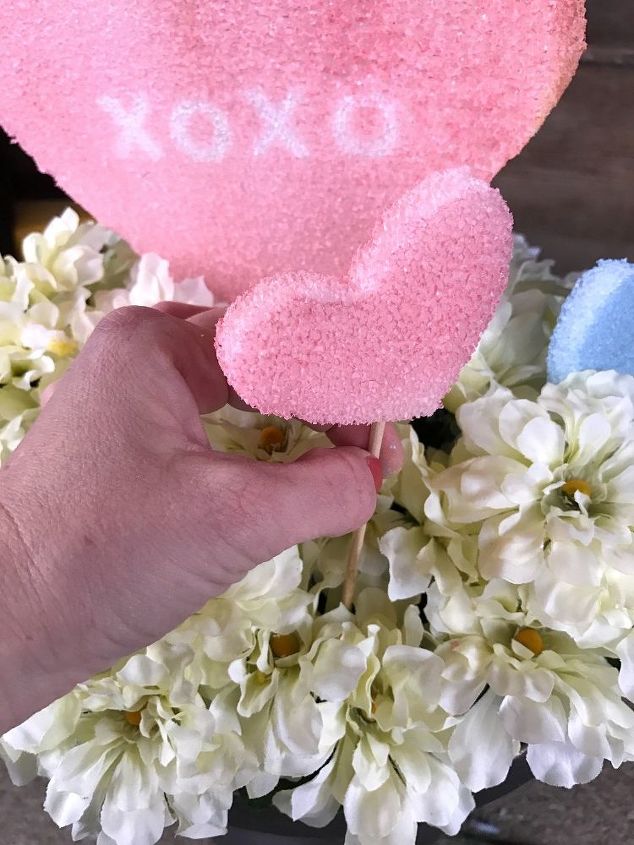
Finally, I cut up some of the thin dowels with wire cutters and inserted them into the small hearts. Then, I inserted the hearts randomly in with the flowers.
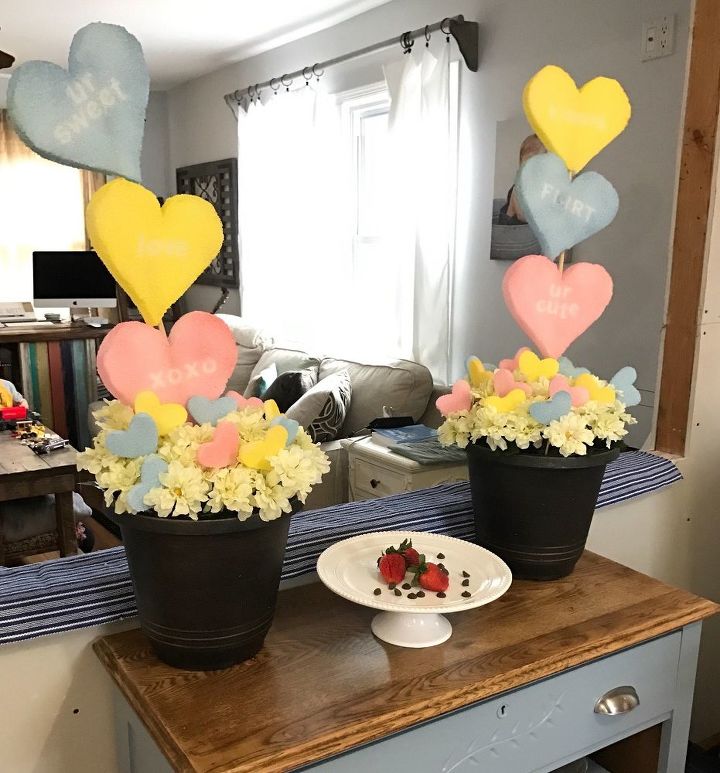
All-in-all I think these topiaries came out pretty cute. The yellow was a bit difficult to read, so I think I would have chosen a different (darker) color like purple if I were to do this project again. Another addition that may be nice is to have ribbon cascading down between the hearts and popping in and out of the flowers here and there. I had these pots on hand from previous holiday/seasonal topiaries I've done but I would have loved to do these in galvanized buckets!!
Resources for this project:
See all materials


Comments
Join the conversation
-
Adorable!
-
Too cute!


Frequently asked questions
Have a question about this project?
Would putting paint on with a brush work just as well as spray paint?
I am not a fan of styrofoam and the environment but the idea is cute, any ideas of something more environmental instead?
why $60.00? Think it looks adorable, but $60.00!! could be done with lot less.........