


Front Door Makeover

10 Materials
$60
2 Hours
Easy
I've been wanting to change up our front door for a while now but with everything else on my "want to do" list, needless to say, it was towards the bottom. I finally had enough brain space to think about an easy and inexpensive solution, and I'm really loving how it came out.
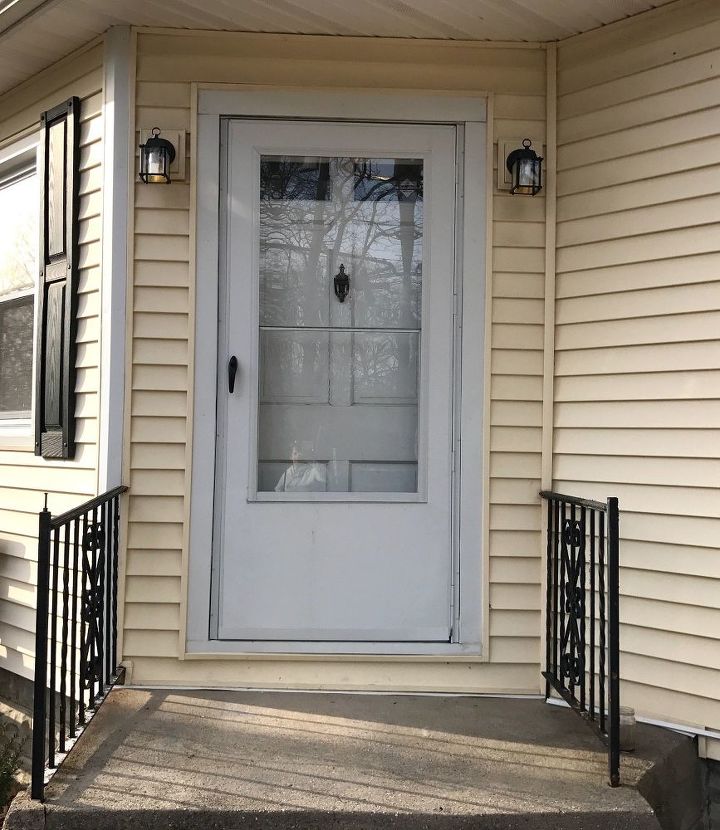
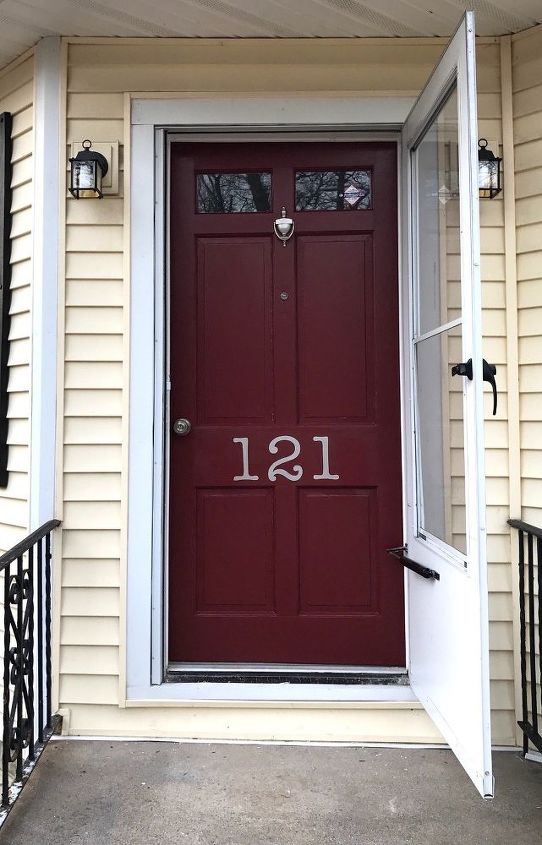
BEFORE:
Our front door needed some major TLC! We've been in our house for 4 and a half years and never did anything to our front stoop area, mainly because we use our side door since our driveway is located on the side of our house. However, we're hoping to redo our driveway this spring/summer so that guests will use the front door which means it needed a facelift.
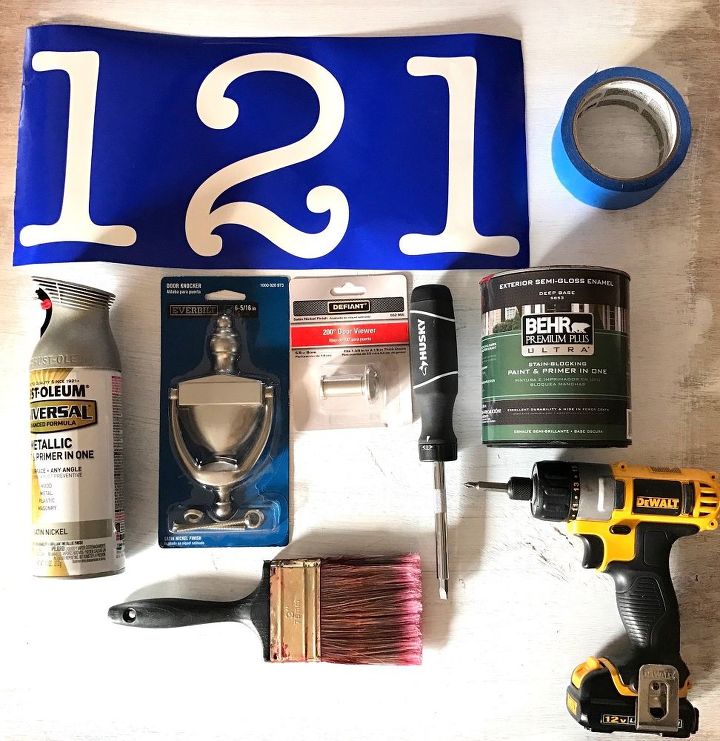
What you need is Behr Premium Plus Ultra Interior Semi-Gloss Enamel Paint & Primer in one (color: Cherry Cola, 1 qt.), 2" paint brush ,an Everbilt door knocker , Defiant door viewer , painter's tape , stencil (mine was homemade but you can purchase stencils from most craft stores or Amazon) Rustoleum Metallic Satin Nickel spray paint, Husky screw driver, Dewalt 12v drill/screwdriver
NOT PICTURED:
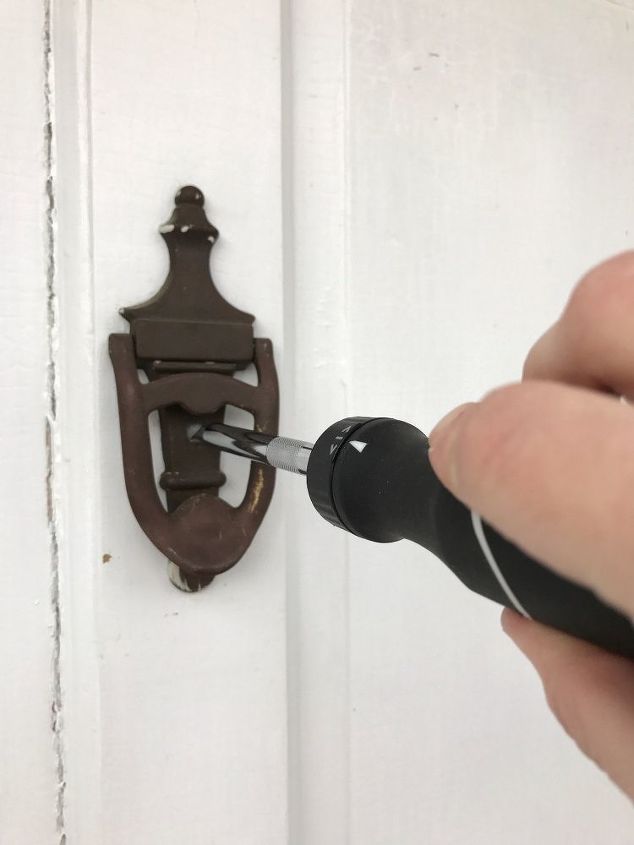
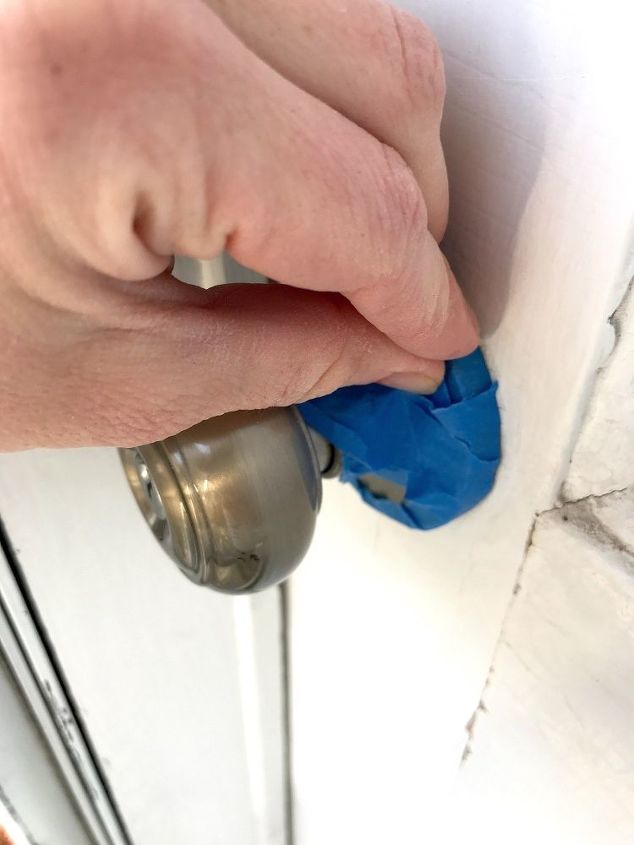
STEP 1: Remove hardware, sand and tape off
First, I took off the old door knocker that was on our front door, then sanded the front side of the door to prep for painting. After I sanded the door, I used painter’s tape to tape off all areas that I didn’t want painted.
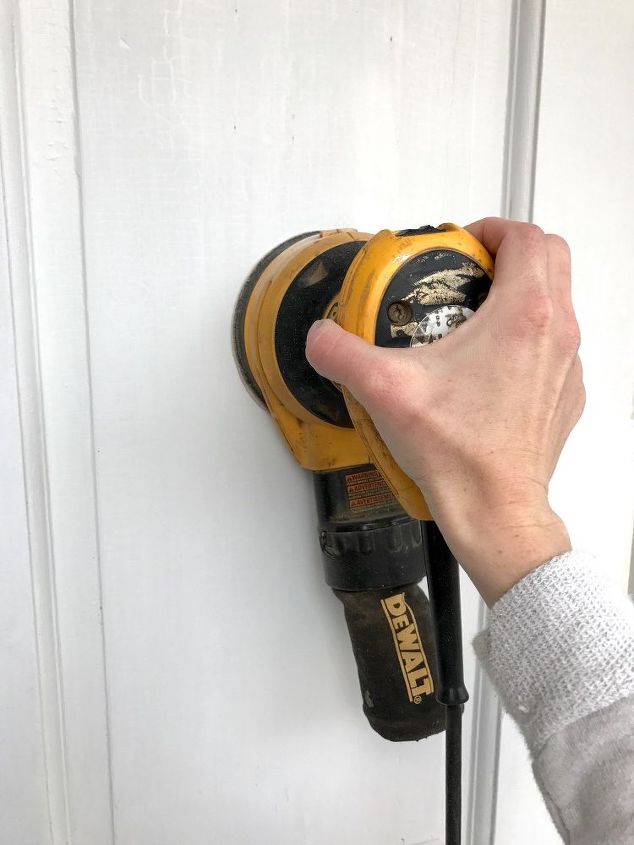
If you don't have a palm sander (orbital sander), you can simply sand by hand. Even if you do decide to sand with a palm sander, you may want to sand the nook and crannies by hand.
If you’re changing out your door knob and any other hardware, you’ll want to remove those as well. Because our door knob matches our side door knob and key pad for our alarm, we decided not to change them out.
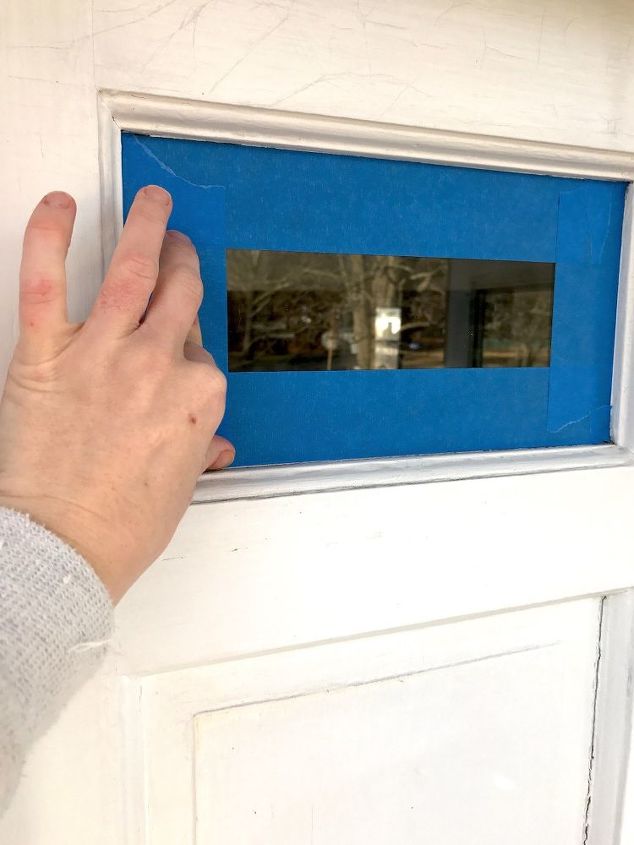
Make sure to tape off your windows or you'll be scraping paint off with a razor!
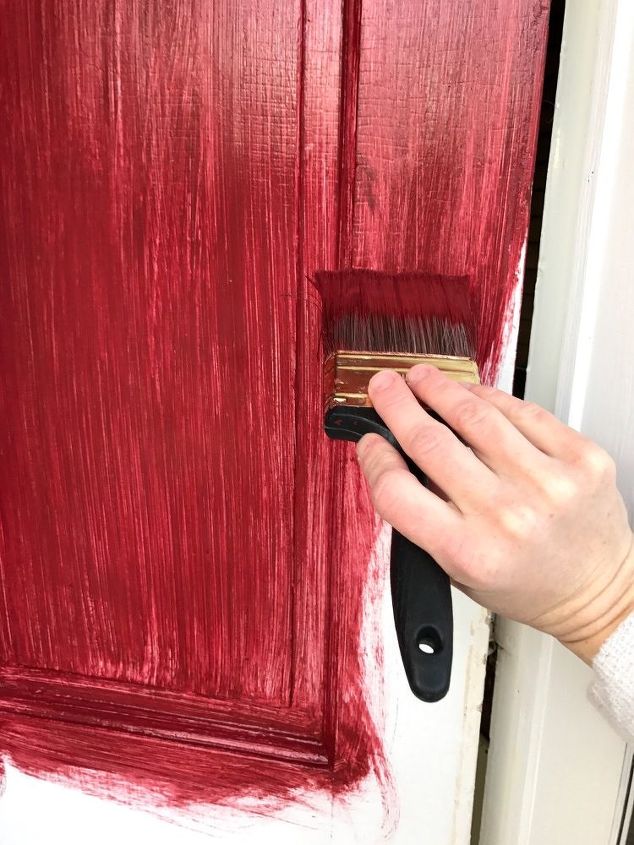
STEP 2: Paint door
Next, I applied two coats of Behr Exterior Cherry Cola paint, letting the first coat dry completely before applying a second coat. This Cherry Cola color is what we painted our sliding barn door that separates our living room and kitchen so we felt we’d use it again for a pop of color on the outside of our house.

STEP 3: Attach new hardware
After the paint was completely dry, I installed a new door knocker by following the instructions on the package. I also installed a peep hole where the old knocker was.
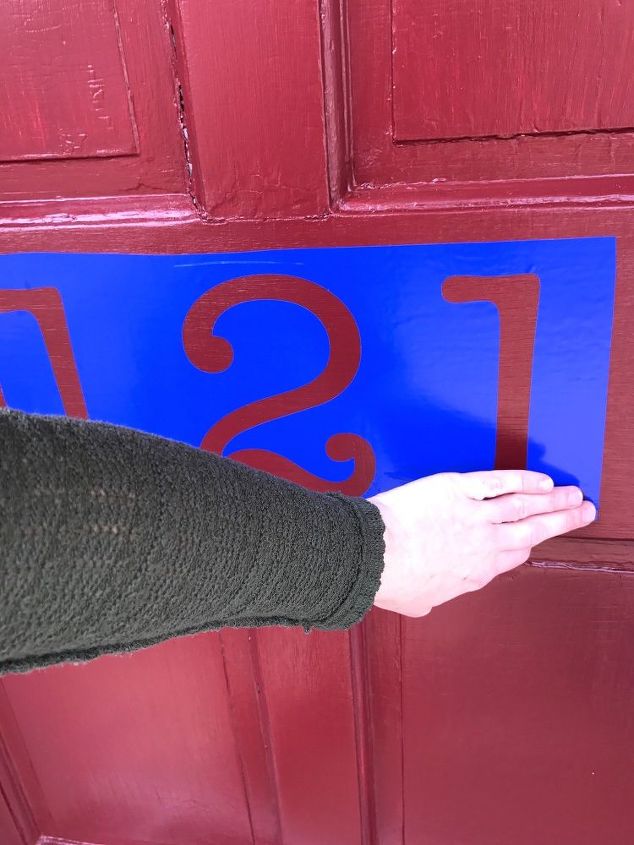
STEP 4: Add stencil
Once I finished attaching the new hardware, I took a stencil I created with my Silhouette Cameo machine and adhered it to the lock rail (center of the door that runs from left to right through the panels).
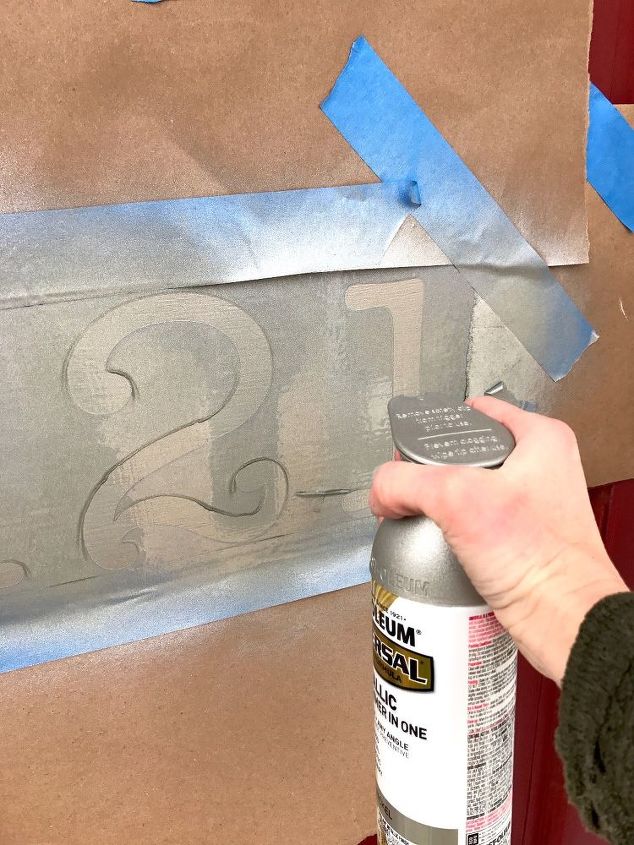
Then, I used brown builder’s paper to block off the areas around the stencil and sprayed a light coat of Rustoleum Metallic Silver spray paint. I let that coat dry completely and sprayed on another coat. Make sure to be extra light on your layers in order to avoid running of the paint.
I'm really happy with how our front door came out--I feel like it makes the entrance of our home look more welcoming and homey. Now, if we can hurry and get to spring so Rob and I can do an overhaul on the front stoop!
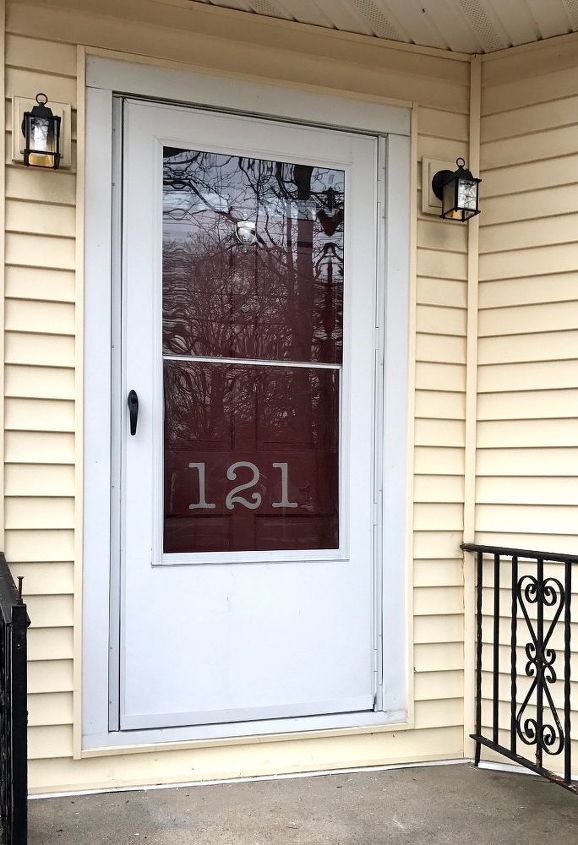
Here is a shot of the screen door closed. I really like how big I made the numbers--they're perfectly aligned where you can still see them when the screen door is closed.
*Because I already had paint and a good brush on hand, it only cost me about $30 to do this front door makeover!
We want to help you DIY, so some of the materials in this post are linked to sellers. Just so you know, Hometalk may collect a small share of sales from the links on this page.
Comments
Join the conversation
2 of 80 comments
-
I want to paint my front door too and have the same screen. I wondered how it would look and I've hesitated to do it! Now I know, and I love it! My color is similar!
-
I love the large address numbers! This is great for delivery drivers.


Frequently asked questions
Have a question about this project?
Why not paint the storm door the same color as the door the white of the storm door seems to take away from your beautiful door
I have a metal doo with wood trim around the stain glass. Want to paint it. Any ideas on what kind of paint to use on the metal door?
danny
Love the red, think about painting the screen Door to match?