


DIY Spring Tulip Wreath
5 Materials
Few things say, "Spring has sprung!" to me more than tulips. They are one of the first signs of winter's passing and brighten the way for more flowers, greenery and sunshine to come.

Are you looking for a way to refresh your home with some springtime cheer? Here's what you'll need to make a beautiful spring tulip wreath of your own.
- grapevine wreath
- mini tulip bunches
- green floral wire
- wire cutters
- ribbon

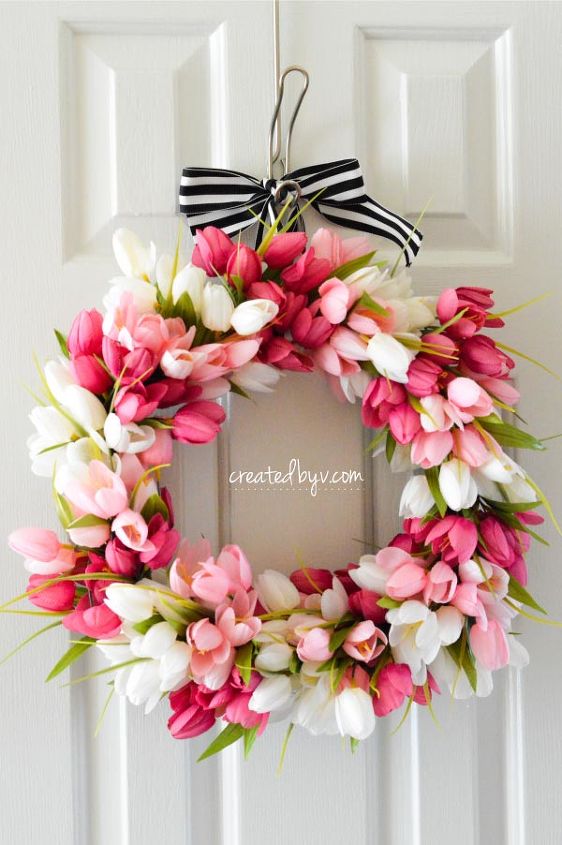
I started with a 18" oval grapevine wreath. I bought it for $1 from a local thrift store, removed and discarded the previous adornments and had a perfectly intact base for my new wreath. I also bought 7 bunches each of cream, pink and fuchsia faux mini tulips from Michael's {use those coupons!} for a total of 21 bunches.
Each bunch has several stems with 2-3 tulips and leaves per stem. Using wire cutters, I cut and separated each stem and pushed the leaves to the top.
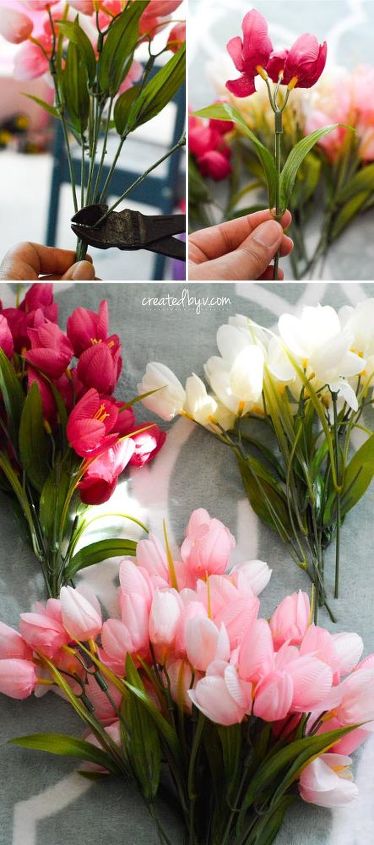
I used a similar method to my boxwood wreath and bundled 3 stems of the same color together and then attached the bundle securely to the grapevine with floral wire. In doing so, I was able to create a more uniform direction.
I followed a pattern of cream-pink-fuchsia and made my way all around the wreath until I had this lovely creation.
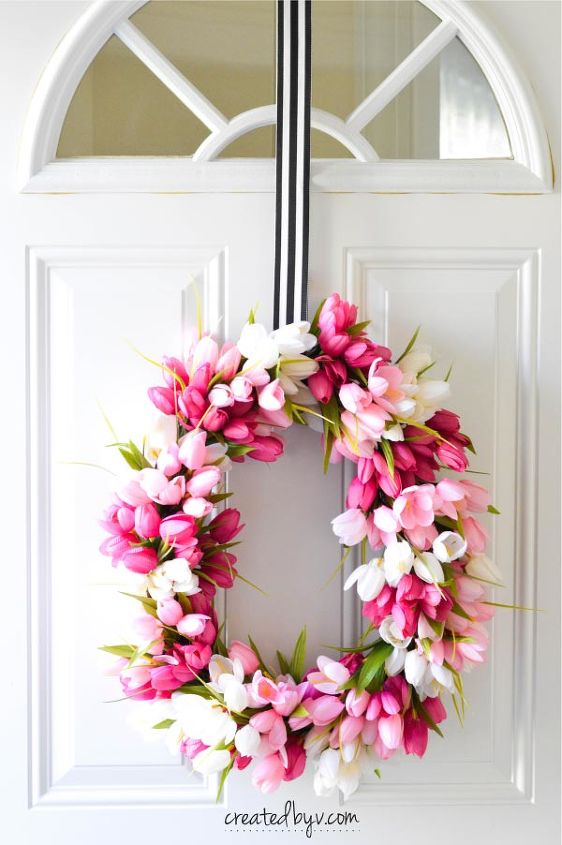
I stitched a few zig zags on black and white ribbon and proudly hung it on my front door to welcome spring! It was an instant pop of color!

I was also able to make a second wreath with the excess flowers using a 14" round grapevine {another thrift store find}. It adorns my kitchen pantry door and makes getting up in the morning a little happier.
Lastly, I arranged the remainder of the flowers in a pitcher to brighten the fireplace mantel and bring a touch of spring into the house as well. As much as I adore real tulips, I love that these faux florals will stay fresh and cheery all season long.


DIY crafts are one of my favorite things to do! If you love them, too, I invite you to visit the blog and join the newsletter for a little creative inspiration sent directly to your inbox. Happy Spring! -- v.

Want more details about this and other DIY projects? Check out my blog post!
Comments
Join the conversation
3 of 25 comments
-
Beautiful!

-
One pix looks round. One looks oval. I really like oval shape. Different, unique, unexpected but not over the top. Plus looks a bit more luxurious. I’ve seen folks “mold” grapevine wreaths so I’m going to give it a shot. Thanks for inspiration


Frequently asked questions
Have a question about this project?
How many bunches of flowers did you use?
How much you spent in flowers?
Do you have to use floral wire to secure the flowers? I just stuck them in the wreath and they appear to be staying? Sorry, I am new to wreath making and trying to learn the ropes