


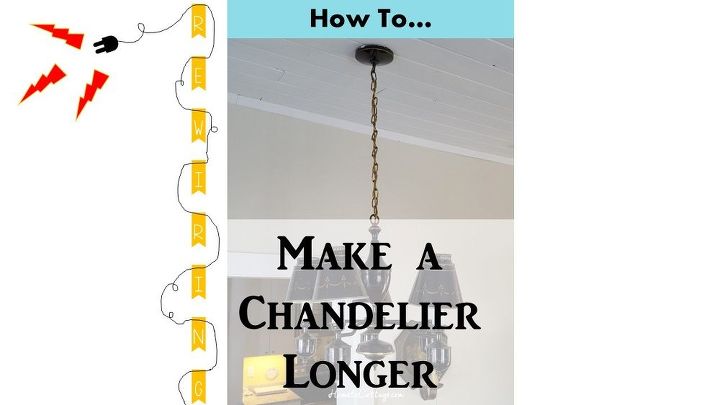
How to Make a Chandelier Longer
Hi Liz here from SimpleDecoratingTips.com, a DIY & decorating blog.
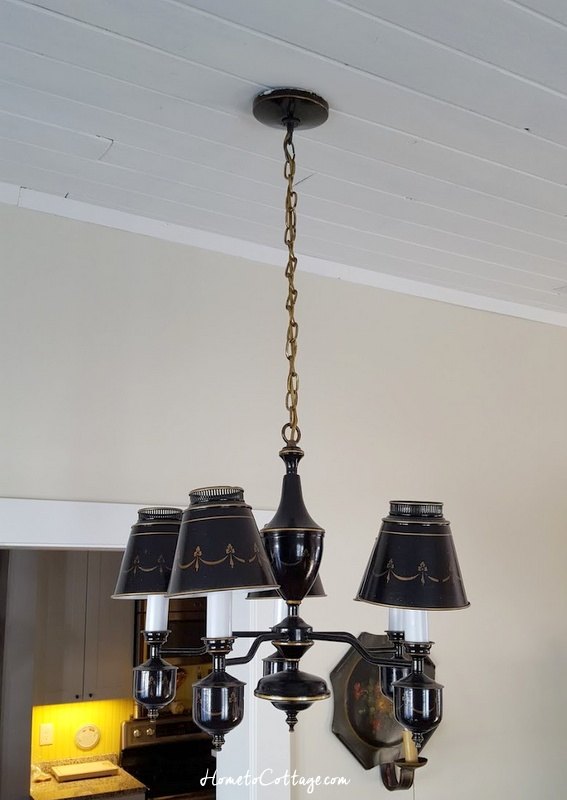
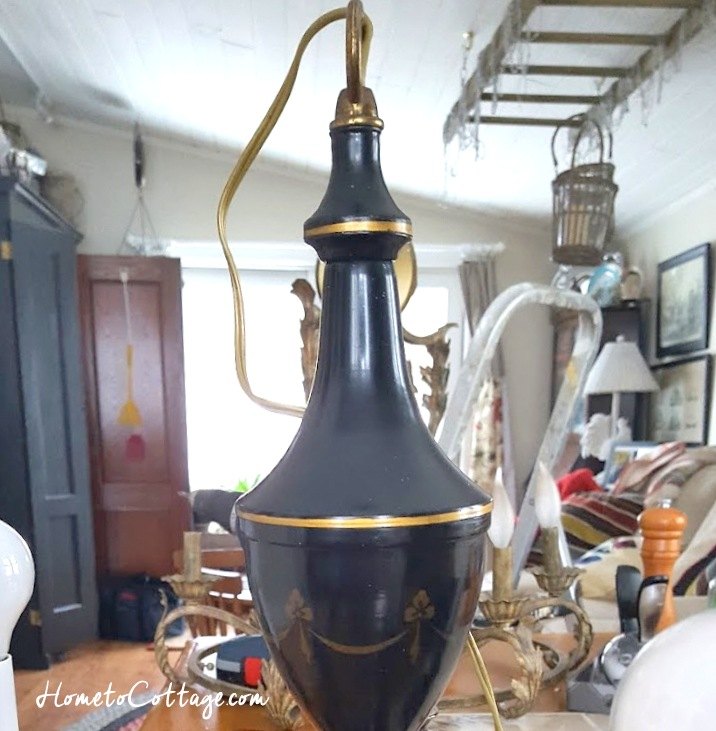
I’ve been wanting to move the dining table away from the wall in the breakfast room, but felt stuck because of where the chandelier was hanging and the chain and wires on it were too short to swag over to where I wanted to place the table. Finally I decided to try my hand at rewiring it, determined that a light fixture would not hold me hostage in my furniture placement endeavors! Here is my DIY experience on how to make a chandelier longer…
The whole thing that started this, was my desire to rearrange the furniture a little. (ha ha No surprise there!) I never was crazy about the table being shoved up against the wall, but when I realized that it would actually fit nicely in the middle of the room, I was stuck because of the chandelier placement.
(This post is about how to make a chandelier longer, but if you’d like to see how my breakfast table was placed up against the wall, you can see it here in our breakfast room renovation… it was a huge renovation job and so I split that up into two posts… Come visit my site and type in breakfast room in the search box, or under 'houses' at the top menu, you'll see 'our 100 year old house' follow that to the 'breakfast room'. )
Then I thought… “But this chandelier is connected to the now misplaced power source in the ceiling with a chain… I could just add a hook in the ceiling and swag the chandelier over the 2 feet to the new center of the table… Except if I do that, the chandelier chain will be so short by the time I ‘swag’ it over, it’ll be hanging tight against the ceiling!”
Ewww… that’s a bad look! Here’s your 1st tip coming up:
Rule of thumb is that a chandelier should hang approximately 36″ from the table top. (that gives ample light, doesn’t block your view across the table when you’re seated, and still visually connects to the table)
So I decided I could make a chandelier longer and just rewire the top wire that connects from the chandelier, weaves through the chain and connects the chandelier to the power source in the ceiling.
This isn’t a hard task, I’ve done it before, but every light is a little different, and this light fixture is a vintage one at that.
First thing I had to do was figure out where that top wire connected to the rest of the wires for each arm of the chandelier. After practically taking the whole darn thing apart, I finally found the ‘nest of wires’ in the center of the bottom area… (now looking at this picture, it seems so obvious that’s where it would be, but for some reason, I started by taking the top off, thinking it would be up in that larger top area…duh!)
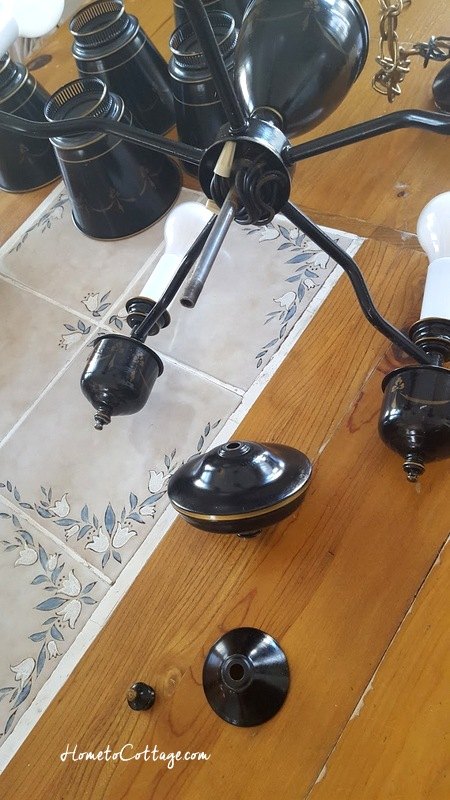
This vintage light fixture is held together with a couple of different rods in the center which all those tin pieces layer together and get held in place with a bottom finial. (‘finial’… that was a fun word to teach my 5 year old grandson, who was ‘helping’ me… especially because his name is Finn… finial… Finn… get it?)
So I found the ‘nest of wires’, but I needed to figure out which two came from the top wire.
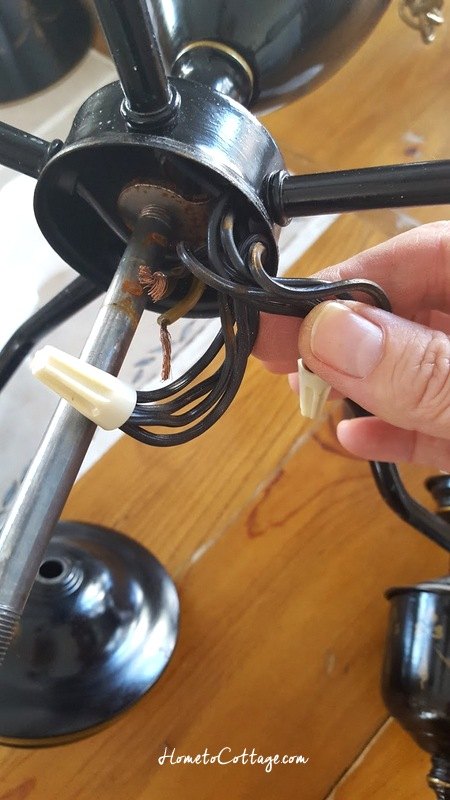
I don’t know a lot about wiring and electricity, just enough to do simple wiring like this… and I know that each arm, (with its own lightbulb on the end of said arm) as well as the wire going to the top power source must have 2 parts to the wire… actually 2 wires… a white and a black… someone a long time ago explained one is a neutral and the other one is a hot one, but I have no idea which is which or even if I understand that fully, so I treat them like they are both hot and just match the colors.
However…
As you can see in this bunch of wires, there doesn’t appear to be an easy white and black. I think that may be part of it being a vintage light fixture, but again, I’m not sure… All I know is that the light worked totally fine how it was wired, so I wanted to maintain their wiring design.
Long story short,
I wiggled and pulled the top wire coming out of the top of the rod, figured out which wire in the bunch was moving and as I disconnected the bunch to remove the top wire, (remember, there was one wire from the top in each of the two bunches). I only undid one bunch at a time, and carefully re-bunched them back, re-screwing the wire nut, securing it to the ends of that particular bunch, before moving on to the other. That way the wires going to the arms wouldn’t get mixed up with each other and result in a light that didn’t work.
Once it was free from the bunches, I removed the old, too short, top wire and fed in the new much longer wire.

The wire easily pulls apart into the two separate wires, each still coated with the protective covering.
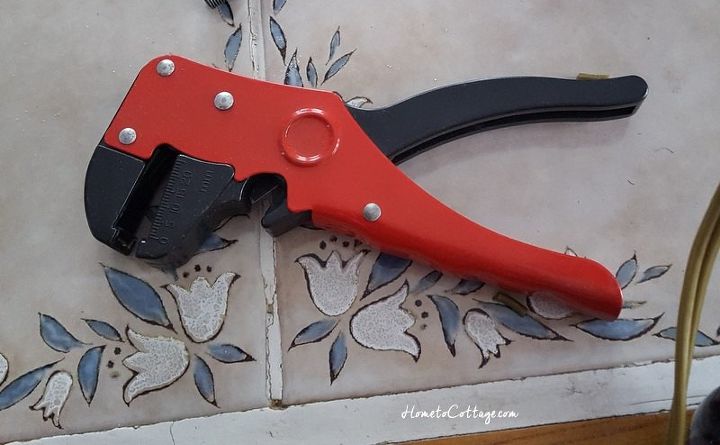
This little tool is so fun and easy to use. It’s a wire stripper.

You just place the end of the wire into its jaws, about an inch, and squeeze the handle. It seems magical when it ‘clicks’ and removes the end of the protective covering, perfectly exposing the wire. (Finn loved doing this part with me!)
Then it was just a matter of taking one of those new wires from the top and connecting it to the bunch of wires in the ‘nest’… and doing the same with the other wire from the top to the other bunch.
Once the wiring was completed, I reattached all the pieces of the lamp and screwed the finial back on.
Now it was time to remove and replace the chain. That’s one part that was kinda sad. The old, vintage chain was thick and heavy… I couldn’t find a nice thick, heavy chain that matched it, so I had to opt for the standard lamp chain in the hardware store. (so I will probably be making a cord cover to hide it… stay tuned)
Here’s another tip:
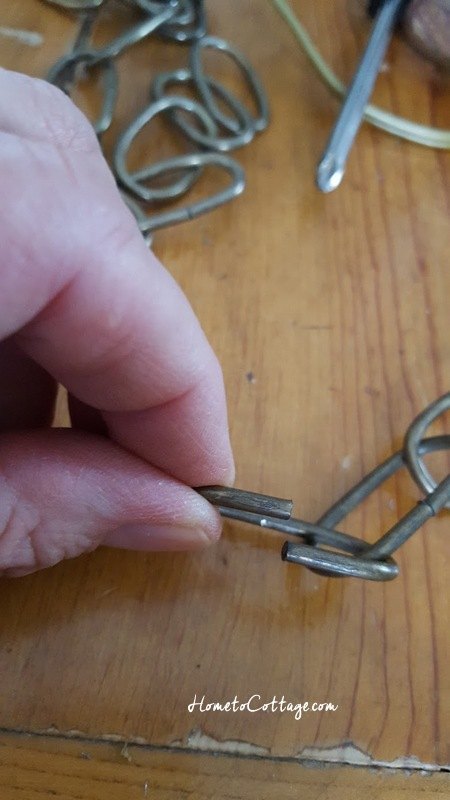
When you need to take apart the link of the chain to the determined length and attach it to the ring of the light etc. be sure to pry it apart side to side… that makes it easier to lever it right back so the ends of the link meet up again. If you pull the ring apart spreading the gap wider, you’ll never get it to bend back together to make a nice clean link, it’ll always have a gap in the ends.
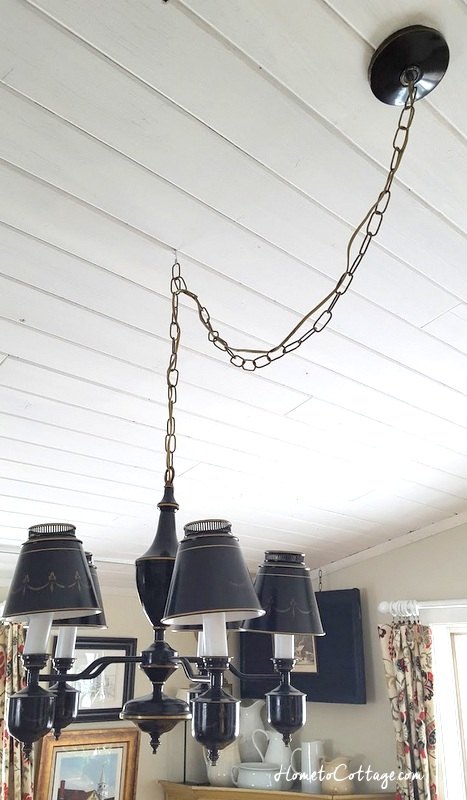
Once the chain was reattached to the light and ring on the end that connects to the ceiling, I fed the wire through the links of the chain and reattached it to the power source.
Here’s the 3rd tip today:
Be absolutely sure that it’s not the wire holding the weight of the chandelier, but the chain is fully supporting the hanging chandelier!
Now that I spent a few minutes or so to make a chandelier longer, it is now long enough to swag over to hang 36″ above the center of the dining table in its new position.
But see what I mean about the chain not being so attractive? I’ll think I’ll be needing to make a cord covering real soon…
Want to read more? Check out the other DIY, tutorials & tips I've written about: SimpleDecoratingTips.com DIY, Tutorials & Tips

Want more details about this and other DIY projects? Check out my blog post!


Frequently asked questions
Have a question about this project?