


DIY Built-in Window Bench

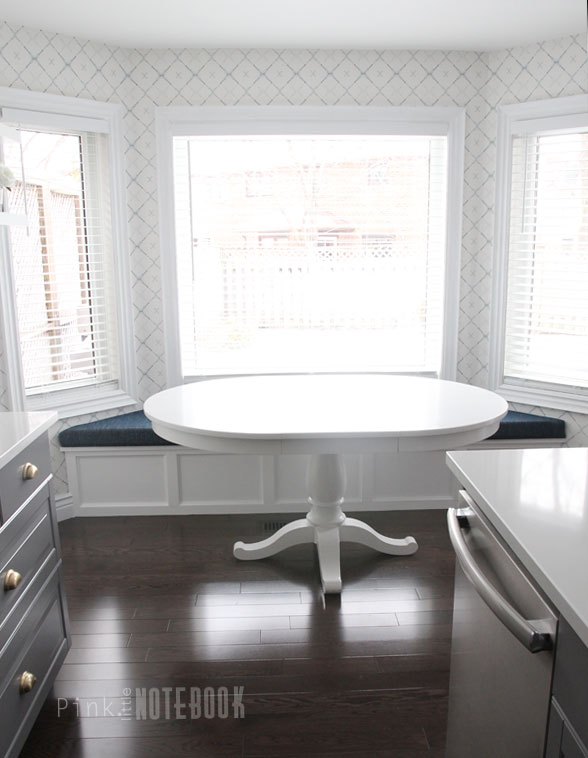
We’re making progress in our kitchen! As you may recall, our breakfast nook is getting quite the makeover. Recently we’ve installed this modern trellis wallpaper that added the perfect touch to our blank walls. Today I’m about to show you how we DIYed our very own built-in window bench.
STEPS
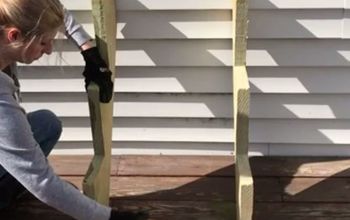
1) Remove baseboard or moulding in your work area. If you have wallpaper like myself, to avoid any tearing, simply use a cutting knife and run it along the baseboard before removing. This will ensure a straight edge of wallpaper when you lift out the baseboard.
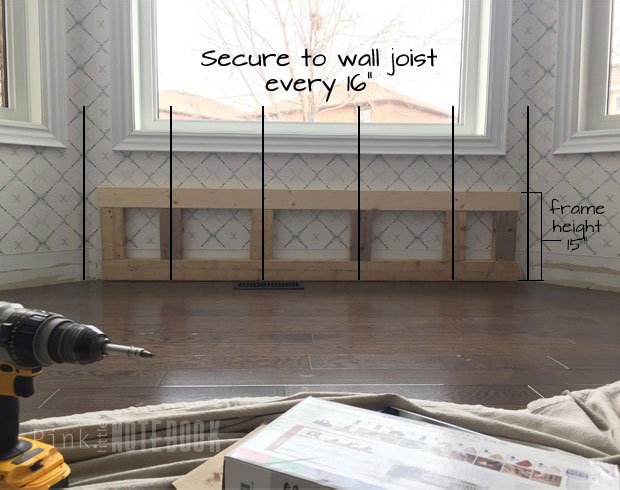
2) Determine the height of your bench. We wanted to achieve an overall bench height of 18″ (matching the height of our kitchen chairs). Since we are adding a 3″cushion, we reduced that amount from the height of the bench, which gave us a total of 15″ for the height of the frame.
Before you secure the back side of the frame, use a level and make sure everything is straight. The goal is to make the top portion of the frame as level as possible. If your floor is uneven, you may have to play around with the height of the vertical 2″ x 4″ to compensate for the unevenness. When screwing everything into place, we made sure we secured the frame into the joists in the wall. We located them by using a stud finder.
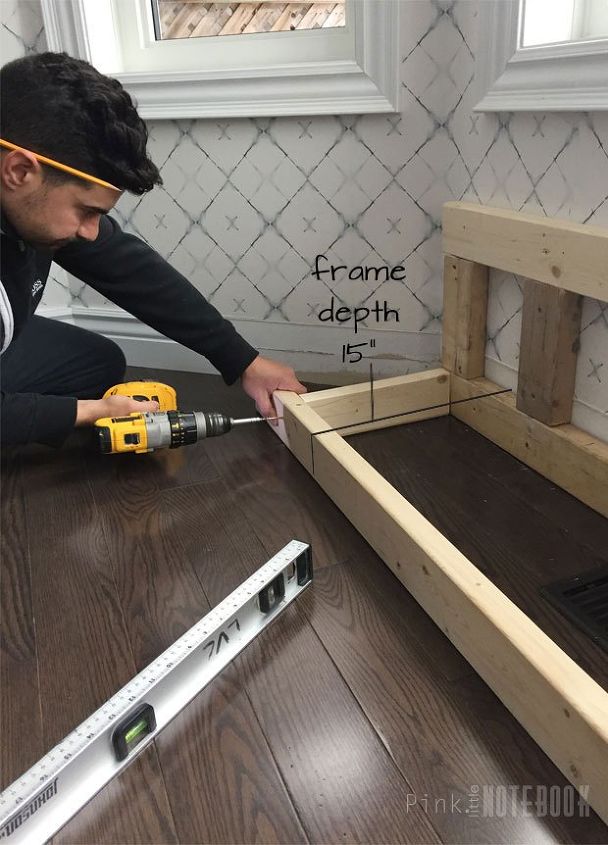
3) Next determine the depth of your bench. Measure the distance from the back wall to the front of the 2″x 4″. For our frame, we decided on a 15″ base. In order to achieve this, we made the frame 14-1/4″ which allowed us to apply our 3/4″ 1-side finished plywood giving us an overall depth of 15″. For our upholstered cushion we wanted an overhang of 2.5″ making our finished seat depth 17.5″.
Once you marked out the depth, you’re going to want to cut and attach the 2″ x 4″ which will span across the front of the frame from wall to wall. We also added joist between the base for added support.

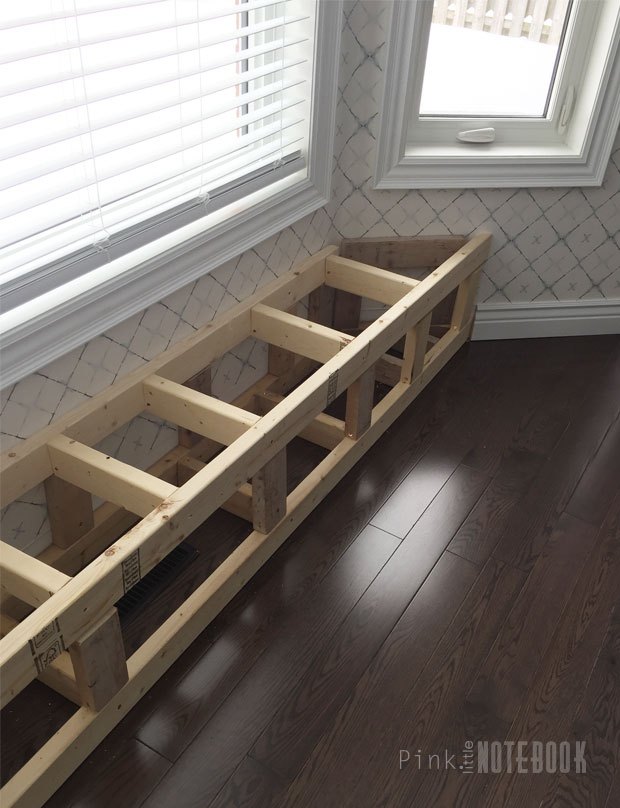
4) The sides of the frame on the top and bottom that are located on the two angled walls were not mitred cut to fit into the back support of the frame due to uneven angles. We simply just secured the 2″ x 4″ to the joist in the wall for maximum support. We also made sure that it was levelled with the other 2″ x 4″ for a well supported bench top.
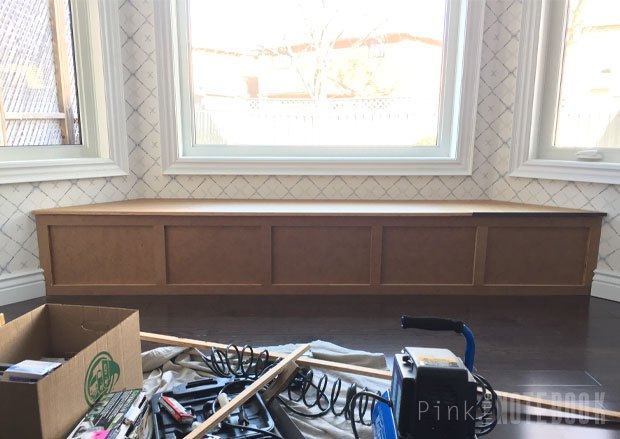
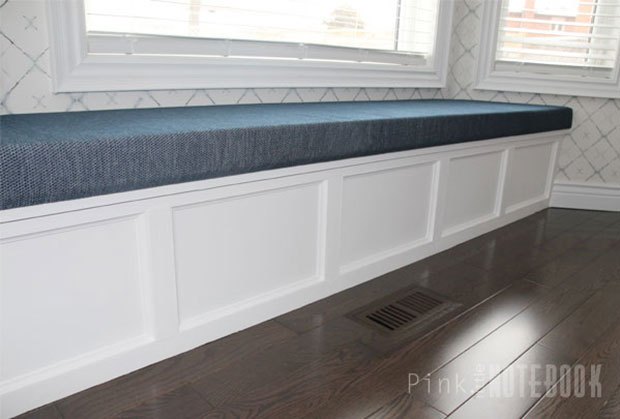
5) To box everything in, we are using 1-side finished 3/4-inch plywood. Since the front of our bench is almost 9 feet, we needed two pieces. To cover the seam, we will be adding trim to the front. Also for either end of the plywood, be sure to cut the sides on a 45 degree angle. This will allow for a snug fit against the wall.
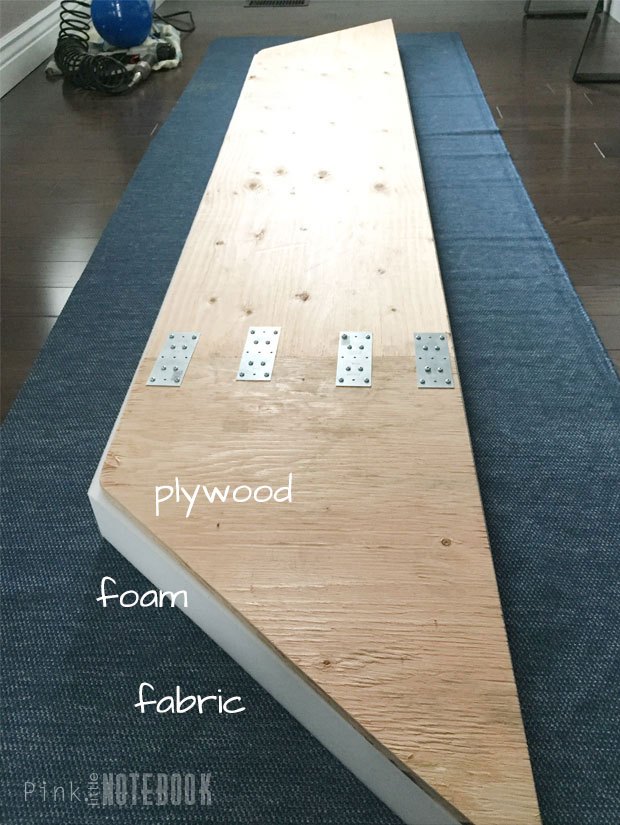
Since we are dealing with such a massive bench top, it was just easier to order the high density foam with the exact measurements already cut-to-size. Remember to always order the foam at least 1″ wider on all sides. When pulling everything tight this gives you enough play that when you’re actually sitting on the bench, you won’t feel the plywood template on the back of your knees.
Since our bench top is longer than our 8 foot plywood sheets, our template was created with two pieces. To connect the two pieces together, we used nail plates on the seam for maximum hold.
Once the fabric is stapled around the sides, flatten and fold the corners as you would with gift wrap. I brought the fabric up on the diagonal to make a corner fold, and held this in place with one hand while tucking the excess fabric on the floor snug against the width of the foam and board neatly stapling it down. Trim any excess fabric to make it easier.
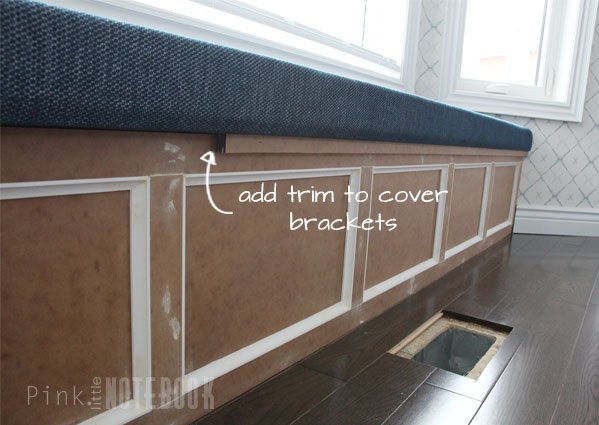
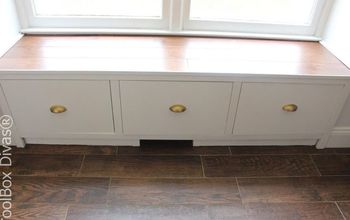
Place the newly upholstered bench top on the base. To secure in place, we used L-brackets every 2 feet attaching the bottom of the upholstered seat cushion to base. To cover up the L-brackets, we used an extra piece of 1″ trimming we had and nailed right to the face of the bench.
For more info and images, please visit Pink Little Notebook's blog post.
Comments
Join the conversation
-
I love it! And I love the white kitchen
You did a beautiful job 💚❤️
-
put hinges on the seat and store thing that you don't use often


Frequently asked questions
Have a question about this project?
I've been wanting to do this but how well does it work as far as comfortable sitting with the windows behind?
Like previous question, in first 2 pictures the floor vent is under the frame for bench. Bench covers 15” from wall/window. Vent is only showing again in last picture, in front of bench or more than 15” from wall/window. All that was asked was did you move the vent?
Why didn't you make the sear in sections that lift on a hing for storage underneath?