


Rainbow Soap Tutorial for St. Patrick's Day
4 Materials
Medium
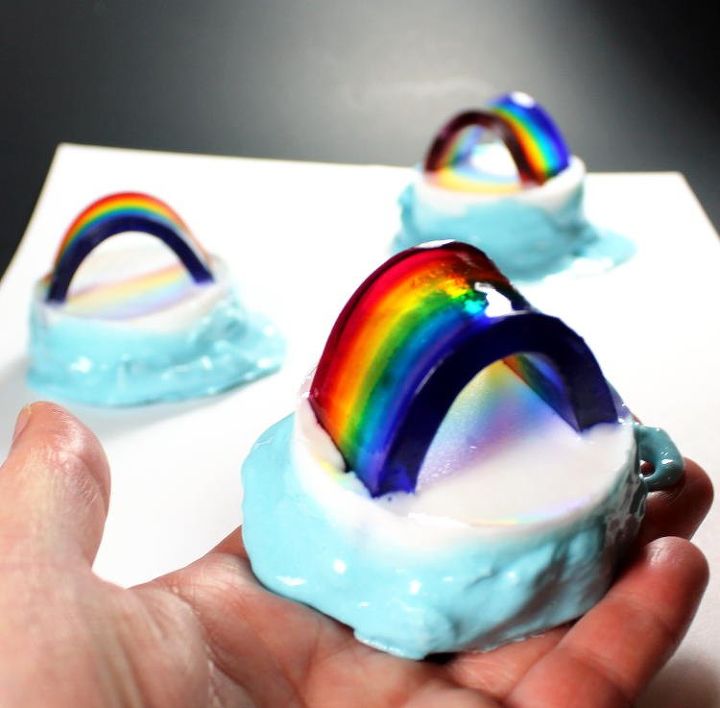
These fun rainbow soaps make the perfect St. Patrick's Day craft! Plus they're easier to make than you might think! Will you be looking for the end of the rainbow this St. Patrick's Day?
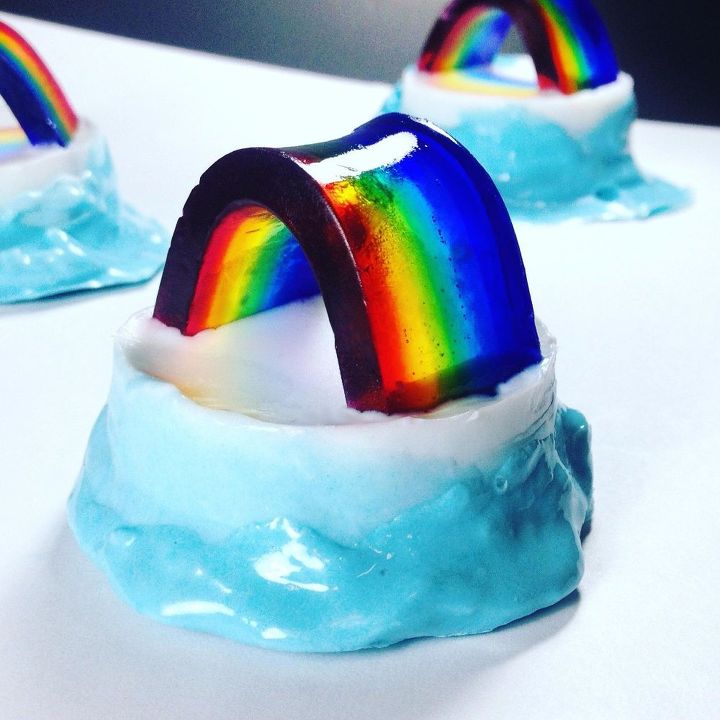
Made using a combination of clear and white melt and pour soap bases, my rainbow soaps require just two basic molds - a rectangle silicone soap mold and a round guest silicone soap mold.
For the molds you'll need as well as the exact recipe I used for this rainbow soap tutorial and additional photos, be sure to check out the full tutorial on Soap Deli News blog here.
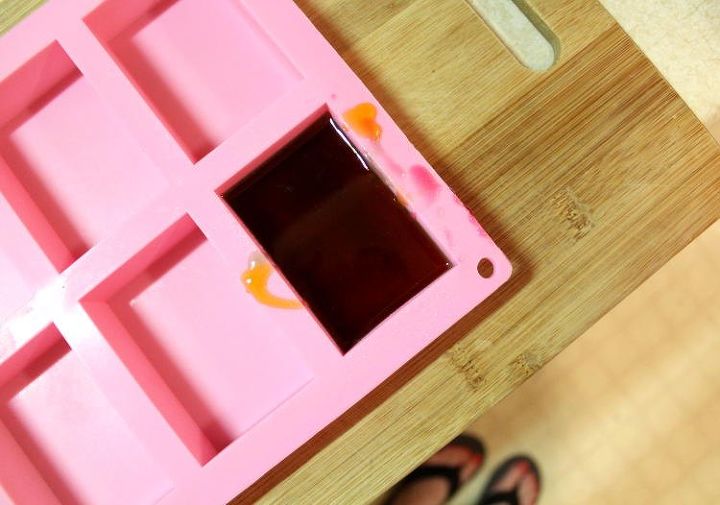
The first step is to create your rainbows! You'll use a rectangle mold for this step.
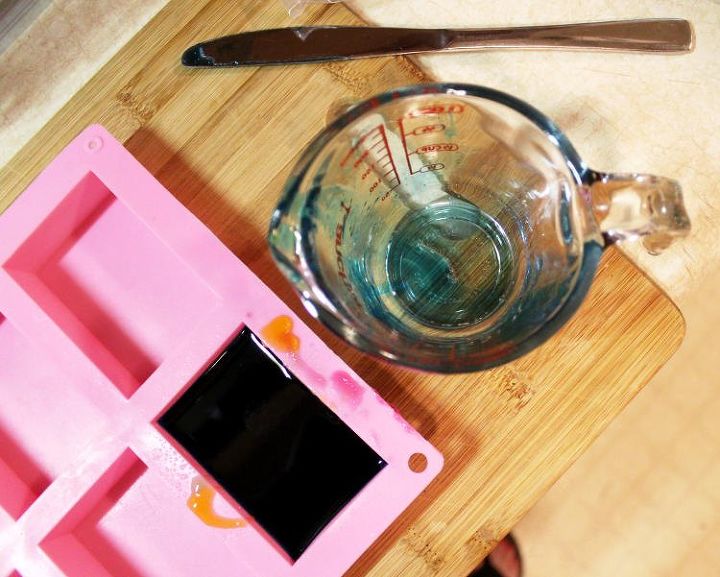
Melt and pour seven layers of clear soap. You'll tint each layer of soap with a different color using liquid soap colorants. Be sure to spray your soap with rubbing alcohol after each layer is poured to remove any air bubbles.
Once a layer has hardened, you're ready to pour the next layer. Spray the previous layer with rubbing alcohol again prior to pouring the subsequent layer.
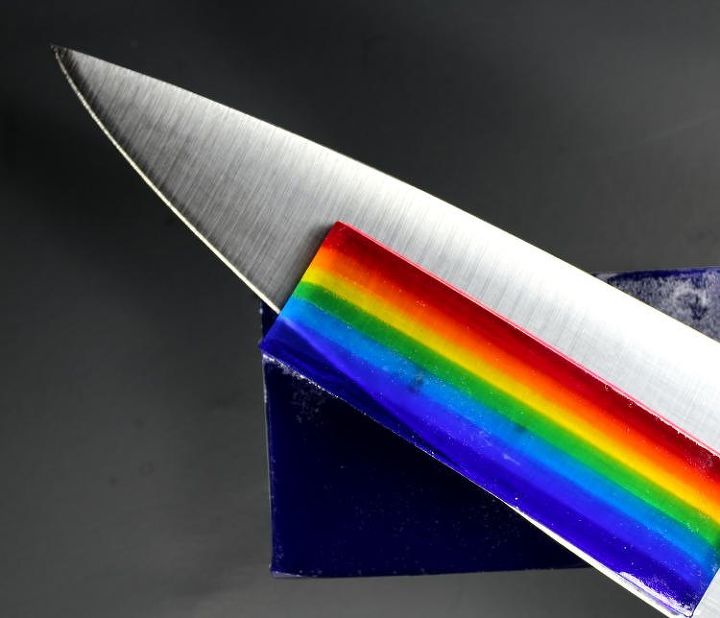
Once you've poured all of your layers and the soap has hardened, you'll remove the rainbow soap from your mold. Then use a knife to cut out the individual rainbows.
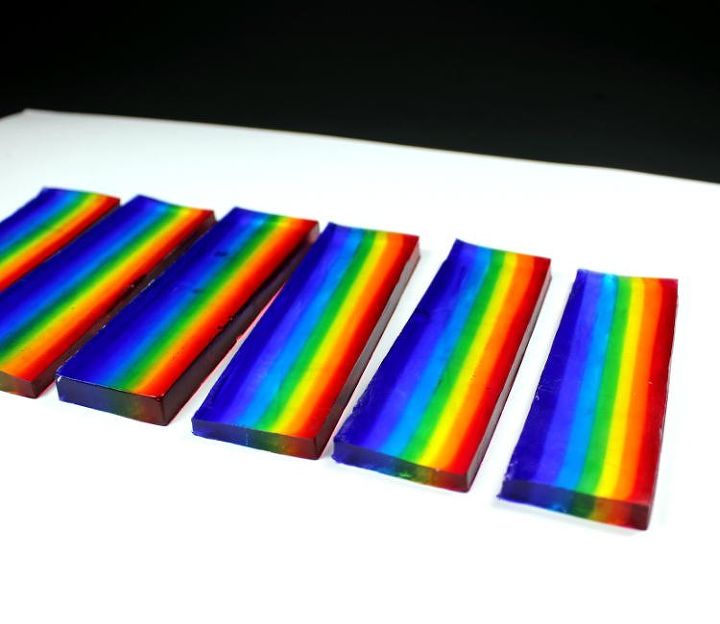
Once you've sliced the entire bar of soap you're ready for the next step.
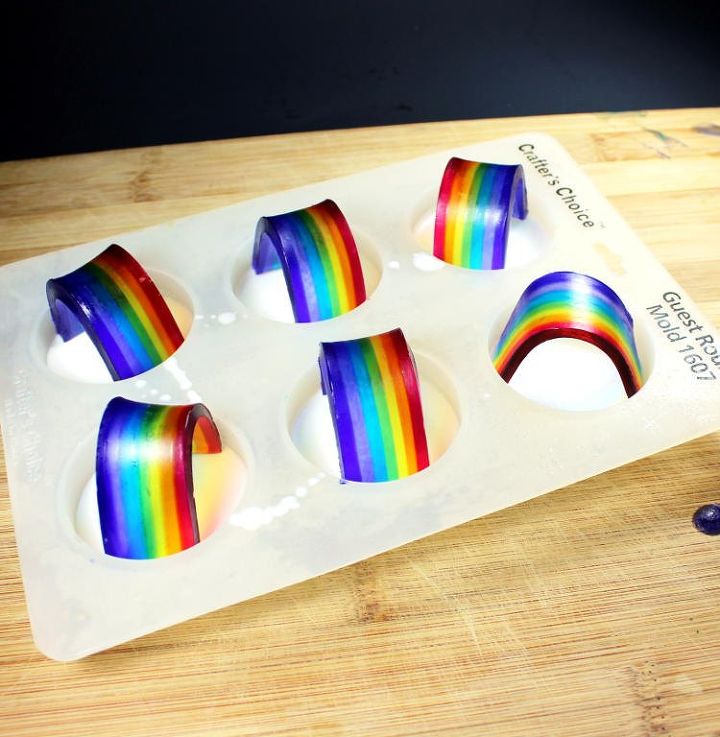
Melt and scent a white melt and pour soap base. Pour the soap into your round guest soap mold, filling each cavity halfway full with soap.
Once the soap hardens, place your rainbows inside each of the cavities on top of the white soap.
Now melt more of the white melt and pour soap base and pour the base into the round mold filling each of the cavities to the top.
Allow to harden then remove the soaps from the mold.
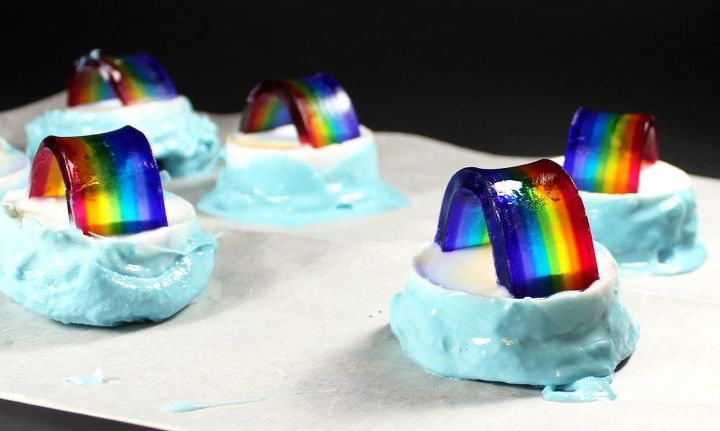
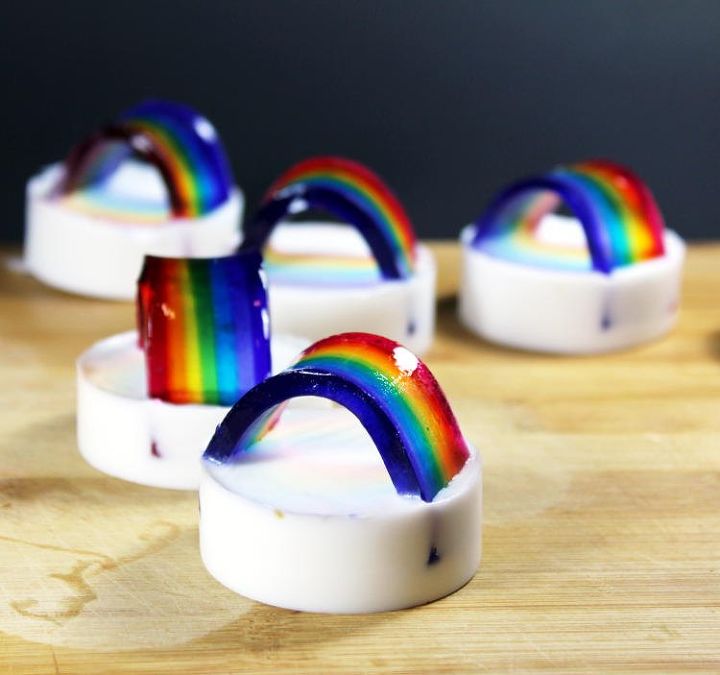
Now melt additional white melt and pour soap base in a shallow glass bowl and add a blue colorant.
Allow the blue tinted soap to cool slightly, then dip the base of each of the rainbow soaps into the soap. Allow the soap to cool further then dip the soap into the blue soap again. This will build up blue clouds around the soap.

As the blue soap hardens around the white base of the rainbow soaps, you can fold the soap over or add clumps of half hardened blue soap. Then simply reheat the blue soap again if needed and dip the rainbow soap bases into the blue melted soap again to smooth out the edges of the soap for a smooth finish.
And you're done! To see more of my soapmaking projects as well as behind the scene sneak peeks of my tutorials in action, be sure to follow me on instagram.

Want more details about this and other DIY projects? Check out my blog post!
Comments
Join the conversation
2 comments
-
Omg!! This is soo cool! And such a fun process :)
-
Thanks! It was a lot of fun to make!


Frequently asked questions
Have a question about this project?