


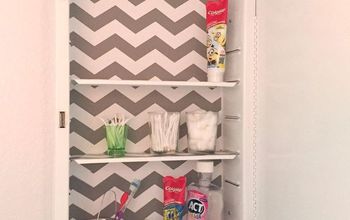
Tension Rod Dividers

6 Materials
$10
15 Minutes
Easy
Is it just me or do most people tend to have a utensil drawer in need of major organization? I've tried many different methods in the past, but none of them have prevented the items from staying organized. I've finally found a solution that works - not only, for my junky utensil drawer, but for my other kitchen items too! See how I used tension rods to create organized spaces in some of my most cluttered kitchen spaces.
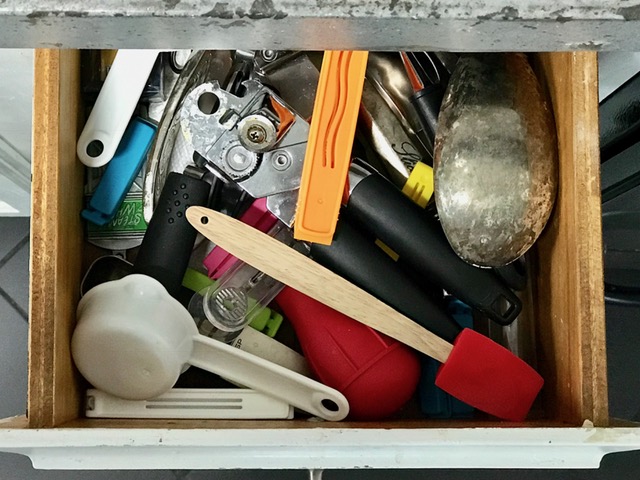
Do you have one of these messy kitchen utensil drawers in your home?
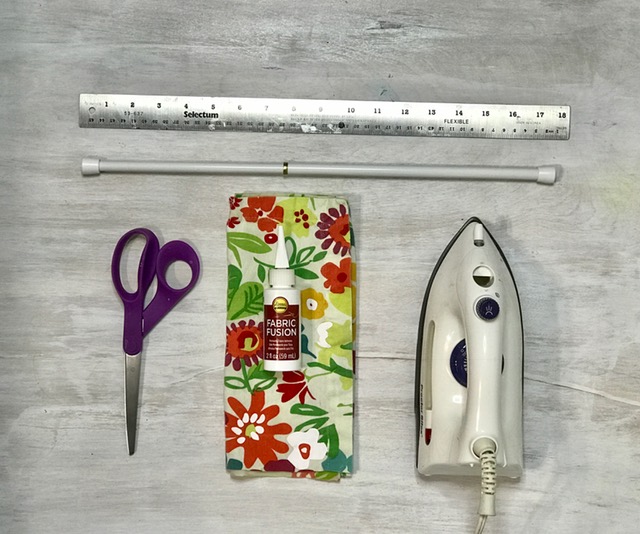
SUPPLIES:
- Tension Rod (in a size that fits your drawer or cabinet)
- Fabric
- Scissors
- Fabric Glue
- Iron
- Ruler
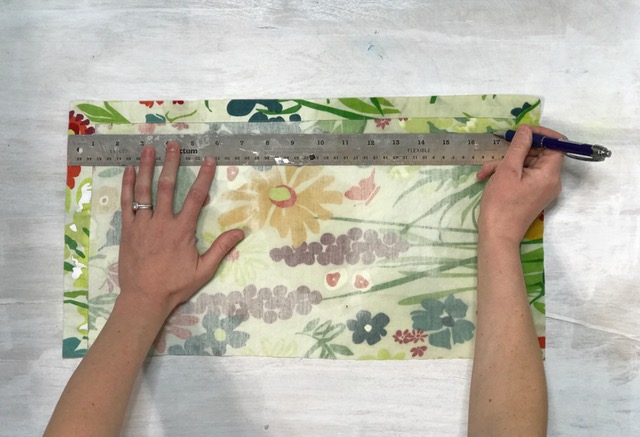
Step 1: Measure the length of your fabric.
After measuring the length of your kitchen drawer with a ruler, mark the same length on your fabric.
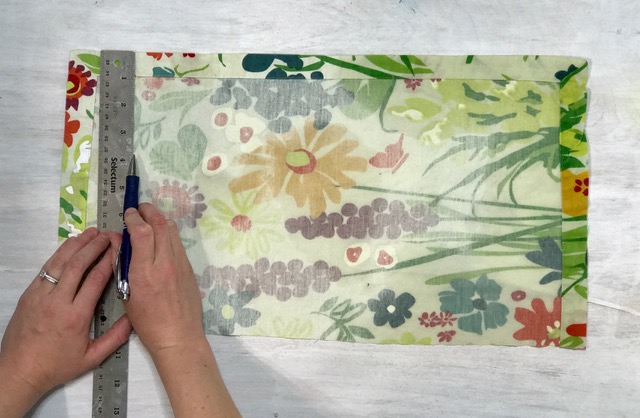
Step 2: Measure the height of your fabric.
After measuring the height of your kitchen drawer with a ruler, mark the same height on your fabric.
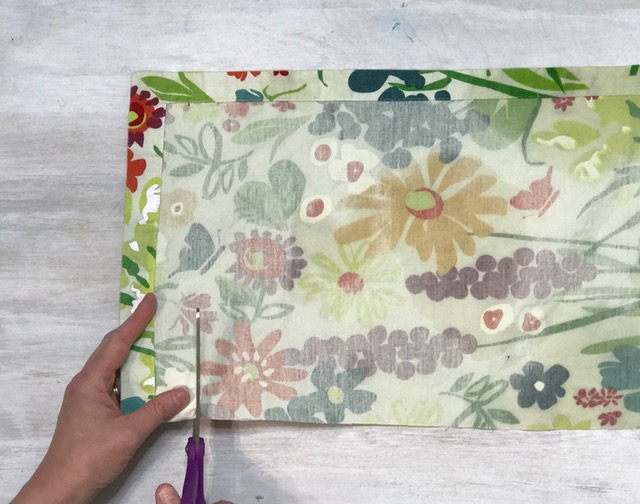
Step 3: Cut along your marked length line. Remove the access fabric.
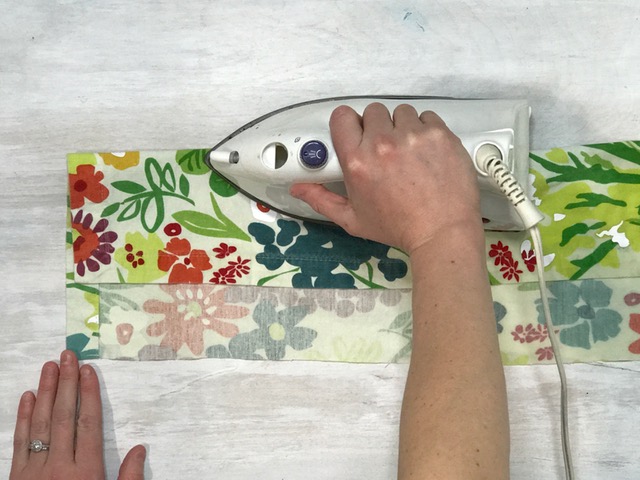
Step 4: Fold along the height line and press with the iron.
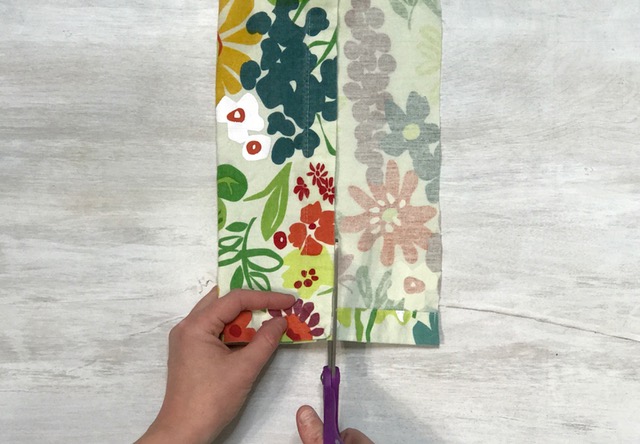
Step 5: Cut along the folded line and remove the access fabric.
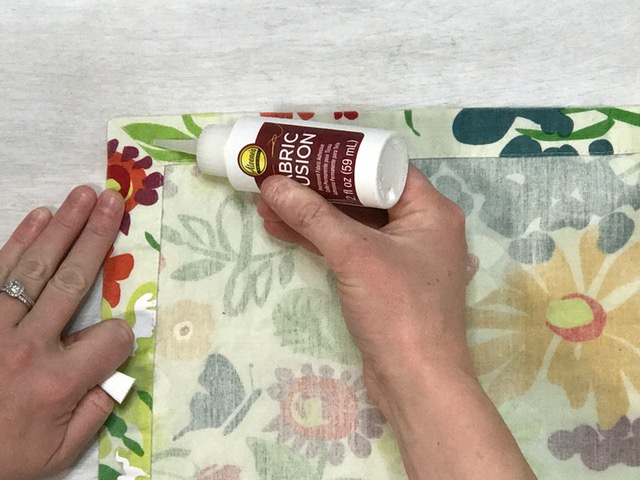
Step 6: Open up the fabric and apply a line of fabric glue along the top seam.
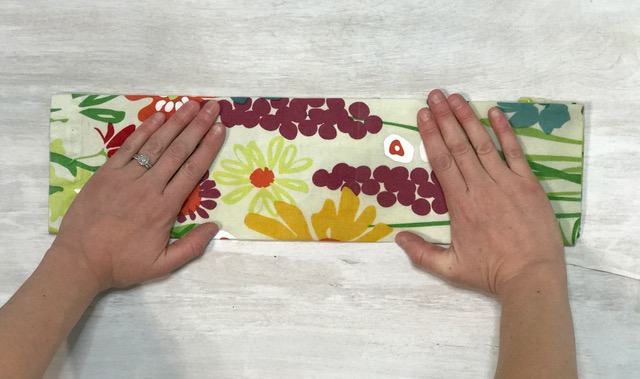
Step 7: Fold the bottom to the top piece and press along the glue line to close.
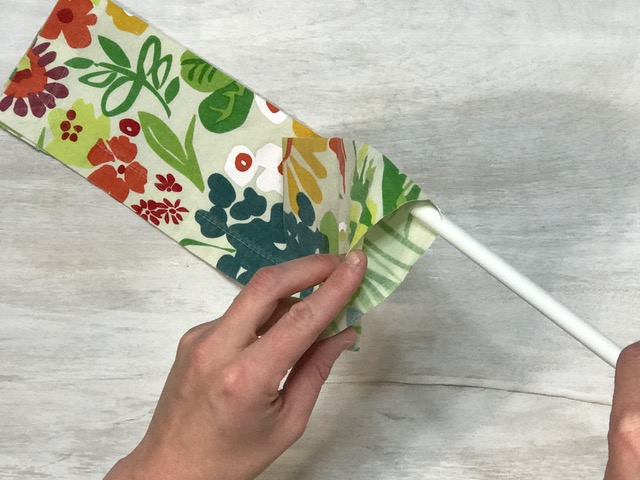
Step 8: Insert the Tension Rod.
Adjust the tension rod to the length of your drawer. Insert the tension rod into the opening you created in your fabric.
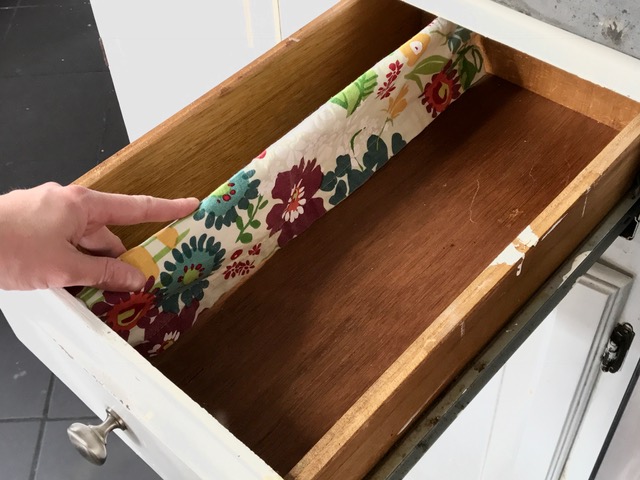
Step 9: Place the tension rod into your drawer.
The rod should be placed at the very top of the drawer opening, and the remaining fabric will hang down to touch the base of the drawer.
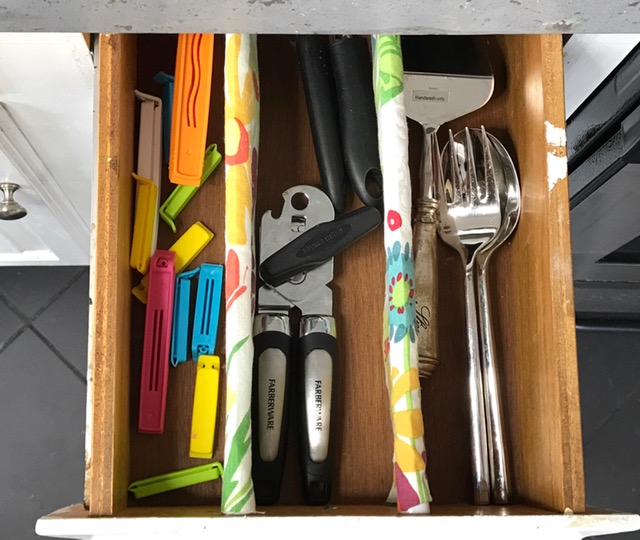
Insert two or more tension rods to create more dividers! The fabric helps create more of a separation between the items and prevents the utensils from sliding into another section.
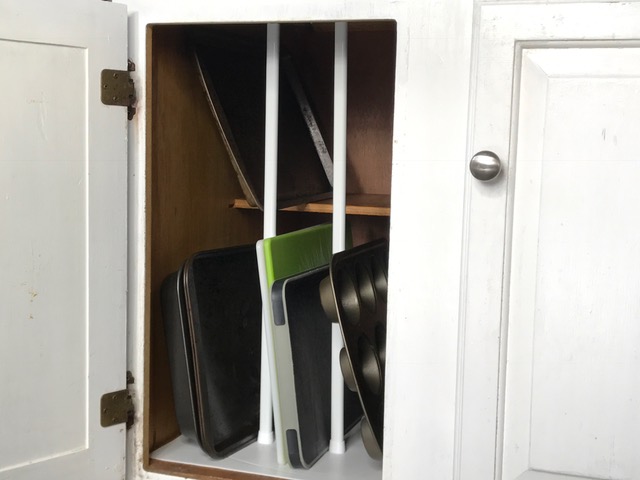
You can also use tension rods in cupboards vertically, to separate cutting boards, baking pans, trays and more!
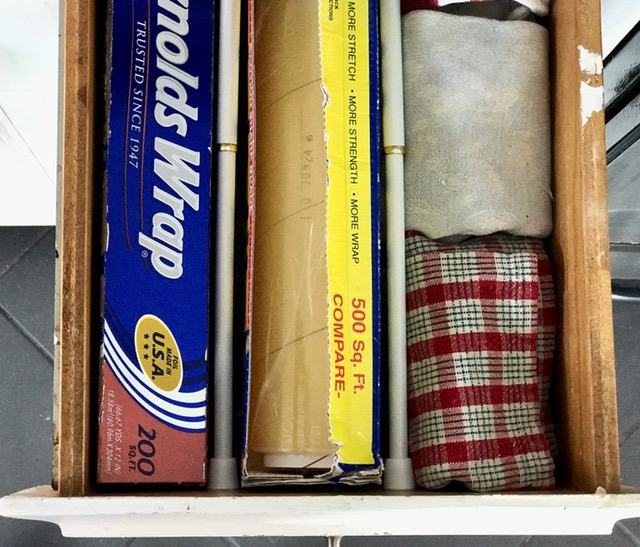
Or, what about using tension rods "sans-fabric" for all of your kitchen wrape? No more sliding boxes for tin foil, plastic wrap, ziploc bags and tea towels? The possibilities are endless! Give these tension rods a try in your own kitchen. I'd love to see what you come up with.
{
"id": "4092676",
"alt": "",
"title": "",
"video_library_id": "8262",
"thumbnail": "https://cdn-fastly.hometalk.com/media/2017/07/31/4092676/tension-rod-dividers.jpg"
}
{
"width": 634,
"height": 357,
"showRelated": true,
"noautoplay": ""
}
Resources for this project:
See all materials


Any price and availability information displayed on [relevant Amazon Site(s), as applicable] at the time of purchase will apply to the purchase of this product.
Hometalk may collect a small share of sales from the links on this page.More info
Comments
Join the conversation
2 of 136 comments
-
I'm doing the backing sheet, cutting board, broiler pan organizer idea immediately.
-
Good idea. I used tension rods to clear out my messy utensil drawer a bit. I don't have a window over my sink, so put up tension rods & S-hooks. I love the room it created in my drawer.


Frequently asked questions
Have a question about this project?
The area above my cabinet is the drawer. How can you open the drawer once you have a tension rod coming up against it?
Wouldn't you need 2tension rods in the drawer to keep items from sliding under the fabric?
I especially like the cutting board divider drawer. I have a small drawer for my pans. I'd like to use the divider idea for that, is there such a thing as heavier tension rods?