


Create Beautiful Refurbished End Tables With Unique Leather Handles

Find Out How to Spice Up Your Decor with These Refurbished End Tables
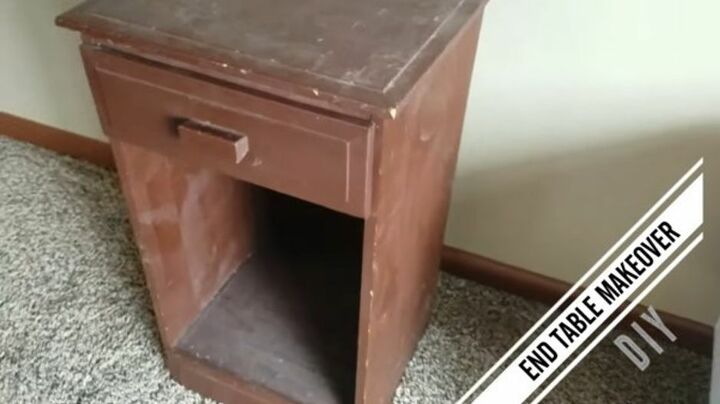
Finding something we already have and changing it into something that instantly adds a completely new feel to a room and to our décor is the best thing about projects we can make at home. Whenever we are about to throw out some shabby old furniture, it’s worth thinking about how we can change it in order to breathe new life into it. That’s exactly what I did with this old bedside table. With just a few simple steps, I managed to transform entirely this drab, old, small end table into something luxurious that added a touch of class to the décor of the room.
Refurbished end tables can be the perfect project if you are having an overhaul of the décor and style of a particular room. By upcycling or refurbishing, we are able to transform something that would have otherwise been discarded into something that becomes the focal point of the room. In this case, I was able to completely change this shabby end table with storage by adding a unique leather handle and making it feel like a bespoke and exciting piece of furniture. This project can be customized for almost any table and can even be adapted to other pieces of furniture in order to truly bring out your creativity.
Tools & Materials
For this project, I used:
- Old end table
- Stripping gel
- Cloths
- Wallpaper scraper
- Sandpaper
- Rust-oleum paint (white)
- Paint roller
- Paint roller tray
- Wood finish
- Sponge brush
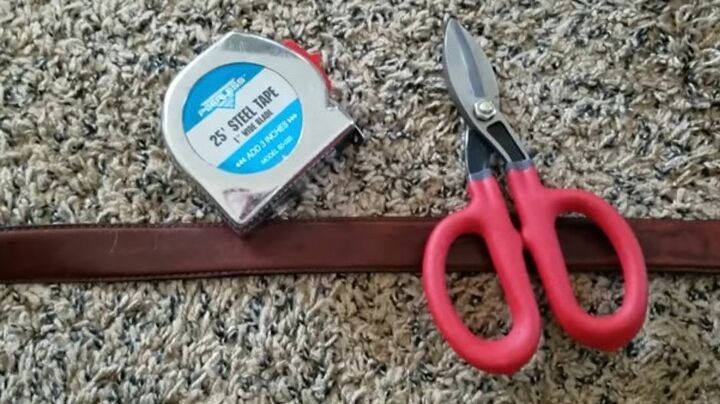
- Tape measure
- Old belt for leather handle
- Gold paint
- Drill
- 2 screws
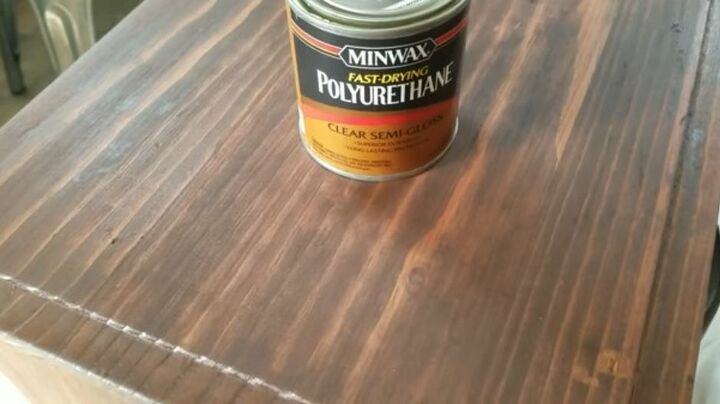
- Polyurethane
Step 1: Gather Your Materials
The first step in this project is to assess the materials you will need. The obvious first one is an old small end table or a small end table with storage, to be able to follow the steps perfectly. Once you have located one – it could be one you were going to throw anyway or could be a find in a thrift shop or local market – you’ll need to decide how you will refurbish it.
The materials you’ll need for this can be customized, but you’ll start with some stripping gel to revert your table back to how it was when it was made. If you found one that hadn’t had any treatment, you could skip this stage. You’ll also need some paint and a roller and tray, some wood finish and a sponge brush, an old belt for the leather handle, a tape measure, a drill, and some screws (I used gold paint to paint the screws). Finally, you’ll need polyurethane to coat the finished piece.
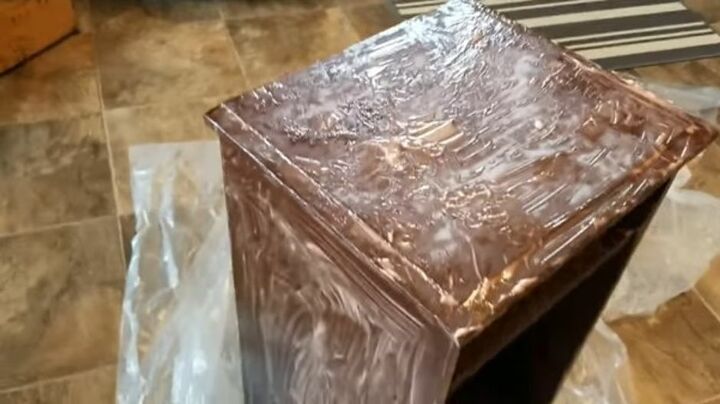
Step 2: Strip and Sand
The first step in this project is to remove any paint or varnish that might be on the small end table to begin with. This could be varnish you have added or could be paint or varnish that it came with. To create the desired effect, we need to start with a clean table. So, I began by covering the entire table with the stripping gel. You’ll need to use a cloth to go over the entirety of it and create almost a foam lather so that the gel works effectively. Then, you’ll need to take a wallpaper scraper and begin to scrape off the residue, which should also remove the varnish that covered the table.
This stage could take as long as necessary to revert the table back to clean, untainted wood. Once the stripping gel has been removed and taken the varnish with it, you can begin to sand it down. Once you have effectively gone over every inch of the table, you should be ready for the next stage.
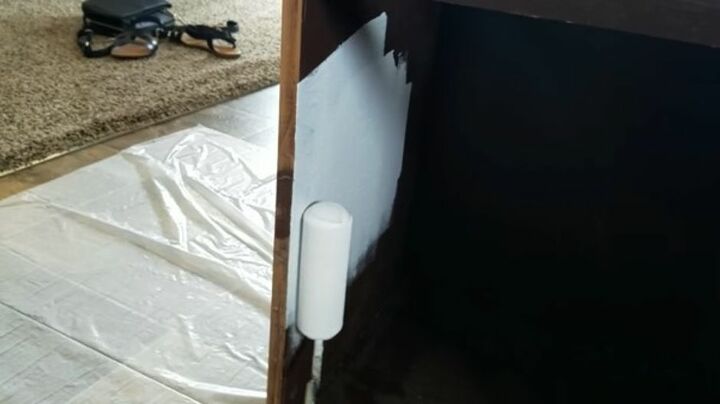
Step 3: Paint the Inside and the Drawer
The next step in the refurbished end tables project is to paint the inside of the unit and the drawer. I used Rust-oleum’s white paint. I used a roller and a roller tray, although a paintbrush could also work. I prefer the roller because it doesn’t leave any streaks. I did use a paintbrush for the corners and the hard to reach places.
The table might need more than one coat of paint, especially being darker wood and white being a lighter color. I also painted the drawer. The drawer had a knob already attached, which I removed in order to create the desired look in the end. You can keep yours if you wish, but the unique leather handle is the element that really brings this project to life. Once you are confident that the white layers have covered the table, you can then leave them to dry for the next step.
Step 4: Stain
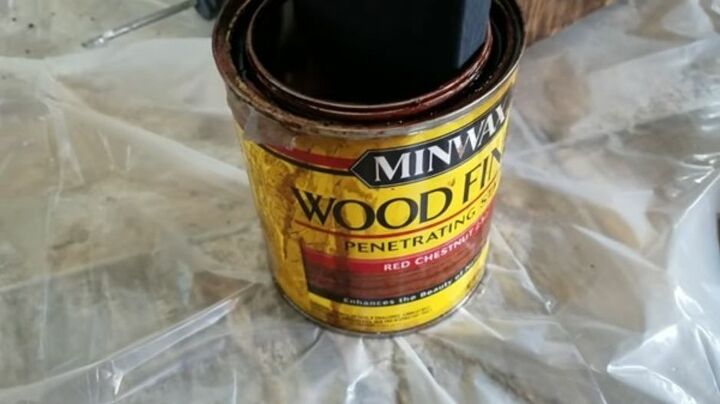
The next step is to stain the end table. I use Minwax Wood Finish in a Red Chestnut color, which gives a darker cherry color. With this project, I wiped the stain off almost as soon as I had applied it evenly as there were already some dark patches and I didn’t want it to look too dark.
When it comes to staining, the longer it is left on, the darker it stains it. The best way to do this is to do it side by side so that the area exposed to the staining is roughly the same. The smaller areas at a time work best. But, this stage is open to personal creativity, and it all depends on exactly how dark you want your wood to look. Once you have effectively stained each component of the project, leave it to dry and begin work on your handle.
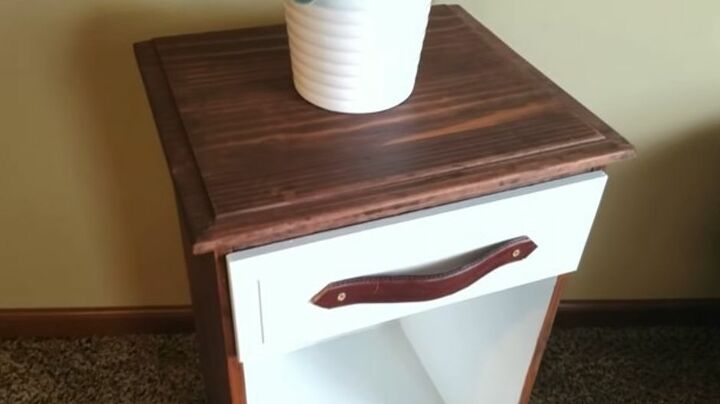
Step 5: Create the Drawer Pull
The unique leather handle is the element that really brings this project together. When deciding what to use as the handle, I came across an old belt that had a perfect leather look. So, I measured the length of the drawer that the handle would be going on and cut the belt down to size. You’ll need to cut the belt longer than the drawer’s length as when screwed in, you’ll want the room to grasp it with your hand.
I used a drill to create two holes in the wooden drawer and then an identical two holes on the belt. Once lined up, I gathered some screws. For the screws – and this part comes down to personal taste so is optional – I decided to paint them gold first. I felt that this fit the look I wanted a lot better and that the gold would go better with the brown, rather than the silver screws. Once painted gold, I simply drilled in the screws to attach the belt to the drawer.
Step 6: Add a Top Coat
The final stage is actually one of the most important, especially if you want your handiwork to last a long time. Once everything was pulled together, I gave the staining a polyurethane coat so that the varnish lasts and that the final finished piece has a nice sheen to it. It’s important to protect your painting and staining, especially if you are using the end table for food and drinks.
Once you’ve effectively added the top coat of polyurethane, you should be ready to use the end table. Each stage is customizable for whatever project you have in mind and so that the refurbished end table suits your décor and style. The best thing about the project is the versatility and the fact that the finished table could suit almost any room in the house.
Following the above steps should leave you with a beautiful refurbished end table of your very own. You’ll be able to wow guests and impress friends and family with the new table, which will help bring your style together in the room. The project is simple and can be easily adapted for almost any kind of furniture project. The addition of the leather handle adds to the décor style and gives the appearance of country style and retro chic, looking almost like an old traveling case. The project is evergreen and can be completed easily year-round.

If you’ve enjoyed making this refurbished small end table with a unique leather handle, why not share the project with a friend or fellow Hometalker? Don’t forget to show off your creations and let us know how you got on and if you took the steps and applied your own creative flair to them. The beauty of this project is that you can choose to do as much or as little as you want, and you’ll end up coming away with a completely new piece of furniture. It saves money and gives you a talking point to show off to those around you would be interested in your creativity.
Comments
Join the conversation
-
You took a piece of trash and turned it into treasure. It really looks great. The leather handle is perfect.
-
I have an old oak and glass cabinet with two drawers. I have hesitated in buying pulls for the drawers for years because the holes are already drilled. I put knotted rope in to use as pulls. I think your leather pulls are the perfect answer for my cabinet. Thanks!!


Frequently asked questions
Have a question about this project?