


Pencil Holder With Anglo Saxon Runes

by
Clint
4 Materials
I needed a present for my Dad's birthday and as he's just made a desk and I have a recent fascination with Anglo Saxons I decided to make him a pencil holder with his name spelt in Anglo Saxon runes to sit on his desk. The woods I used were Sapele and Ash which I saved from a carpenters rubbish pile. It's a very simple build and as well as having these instructions here on Hometalk I've also got a YouTube video of the process.
Thanks a lot for checking it out and I hope you enjoy it!
{
"id": "3803419",
"alt": "",
"title": "",
"video_link": "https://www.youtube.com/embed/gWzT5P1DbiM",
"youtube_video_id": "gWzT5P1DbiM"
}
{
"width": 634,
"height": 357,
"showRelated": true
}
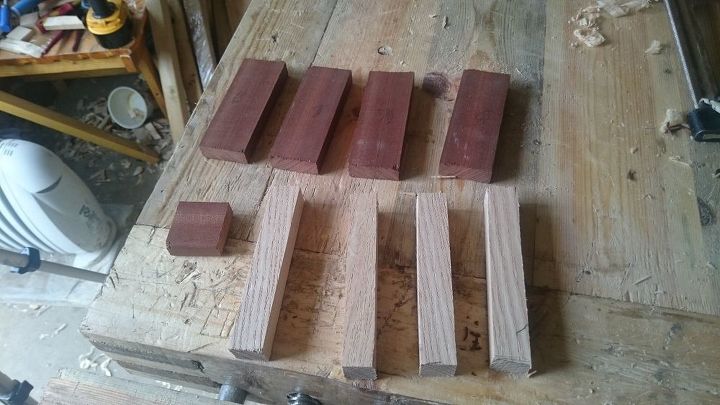
All the pieces cut and ready
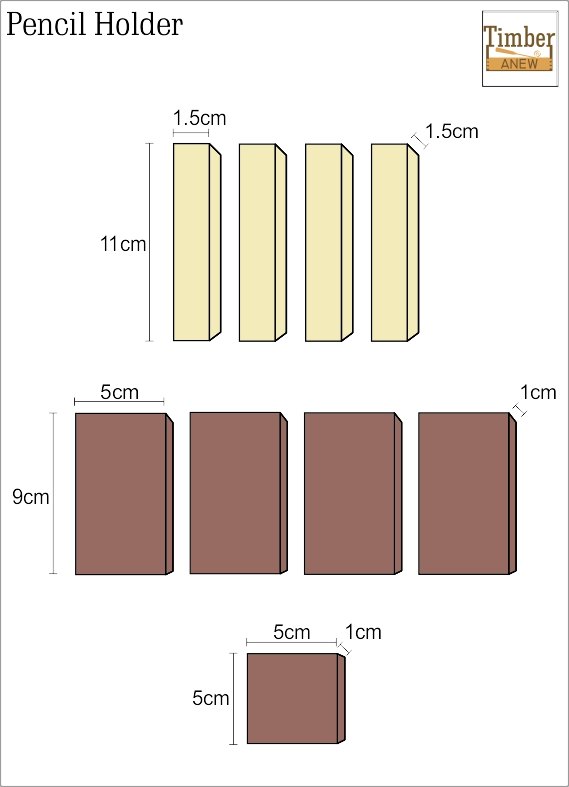
The measurments for each piece
After cutting all the pieces to size I glued up the 4 uprights and two sides together. This was to be the first glue up. I decided to divide the glue up into two separate actions to get the best accuracy possible.
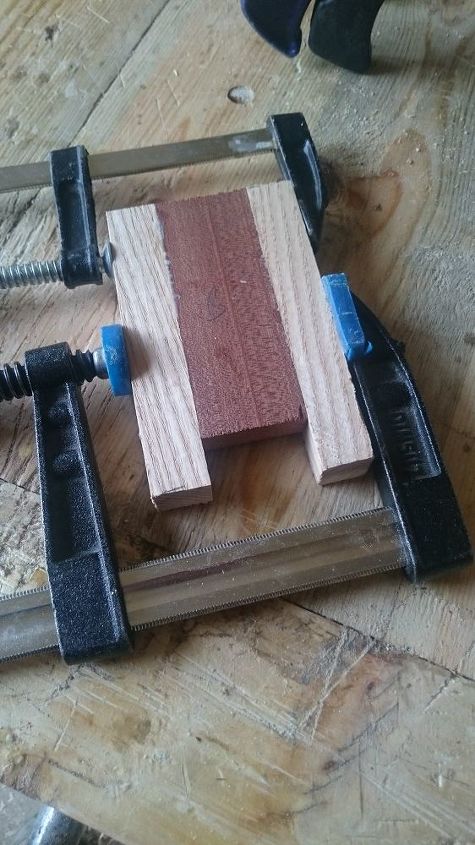
The first glue up
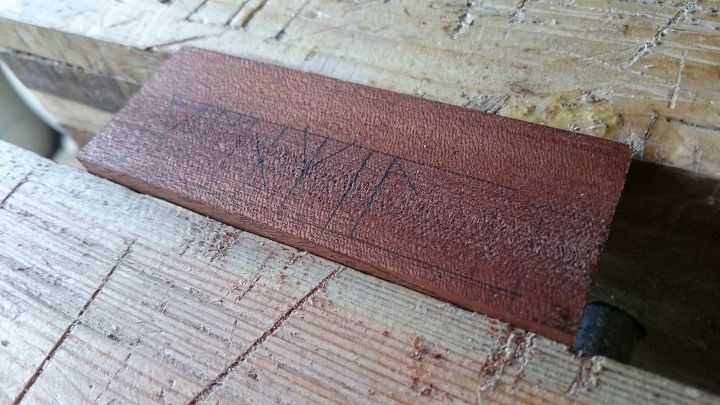
Whilst I was waiting for those pieces to dry I carved the Anglo Saxon Runes into one of the other unglued sides. I just searched for Anglo Saxon lettering on google and found several sites informing me what (I hope) the correct symbols were for each letter of my Dad's name. I then took my time with a couple of sharp chisels and did some very simple letter carving. Dr
Drawing out the letters
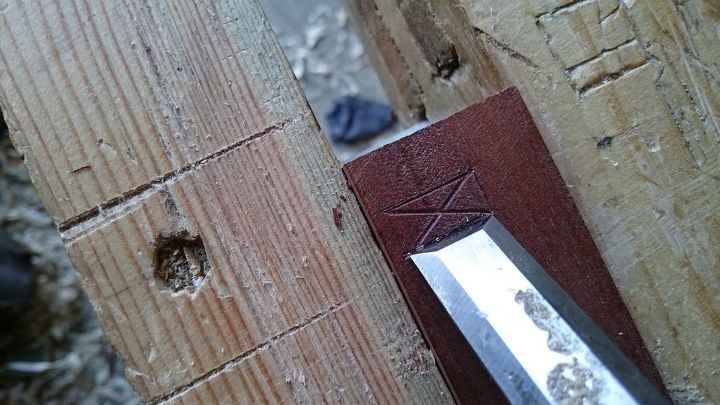
Chiselling the letters/runes
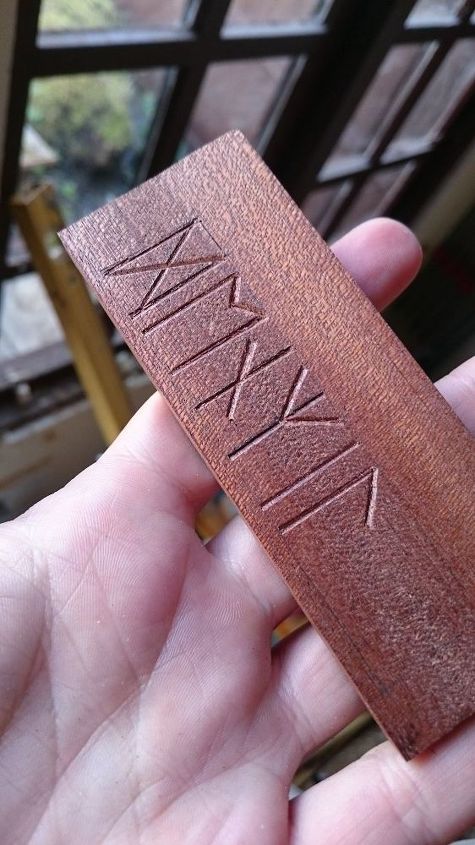
The finished name
After this piece was carved I could then move onto the second glue up, this was as simple as adding glue to the remaining pieces and keeping everything flush and square as I added the clamps.
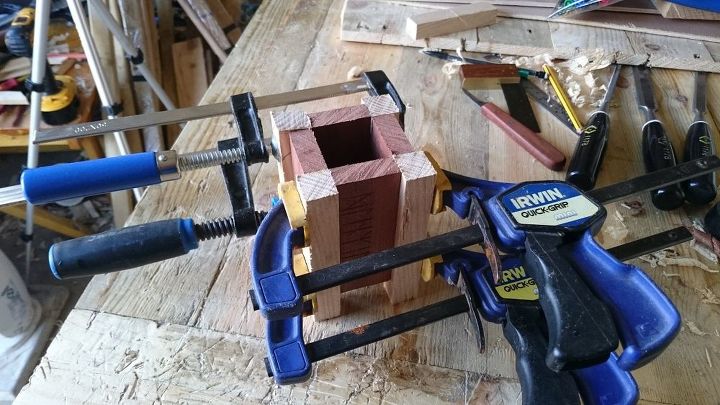
4 clamps seemed to work best
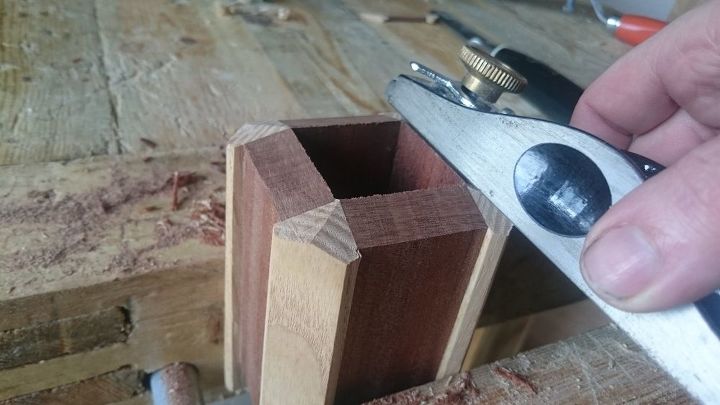
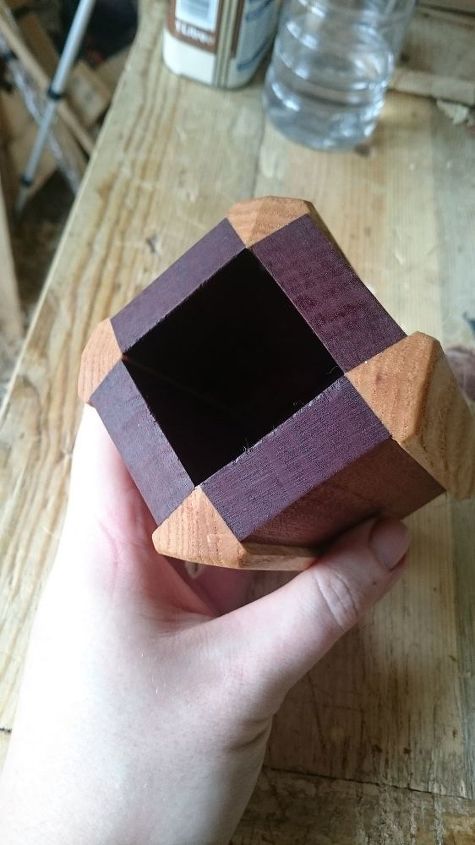
The next part I did on the fly and much like the carving is an optional step. To give it a nice angular look I decided to chamfer all the edges and ad some angles using a plane and a chisel. If you've never used a sharp chisel against wood I suggest you try it one day, incredibly satisfying!
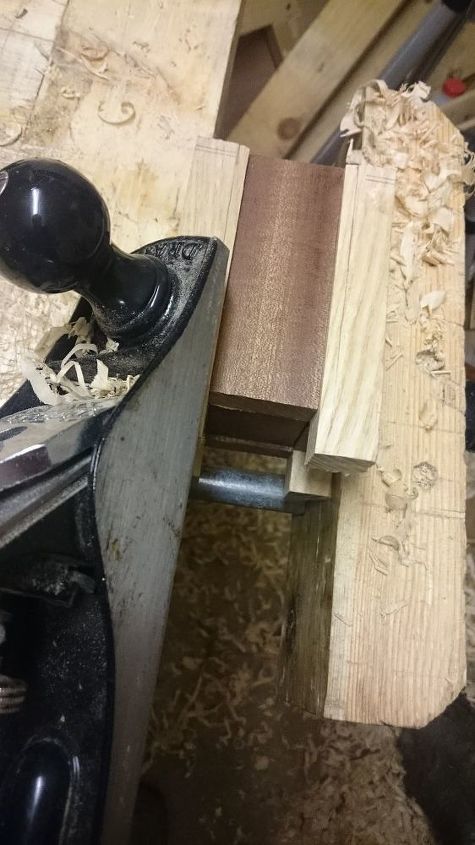
Planing down the legs
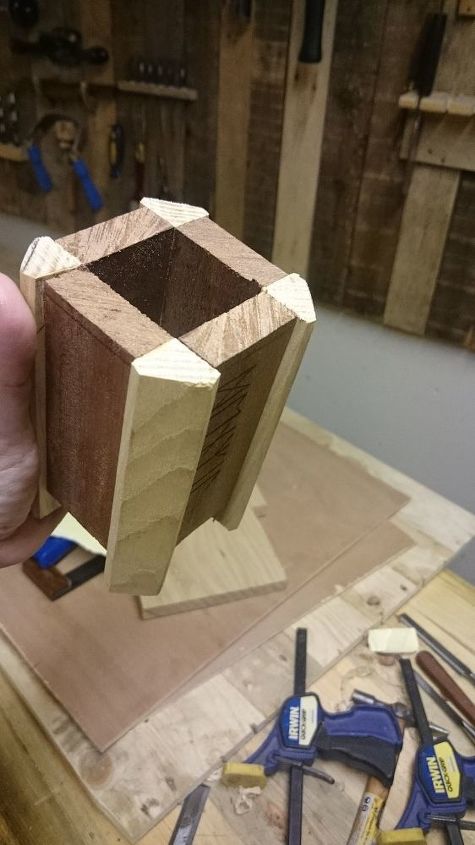
The leg angles finished
Planing the top angles
After all of this was done I took some 800 grit sandpaper and sanded it allover. I then applied a 50/50 mixture of mineral spirits and Danish oil, waited for it to dry, sanded it again lightly and then applied two more coats of the mixture.
The top sanded and oiled
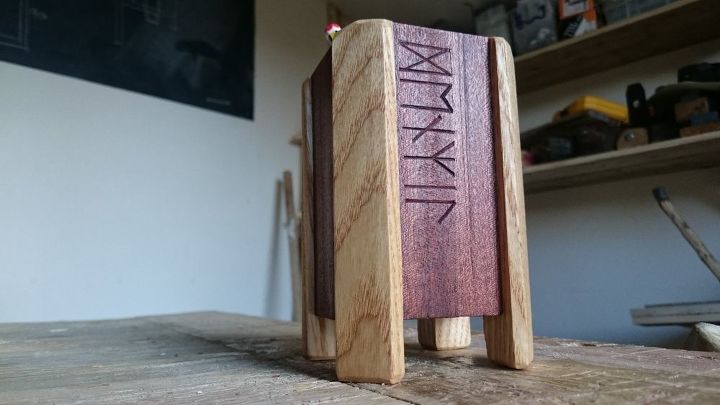
The finished holder
After it was oiled and sanded I handed it to my Dad and he seemed to like it! I hope! It now sits on his desk and holds his pens and pencils and hopefully will live a long life.
I hope you enjoyed checking out my pencil holder, if you'd like to keep up to date with my projects then please give my Facebook page a like, thank you!
Want more details about this and other DIY projects? Check out my blog post!
Comments
Join the conversation
2 comments
-
This is so great! Looks awesome :D


Frequently asked questions
Have a question about this project?