


How to Take a Simple Bench to a Whole New Level...

When I posted my "How to Build a Bench in 60 Seconds", I received some awesome ideas through comments from other Hometalkers. I decided it wouldn't take much to show you how easily this bench can go from bench to bookcase to hall table to hutch. Also, I love the functionality of the wooden crates in the craft/home improvement stores but I have long been bothered by the look. It might be that they don't look bad, I just want to have a little bit of uniqueness to the items in my home. Someone once told me that I always have to be different. LOL Probably, true.  So, below I will show you how I made my crates look less "crate-ish" and more unique.
You will need:
- crates
- paint
- table legs
- drill
- screws
- stain
The first thing I did to jazz up my bench was to add wood legs. To add the legs, I drew a template so that each leg would be the equal distances from the edges. Here is a video that shows from marking the template to adding the brackets and legs, and how quickly this can be accomplished.
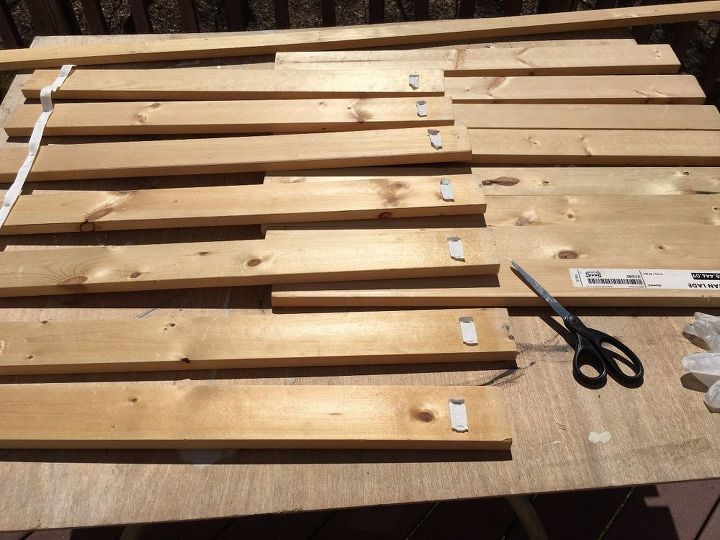
To add some interest to my crates, I am repurposing IKEA bed slats. You would want to get a few 3 1/2 wide and 2 1/2 wide boards from the home improvement store if you don't have any wood to use up. (Just FYI, they will probably say 4 inches wide and 3 inches wide but if you measure, they are smaller.) My crates were roughly 16 3/8's inches wide.
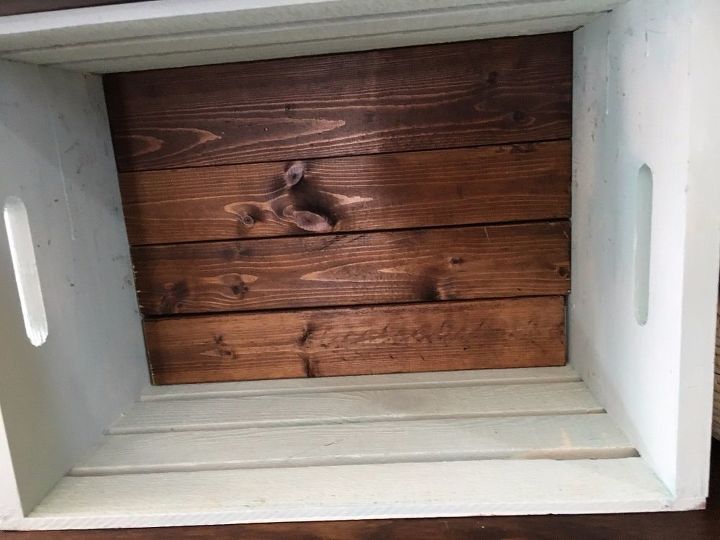
It took one - 3 1/2 inch board and three - 2 1/2 inch boards all 16 3/8's in length to cover the back of my crate. (My crates tended to be slightly different measurements so measure twice and cut once.) I glued these in place with Titebond Glue. In the white/teal crates, I put the wood against the back. I completely apologize for how off kilter this picture is. (I was working in a limited area and stepping over a dog at times. We had a pipe break and water came raining through all the light fixtures on most of our first level so all the furniture is piled in my workrooms, which doesn't leave much room to work.)
See... I kid you not about, stepping over the dog and limited space to work... 
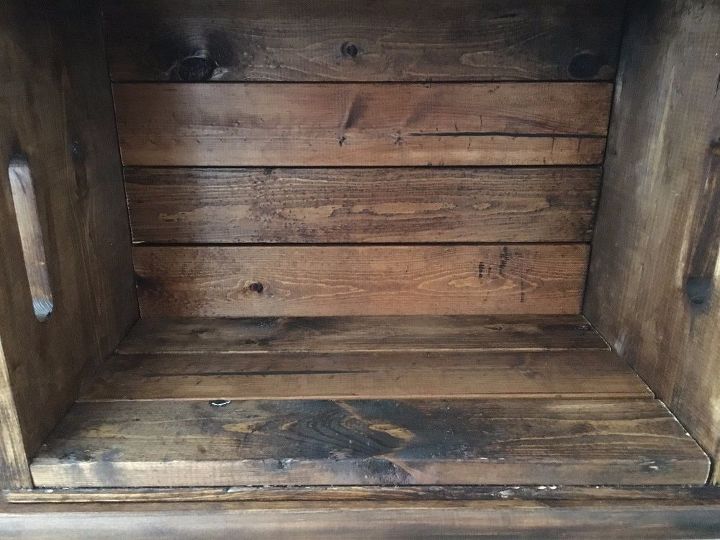
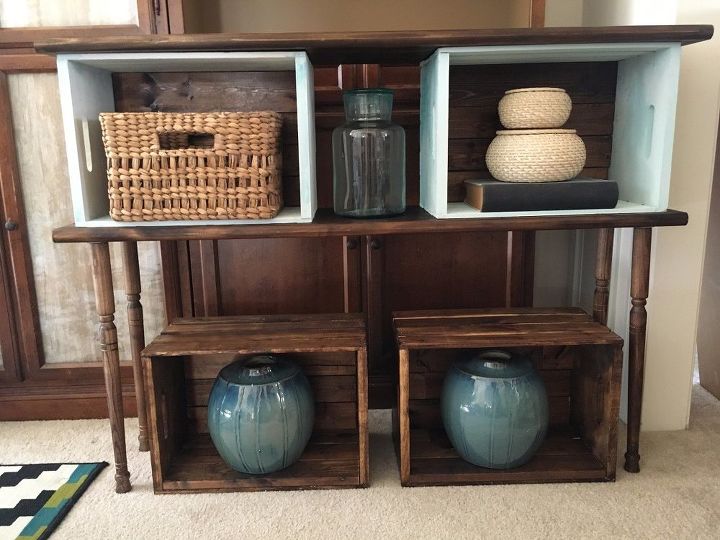
In the dark stained crates, I put the wood against the back and the bottom. I didn't glue the ones on the bottom in place. I wanted to be able to remove them if needed.
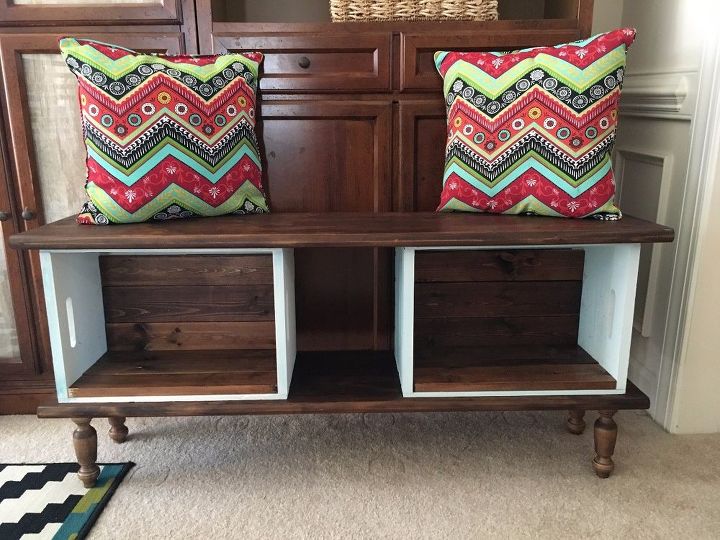
Here is my bench.
In this instance, I opted for wood in the bottom of the crates.
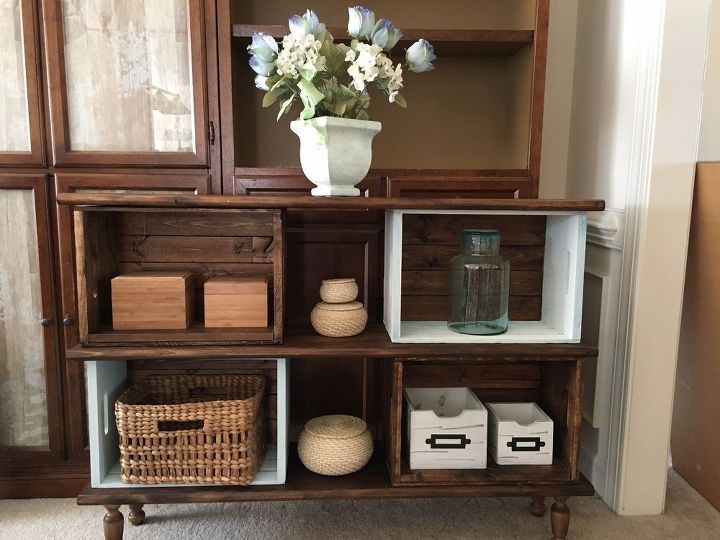
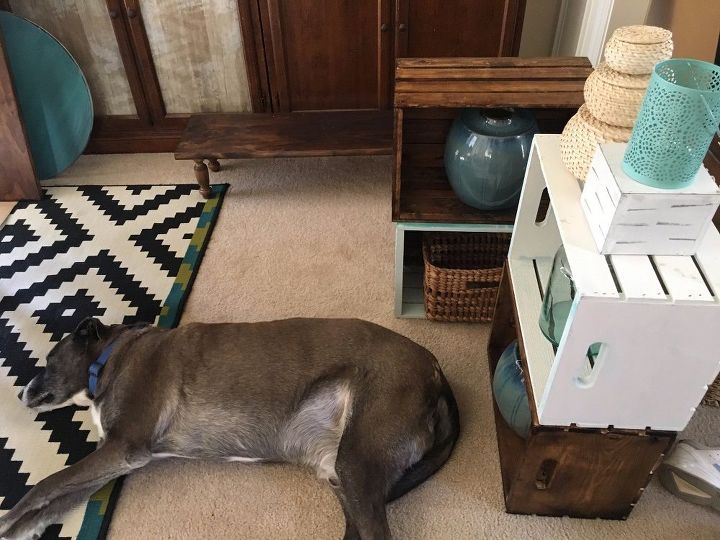
Add two more crates and another stair tread and you have a bookcase or foyer table.
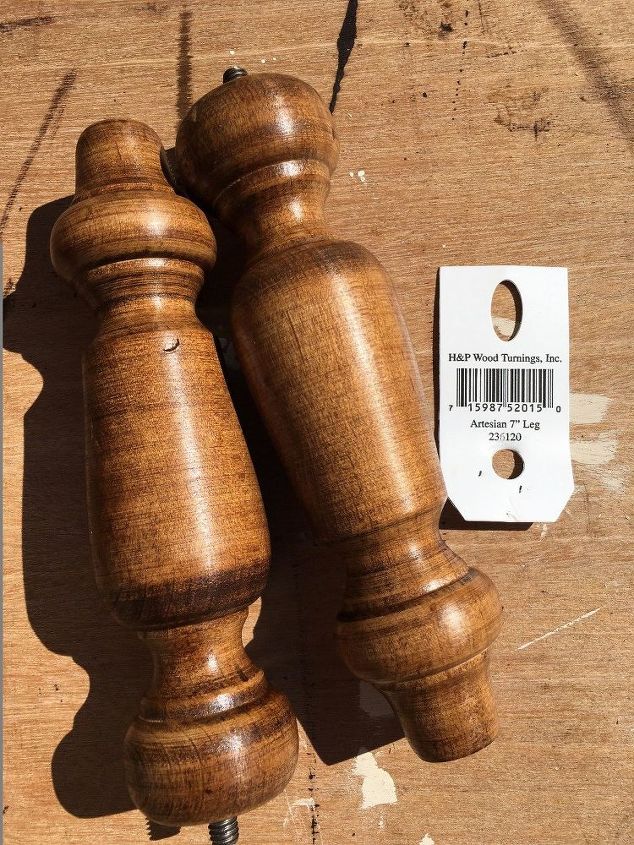
I removed my 7 inch legs...
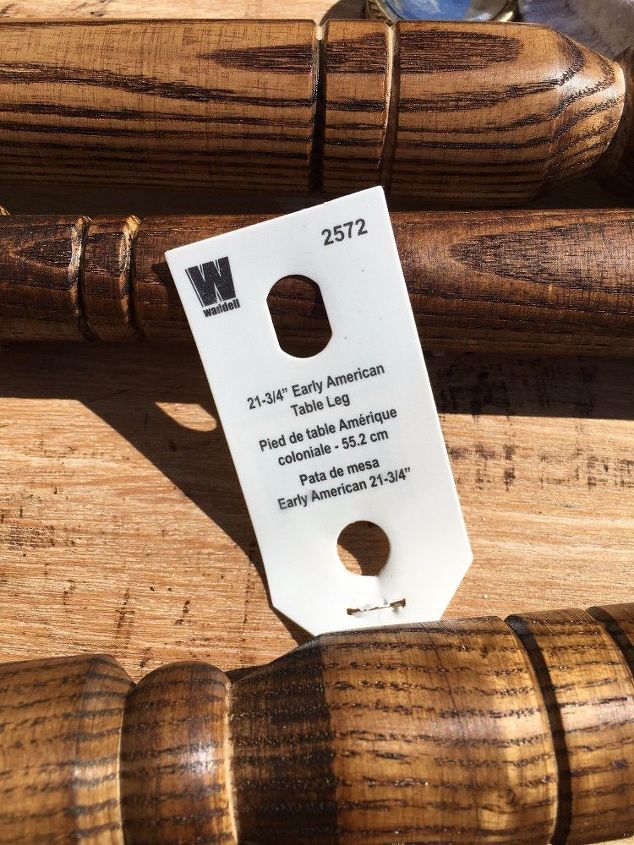
And I put on 21 3/4 inch legs... I was in a bit of a hurry staining these legs and will go back and get the cracks I missed... I promise!
So, it only took 36 seconds to change two legs...
And it is a console table... It is easy to change this and quick too. But eventually when you decide what you want, it does need to be secured. For now, most of these pieces are going into my mudroom project.
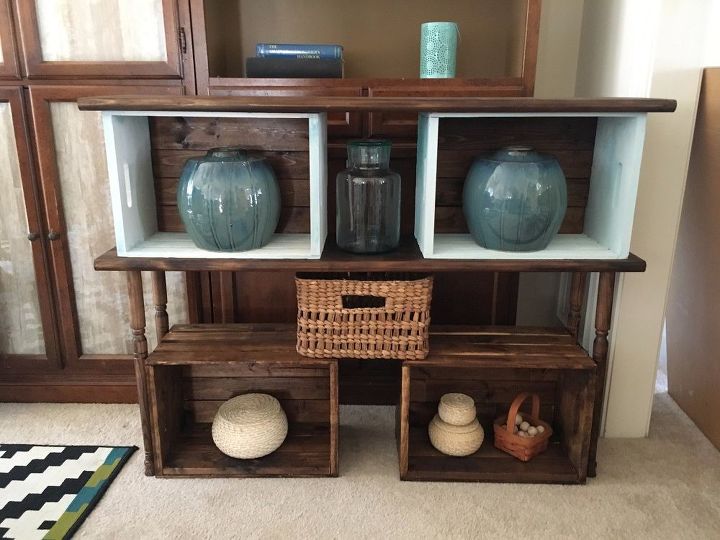
I love the bookcase but I am still trying to tweak the tall table aspect. It may be the decor items, I'll have to work on it once my mudroom project is complete.
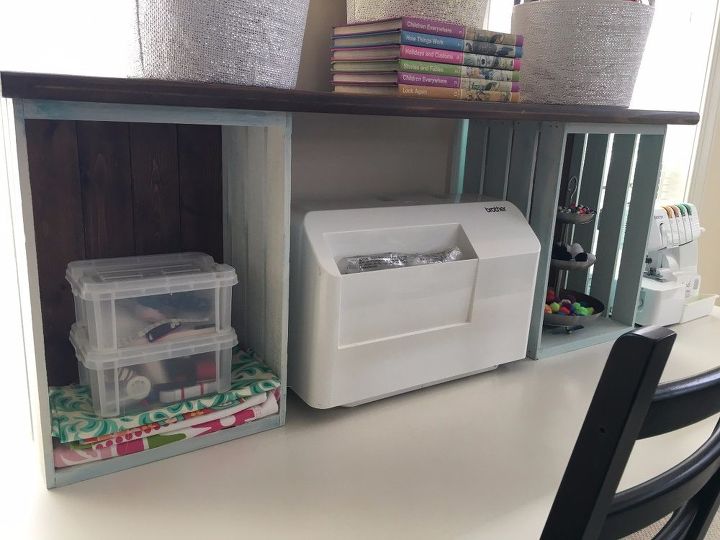
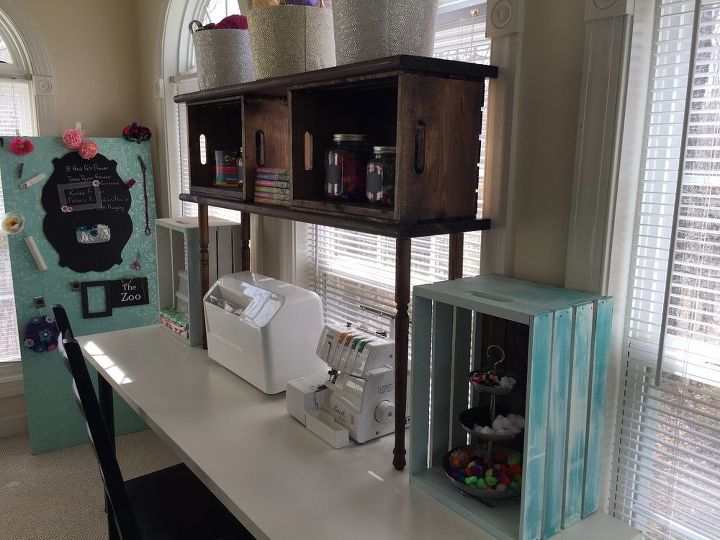
Here it is as a hutch... a sewing/craft hutch.
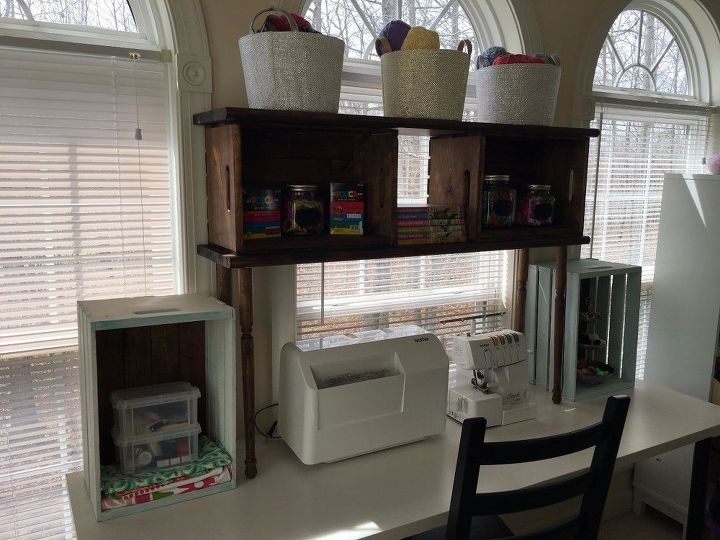
While I wasn't loving mine as a tall table, I do love the tall table as a tall hutch!
I could create new ideas on how to use these all day long!
Resources for this project:
See all materials


Comments
Join the conversation
-
Beautiful dog.
-
beautiful, and so is the doggie


Frequently asked questions
Have a question about this project?
Stacy I didn’t know you were living In Fredericksburg!!!!!
Where did you get the stair treads. Would using finished shelving work too?
Stacy,
what kind of dog do you have? I have a foster dog that looks just like yours.