


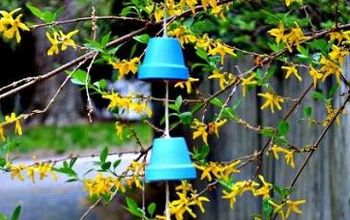
DIY Hand Painted Wind Chimes
8 Materials
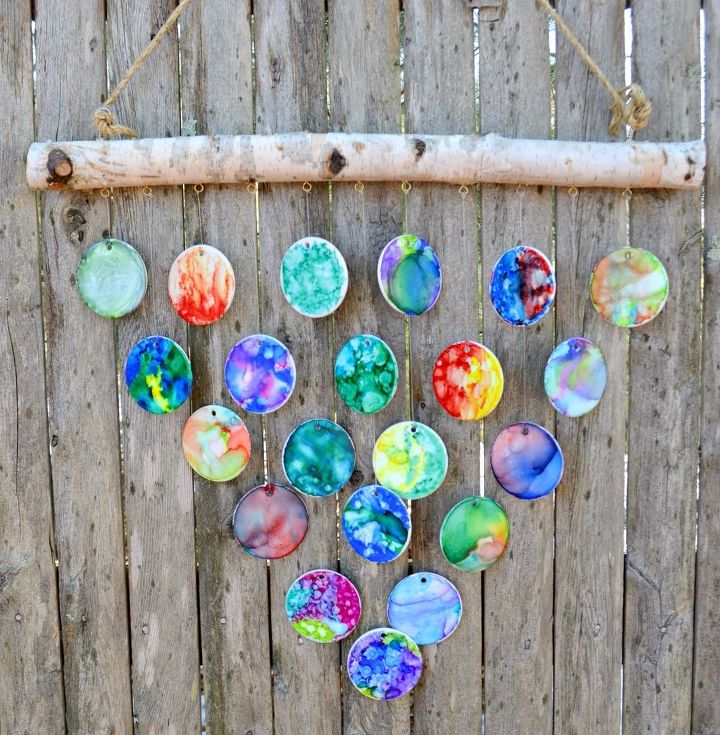
I recently volunteered myself to put together a class auction project for my daughter's 7th grade class. I decided on these beautiful wind chimes, made from unique personalized ornaments that each of the kids painted.
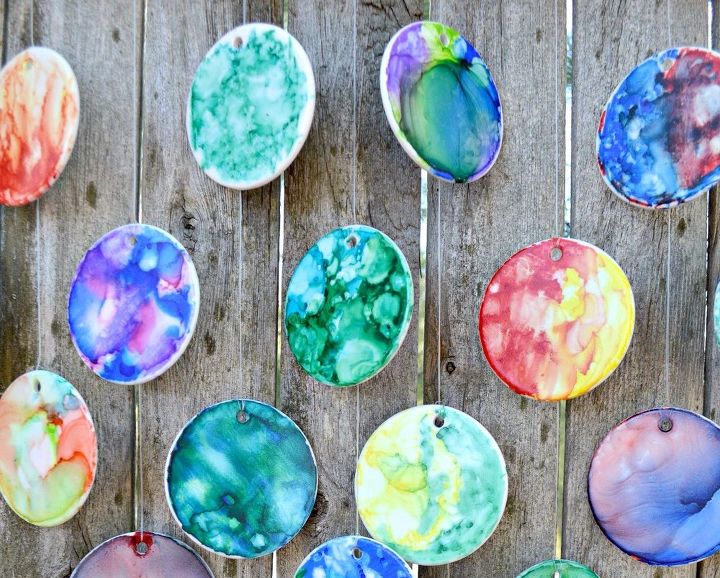
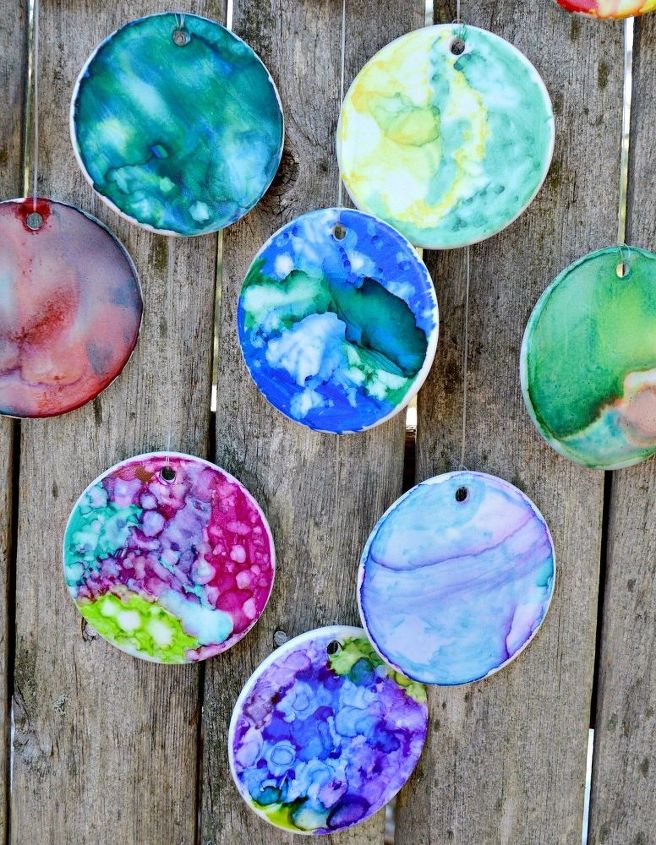
The first step is to paint and seal your ornaments. I practiced this with some ceramic tiles, sharpies and rubbing alcohol. The full instruction for painting the chimes can be found here: http://lifestyleforreallife.com/2017/01/18/paint-sharpies-alcohol/ and the instructions for sealing your chimes can be found here: http://lifestyleforreallife.com/2017/01/25/how-to-seal-painted-tiles/
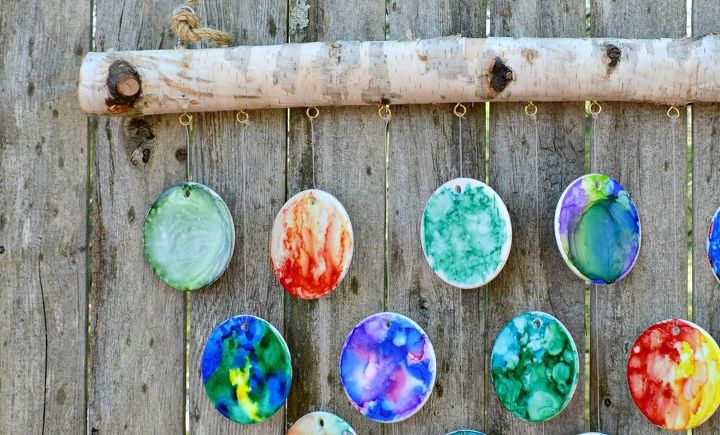
Determine the lay out of your chimes. I knew I wanted a triangular/V shape, so I planned out where I would need to attach them and spacing. Leave enough room so that none of the chimes are actually touching, but close enough that if there is a light breeze they will move into each other to create the tinkling chime sound. My birch branch was about 24 inches wide and I placed the hooks for hanging the chimes, about 2.5 inches apart. Honestly, I mostly eye balled this part and it took a little bit of trial and error to get it the way I wanted. For my 21 wind chimes, I needed 11 hooks to attach the chimes to. Determine the lay out of your chimes. I knew I wanted a triangular/V shape, so I planned out where I would need to attach them and spacing. Leave enough room so that none of the chimes are actually touching, but close enough that if there is a light breeze they will move into each other to create the tinkling chime sound. My birch branch was about 24 inches wide and I placed the hooks for hanging the chimes, about 2.5 inches apart. Honestly, I mostly eye balled this part and it took a little bit of trial and error to get it the way I wanted. For my 21 wind chimes, I needed 11 hooks to attach the chimes to:
Attach the chimes to the fishing line. You will start with the top left chime. Determine how long you want the first row to hang, then cut a piece of fishing about double that size. Fold the fishing line in half and feed the closed end of the line through the hole in the chime. Bring the open ends of the fishing line through the closed end creating a "larks head knot". Here is a visual of that for you (and you can click the picture for additional instructions if you still need help):
Attach the first chime to the first hook at the far left of the branch. To do this, I tied off the open end of the fishing line that is attached to the chime, and then repeated the same knot from above to attach the chime to the hook. Continue with the rest of the first row checking to make sure your chimes are hanging approximately evenly. For instance, the First hook is going to hold one chime which is the first chime of the first row. The Second hook is going to hold one chime which is the first chime of the second row. The Third hook is going to hold two chimes which are the second chime of the first row and the first chime of the third row. The second chime will be attached to the chime above it using the same process we used attaching the chime to the hook. I know that sounds super confusing, but it will make more sense when you have it laid out in front of you.
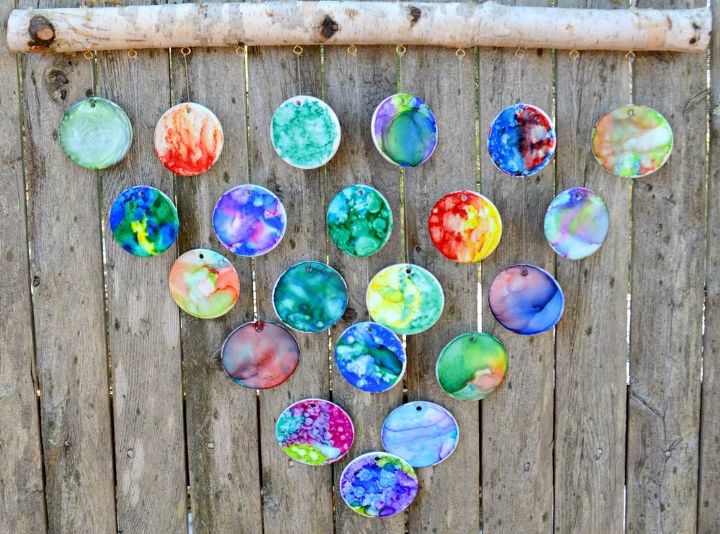
For instance, the First hook is going to hold one chime which is the first chime of the first row. The Second hook is going to hold one chime which is the first chime of the second row. The Third hook is going to hold two chimes which are the second chime of the first row and the first chime of the third row. The second chime will be attached to the chime above it using the same process we used attaching the chime to the hook. I know that sounds super confusing, but it will make more sense when you have it laid out in front of you.

Want more details about this and other DIY projects? Check out my blog post!
Comments
Join the conversation
3 of 36 comments
-
That's a great idea!!
-
Do you have a video for making this? My middle school art students want to make wind chimes next year. They grasp instructions better when we have a video tutorial. They like the pause and rewind aspect.


Frequently asked questions
Have a question about this project?
The blog seems to be down so sorry if this question is answered there... Did you paint both sides of the ornaments? If so, how long did you have to wait for one side to dry before you flipped it over? Thanks!
How big were the discs that you used? All I can find is 4 inch, but that seems too large. Thanks!!
Did you cover in resin as referenced in the post for sealing the tiles? If so, did it change the sound of the chimes?